6 Easy Ways to Customize Your WordPress Calendar

Estimated reading time:
1 minute
One of the best reasons to build a website on WordPress is the flexibility in customization. You’ll want a calendar to match the look and feel of your branded website, which makes customization options one of our highest priorities.
In this post, we’ll show you six ways you can customize your WordPress calendar – no code required! Plus, we’ll highlight some of our favorite customers who’ve customized their calendars to suit their needs. We’ll cover the following customization settings:
Let’s get started!
1. Adjust colors
One of the earliest steps you’ll want to take is adjusting your calendar colors to your liking. Colors can be easily changed to reflect your brand and website design.
Use the WordPress Customizer to change the colors of fonts, backgrounds, links, buttons, and more! Access the customizer by going to the event page and clicking Customize in the admin Toolbar menu. You’ll see a link for The Events Calendar and a list of features to customize. Choose your color option, and you’ll see a preview in the right-hand pane.
Take a look at one of our The Events Calendar featured customers, TriStar. They matched their company logo colors on their calendar for a seamless, branded look.

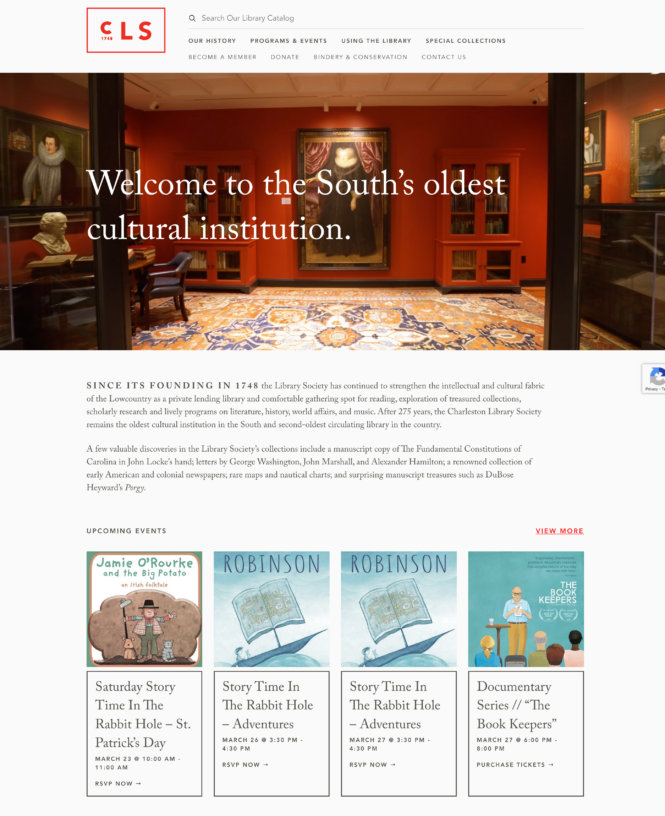
2. Change fonts
You can keep customizing your calendar by changing the fonts on your WordPress calendar. The simplest way to customize fonts is through the WordPress Customizer.
To begin, navigate to Appearance → Customize from the WordPress dashboard. Click on The Events Calendar, then Global Elements. Once you’re in Global Elements, you can begin to customize font family and font size.
The Charleston Library Society is a great example of how to integrate a calendar into your website through font consistency. Their events calendar fits right into the branding of their site by keeping a unified font.
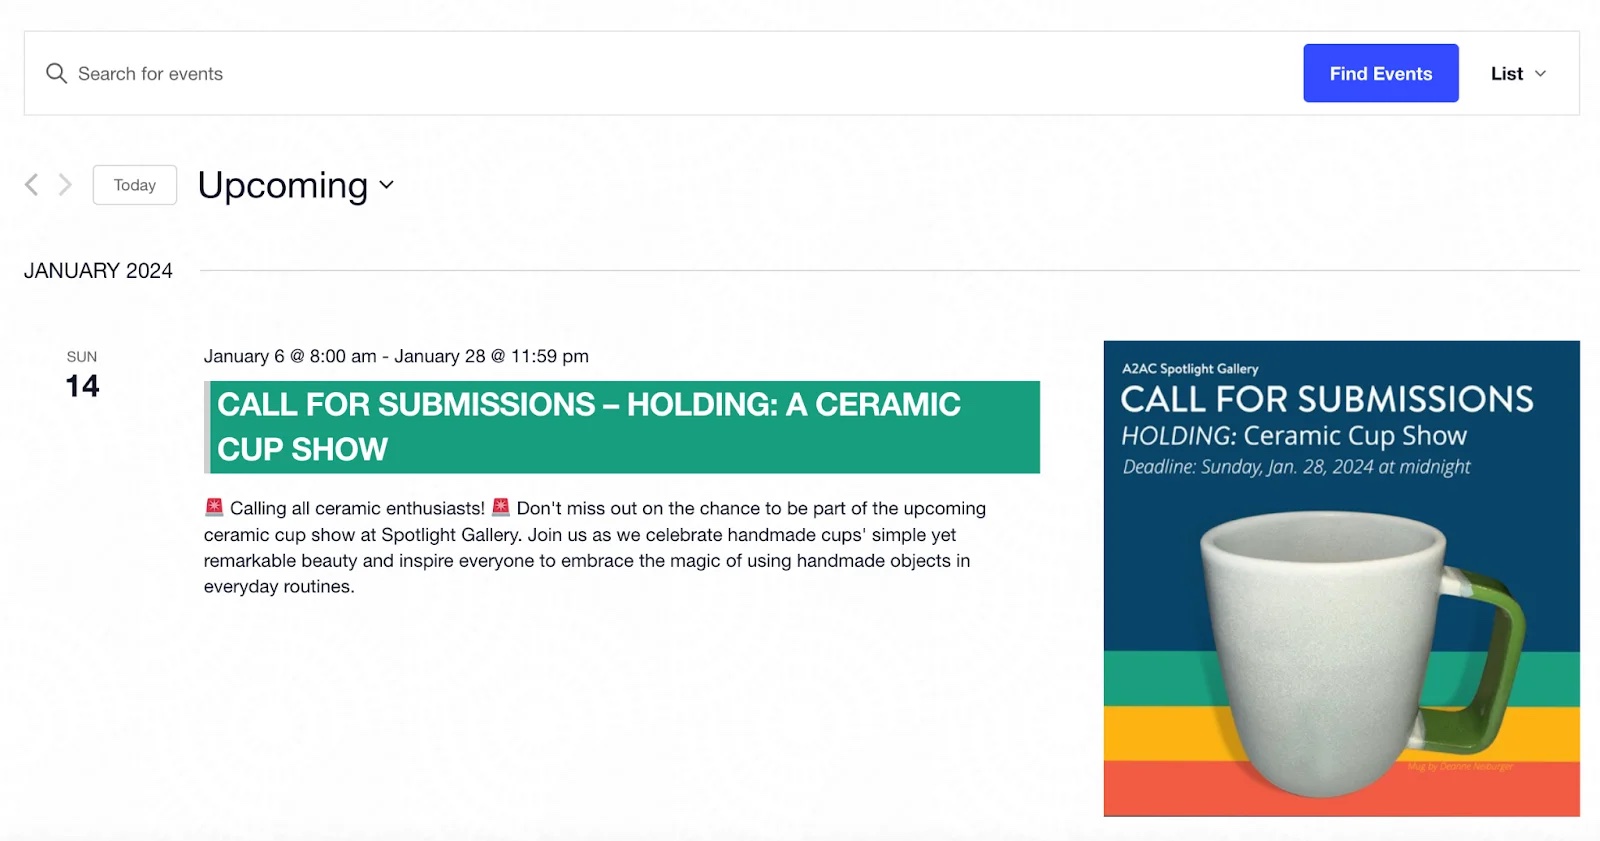
3. Add images
Take your events a step further by adding images that make each event feel truly custom and unique. Featured images can be used to visually represent your events or to add additional information.
Adding featured images to events is just like adding featured images for pages and posts. Begin in the sidebar in the single event editing screen. From there, head down to the Featured Image box in the lower right corner and set your image.
Take a look at our friends over at the Ann Arbor Art Center. Their colorful custom images within their events both tie in their branding and provide event details at a glance.
4. Set the default view
There are multiple calendar views to choose from. List view is the default calendar view, but that can be changed depending on your needs. Within the free version of The Events Calendar, you can also set your calendar view by Month or Day. When you upgrade to the Events Calendar Pro, you unlock Photo, Map, Week, and Summary view.
To change your calendar view, set the default view under Events Settings > Display. You can also enable multiple views so that users can toggle between views.
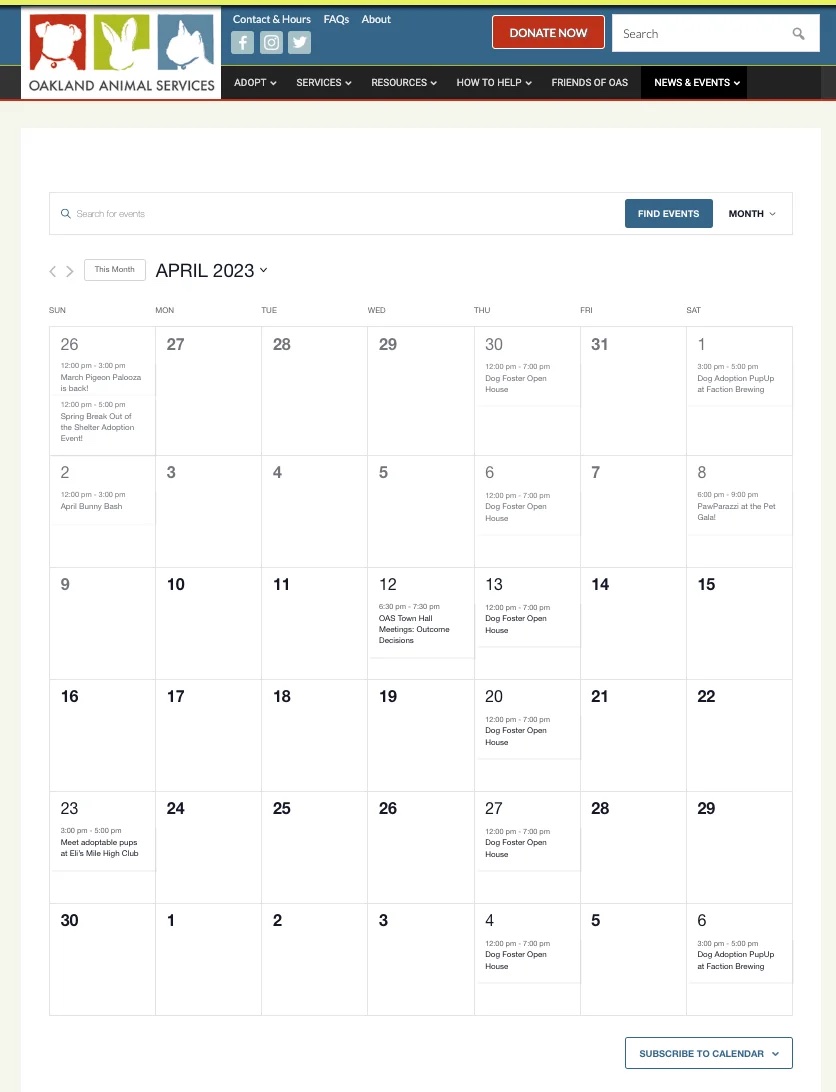
Look at how Oakland Animal Services uses their calendar view. Oakland Animal Services displays its events in month view by default, but in the right side drop-down, you can change the calendar to a list, day, or week view.
5. Feature events
If you have an event you’d like to draw more attention to, feature it! To feature an event, head to the post editor and find Event Options. Then select Feature Event. Save the post, and The Events Calendar will take care of making the event stand out on the calendar.
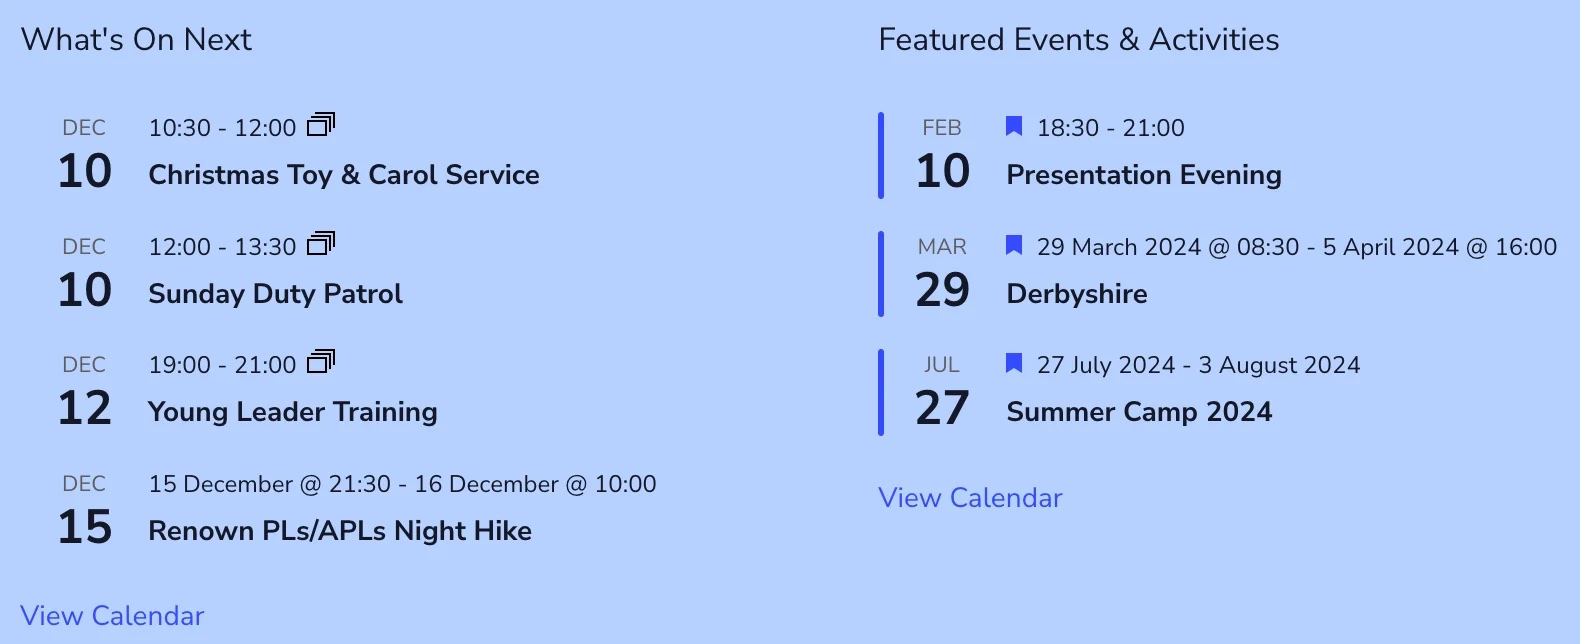
Here’s an example from 3rd Chalkwell Bay Sea Scouts, one of the largest Sea Scout groups in the UK. With a default list view, the events marked as “featured” populate in the right-side column, giving them a prominent display. This is a great way to pick and choose what you want to showcase to make your calendar feel curated.
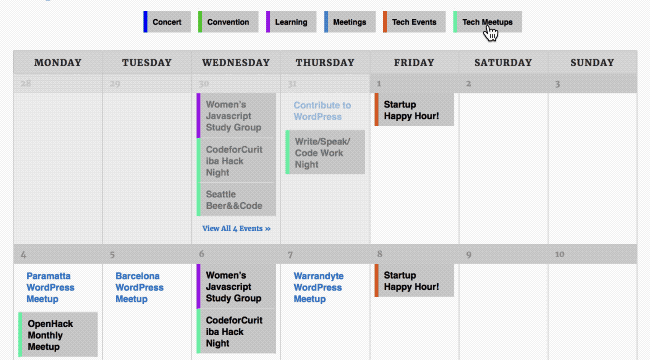
6. Add filtering
Finally, make sure to let users search and filter your calendar for ultimate customization. Filter Bar allows users to search for events by category, tag, venue, organizer, and more.
You can even customize Filter Bar by creating custom filters and choosing which filters to show. If you have the Filter Bar add-on, you’ll find it under Events → Settings → Filters in your WordPress admin. From there, you can customize or create unique filters, following our guide.
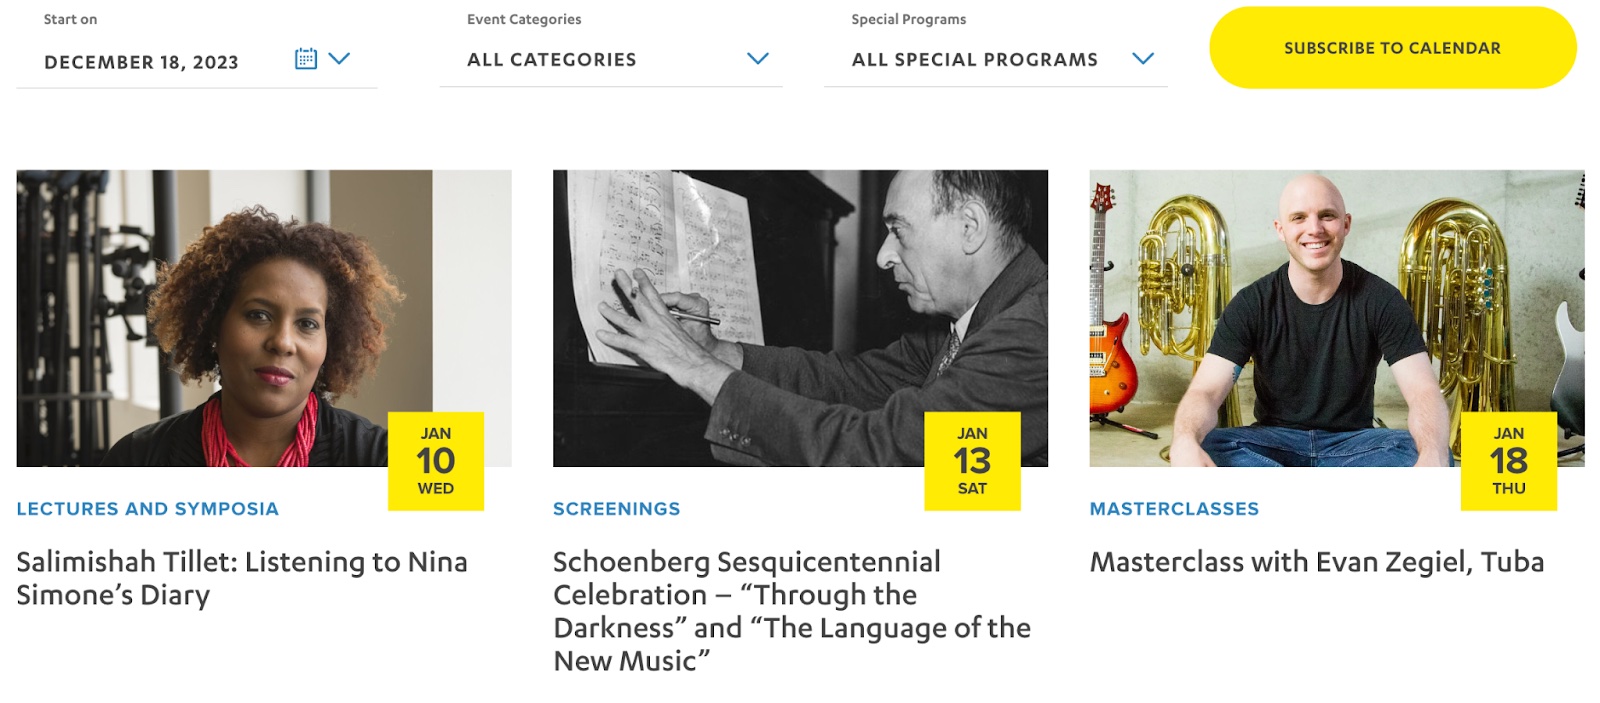
Look at how The UCLA School of Music uses Filter Bar. Once on the main calendar page, the customized filter bar lets folks filter by date, category, and program, displaying the events they’re most interested in for a custom experience.
Make your calendar your own
Simply by making a few changes to your colors, fonts, layouts, and view, your calendar can feel unique and truly custom to your website. The good news is that most of these customizations happen right in our free version of the plugin! For further customization, such as more views and filtering, our upgraded Events Calendar Pro can offer an optimal user experience.
For additional information on customization, look through our guide on Customizing The Events Calendar.
It’s free to demo The Events Calendar so you can see for yourself how to use a WordPress calendar that’s tailored to your brand and goals. You can also view all of our premium features in the demo to see if Events Calendar Pro is right for you.