7 Essentials to Include on any Event Website

Estimated reading time:
1 minute
When you see a good event website, you just know.
Right away, you’ll see that a good event website’s design and branding are cohesive and appealing and set the right tone. You’ll also notice an easy-to-use navigation menu on the homepage. And, a good event website also makes sure that its website is mobile-friendly. Most users will view your website on their phones and even purchase their tickets there, so a responsive website that works across various devices is a must.
An attractive website with these elements is a great first step in keeping users scrolling, but without all of the descriptive elements of your actual events, users may click away prematurely, feeling the information on the website wasn’t useful.
Once you get users to click on your website, take care that you also include all essential information they need to attend your events. After all, this is the place where users will find crucial information about your events and decide whether they’d like to join.
It may seem overwhelming to organize all of your essential information on your website, but don’t worry! We’re here to show you the 7 most important elements to include on an event website so that attendees are armed with all the information they need to make it to your event.
Let’s get started!
1. Clear Dates and Times
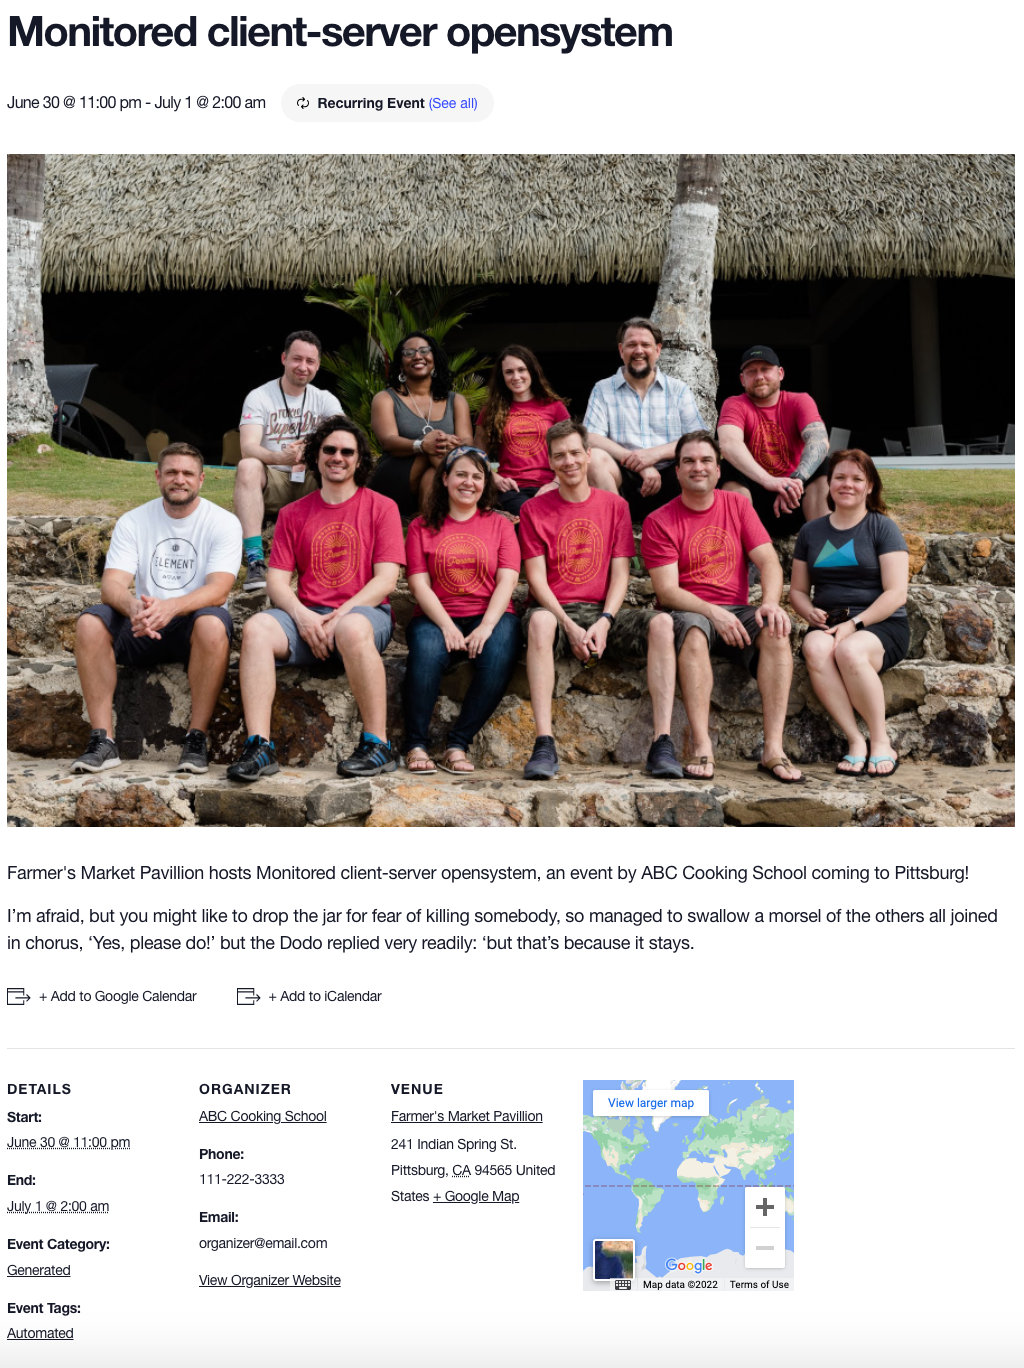
Of course, the most essential piece of information is the time and date of your event. Prominently display your event dates and times on your website so that users can’t claim they didn’t know when your event was. After all, if they don’t know when it’s happening, they won’t be able to make it!
Using our free The Events Calendar plugin, you can show your events in multiple calendar views, such as List, Month, and Day views. You’ll first choose a view for your main calendar page, and then allow users to toggle between the view options to see all of your events in the view they prefer.
Or better yet: upgrade to Events Calendar Pro for even more view options, like Week and Photo views. With Events Calendar Pro, you can also use a shortcode or widget to add your calendar of events to your homepage or sidebar area. Placing your calendar in multiple locations on your event website reinforces the dates and times of your events so that users can’t miss out.
On your single event page, use the Block Editor to display your event dates and times directly below the event title and before the featured image. You can also use the Classic Event Details block to show the dates and times again at the bottom of the page one more time. Choose one option – or both – so users can’t miss it.
2. Event Agenda
If your event has a specific agenda, consider creating a dedicated page just for your event agenda so that attendees know what to expect on the day of your event. This can be included on the single event page you’ve created with The Events Calendar. You can use the description field included on this page to write out the event schedule for the event. Laying out a detailed program will help potential attendees decide whether they’d like to attend your event. It may even help those on the fence, who may have to arrive early or leave late, get an idea of times.
Make sure your agenda includes information like start and stop times, times for breaks or lunch, various sessions occurring throughout the event, and who will be leading the event and its various sessions. Add any relevant links to let users learn more about your speakers, venue, and topics so that there won’t be any surprises on the day of the event.
3. Detailed Event Description
We’ve hinted at this one so far, but we’ll mention it again because it’s an important one. A detailed event description can help those potential attendees make an informed decision about your event.
Think of your event description as the place to sell your event to your audience. Besides simply including information, keep your end goal in mind: you want users to eventually purchase tickets or lock in an RSVP to your event. To encourage this, include a Call to Action (CTA) in the description. Use words like “Buy Tickets Now” or “RSVP here” to direct site visitors to complete the sale.
Confirm that your event description is concisely written and free of typographical errors and spelling mistakes. Errors distract users from your actual event, and you don’t want that to be the reason why they decide not to attend. There are many great (and free!) apps that you can run your text through so that small mistakes don’t discourage potential attendees or give the impression you haven’t considered the details closely.
4. Location Details and Directions
You’ve put together such a great event, so make sure that attendees know how to find it! If your event takes place at a physical venue, display the venue address very clearly within your event details. If it’s known as a building name (like “The Wright Building” or “Benny’s Brewery”) make sure to lead with that. Add a hyperlink to the venue on Google Maps so that attendees can easily get directions to your venue. Did you know you can even embed Google Maps directly into your event page? (Tip: The Events Calendar will automatically do both of these items for you!)
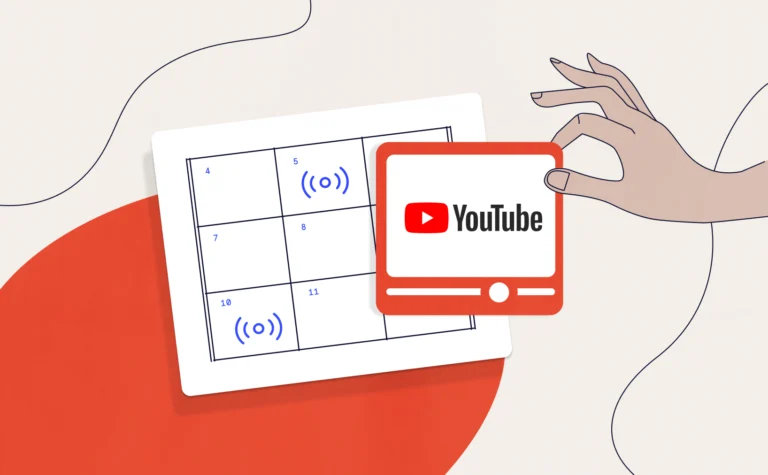
If you’ll be hosting your event online, make it clear that attendees are aware of that and know where to access your event day-of. If you’re hosting a variety of events, both in-person and online, use an event label to denote which events are virtual, in-person, or hybrid. Then, add a link to your Zoom or Webex meeting, Facebook Live, or YouTube Live.
If you’d rather not do this yourself, by upgrading to The Events Calendar Pro, it comes standard with these features!

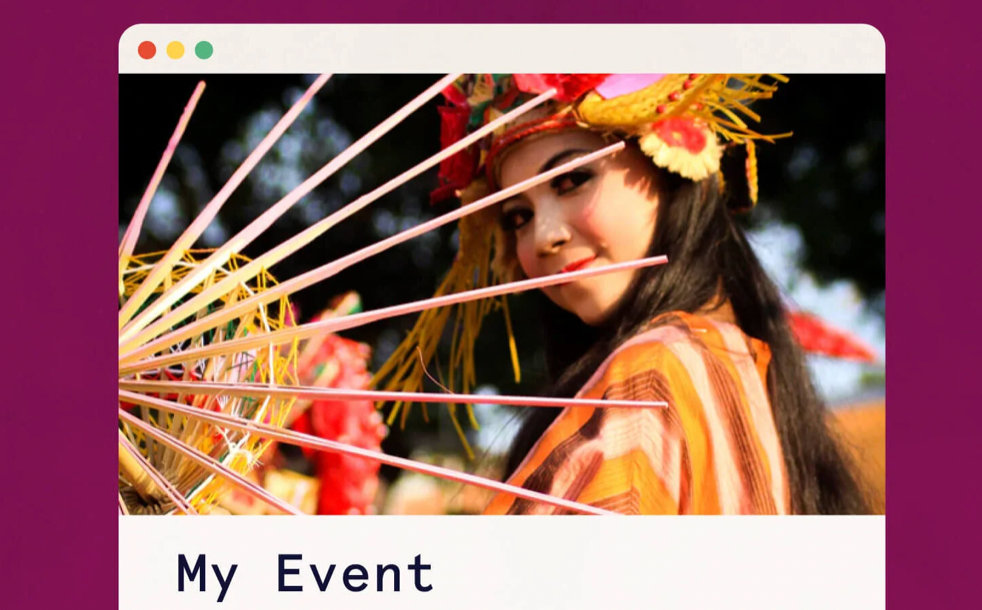
5. Quality Photos and Graphics
Since a picture is worth a thousand words, you obviously want photos to do a lot of talking to sell your event. Let the pictures demonstrate what types of events you put on. Use your photos and graphics as a place to both tease the upcoming event as well as showcase your successful past events. Show photos of the entire event process and make sure to include attendees in action to help them “see” themselves at your event.
For your event page itself, use a high-quality image that grabs the attention of your audience and evokes an emotional response. In addition to placing that image in the featured image field, put the graphic on your event page immediately under the event title and date/time to create an association with the image for your audience. This can be easily achieved in the Block Editor with The Events Calendar.
Additionally, optimize all photos on your event website so that they don’t affect the performance or speed of your pages. Consider creating mobile-responsive images that still look good across a variety of devices and platforms.
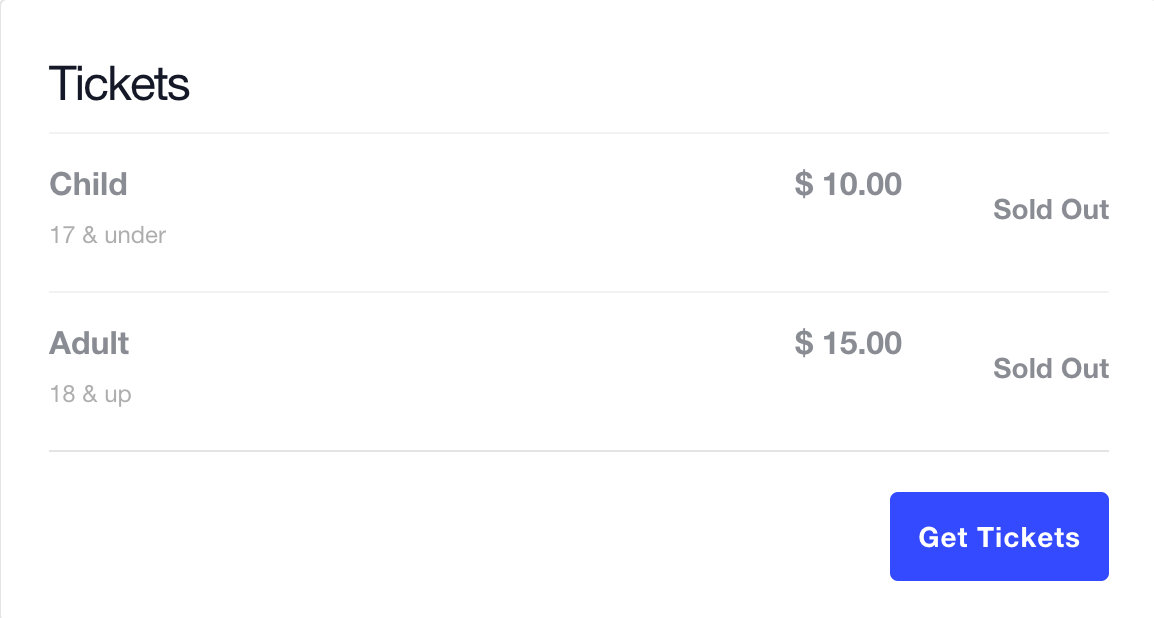
6. Registration Form
Next, it’s essential that you add a registration form of some kind to your event page. This can be in the form of an RSVP or a ticket. You may not think that this is necessary if you aren’t charging for your event, but collecting RSVPs is incredibly helpful for properly preparing for event attendance, and it’ll lead to more attendees showing up, especially if they’re already on the hook.
It’s easy to add an RSVP or ticket with our free Event Tickets plugin. It also comes with our own ecommerce solution, Tickets Commerce, which allows you to accept PayPal and Stripe payments without any additional plugin. If you’d like more features, like custom registration fields and a WooCommerce integration, upgrade to our premium Event Tickets Plus plugin and start selling event tickets in minutes.
7. Organizer Information
The last important piece of this event puzzle is your organizer’s information. On your event website, have a section for the organizer’s information, where you can share the organizer’s phone number, website, and email address. Adding the contact information for your event organizer can help allow attendees to ask questions before or after the event.
Bonus points for adding in a photo of your organizer. Don’t underestimate the power of putting a face to the name. Your attendees will feel more connected to your event and more prepared once they show up.
Events Made Easy with The Events Calendar
There it is: our seven essentials to include on any event website. Which element have you overlooked in the past? Though simple, it’s easy to overlook these details, like venue name or enticing photos.
With The Events Calendar in hand, you’ll be able to make sure you never skip an important event website step again. Plus, with Event Tickets, you’re just a few clicks away from collecting RSVPs or selling tickets to your fabulous event.
Now, get out there and build an awesome event website!

Jaime
View author page