Managing Event Registrations on WordPress

Estimated reading time:
1 minute
You’ve organized a major event and you’d like to get a head count to estimate how many people are coming. But guests don’t have any way to respond and let you know they’re planning to attend.
The solution? Add event registrations to your WordPress site and streamline the RSVP process so you have one less thing to worry about.
Adding event registration to your site can keep you more organized. It saves time following up and keeping tabs on attendees so you can get back to preparing for your event. And for day-of-event management, speed up the check-in process by giving attendees portable tickets.
To get started, you’ll want to add an RSVP form to your events on WordPress. Luckily, the process is super simple, and you don’t need to write a single line of code to make it happen. Then, you’ll want to install Event Tickets Plus to create digital tickets.
Below, we’ll walk through how to do it.
Install Event Tickets
With the free Event Tickets plugin, you can create RSVP forms and manage your registrations right from WordPress. You can find the Event Tickets plugin by searching for it in your WordPress Dashboard under Plugins > Add Plugin.
Once you have installed and activated Event Tickets, you can start adding registration to any custom post type.
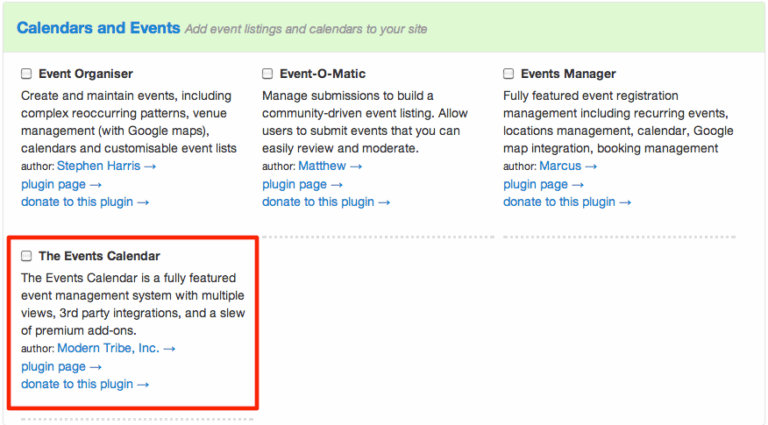
Pro tip: You can also add registrations to a calendar of events by using Event Tickets alongside our free The Events Calendar plugin.
Configure the settings
Next, head over to Events Settings > Tickets to make sure that you check off where you’d like to use registration. Even though it says “tickets,” these settings also apply to your RSVPs and free registrations.
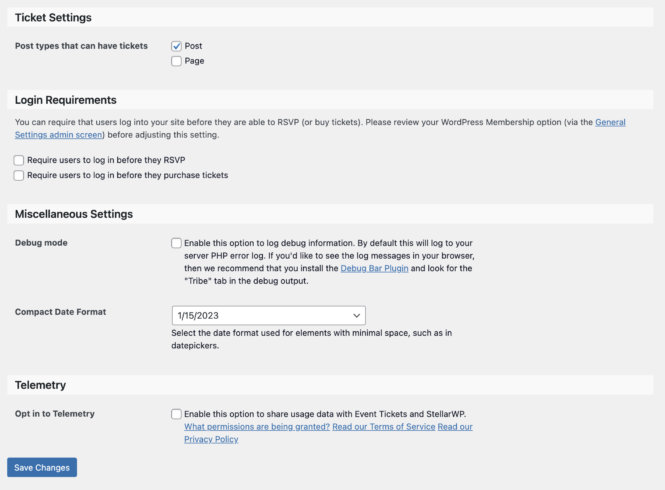
You can also make changes here regarding the location of the form and decide whether you’d like users to log in before creating an RSVP.
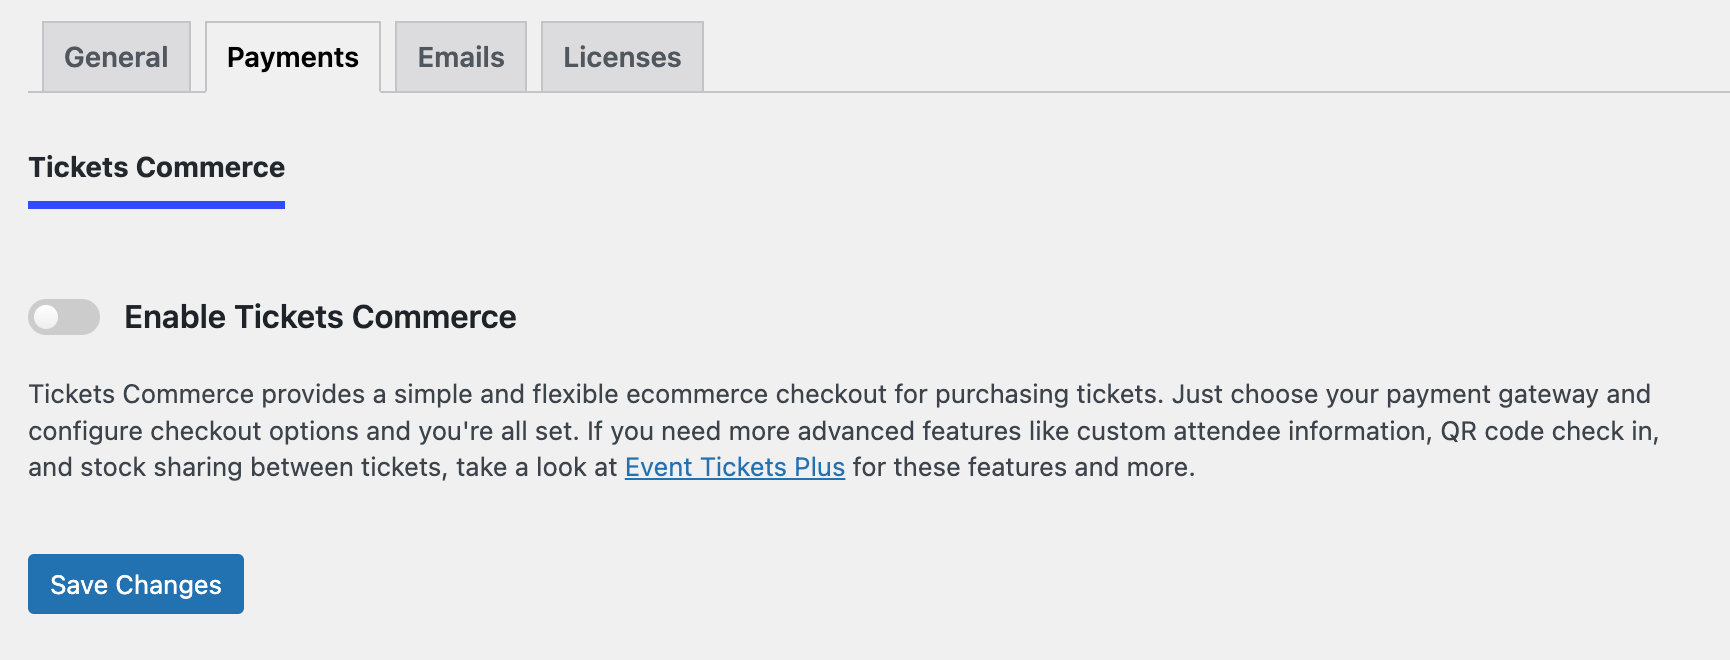
You can set up Tickets Commerce in the Payments tab if you’d like to sell tickets or charge a fee for your registrations.
Create your event registration
Once you’ve tailored the settings to your liking, you can begin creating a registration. To do this, head over to the post or page where you’d like it to appear.
You can search for the RSVP block with the Gutenberg Editor. Once you find it, an RSVP form will be added to your post type of choice.
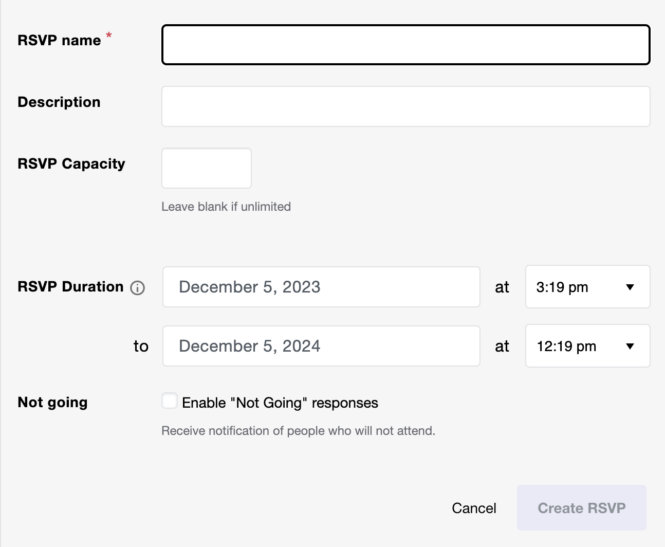
You can add a capacity limit and let users choose “Going” or “Not Going” instead of requiring a response only if they plan to attend. You can also set how long the form should display before the event, add a name, and include a description.
If you expand the settings on your RSVP, you can add a header image as well.
Once you click Create RSVP, your finished product will look something like this:

Manage attendees with Event Tickets
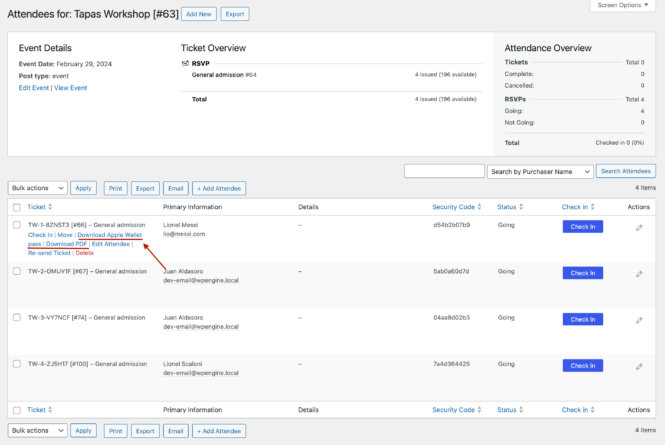
Now that people have started to respond, you can keep track of who’s coming from the Attendees screen. You can get to this page by finding your RSVP then clicking on View Attendees.
Once you click on your attendees tab, you can view all of your attendees on the backend. Hovering over an attendee will bring up options to delete, edit, move, or check them in.

Send digital tickets with Event Tickets Plus
It’s easier than ever to manage event registrations by sending digital tickets! Attendees can save their tickets to digital wallets, like Apple Wallet or PassWallet, and download PDF tickets so they can have their tickets anytime, anywhere. With easy access to tickets, the check-in process is much faster.
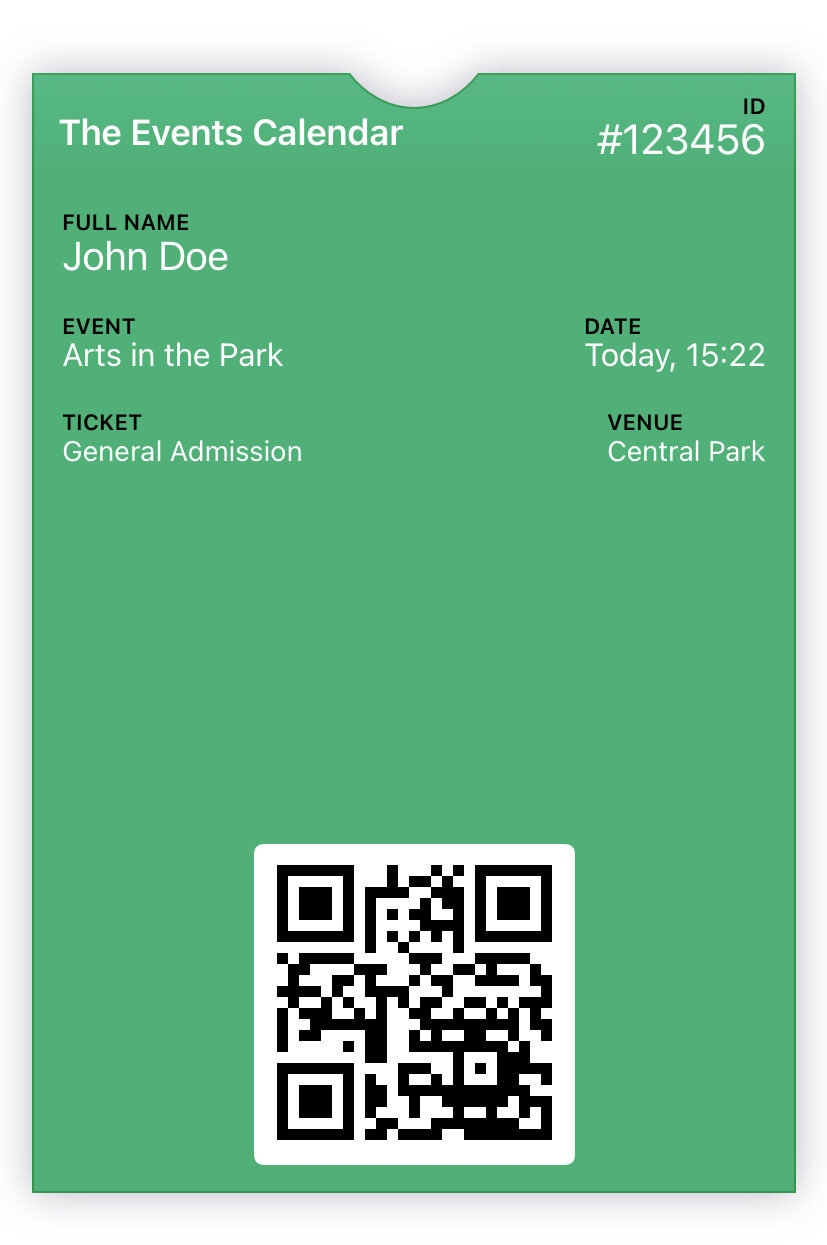
First, purchase and download Event Tickets Plus. Then, head over to your Ticket Settings and click the Wallet Plus tab. You can configure settings for Apple Wallet passes or PDF tickets, including how they look and where you want them. Digital tickets can show in the RSVP or checkout confirmation pages.
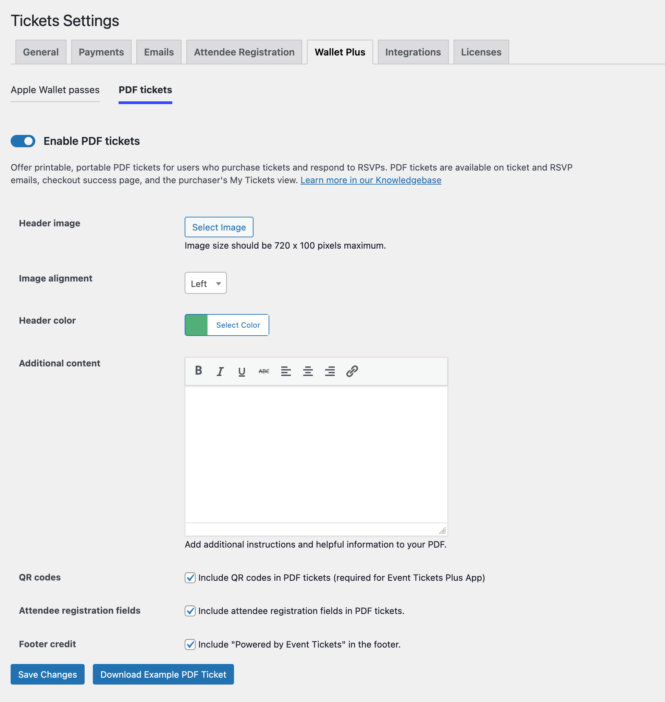
You can even add a QR code to make check-in easier.
If you want to view the tickets, visit the attendee page for admins and click Download Apple Wallet pass or Download PDF.
Enhance your registrations with even more features
Event Tickets will give you all the tools you need to add event registrations right in WordPress. But you can also connect to WooCommerce, add custom fields to your registration forms, and check attendees in with a QR code by upgrading to Event Tickets Plus. It’s a great way to add ticket sales to your site, too.
We even have you covered on the day of your event. For the best experience, get Wallet Plus to add portable and digital tickets to your RSVP forms. Attendees will have easy access to their tickets, allowing for a smoother check-in process and, ultimately, a successful event!

Jaime
View author page