12 Essential Steps to Plan Your First Conference
Estimated reading time:
1 minute
Planning a conference is not easy. From finding the perfect venue to coordinating speakers and making sure attendees have a great experience, there’s a lot to manage.
If you’re feeling overwhelmed by the thought of planning your first conference, take a deep breath. Breaking the process into clear steps makes it much more manageable.
Today, we’re looking at the essential steps to plan a conference, right from initial planning to post-event analysis. Let’s create an event that leaves your attendees impressed and eager to return next year!
Step 1. Define your conference objectives and target audience
Without clear goals, a conference can feel scattered and miss the mark. Define objectives to guide decisions — speakers, marketing, and content — so everything adds value for your audience.
Start by asking yourself:
- What do we want to achieve with this conference? (Knowledge sharing, networking, product launches, brand awareness.)
- What outcomes would define success? (Attendance numbers, revenue goals, lead generation, attendee satisfaction.)
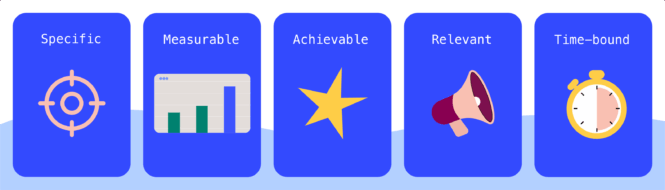
Try using the SMART method to create objectives that are Specific, Measurable, Achievable, Relevant, and Time-bound.
For example, instead of “host a successful tech conference,” aim for “Within the next year, organize a two-day tech conference attracting 300 industry professionals, with 85% attendee satisfaction ratings.”
🚨Tip: When identifying your target audience, think about industry, job roles, seniority levels, attendee pain points and interests, and how they prefer to learn and network.
Step 2. Build your team
Having a strong team means tasks are properly delegated, deadlines are met, and problems are solved quickly. Based on our experience, some of the essential roles needed for successful conference planning are:
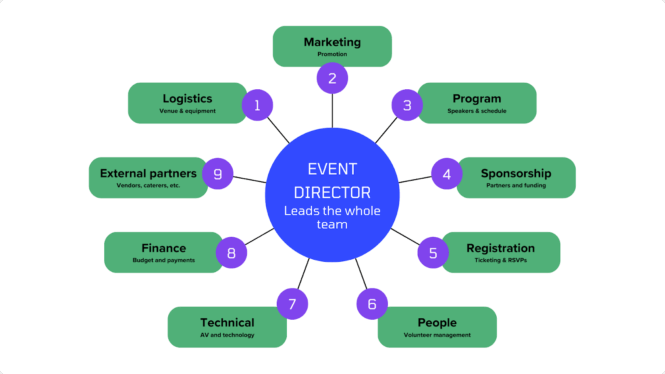
- Event director/project manager: The quarterback who oversees the entire conference, ensures timelines are met, and leads the team.
- Logistics coordinator: Manages venue arrangements, catering, equipment, and on-site operations.
- Marketing lead: Develops and executes promotional strategies to attract attendees.
- Sponsorship manager: Secures sponsors, manages partnerships, and coordinates exhibitor needs.
- Registration coordinator: Handles ticketing, RSVPs, and attendee communications.
- Volunteer coordinator: Recruits, trains, and manages volunteers for event day support.
- Technical coordinator: Ensures all technology works properly, from presentation equipment to internet connectivity.
- Finance manager: Keeps track of the budget, processes payments, and makes sure the event stays financially healthy.
For larger conferences, specialized committees can manage areas like speaker selection or attendee engagement, keeping efforts focused. Clearly define roles to avoid confusion, set regular check-ins, use project management tools, and establish accountability to track progress.
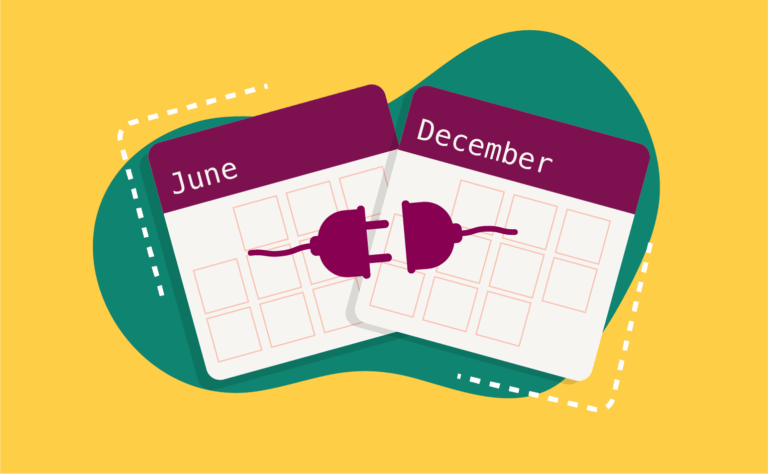
Step 3. Create a realistic budget and timeline
They say, “A budget is telling your money where to go instead of wondering where it went,” which captures the need for a realistic budget perfectly. Your budget and timeline will keep you on track and help you plan all aspects of your conference without being too pricey.
When building your budget, account for:
- Venue rental (typically 30–40% of your total budget).
- Catering (meals, coffee breaks, accommodating dietary needs).
- Speaker fees and travel expenses.
- Marketing and promotion costs.
- Technology and equipment (AV systems, Wi-Fi, event apps).
- Staffing and volunteer support.
- Contingency fund (set aside 10–15% for unexpected costs).
Identify potential revenue streams like ticket sales, sponsorships, exhibitor fees, and merchandise. Use a spreadsheet or budgeting tool to track expenses in real time, and get multiple vendor quotes to compare costs and negotiate better deals. Using project management tools like Asana, Trello, or even a shared spreadsheet can help track tasks and deadlines across your team.
Step 4. Select and secure your venue and logistics
Your venue choice shapes the entire conference experience, from how sessions flow to how easily people can network. When choosing a venue, you need to pay attention to:
- Capacity and layout: Can it comfortably fit your attendees? Does it have flexible spaces for different session types?
- Location and accessibility: Is it easy to reach by public transport? Are there nearby hotels? Is it accessible for people with disabilities?
- Technical capabilities: Does it have reliable Wi-Fi, quality AV equipment, and tech support for presentations or streaming?
- On-site amenities: What about parking, restrooms, catering options, and spaces for breaks?
- Ambiance: Does the venue’s style and feel match your conference theme and audience expectations?
Once you’ve chosen a venue, tackle these logistical details:
- Catering arrangements: Plan meals, breaks, and accommodate dietary restrictions.
- Accommodation: Reserve room blocks at nearby hotels for out-of-town attendees.
- Transportation: Arrange shuttles or provide clear information on public transport options.
- Signage and wayfinding: Ensure attendees can easily navigate the venue.
When negotiating contracts, ask your venue manager about package deals that might include catering or AV equipment. Read the fine print to understand cancellation policies and be aware of hidden fees like service charges, cleaning fees, or overtime charges.
Step 5. Secure event sponsors and exhibitors
Sponsors help offset event costs, while exhibitors enhance the experience by showcasing relevant products and services. Strong sponsorships can boost your event’s reputation, attract more attendees, and create valuable networking opportunities.
To find potential sponsors and exhibitors:
- Target companies that align with your conference theme and audience.
- Look at industry leaders, tech companies, service providers, and local businesses.
- Tap into your existing professional networks and past event sponsors.
Create a compelling sponsorship package that includes:
- A clear value proposition explaining what sponsors will gain (brand visibility, lead generation, speaking opportunities).
- Different sponsorship tiers (gold, silver, bronze) with varying benefits.
- Customizable options allowing sponsors to tailor packages to their specific goals.
Support your pitch with audience demographics and engagement statistics. Assign a dedicated team member to manage sponsor relationships, ensuring clear communication and consistent support throughout the event. Focus on building long-term partnerships rather than one-off deals.
Step 6. Plan your conference program and speakers
A strong program keeps attendees interested, creates networking opportunities, and delivers on your event objectives. Here’s how to design an engaging agenda:
- Define key themes and topics that align with attendee interests and conference goals.
- Mix different session formats, like keynotes for inspiration, panels for diverse perspectives, and workshops for hands-on learning.
- Consider session flow. Alternate between high-energy presentations and interactive discussions to prevent fatigue.
- Build in plenty of breaks, as they’re crucial for networking and mental refreshment.
To find and secure speakers, you can identify thought leaders in your industry — subject matter experts, influencers, and engaging storytellers. Consider opening a call for speakers to discover fresh voices and niche expertise.
Be clear about speaking terms. It’s always good to be upfront about their fees, who will cover travel arrangements, and what you expect them to deliver. Craft personalized invitations that highlight your event’s value and expected audience.
Make sessions more engaging by incorporating interactive elements like Q&A periods, live polls, or small group discussions. Real-world case studies, success stories, and hands-on activities are a great way to add practical value for attendees.
For your attendees, create a comprehensive speaker guide with session schedules, technical requirements, and event details. This will help them know exactly how the conference will pan out and catch all the sessions they are interested in. Make sure to communicate any changes in the schedule through your event app, email, or WhatsApp.
Step 7. Organize catering options
Food might seem like a small detail, but it plays a huge role in the conference experience. Like a good intermission at a theater performance, meals and breaks give attendees time to digest information, network, and recharge.
Poor catering can lead to grumbling stomachs and negative feedback, while thoughtful food choices create positive impressions that last. When planning your catering, consider your attendees’ cultural preferences and dietary restrictions (vegetarian, vegan, gluten-free, etc.). Have a balance of healthy options and comfort foods.
Align meal times with your agenda:
- Breakfast for early arrivals.
- Mid-morning and afternoon breaks with snacks and beverages.
- Lunch at a natural pause point.
- Evening receptions or dinners for networking.
Choose appropriate serving styles:
- Buffets for variety and social interaction.
- Plated meals for formal occasions.
- Food stations to reduce lines.
- Grab-and-go options for tight schedules.
Review venue catering policies and constraints early in your planning. Many venues require using their in-house services or preferred vendors. Get multiple quotes and consider package deals to manage costs effectively.
Step 8. Choose your event management system
Managing a conference manually is like trying to conduct an orchestra while also playing all the instruments yourself. Something’s bound to go wrong — missed registrations, double-booked speakers, or that dreaded moment when an attendee shows up and isn’t on your list (awkward!).
A quality event management system brings order to this chaos. It becomes your digital assistant, handling repetitive tasks, centralizing information, and creating a single source of truth that your entire team can access. No more digging through email chains or wondering if you have the latest version of the schedule.
When shopping for your event management sidekick, here are the features that separate the “must-haves” from the “nice-to-haves”:
- Registration and ticketing: Choose a system offering multiple ticket types and secure payment processing with a streamlined checkout process.
- RSVP management: Look for automated response tracking, confirmations, and reminder capabilities to keep attendees informed.
- Agenda scheduling: Ensure attendees can create personalized schedules, bookmark sessions, and receive updates about changes.
- Attendee engagement: Select platforms with interactive features like live polling, Q&A, and networking tools. For hybrid events, prioritize features that engage both in-person and virtual attendees.
- Analytics and reporting: Seek robust tracking of registration trends, session popularity, and attendee demographics to inform future event planning.
When choosing your event management system, focus on three things:
- Ease of use: Nobody wants to need a PhD to run their event! Pick a platform with intuitive interfaces that both your team and attendees will love.
- Integration power: Your system should play nice with your existing tools. From CRM to email marketing, smooth connections mean less manual work and fewer headaches.
- Room to grow: Today’s intimate gathering could be tomorrow’s mega-conference. Choose a system that can scale up without forcing you to start over.
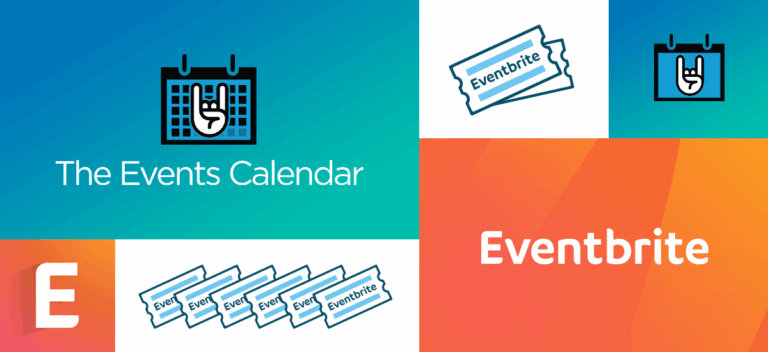
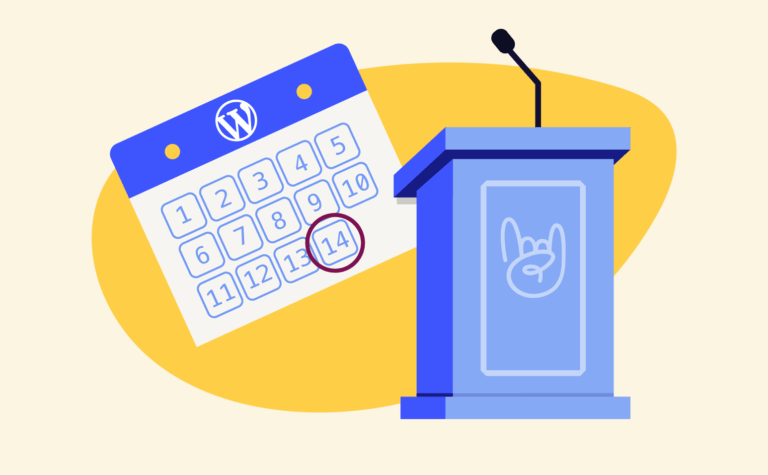
For WordPress users, The Events Calendar’s suite of plugins is designed specifically for event management. No steep learning curve or complex migration.
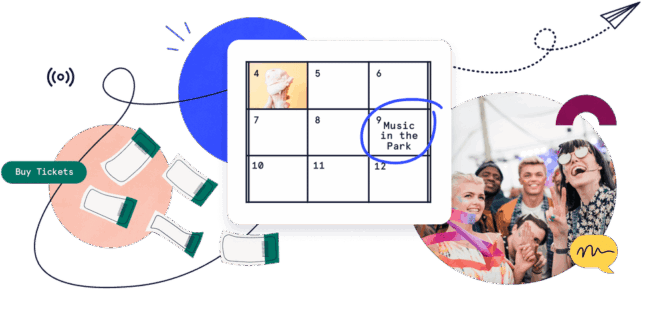
- The Events Calendar helps you showcase your events in a visually appealing, easy-to-navigate format. Note: you may not need a calendar if you’re only planning a single event. But if your conference is part of a larger slate of events then The Events Calendar is ideal.
- The Filter Bar add-on allows attendees to quickly find relevant sessions using keywords.
- Event Aggregator automatically imports events from Google Calendar, Eventbrite, Meetup, and more, ensuring your calendar stays up to date with minimal effort.
- Eventbrite Tickets lets you create, manage, and sync Eventbrite events and ticket sales directly from your WordPress dashboard.
- Event Tickets Plus streamlines ticketing and registration, integrating with popular payment platforms for secure transactions.
- With the Promoter tool, you can create email campaigns and send event updates.
- Community allows users to submit events with customizable forms, registration options, and built-in spam protection.
- Event Schedule Manager helps you design and display multi-track event schedules with speaker highlights and flexible layout options.
- Seating enhances events with interactive assigned seating, offering custom pricing, real-time availability, and a smooth checkout experience.
What really sets The Events Calendar apart is its flexibility. It can easily handle both physical and virtual event calendar management and works well with other WordPress tools you might already be using, creating a unified experience rather than a digital patchwork.
Step 9. Set up event registration
Registration is the first interaction attendees have with your event, and first impressions matter! Make your registration process as smooth as possible to keep attendees happy, reduce sign-up abandonment, and simplify data collection and payment processing.
- Choose a reliable registration platform. For WordPress users, Event Tickets Plus offers integrated solutions for ticketing and RSVP tracking. Its features include customizable registration forms, attendee management tools, and integration with WooCommerce for payment processing.
- Create a user-friendly registration page that is mobile-responsive, clearly displays event details (date, location, agenda, pricing), and has a simple, logical flow from start to finish.
- Collect essential information without overwhelming registrants, such as:
- Basic details: name, email, organization.
- Necessary logistics: dietary restrictions, accessibility needs.
- Session preferences, if applicable.
- Keep forms concise and ask only for information you truly need
- Offer multiple secure payment options like credit cards, payment apps, or payment gateways like PayPal. Consider implementing some innovative strategies to encourage early ticket sales.
After registration, send clear confirmation emails with receipt and payment confirmation, event details (date, time, location, parking information), what to bring or prepare, and how to contact your team with questions.
Set up automated reminders (Promoter can help here!) as the event approaches to reduce no-shows and keep attendees informed of any updates or changes.
Step 10. Develop your marketing and promotion strategy
Even the most brilliantly planned conference won’t succeed if people don’t know about it. Marketing builds awareness, creates excitement, and drives registrations. Without it, you risk hosting an amazing event with empty seats.
Start building your marketing plan by clearly defining who you’re trying to reach. Consider factors like industry, job roles, interests, and location. Tailor your messaging to address their specific needs and highlight how your conference will benefit them.
Use at least three of these key marketing channels, depending on where your target audience is likely to engage.
- Email marketing: Send personalized invitations and updates to segmented lists. Promoter helps create customized messaging for different audience segments to boost engagement and open rates.
- Social media: Promote on platforms where your audience is active using event hashtags, countdown posts, and engaging visuals. Share speaker announcements, behind-the-scenes content, and teaser videos.
- Content marketing: Publish blog posts, speaker interviews, and thought leadership articles that generate interest in your event themes.
- Paid advertising: Consider targeted ads on social media, Google, or industry websites to expand your reach beyond your existing network.
- Partnerships: Collaborate with sponsors, speakers, and industry influencers to amplify your message. Provide them with ready-to-share content about your event.
- Referral programs: Encourage past attendees, partners, and exhibitors to spread the word by offering incentives for referrals.
Maintain consistent messaging across all channels, but adapt the format to suit each platform. Keep building momentum as the event approaches with regular updates and content that showcases the value of attending.
Step 11. Create an on-site event management plan
On D-day, your on-site plan is going to ensure that everyone knows their role and can execute their responsibilities flawlessly when it matters most. Without a detailed plan, even small issues can snowball into major problems that impact the attendee experience.
A solid on-site plan minimizes stress, ensures smooth operations, and creates an enjoyable experience for everyone involved. Now the question is, what do you include in an on-site plan? It can’t be too detailed, but neither can it have just the basics.
Here’s what you need to cover.
- Detailed event schedule, including a minute-by-minute timeline.
- List session start times, breaks, speaker arrivals, and technical setups.
- Build in buffer time for transitions and unexpected delays.
- Clear staffing and role assignments.
- Who will staff registration desks?
- Who provides AV support?
- Who manages speakers and VIPs?
- Who handles troubleshooting?
- Venue setup details.
- Seating arrangements and room layouts.
- Stage design and equipment placement.
- Signage locations and wayfinding.
- Exhibitor booth placement.
- Accessibility accommodations.
It’s also helpful to build a clear communication plan. Equip your staff with radios, messaging apps, or phones, and establish a central command point for issues. Create an emergency contact list, which you can include in your on-site plan, and set up regular check-in times for team updates.
Prepare for common issues like speaker no-shows, technical glitches, or weather disruptions. Have backup plans, extra equipment, and a clear escalation process for emergencies.
If using volunteers, ensure they receive proper training, understand their roles, and have access to key information. Assign a volunteer coordinator to manage schedules and provide support.
Step 12. Analyze your event and collect post-event feedback
The work doesn’t end when the last attendee leaves. Reviewing what went well and what could be improved provides valuable insights for future events. Think of it as the conference equivalent of a sports team watching game footage — it helps you identify strengths to build on and weaknesses to address.
Feedback helps measure success, identify gaps, and refine strategies for better outcomes next time. Focus on these key metrics:
- Attendance rates: Compare registered attendees to actual turnout.
- Engagement metrics: Session participation, networking activity, app usage.
- Revenue and budget: Sponsorship income, ticket sales, overall budget performance.
- Marketing effectiveness: Email open rates, social media engagement, website traffic.
Collect meaningful feedback through post-event follow-up questionnaires to attendees, speakers, and sponsors. Ask short and focused questions on specific aspects of the event. If possible, conduct one-on-one interviews with key stakeholders to discuss their feedback. Set up quick feedback stations at the event for immediate responses.
Use a mix of rating scales (1–5 stars), open-ended questions (“What was your favorite session?”), and multiple-choice questions for a complete picture. Offer incentives like gift card drawings to boost survey participation.
Compile and analyze the data to identify patterns and trends. Look for both positive feedback to reinforce and constructive criticism to address. Share relevant insights with your team, stakeholders, and potentially even attendees to demonstrate your commitment to improvement.
Take the next step: Streamline your planning process
Planning a conference doesn’t have to be overwhelming. Define clear objectives, assemble the right team, and create detailed plans to stay on track. There will always be unexpected challenges, but having systems in place makes them easier to handle.
Count your success in terms of the meaningful experiences your attendees take away from the event. Take time to celebrate small wins along the way. Successfully booking your dream venue, securing an industry-leading keynote speaker, or hitting your registration goals are all meaningful milestones.
Remember, even seasoned planners hit bumps along the way. Stay organized, embrace the unexpected, and keep your focus on creating an experience that attendees will rave about.
Need more event planning tips? Sign up for our newsletter!

Nathan
View author page