How to Work With WordPress Block Patterns
Estimated reading time:
1 minute
Block patterns have the potential to make publishing content in WordPress easier and more flexible than ever.
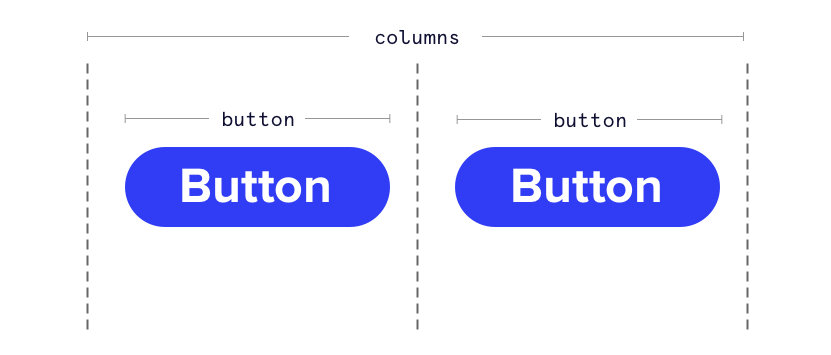
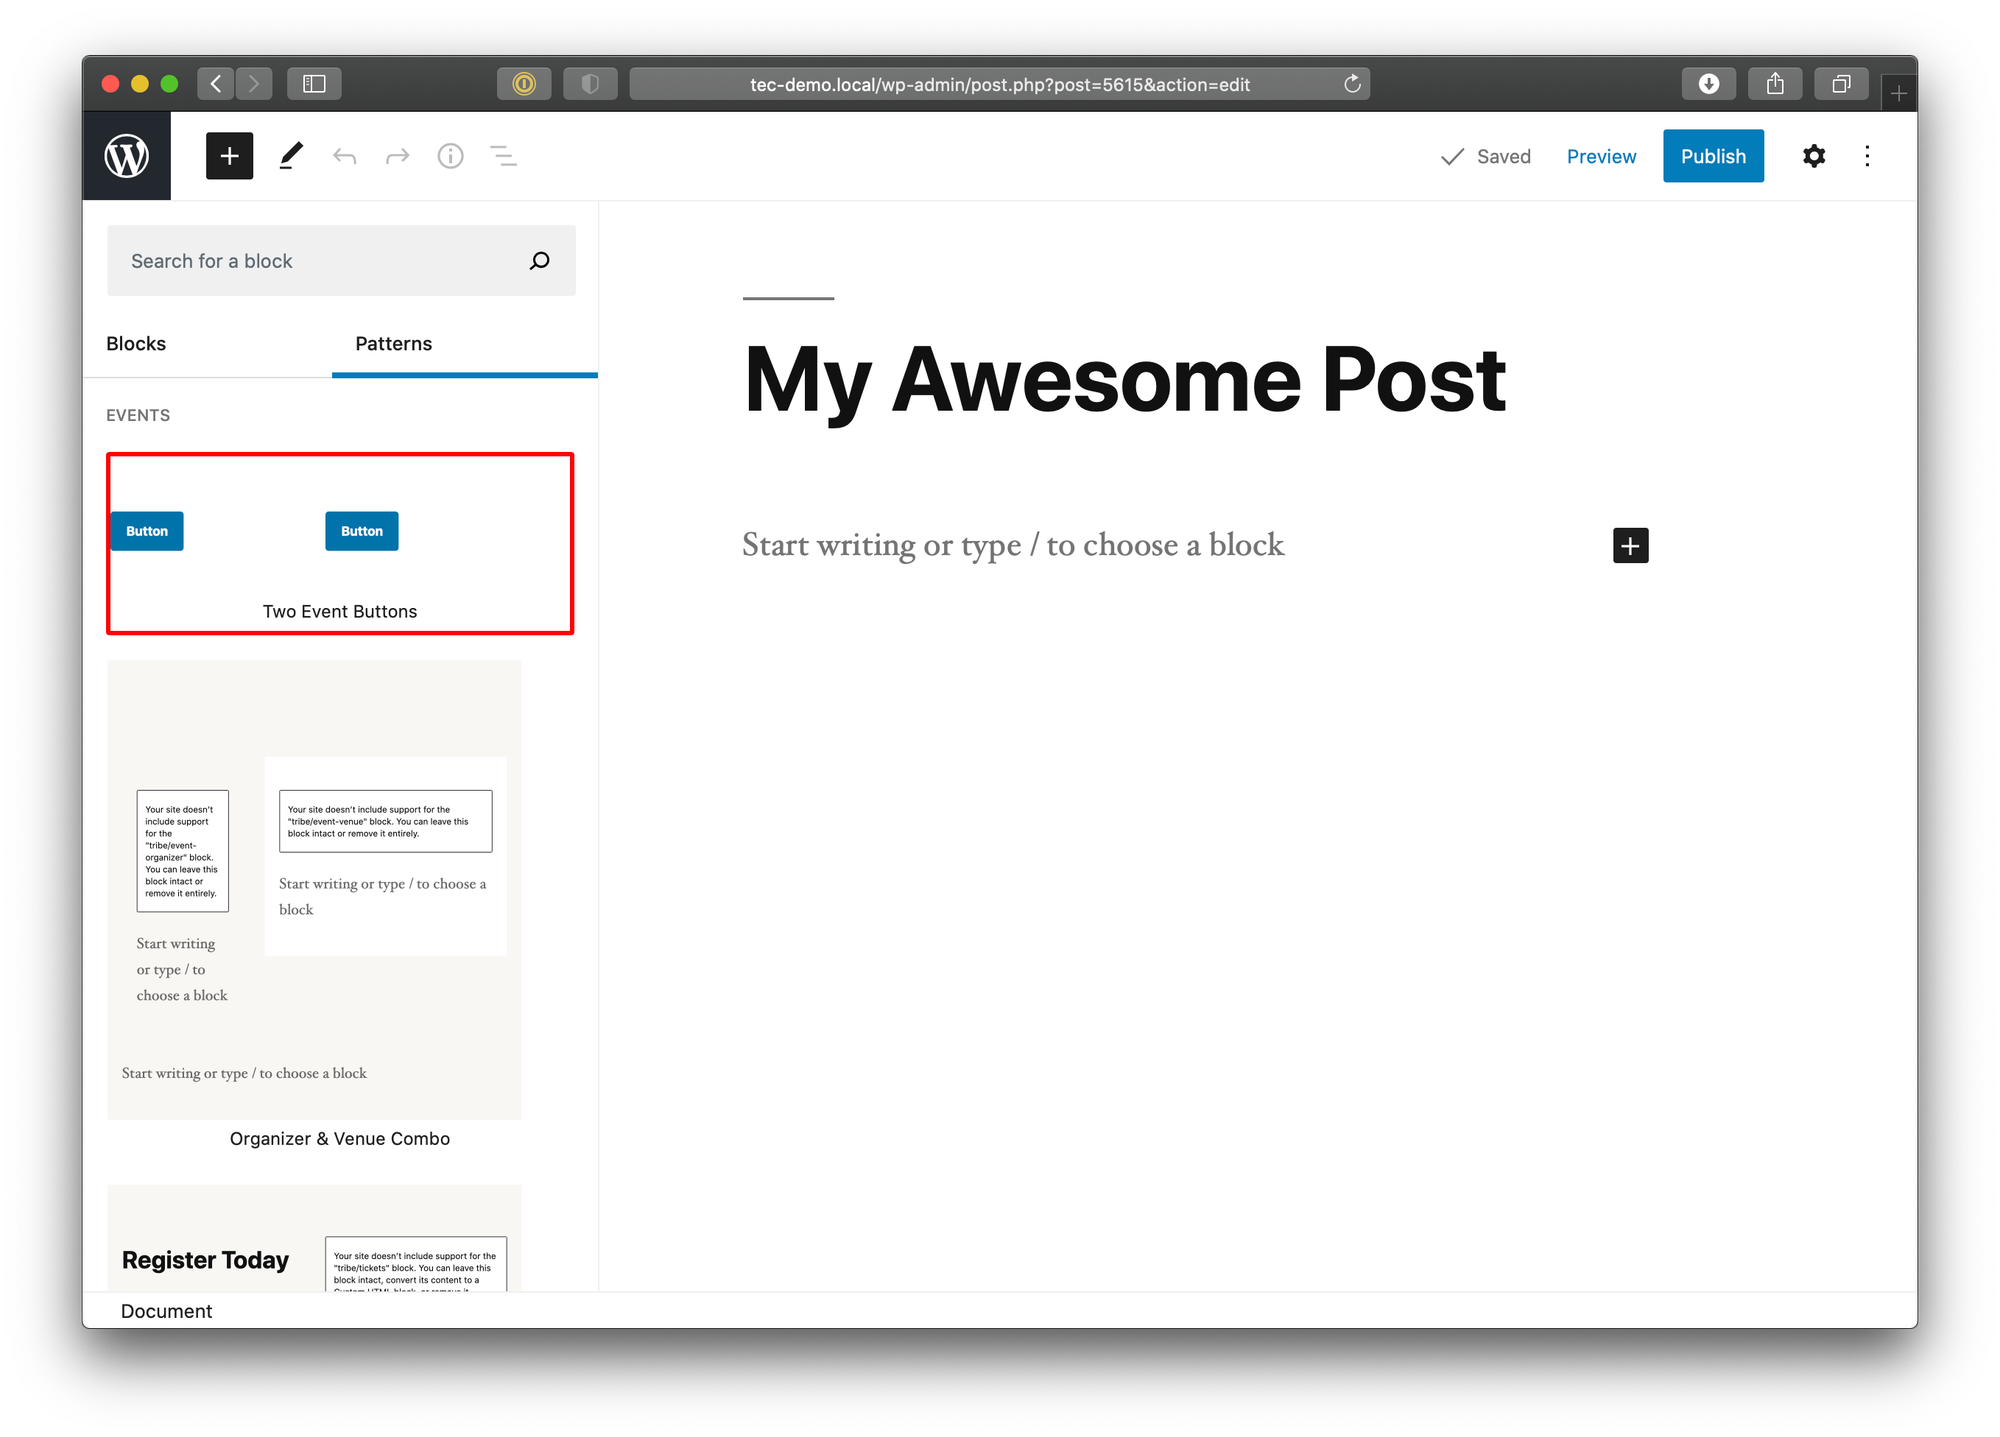
For example, let’s say you always find yourself adding the same two blocks to your posts. Perhaps it’s two side-by-side buttons. If you’ve done this before, then you know what it takes to make this happen:
- Add a Columns block with two columns
- Next, add a Button block to the left column
- Then. add a Button block to the right column
What a pain. Three blocks to create what essentially amounts to one.
That’s what block patterns are designed to fix.
Instead of dropping in multiple blocks to create one element, block patterns allow you to combine blocks into a single group that can be reused whenever you want. WordPress even provides several of these block patterns right out of the box.
Taking our button example, we can group the pieces together and save them as one block for later use. But before we get there, let’s draw another important distinction.
Block patterns are super similar to reusable blocks.
The block editor already sort of allows us to accomplish what block patterns do with reusable blocks: Drop some blocks into the editor as a group, click the little menu icon, then select the “Add to Reusable Blocks” option.
Cool! Now give it a name and we can use it anytime we need two buttons right next to each other.
So, why use block patterns when reusable blocks can also save groups of blocks?
One reason is because when you make a change to a reusable block, those changes will automatically apply anywhere the block is used, whether it’s on the same post, or another one. It is possible to convert a reusable block to a regular block so that the changes only apply to that one instance, but that can break the layout of the grouped blocks and requires you to modify a bunch of content.
Block patterns, on the other hand, are editable right out of the gate. They simply provide a layout of blocks where you can create and customize your content.
Related: Check out these block patterns to use with The Events Calendar.
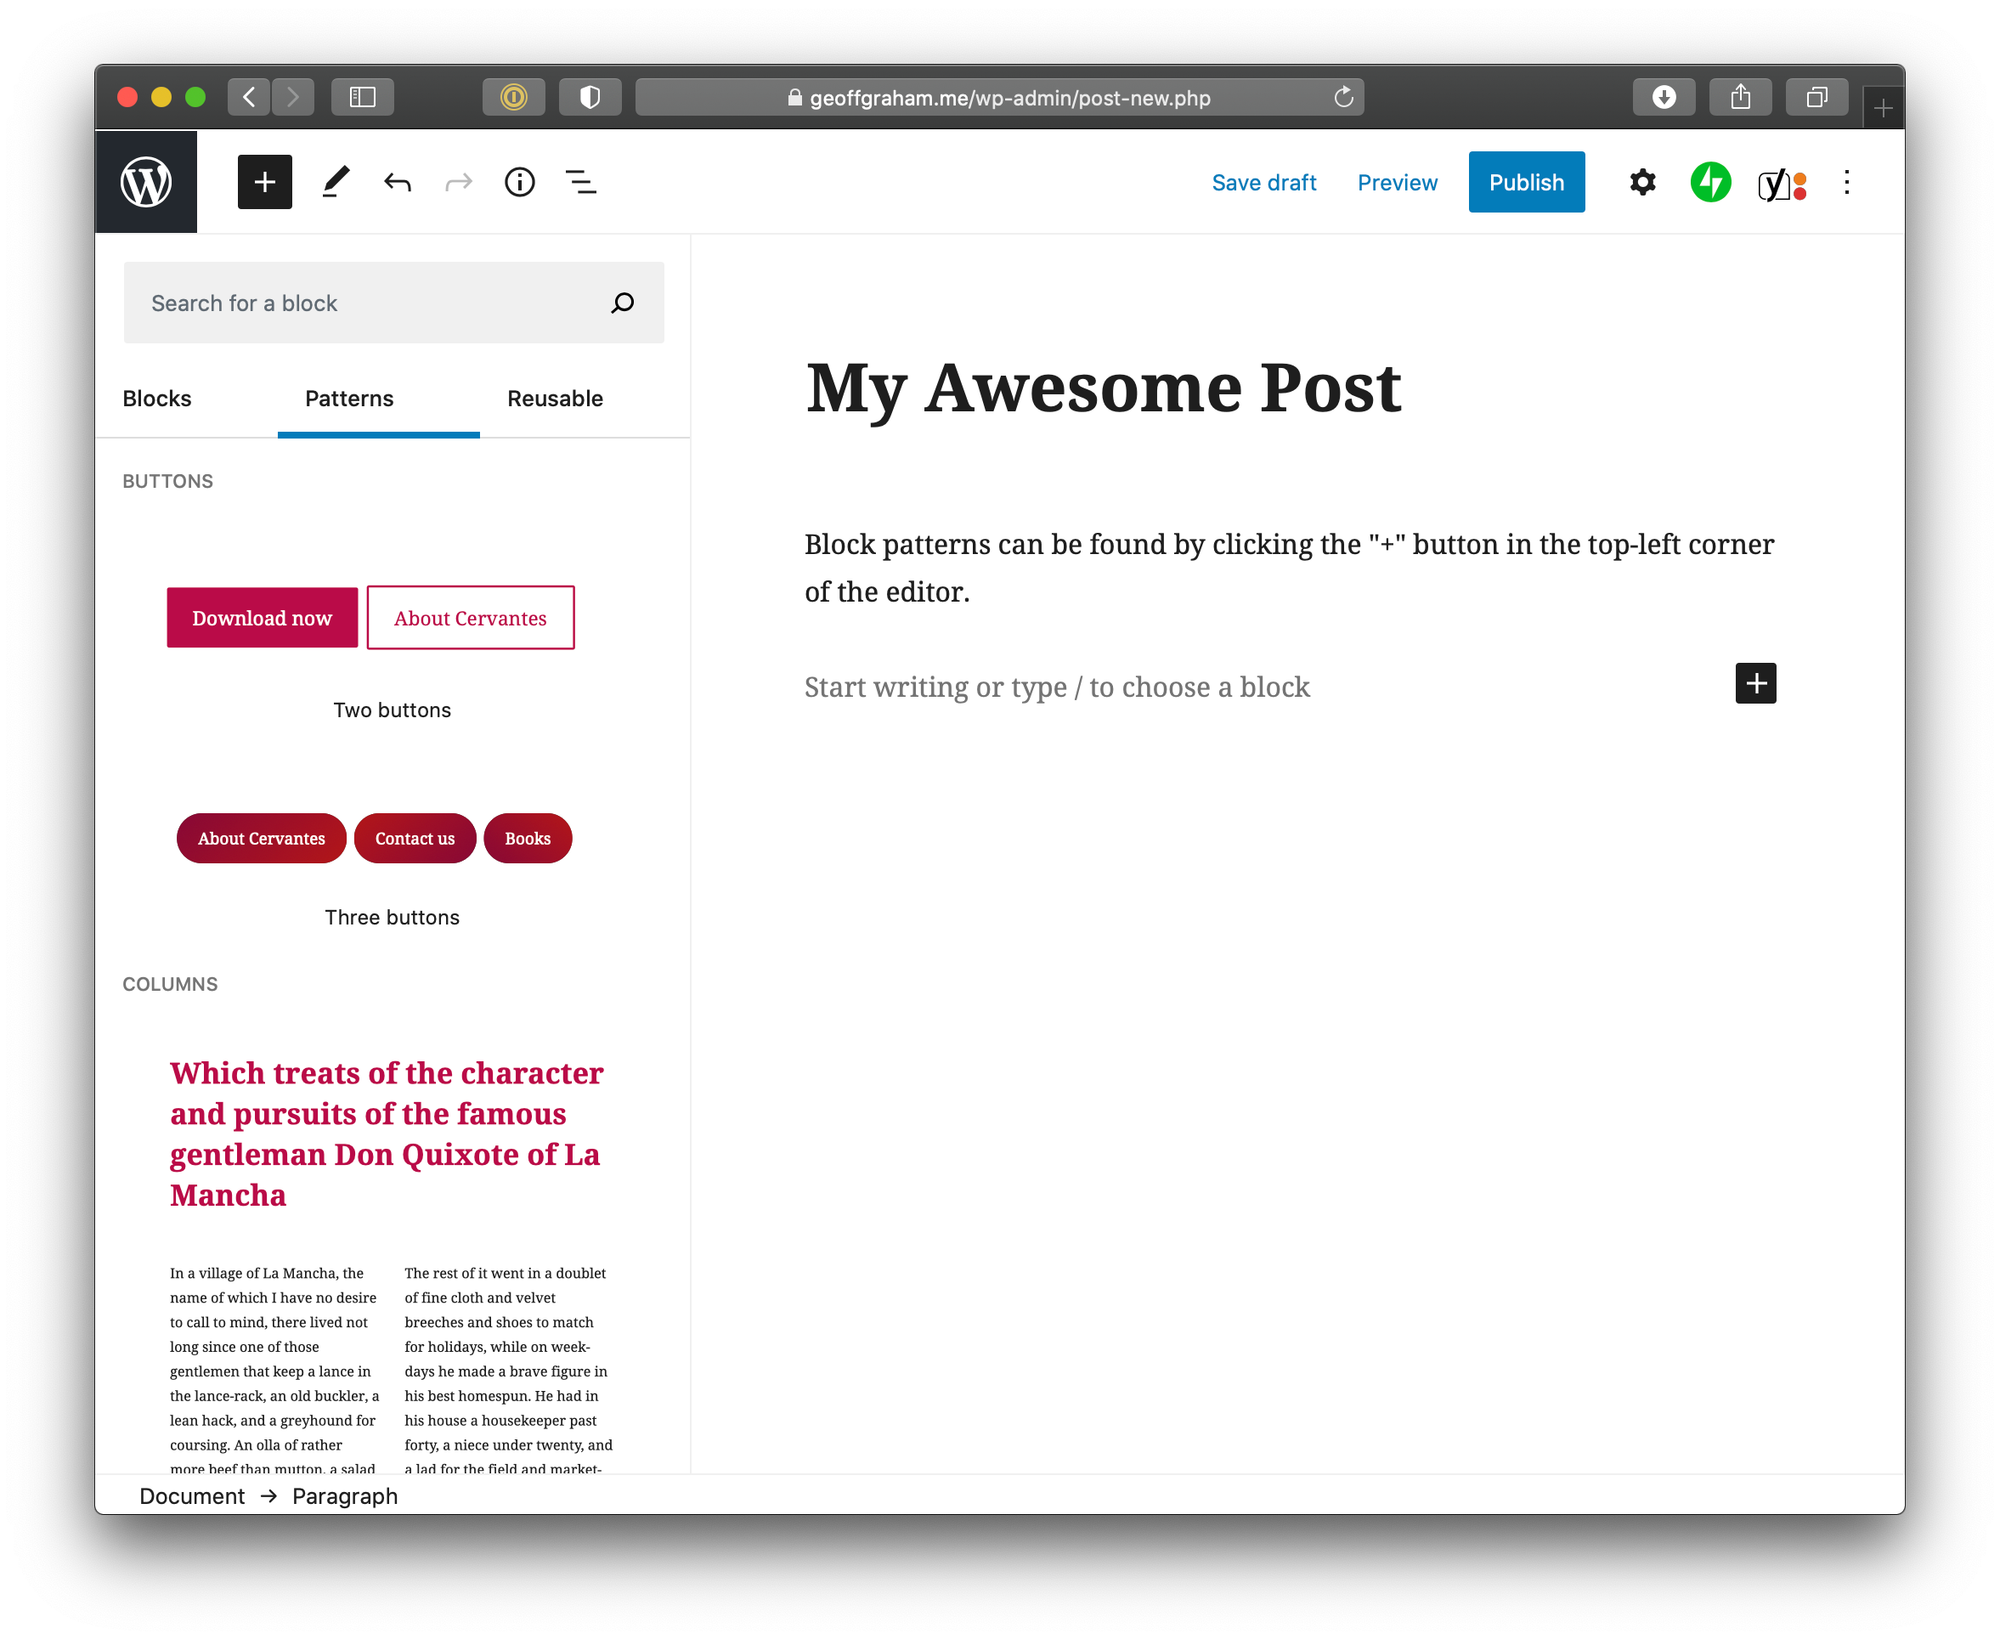
How to register a block pattern
WordPress introduced a new register_block_pattern() function that — true to its name — registers a block pattern so you can use it in the future. All the documentation for it is available on WordPress.org, so we won’t detail everything here. What’s important to know are the arguments it takes. These are the two required arguments:
title: The pattern name you’ll see in the Pattern menu.content: The pattern code.
There are a few others:
description: A short blurb that describes the pattern.categories: Groups the pattern with other patterns in the same categories.keywords: Tells WordPress if searching certain words in the block menu should return the pattern as a search result. This is super handy for making a pattern more discoverable. For example, a pattern that contains a row of three cards called “Cards” can be found when searching for “Three” or any other combination of words.viewportWidth: This gives you a little extra control over how the pattern looks in the block inserter, like making it a full-width item.
To start, let’s define a pattern category.
This is totally optional and only really necessary if you want to register a pattern under an entirely new category. The patterns that are already available in WordPress include several existing categories:
- Buttons
- Columns
- Gallery
- Headers
- Text
If you can use any of those, great! If not, create one! Either way, if you don’t want to categorize a pattern, it will automatically go into an “Uncategorized” category the same way uncategorized posts do.
The register_block_pattern_category() is what we need to create a new category. Let’s register one called “Events”:
register_block_pattern_category(
  'events',
  array( 'label' => __( 'Events', 'my-block-patterns' ) )
);
As you can see, all it really takes is a single label argument. The part with my-block-patterns is just the namespace of your plugin or theme… wherever you’re registering block patterns.
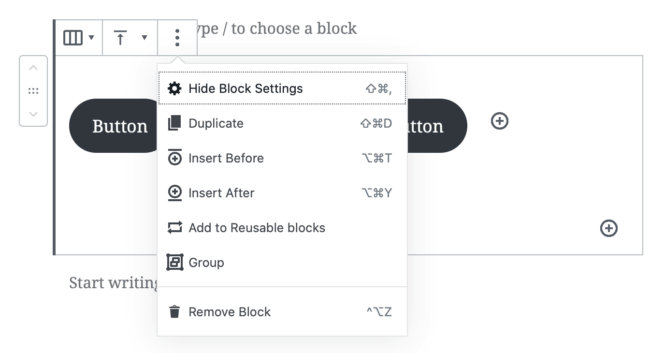
Next, create the pattern in WordPress.
Now, we could write the code for a pattern directly in the register_block_pattern() function. But that would be a test of patience. It’s much easier to sketch the pattern in the block editor and then copy the code to the function.
First, create a group. Then, drop some blocks in that group. Next, select the group, open the block options menu, and select “Copy” option.
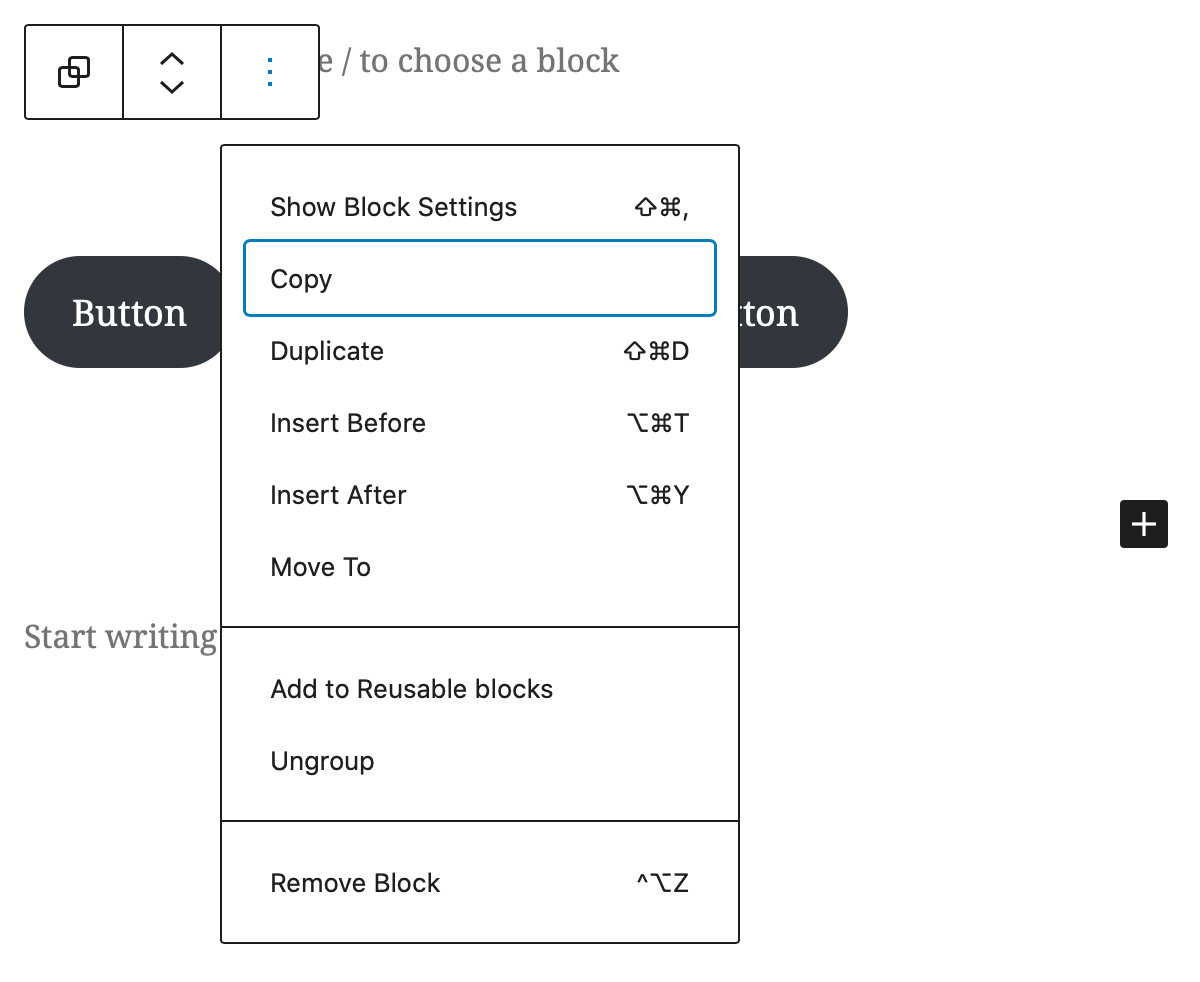
Copying a block copies the HTML and markup for the block. That’s what we need for the content argument our register function.
But first…
We need to escape the copied code.
That’s right. We aren’t able to simply paste it in as is. Fortunately, there’s an online tool that will escape the code for us. Paste it there, clock the “Escape” button, and then copy the code it outputs.
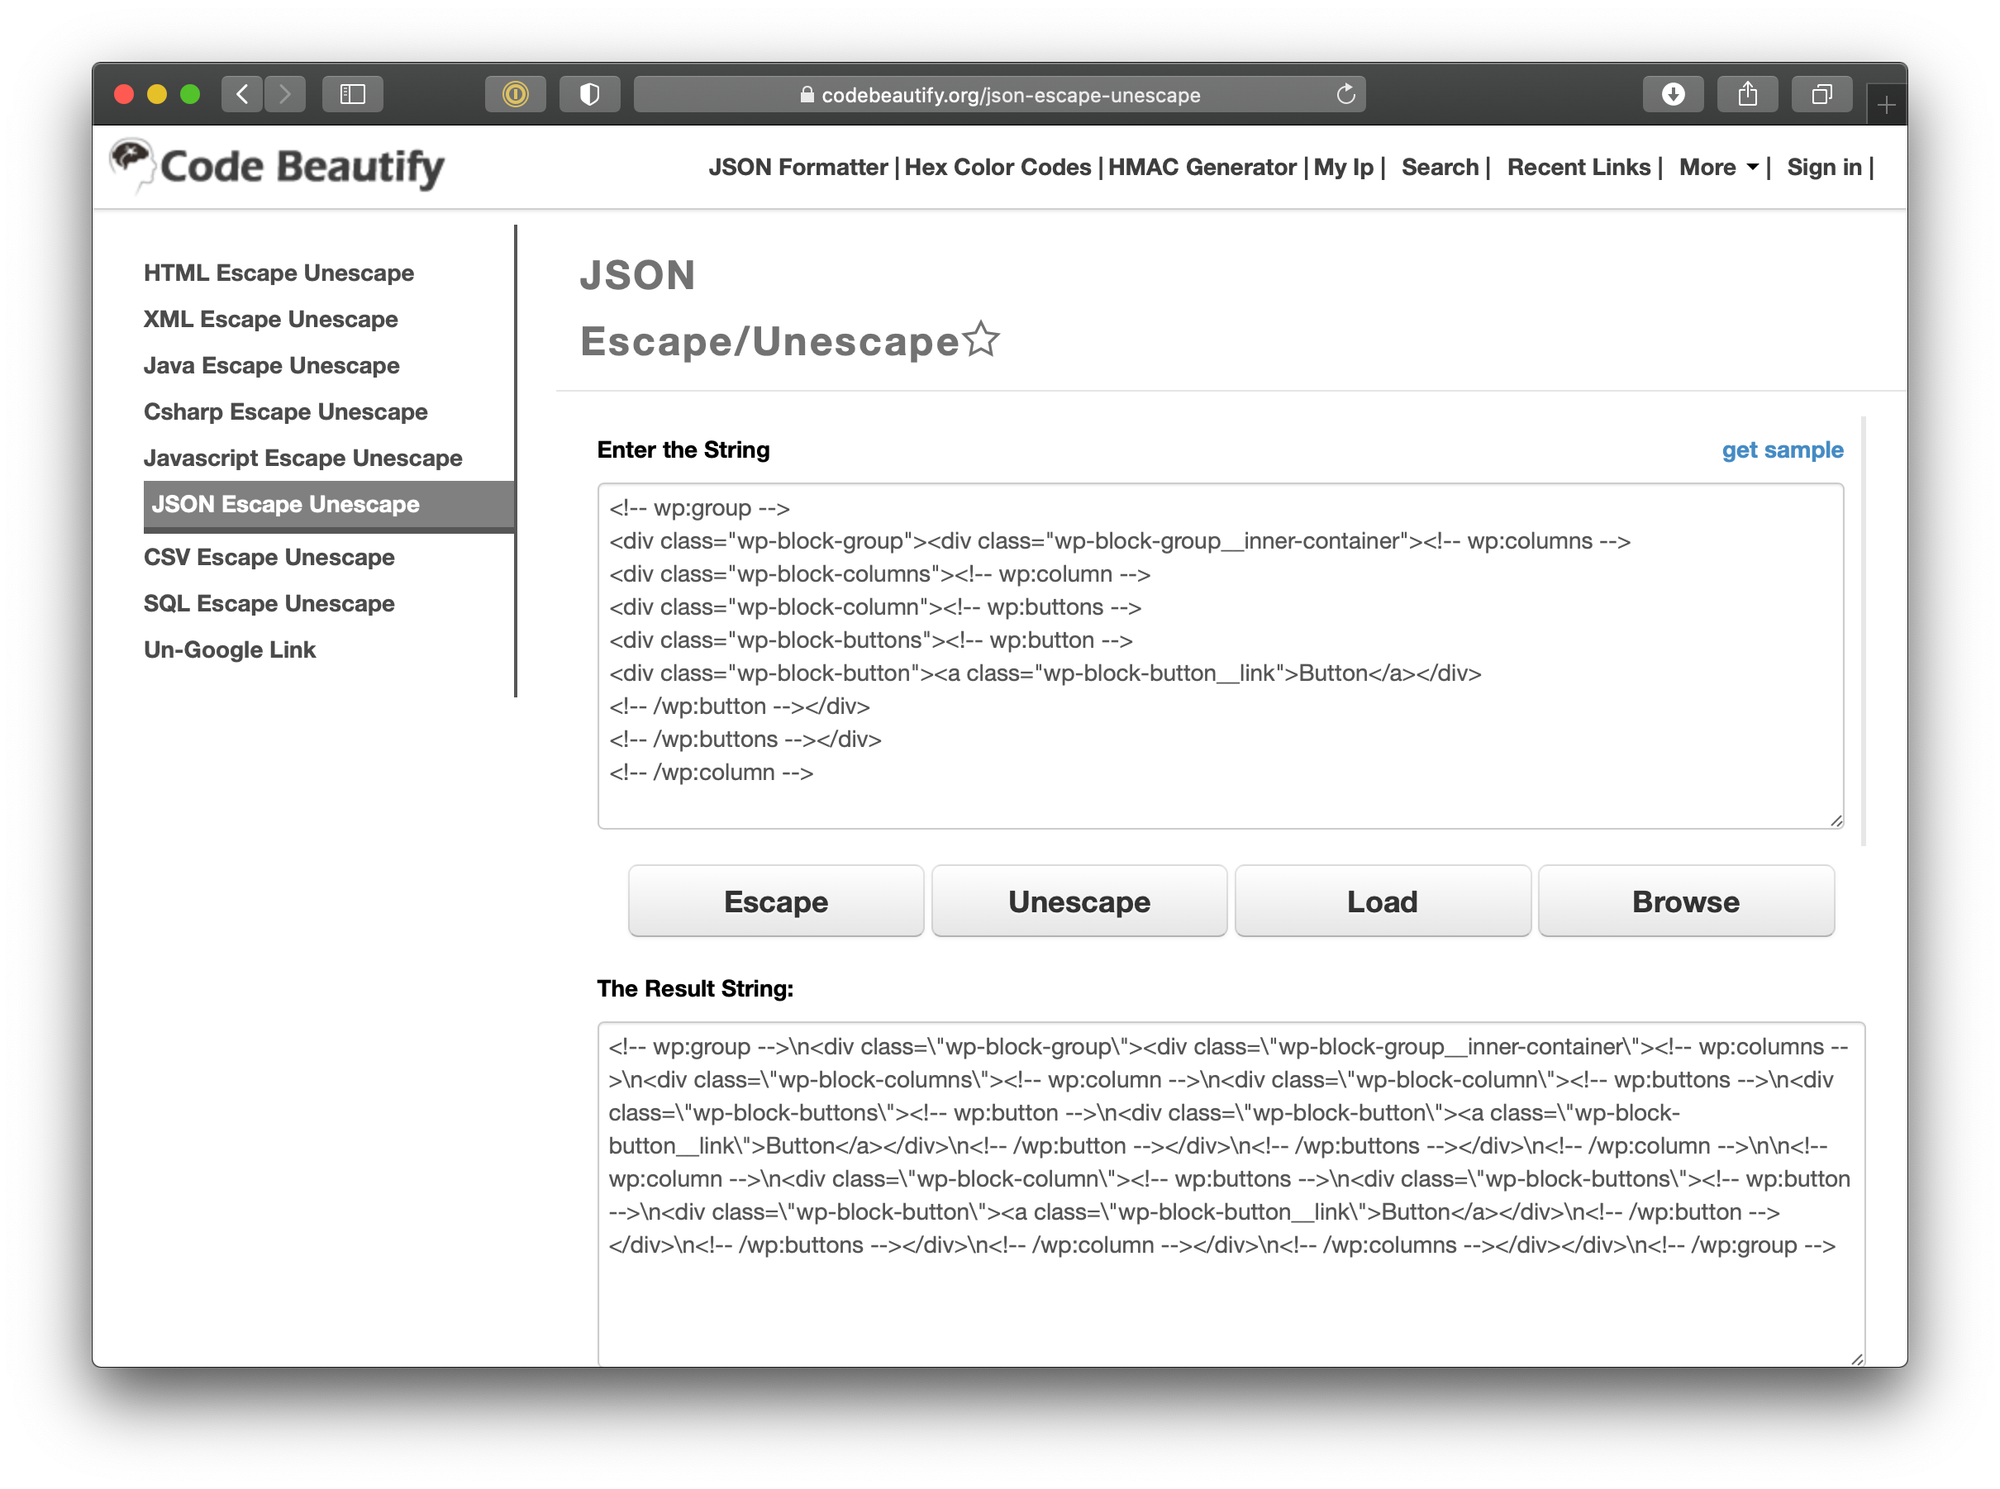
Hold on to this for now. We’ll need it in just a bit.
Register the pattern.
We have some code for a pattern. We have a function to register a pattern. Now, let’s put them together to create a pattern.
Here’s our pattern complete with the markup we escaped a moment ago. We’re hooking into the register function and calling it on init:
function tec_register_block_patterns() {

  // Let's check if block patterns are even supported
  if ( class_exists( 'WP_Block_Patterns_Registry' ) ) {

    // Start the pattern
    register_block_pattern(
      // The registered name of the pattern
      'tec/two-buttons',
      array(
        // The pattern name (required)
        'title'       => __( 'Two Buttons', 'textdomain' ),
        // The pattern description (optional)
        'description' => _x( 'Displays two buttons on the same line.', 'Block pattern description', 'textdomain' ),
        // The escaped pattern code (required)
        'content'     => "<!-- wp:group -->\n<div class=\"wp-block-group\"><div class=\"wp-block-group__inner-container\"><!-- wp:columns -->\n<div class=\"wp-block-columns\"><!-- wp:column -->\n<div class=\"wp-block-column\"><!-- wp:buttons -->\n<div class=\"wp-block-buttons\"><!-- wp:button -->\n<div class=\"wp-block-button\"><a class=\"wp-block-button__link\">Button</a></div>\n<!-- /wp:button --></div>\n<!-- /wp:buttons --></div>\n<!-- /wp:column -->\n\n<!-- wp:column -->\n<div class=\"wp-block-column\"><!-- wp:buttons -->\n<div class=\"wp-block-buttons\"><!-- wp:button -->\n<div class=\"wp-block-button\"><a class=\"wp-block-button__link\">Button</a></div>\n<!-- /wp:button --></div>\n<!-- /wp:buttons --></div>\n<!-- /wp:column --></div>\n<!-- /wp:columns --></div></div>\n<!-- /wp:group -->",
        // Pattern categories (optional)
        'categories'  => array( 'events' ),
      )
    );
  }
}

// Register the pattern on init
add_action( 'init', 'tec_register_block_patterns' );
Start using the pattern!
Now we can head back to the editor. Open up the block inserter, search for the pattern, and select it from the results.
Start using block patterns with The Events Calendar.
This post isn’t complete if we didn’t have a few patterns to take with you. So, we created a little extension you can install to add some patterns to use with The Events Calendar.

Jaime
View author page