You can access the settings for The Events Calendar and Events Calendar Pro from the WordPress Admin by following Events → Settings from your WordPress admin bar or sidebar. The settings offer a lot of cool options to get your calendar looking just the way you want it.
Let’s review what each of the options entails. Note that some of the settings below are specific to Events Calendar Pro and are marked as such.
Note: As of The Events Calendar 6.2.0, you can now attach multiple venues to an event.
Creating a new event
This is actually really easy. Let’s start in the WordPress dashboard — you should be able to find a menu entry called Events and, if you click on it, you should see the Add New link.
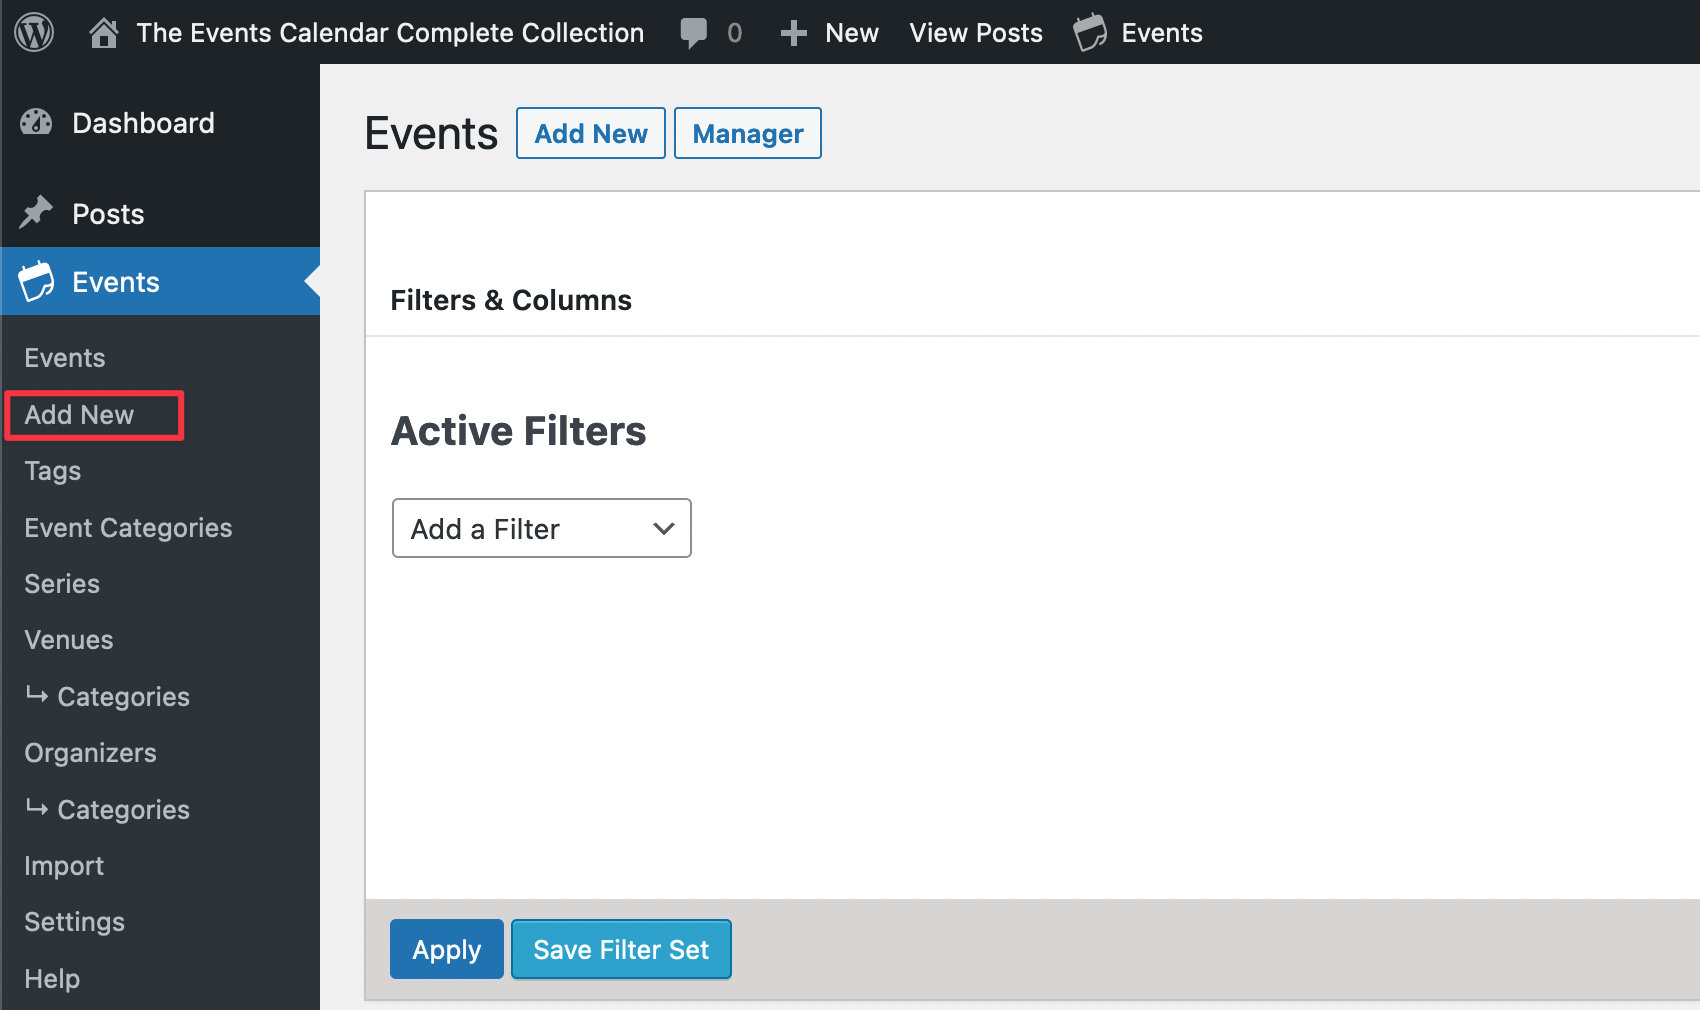
Once you’ve found it, go ahead and click on it! This should bring you to the event editor.
The event editor hopefully won’t contain too many surprises: it is intentionally almost identical — at least on first glance — to the regular page and post editor used by WordPress itself.
So, if you’re familiar with WordPress, you should feel right at home. Here is how to create an event in the classic editor:
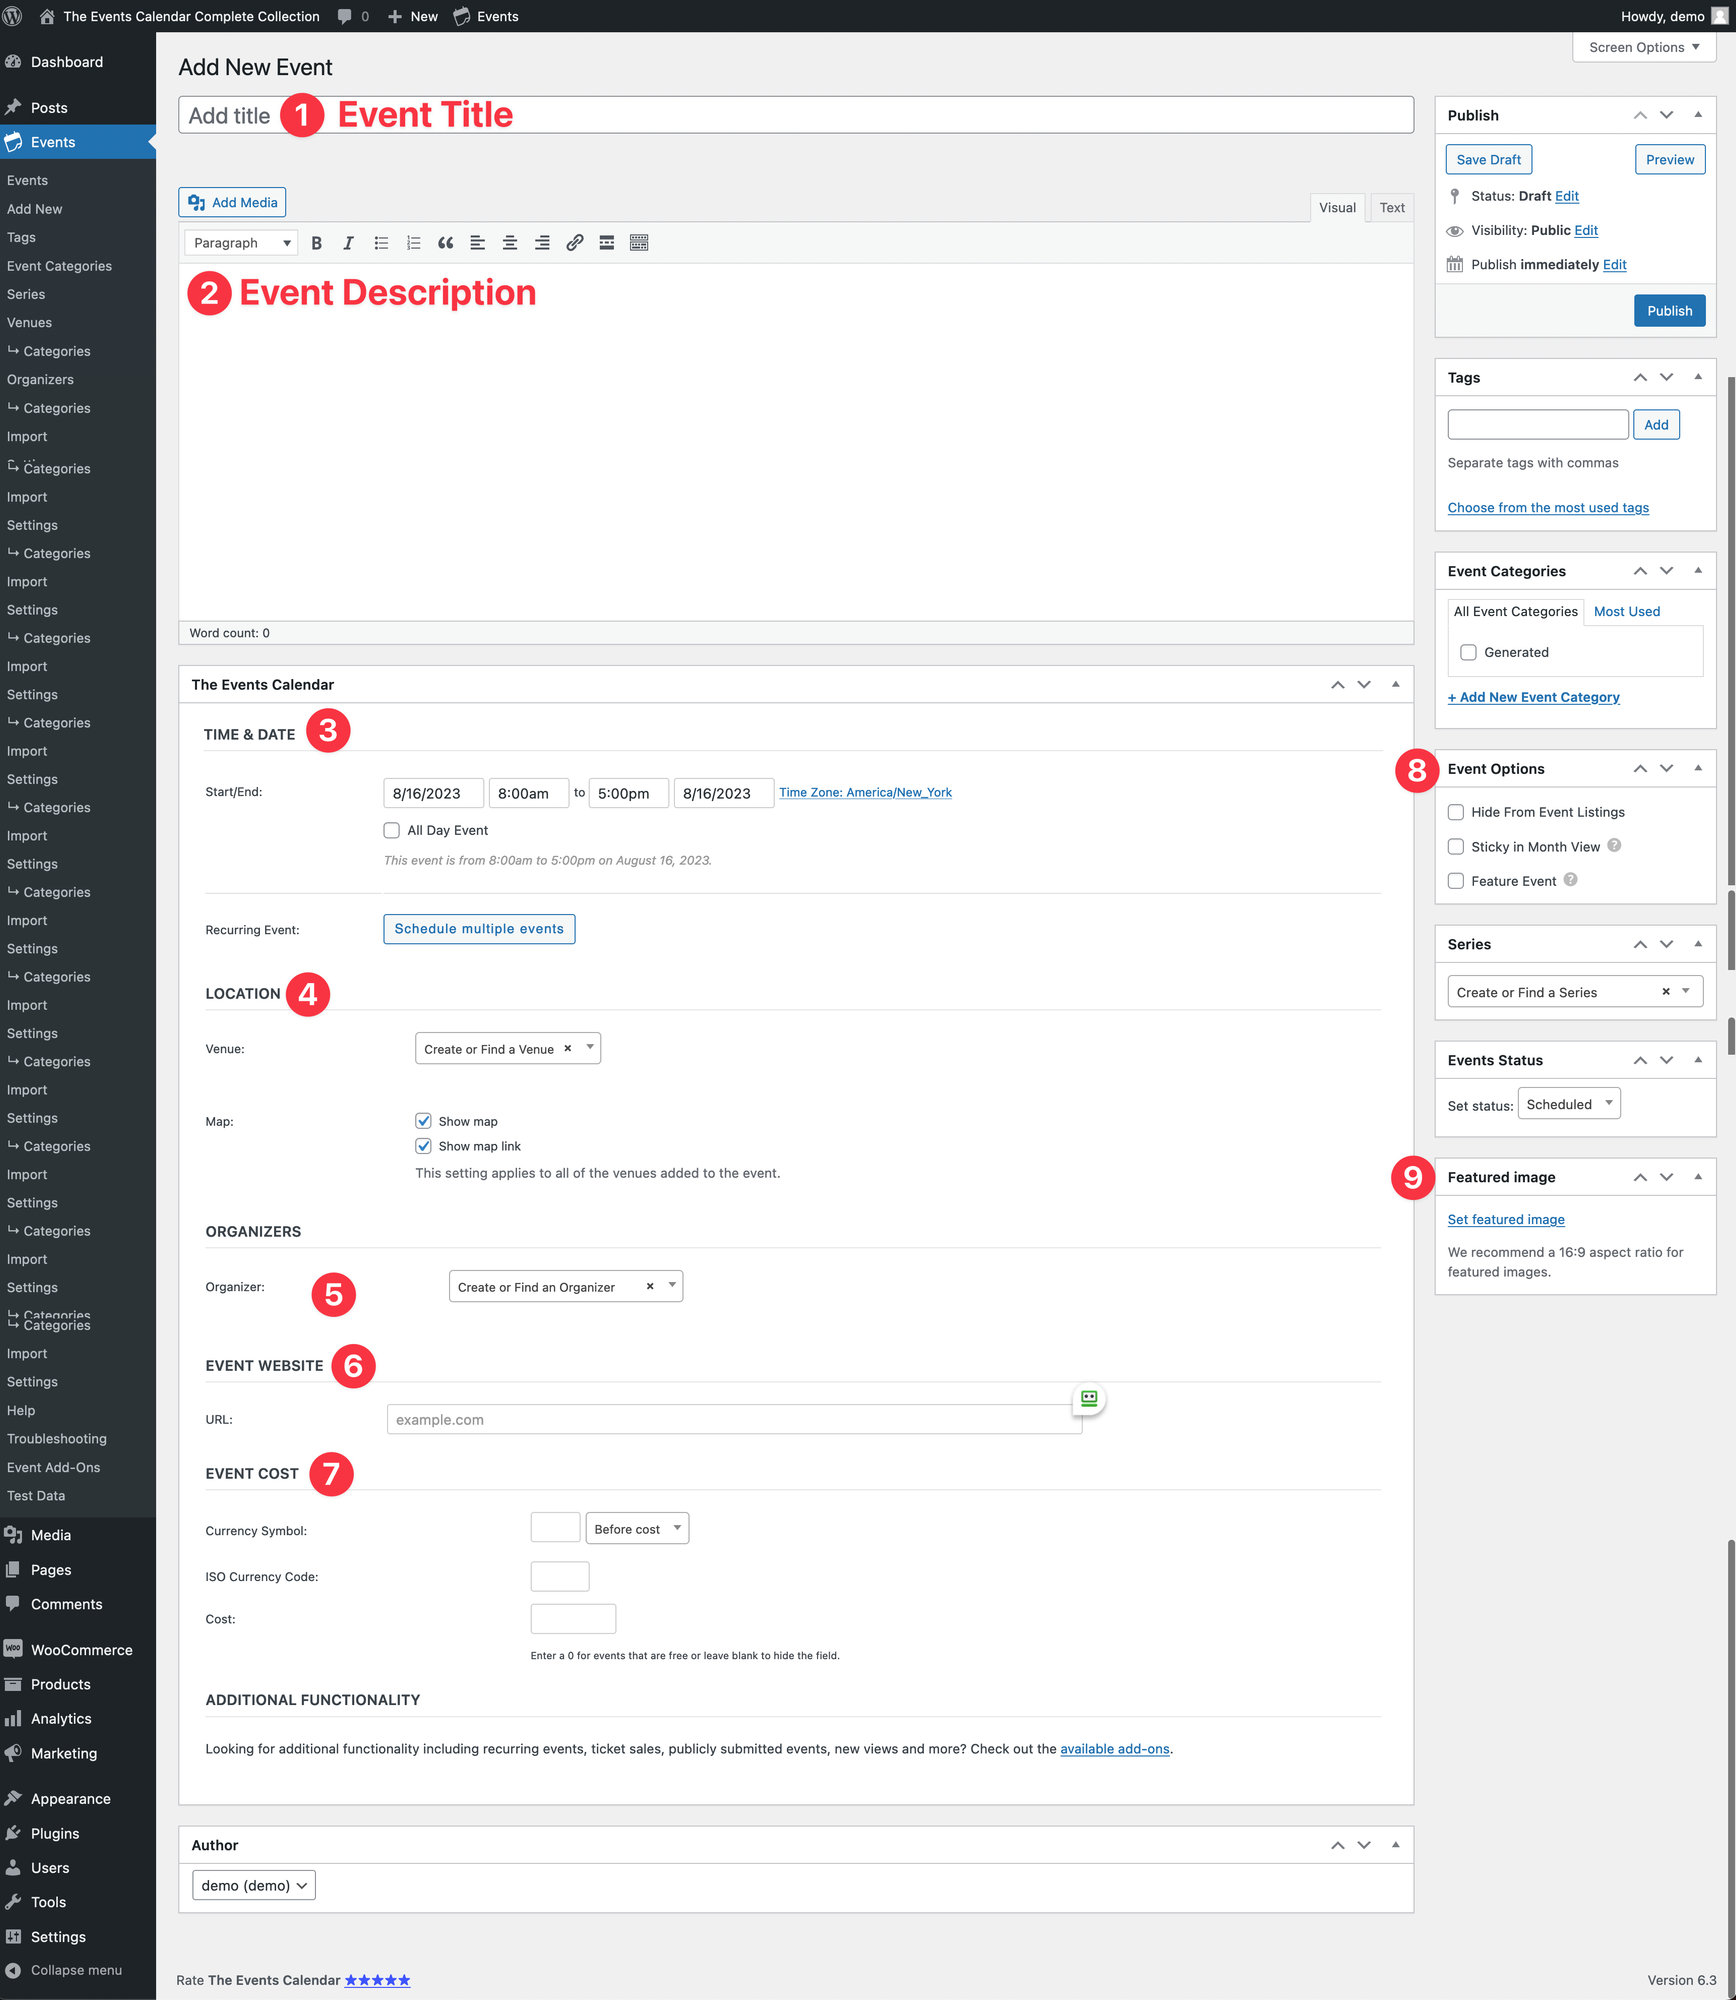
- Add a title to your event
- Describe your event
- Select the date and time for your initial event (required), as well as any desired recurrences (optional)
- Select an existing venue or create your own (optional). If using Events Calendar Pro, you can attach more than one venue to an event.
- Specify the event organizer (optional)
- Link to an external website about the event (optional)
- Determine the cost of the event
- Determine if the event should be featured (optional)
- Upload a featured image to display in event listings (optional)
If you are using Block Editor, the default layout will look slightly different:
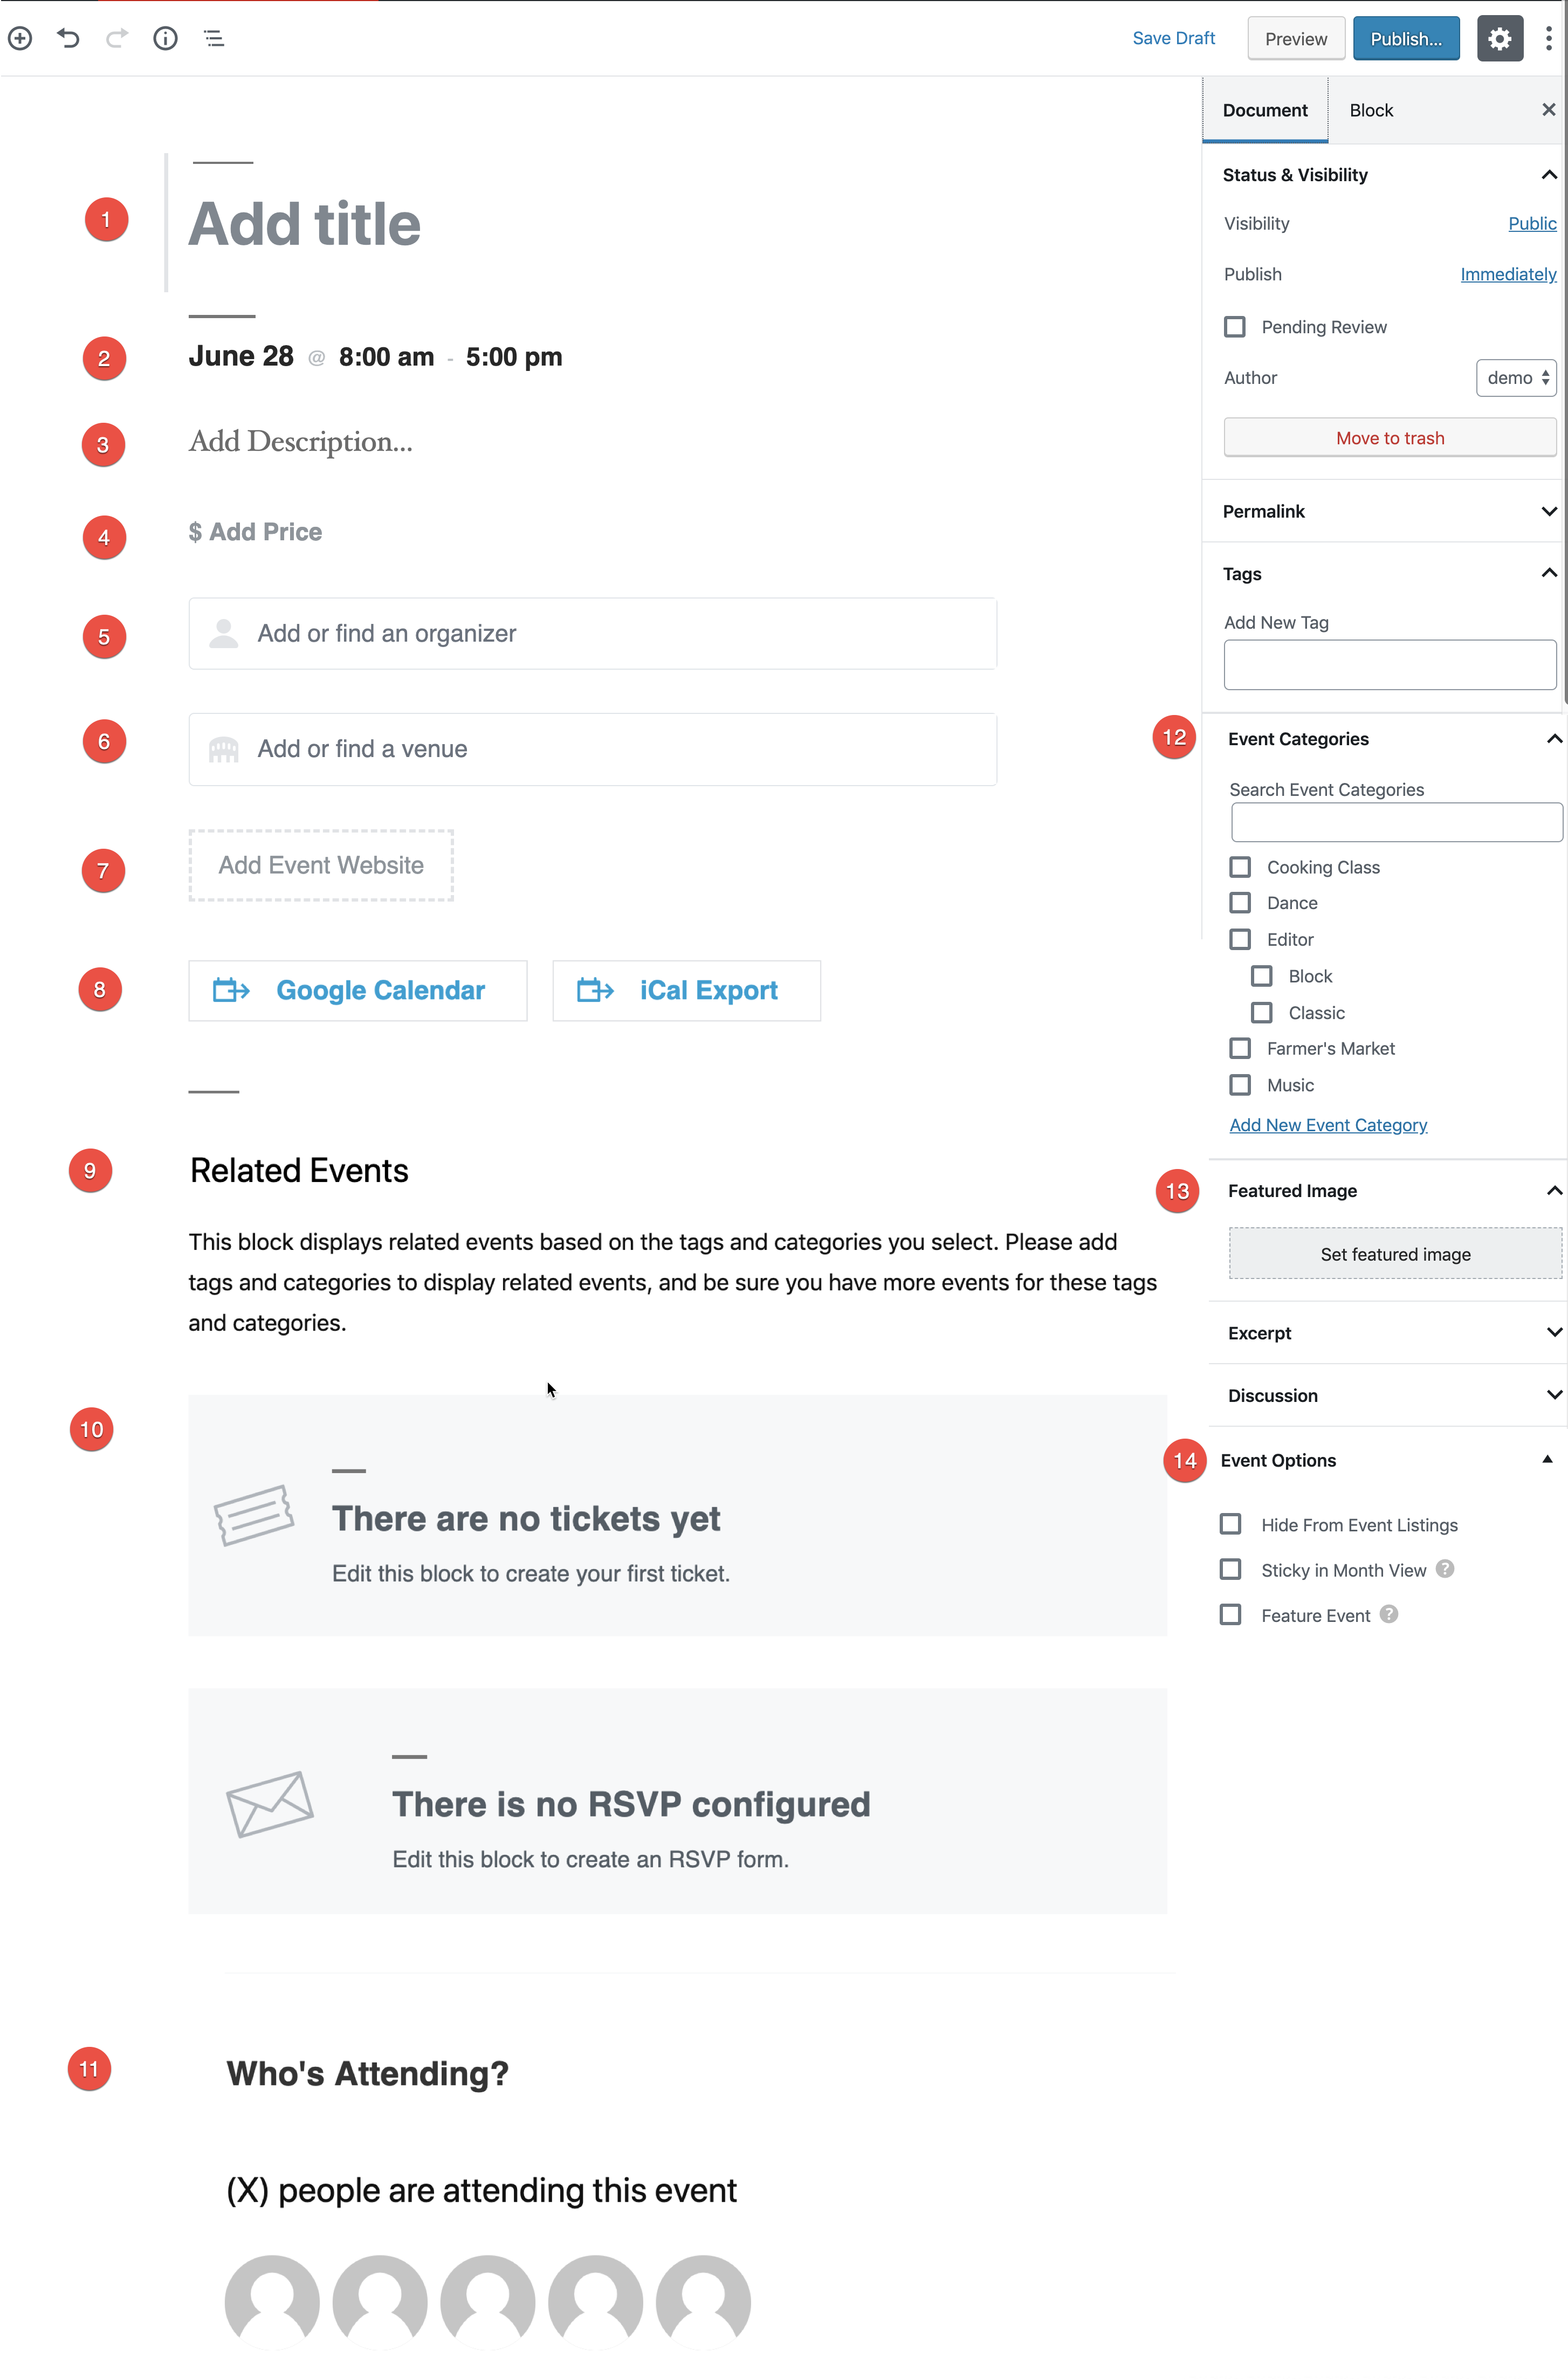
- Add a title to your event
- Select the date and time for your initial event (required), as well as any desired recurrences (optional)
- Describe your event
- Add a price for your event (optional)
- Specify the event organizer (optional)
- Select an existing venue or create your own (optional). If using Events Calendar Pro, you can attach more than one venue to an event. To add another venue, click on the three vertical dots and select Add Before or Add After. Type /venue and select the Event Venue block.
- Link to an external website about the event (optional)
- Provide visitors with a way to add this event to their own calendar software (optional)
- Show related events (optional)
- Display tickets/RSVPs if using Event Tickets and Event Tickets Plus (optional)
- Show who is attending the event if using Event Tickets Plus (optional)
- Select an Event Category (optional)
- Upload a featured image to display in event listings (optional)
- Determine if the event should be featured (optional)
For more help creating events, please see Creating an Event.
Creating a recurring event
💡 Note: This is a feature limited to Events Calendar Pro
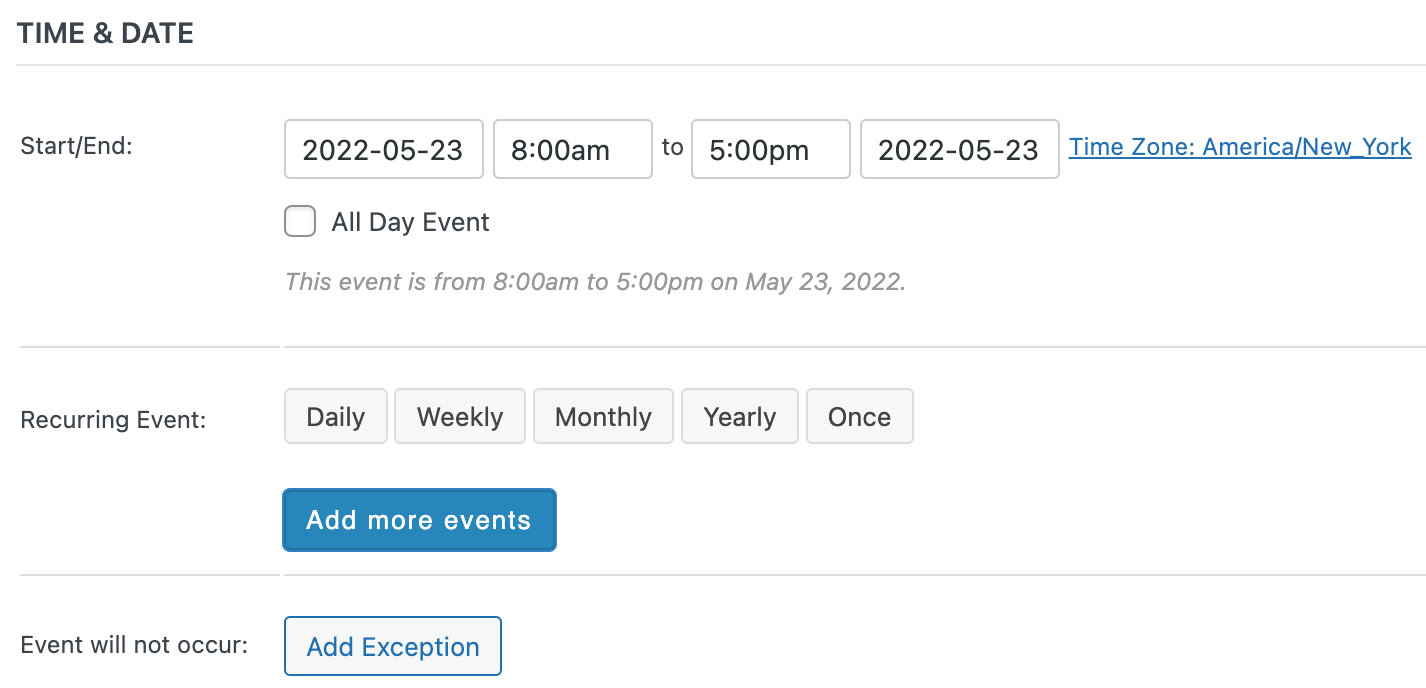
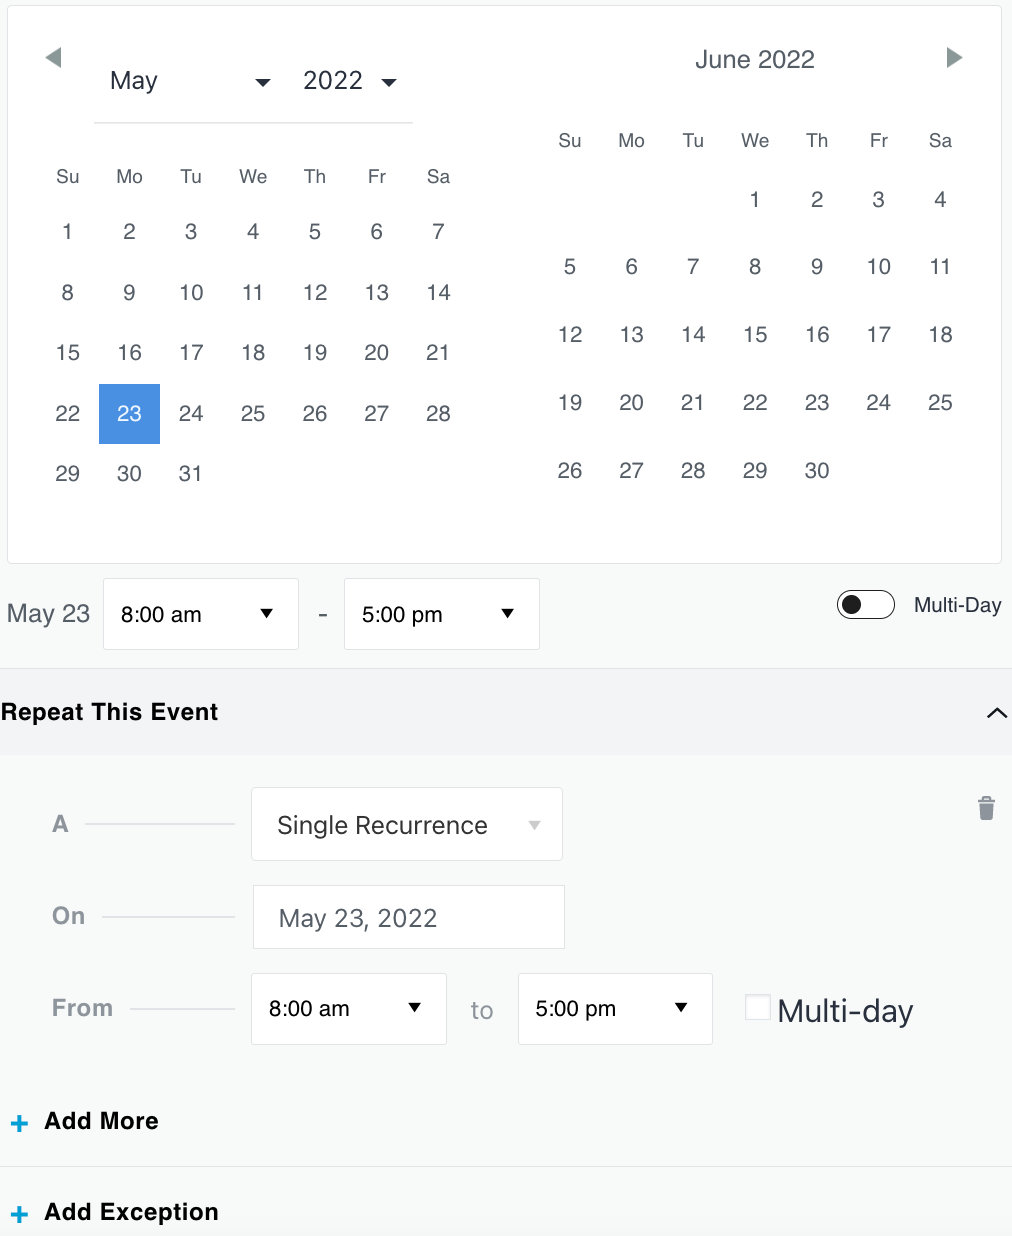
In the Time & Date settings of your event, you will find the Event Series settings, which are used to turn one event into a recurring event.
