When purchasing a subscription for one or more of our plugins, your license should be included with your plugin downloads and activated automatically upon installation. However, there may be times when you need to input or update a license key on your site: for instance, if you’ve recently purchased a subscription for Event Aggregator, or if you’ve recently acquired your own license separate from a website developer. This tutorial will show you how to input your own license key.
👋 If you have more than one of our plugins, please note that you have a license key for each one and will need to complete this step for each plugin.
If you have purchased a multi-site license, check out this tutorial for further instructions.
Logging into your account
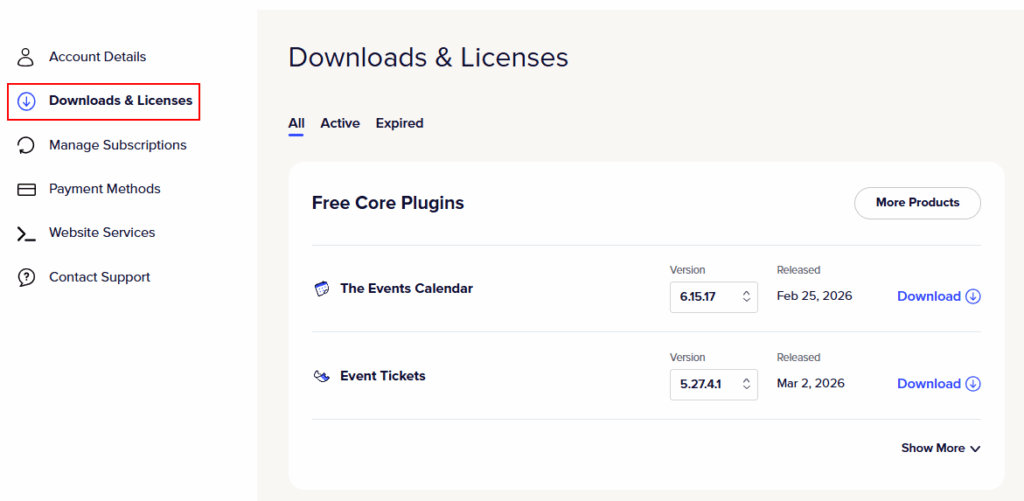
If you’re reading this article, you’re already on our website — so all you’ve got to do is go to the top of the article and click on the My Account tab. Once you are on your account page, please take a look at the menu on the left side and choose the Downloads & Licenses tab. On this page you’ll find an overview of all the licenses associated with your account.
👋 Note: If not logged-in you will be prompted to log in with the credentials you created when you made the purchase.
Your license key is also included in the email you received after purchasing your subscription. If you have that handy, you can also grab it there.
Finding the license key
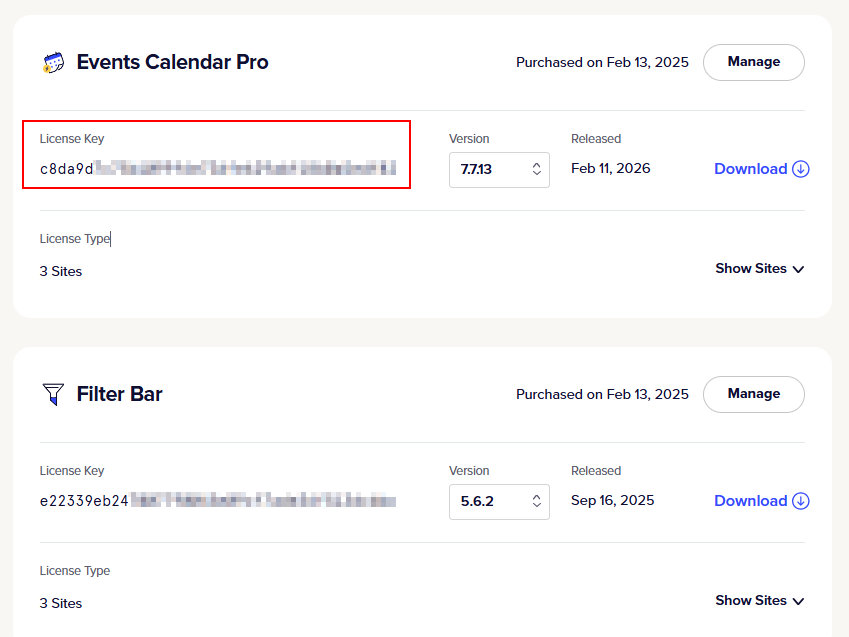
If you only have one license key, then finding the right key to use will be pretty simple — it will be the only one on the page. Highlight and copy that key.
If you have more than one license key, the licenses will be nicely separated by plugin with a breakdown that displays the license key number and the URLs with which they are associated. Highlight and copy the license key of the plugin in question.
Inputting your license key
Now that you’ve found and copied your license key, the next step is to input it on your site. This ensures the plugin is properly registered to your site and that you will get updates.
From your WordPress dashboard, head over to Events → Settings or Tickets -> Settings, and select the Licenses tab at the top of the screen.
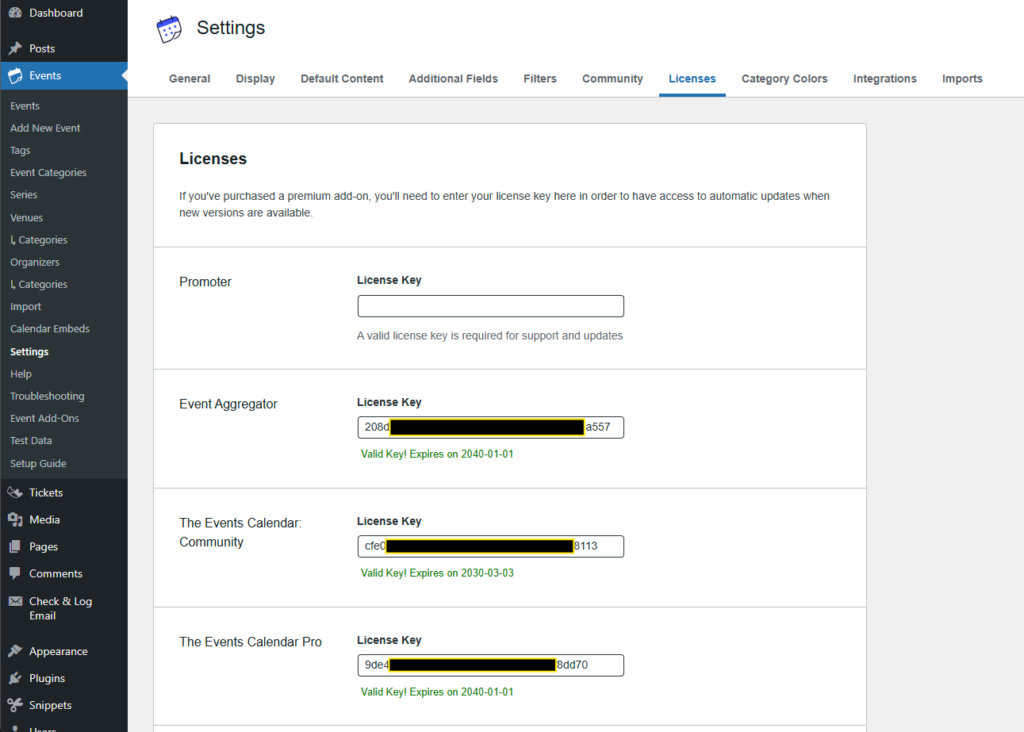
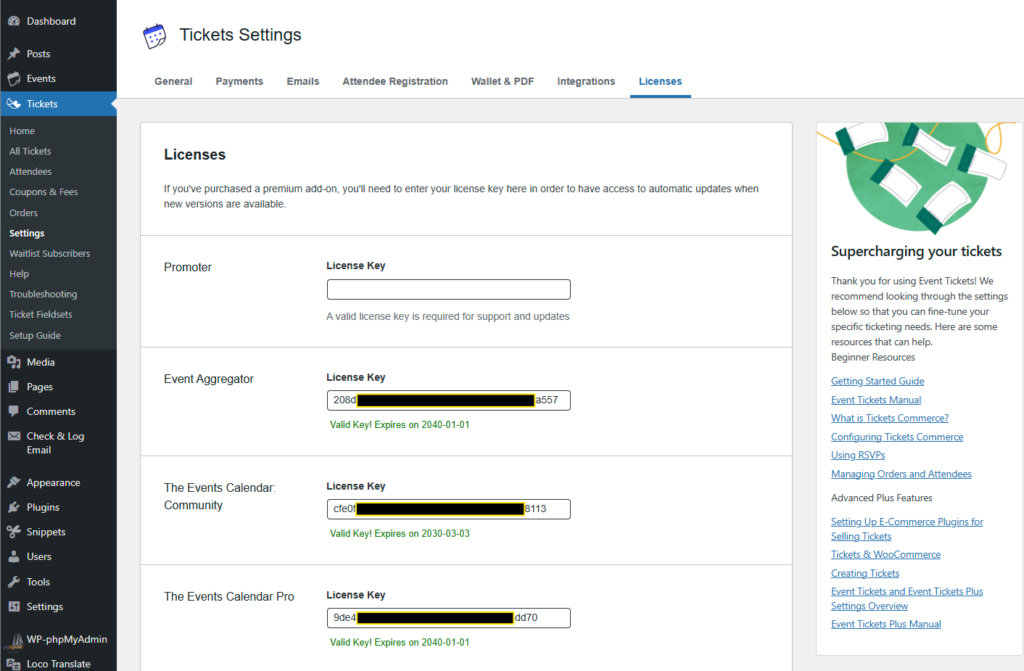
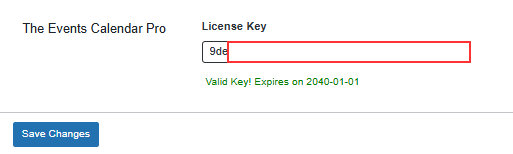
You will see a License Key field for each activated plugin that requires a license key. Paste the license key you copied from the previous step. It should show a green “Valid Key!” message underneath. Once you see this message, click the Save Changes button to register your license.
And you’re all set!
What if I’m not seeing the “Licenses” tab?
This is probably the result of using different plugin versions. For example, if you are running version 4.8 of The Events Calendar, then you should also be running 4.8 of Events Calendar Pro. Otherwise, the Licenses tab may not work correctly. You may need to manually update your plugins until their version numbers are compatible with each other — learn more about manually updating plugins. Once the version numbers are made compatible, the Licenses tab should show up for you.