Managing updates safely is a critical part of maintaining a stable events environment. This guide covers change management best practices, safe update workflows, and rollback procedures for The Events Calendar and its add-ons.
Why Change Management Matters
Regular updates keep your site secure and compatible with the latest WordPress ecosystem. However, unplanned updates or plugin conflicts can lead to:
- Missing events or broken layouts
- Ticketing or checkout failures
- Shortcode or block incompatibilities
- API disconnects (Promoter, Event Aggregator, etc.)
A structured change management process helps you plan, test, and recover from updates safely.
Change Management Workflow
Follow this recommended workflow when updating TEC or related plugins:
1. Backup Everything
Before any change:
- Use a reliable backup tool.
- Include your database, uploads, and plugin files
- Save a snapshot locally or in cloud storage (Google Drive, Dropbox, etc.)
💡 Tip: If your hosting provider supports one-click restore points, create one before proceeding.
2. Test Updates in a Staging Environment
A staging site lets you apply updates without affecting your live events.
Check:
- Event pages display correctly.
- Ticket purchasing and email notifications work.
- Integrations remain connected.
- Theme or custom code changes (template overrides, CSS) are still compatible.
If you use version control (Git), commit changes to a staging branch before merging to production.
3. Apply Updates Gradually
When rolling out updates:
- Update The Events Calendar and Event Tickets plugins first.
- Then update their add-ons.
- Finally, update extensions and custom integrations
After each step, perform basic functional checks (e.g., create a new event, test ticket checkout).
Version Rollback Options
If a recent update causes issues, you can roll back quickly using one of these methods:
Option 1: Use WP Rollback Plugin
- Install and activate the WP Rollback plugin.
- Go to Plugins > Installed Plugins.
- Click Rollback next to The Events Calendar.
- Choose a previous version and confirm.
- Test functionality again after rollback.
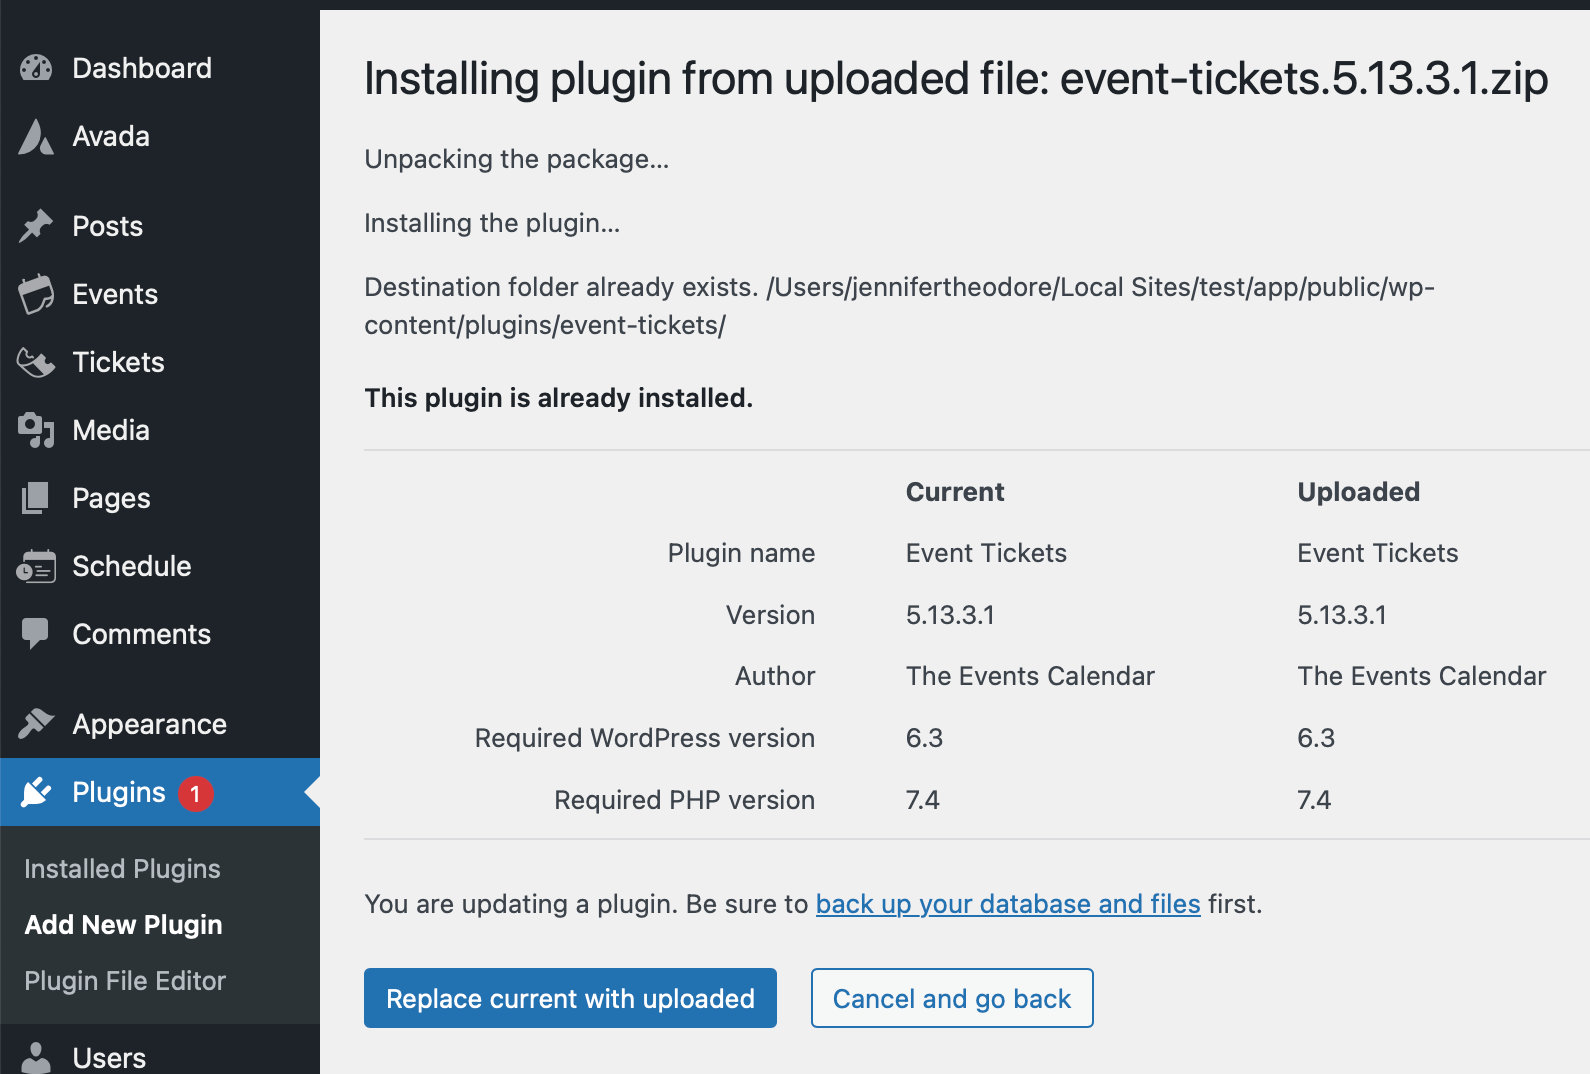
Option 2: Manual Rollback via WP Dashboard
- Download the older version of The Events Calendar or its add-ons from your account. Free plugins can be downloaded from WordPress.org (under “Advanced View”).
- Once you’ve downloaded the old version of the plugin, you’re ready to replace the it with the current version.
- Now login to your WP dashboard.
- Navigate to Plugins > Add New Plugin.
- Click Upload Plugin.
- Click Choose File and select the zip file that you just downloaded and click Install Now.
- You will see a notice asking if you would like to replace the existing version with the new one. Click Replace current with uploaded to proceed with the update.
Option 3: Manual Rollback via FTP
For advanced users:
- Download the older version of The Events Calendar or its add-ons from your account. Free plugins can be downloaded from WordPress.org (under “Advanced View”)
- Deactivate and delete the current plugin via FTP or File Manager.
- Upload the older ZIP file and reactivate it.
- Clear caches and test the site.
⚠️ Avoid deleting the plugin if you don’t have a full backup.
Option 4: Restore From Backup
If your site used a backup or staging workflow:
- Restore from the latest stable snapshot.
- Sync new event data (if any) created after the backup, using CSV export/import or database merge tools.
Keep in mind that free plugins and premium ones need to be at their matching versions. In order to prevent breaking, disable Events Calendar Pro before downgrading The Events Calendar. If you’re downgrading both, do the same thing: first The Events Calendar, then Events Calendar Pro
Final Tips
- Never update directly on production.
- Monitor the TEC release notes before upgrading.
- Always test your site after updates.