Google requires the use of an API key to use Google Maps features. The Events Calendar comes with a Google Maps API key built into it, but we strongly recommend adding your own API key, especially if you use Event Calendar Pro.
Adding Your Own API key
- Head to Google’s API Key documentation and click the “Get Started” button underneath the “Get an API key” header.
- Prompts will guide you through the creation of a “project” within Google—complete this process until you end up with a Google Maps API key. Make sure that Geocoding API, Maps JavaScript API, and Maps Embed API are enabled. Go to the APIs and Services section, choose “Enable APIs and Services” at the top, and you should be able to enable these services on the following page.
- Head to Events → Settings → Integrations in the WordPress admin. Copy the API key created in the previous step and paste it into the Google Maps API Key field.
- Click “Save Changes.”
But what are all those APIs for?
The Geocoding API fetches the coordinates for the venue locations automatically.
With the help of Maps Javascript API the map will show up on the Map view and the Single event page.
The Maps Embed API is needed for the map to show up on the Venue page.
(Note: the Map view and the Venue page are features of Events Calendar Pro.)
Custom API Keys
In most cases, the default Google API key will work just fine. But if you’re using Events Calendar Pro, using a custom API key has the advantage of enabling location search in the calendar’s search bar.
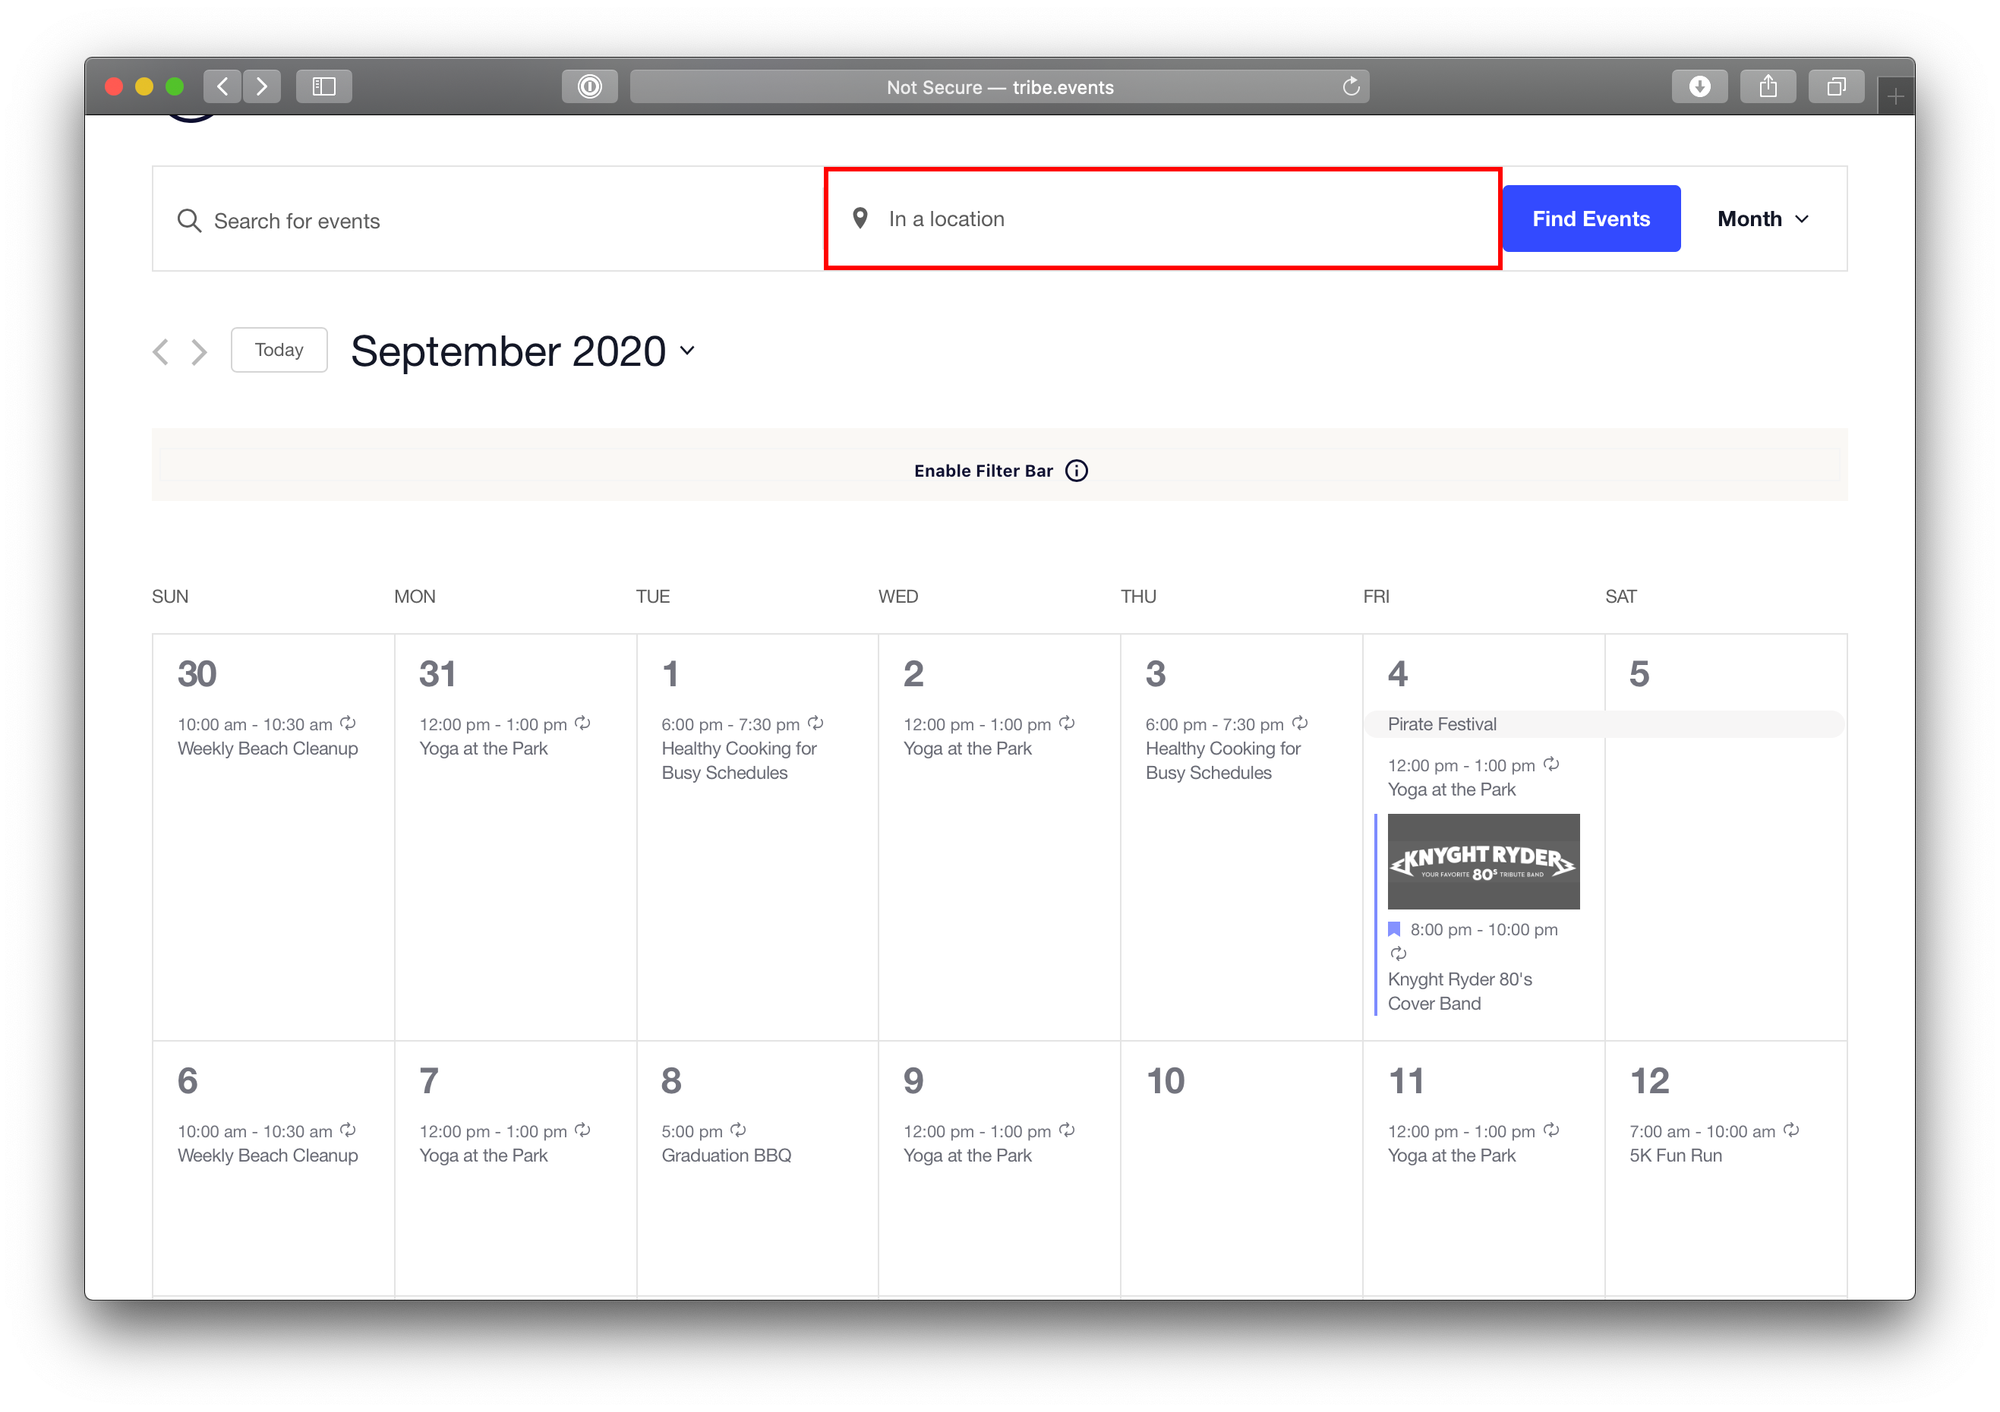
Here’s a breakdown of the differences in functionality and appearance of maps-related features based on what kind of API key you’re using:
| Feature | Default API Key | Custom API Key (Recommended) |
|---|---|---|
| Single event | ✅ Fully functional Screenshot | ✅ Fully functional Screenshot |
Venue page  | ✅ Fully functional Screenshot | ✅ Fully functional Screenshot |
| Map view | ⚠️ Limited functionality Only one venue displays on the map Screenshot | ✅ Fully functional Multiple venues are displayed Screenshot |
| Location search | ⛔️ Not functional Search by location will be disabled Screenshot | ✅ Fully functional Search by location is enabled Screenshot |
| Custom Map Pin | ⛔️ Not functional This option will not appear in the WordPress Customizer Screenshot | ✅ Fully functional Enabled under WordPress Customizer > The Events Calendar > General Screenshot |
Events Calendar Pro feature
⚠️ Note: You need to have the map view enabled to see the setting to add a custom map pin.
Restricting Access to Your API Key
There’s often a limit on the number of API requests your API key is authorized to make per day. If you have a particularly high-traffic site, it’s recommended that you take some steps to restrict your API keys’ functionality a bit and limit their use to only specifically white-listed domain names.
Google provides a number of options to help secure your API key and prevent unauthorized usage, which we highly recommend if you think restricting your API key is a necessary step.
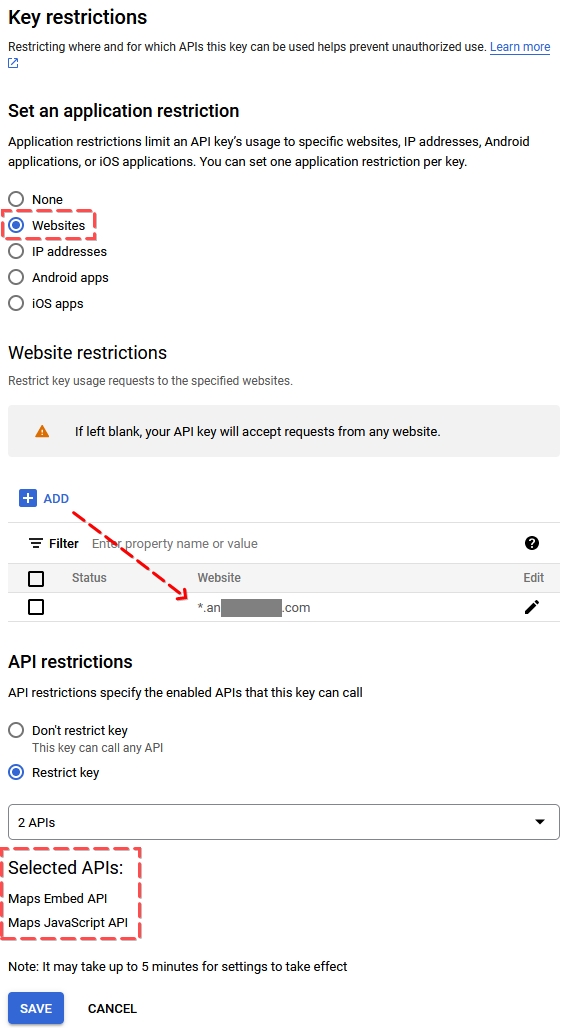
Set up one Google Maps API Key for JavaScript map displays.
For this key should select “Websites” as the restriction. The value should be your domain name, for example https://example.com.
In the API restrictions section select:
- Maps JavaScript API
- Maps Embed API
See the screenshot on the right for reference.
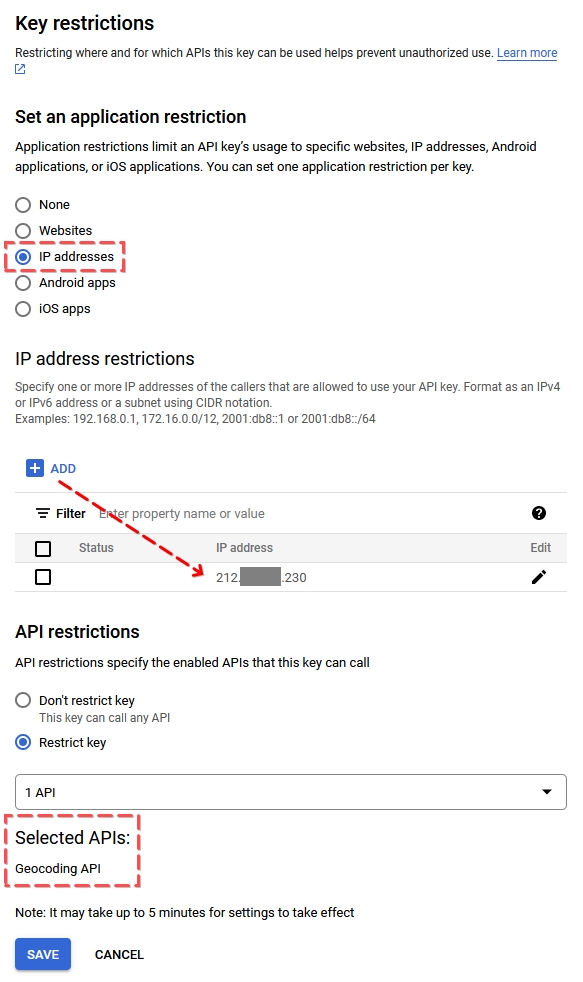
Create a second API Key for venue geolocation lookups (Events Calendar Pro) with Geocoding API.
This key should select “IP addresses” as the restriction. The value should be the IP address of your website.
Under the API restrictions select:
- Geocoding API
Again, check out the screenshot on the right for reference.
Since there is only one field for the API key in the settings panel (under Events > Settings > Integrations) you will need some code as well. Paste the following into your child theme’s functions.php file, use the Code Snippets plugin to add custom code to your site, or create a separate plugin from it.
The first API key that you use for Maps JavaScript API (and Maps Embed API), enter under Events → Settings → Integrations tab → Google Maps API key.
The second API key that you use for Geocoding API put in the appropriate place in the code, where it says IP_ADDRESS_PROTECTED_API_KEY.
<?php
/**
 * Facilitates dictating a separate (IP-address protected) Google Maps
 * API key for server-side geocoding requests.
 */
class Server_Side_Google_Maps_Key {
	/**
	 * @var string
	 */
	private $key = '';

	/**
	 * Sets up a Google Maps API key to be used for server-side initiated
	 * geocoding requests.
	 *
	 * @param string $key
	 */
	public function __construct( string $key ) {
		$this->key = $key;
		add_filter( 'pre_http_request', [ $this, 'pre_http_request' ], 10, 3 );
	}

	/**
	 * @param mixed  $response
	 * @param array  $args
	 * @param string $url
	 *
	 * @return array|WP_Error
	 */
	public function pre_http_request( $response, $args, $url ) {
		// If this is not a Google Maps geocoding request, or if it is but our replacement
		// key is already in place, then we need do nothing more.
		if (
			0 !== strpos( $url, 'https://maps.googleapis.com/maps/api/geocode' )
			|| false !== strpos( $url, $this->key )
		) {
			return $response;
		}

		// Replace the API key.
		$url = add_query_arg( 'key', $this->key, $url );

		// Perform a new request with our alternative API key and return the result.
		return wp_remote_get( $url, $args );
	}
}

// Specify our alternative API key here (to be used for server-side geocoding requests).
new Server_Side_Google_Maps_Key( 'IP_ADDRESS_PROTECTED_API_KEY' );