It’s essential to create custom email marketing campaigns so that you can stay in touch with your event attendees throughout the event process. Sure, you can capture each oemail address manually and create your own email list, but we think there’s a better solution that will save you time and automate the process for you.
With our Promoter service, you can create custom email marketing campaigns that are made specifically for your events with The Events Calendar and your tickets with Event Tickets Plus. Let’s take a look at how to set this up below.
What you need
- The Events Calendar (free)
- Event Tickets (free)
- Promoter (premium subscription)
Installation
The first thing you’ll want to do is ensure that you have both The Events Calendar and Event Tickets installed and activated on your WordPress site. Don’t worry, they’re both free, so you can search for them in the WordPress Dashboard under Plugins > Add New. For more information on installing a WordPress plugin, check out this Knowledgebase article.
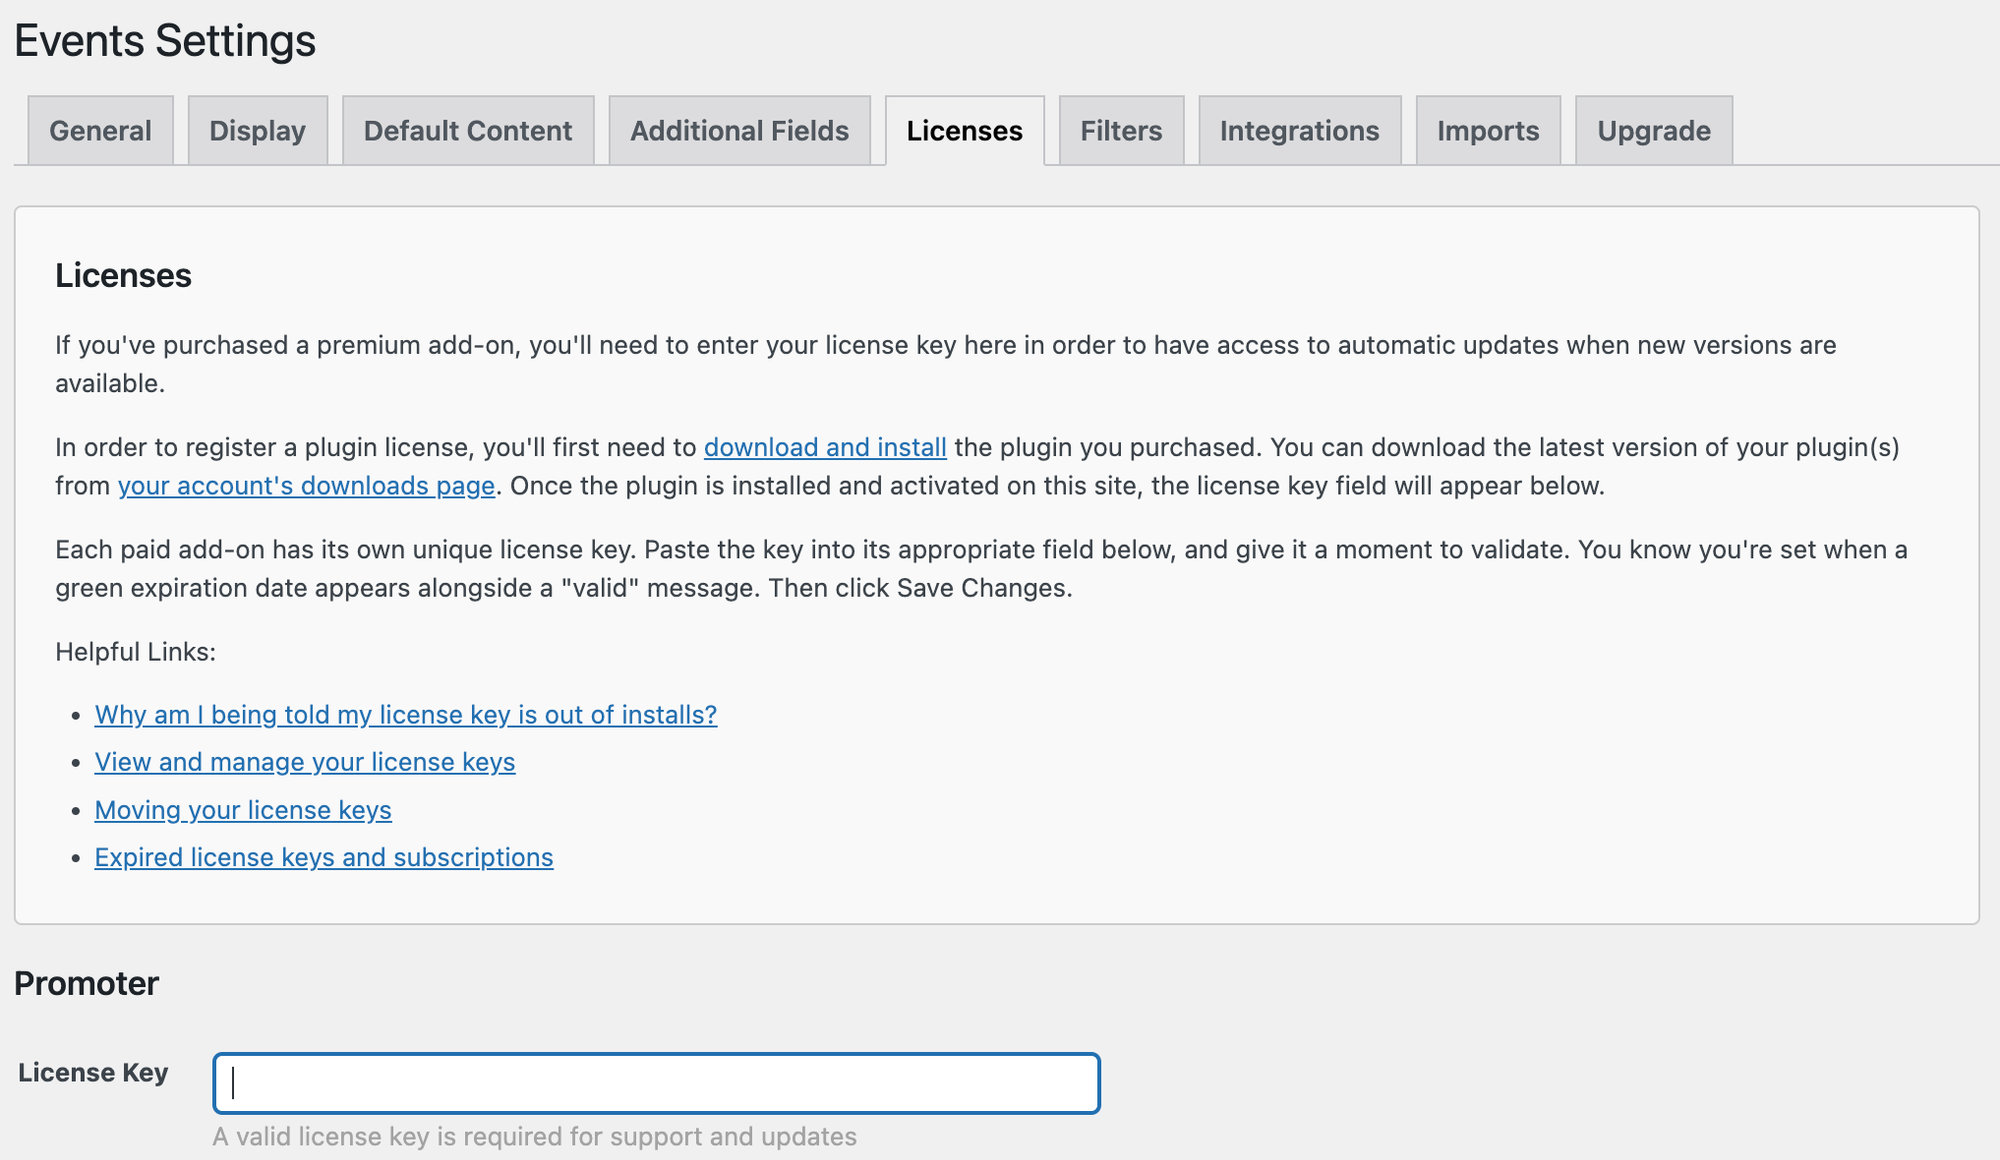
Next, enter your Promoter license key under Events > Settings > Licenses and Save Changes. You can find your license key at https://theeventscalendar.com/license-keys/.
Using the Promoter Quick Start Guide
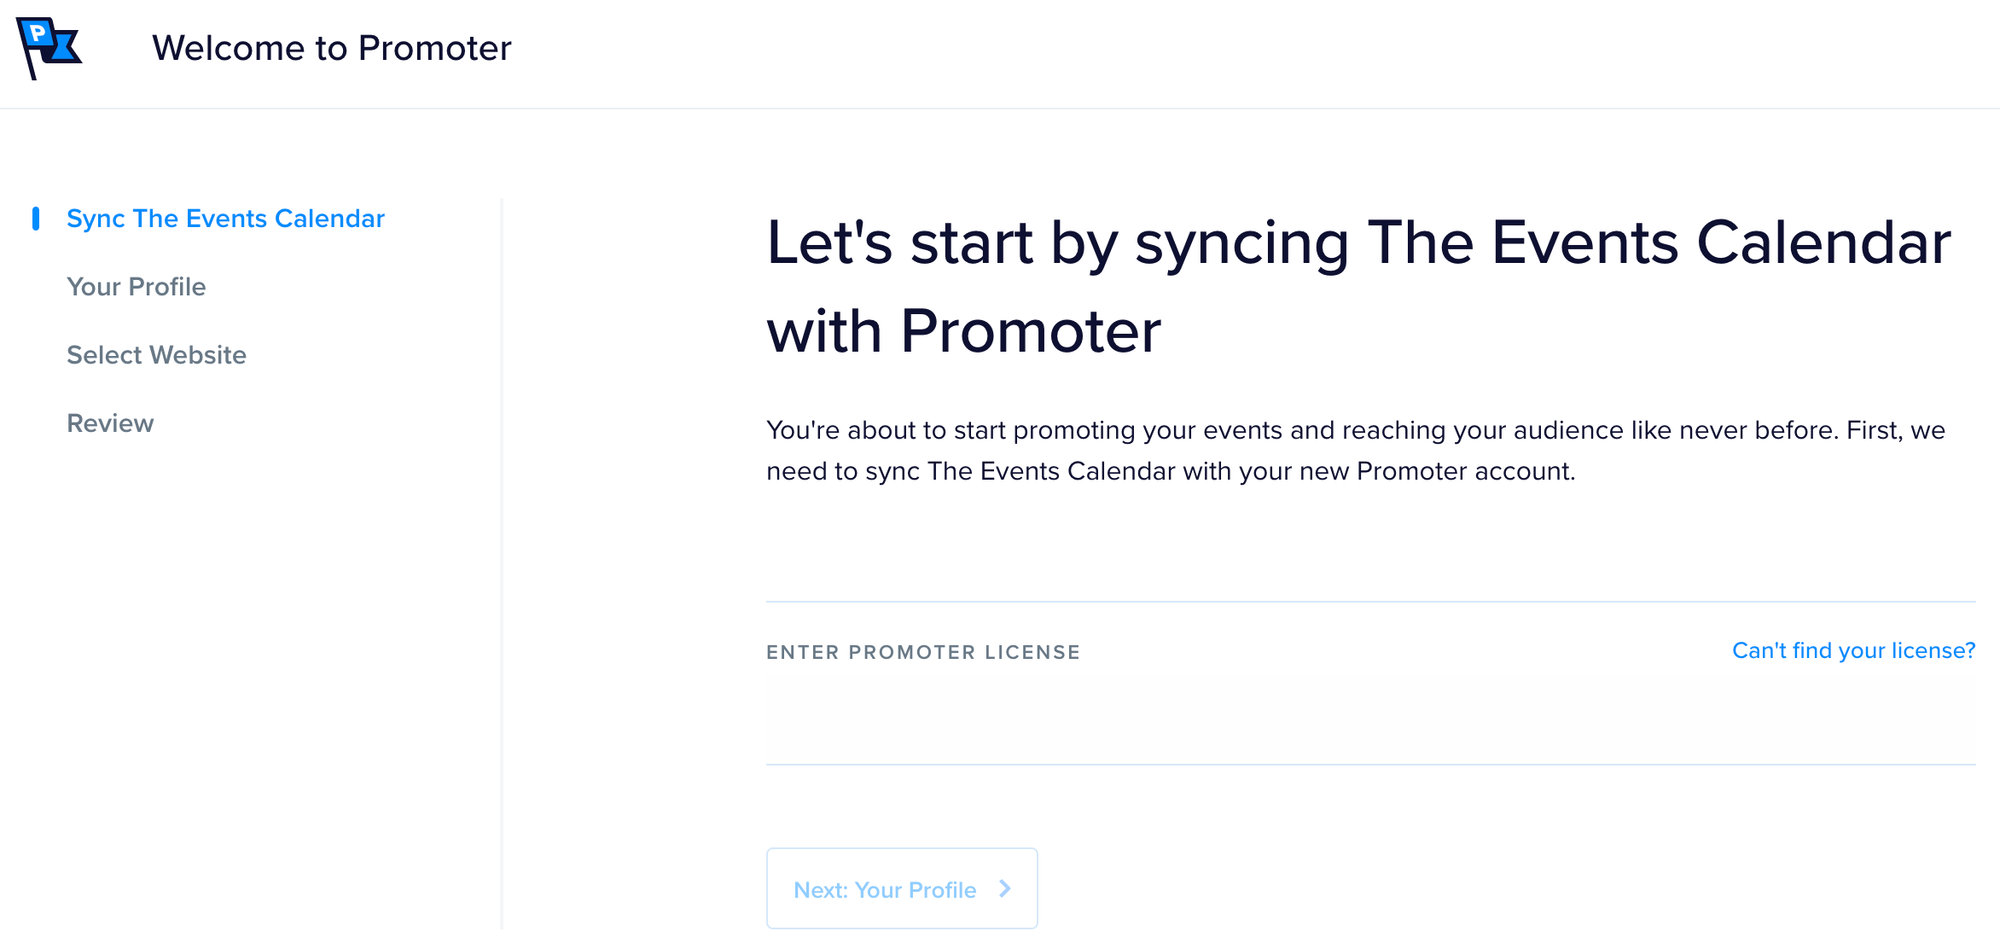
Next, head over to https://promoter.theeventscalendar.com/welcome and follow the prompts on the screen. You’ll be asked to enter your Promoter license key again, so keep that number handy!
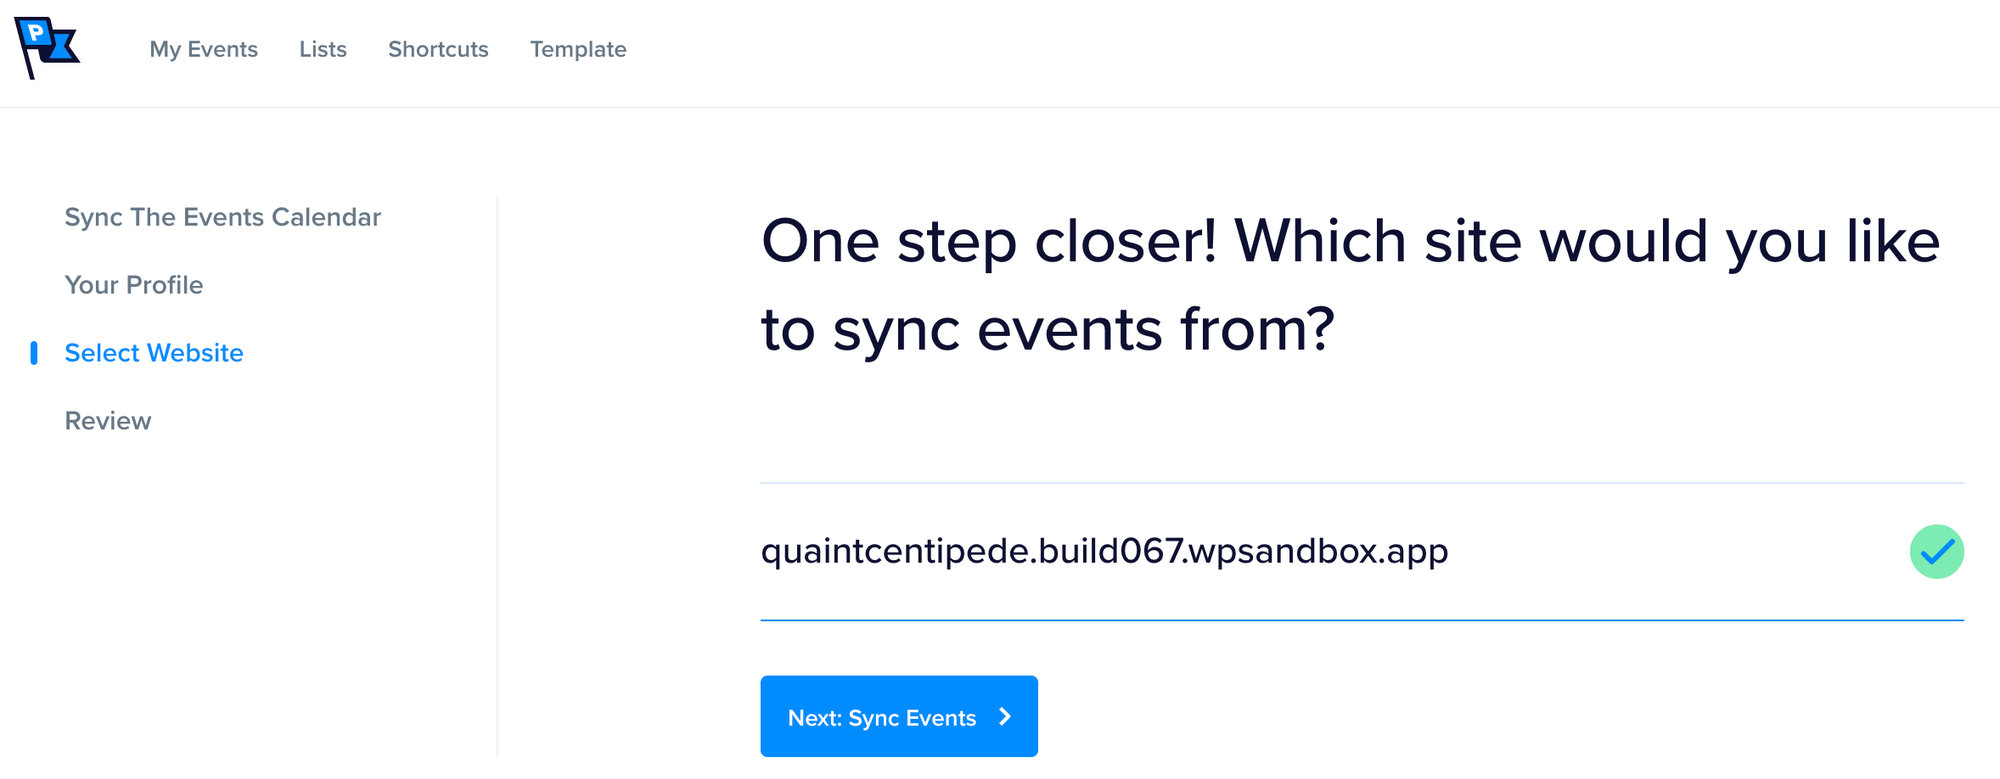
Click on Next: Your Profile to continue to the next step. There, you’ll review your account details and create a password for your Promoter account. Then you can select your website in the following step.
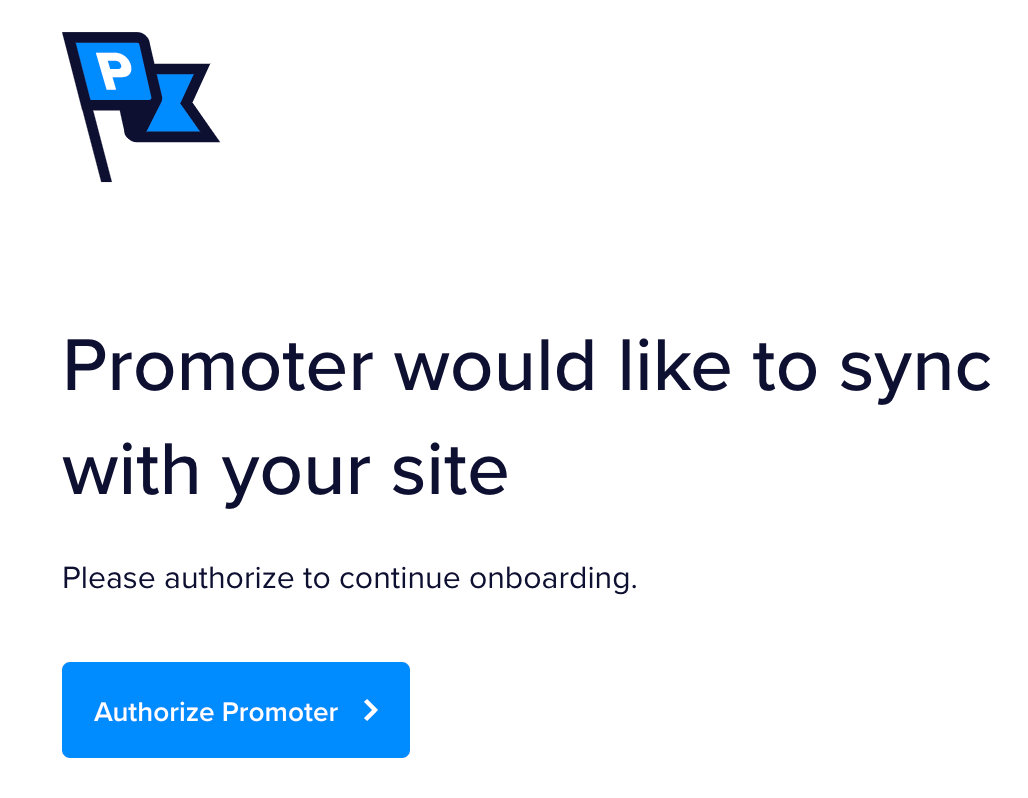
After that step, you’ll need to authorize Promoter to access your events on your website.
Sync your events with Promoter
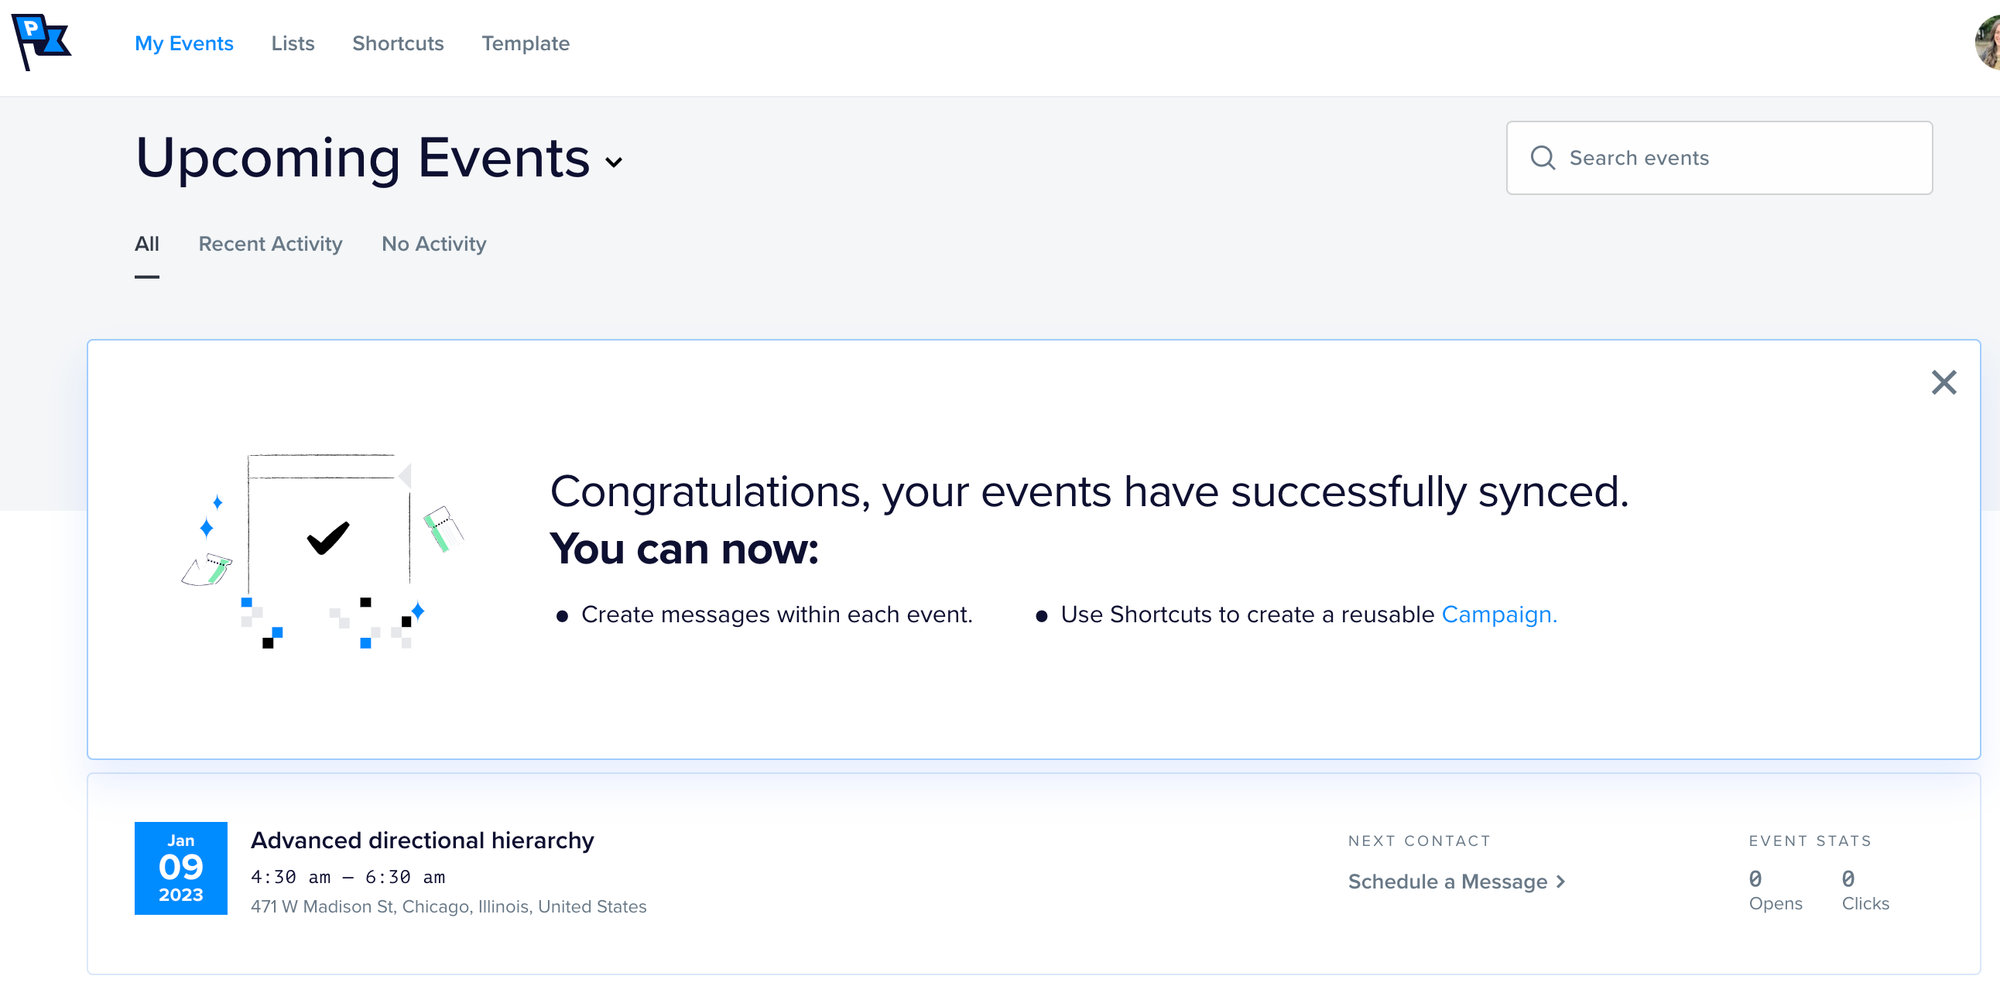
Once you have completed the authorization, you can begin to sync your pre-existing events with The Events Calendar on your WordPress site with Promoter.
Note: Events must include a ticket and have at least one attendee to sync.
Once you sync your events, you’ll be able to see them in Promoter and begin scheduling your custom email marketing campaigns.
Create custom email marketing
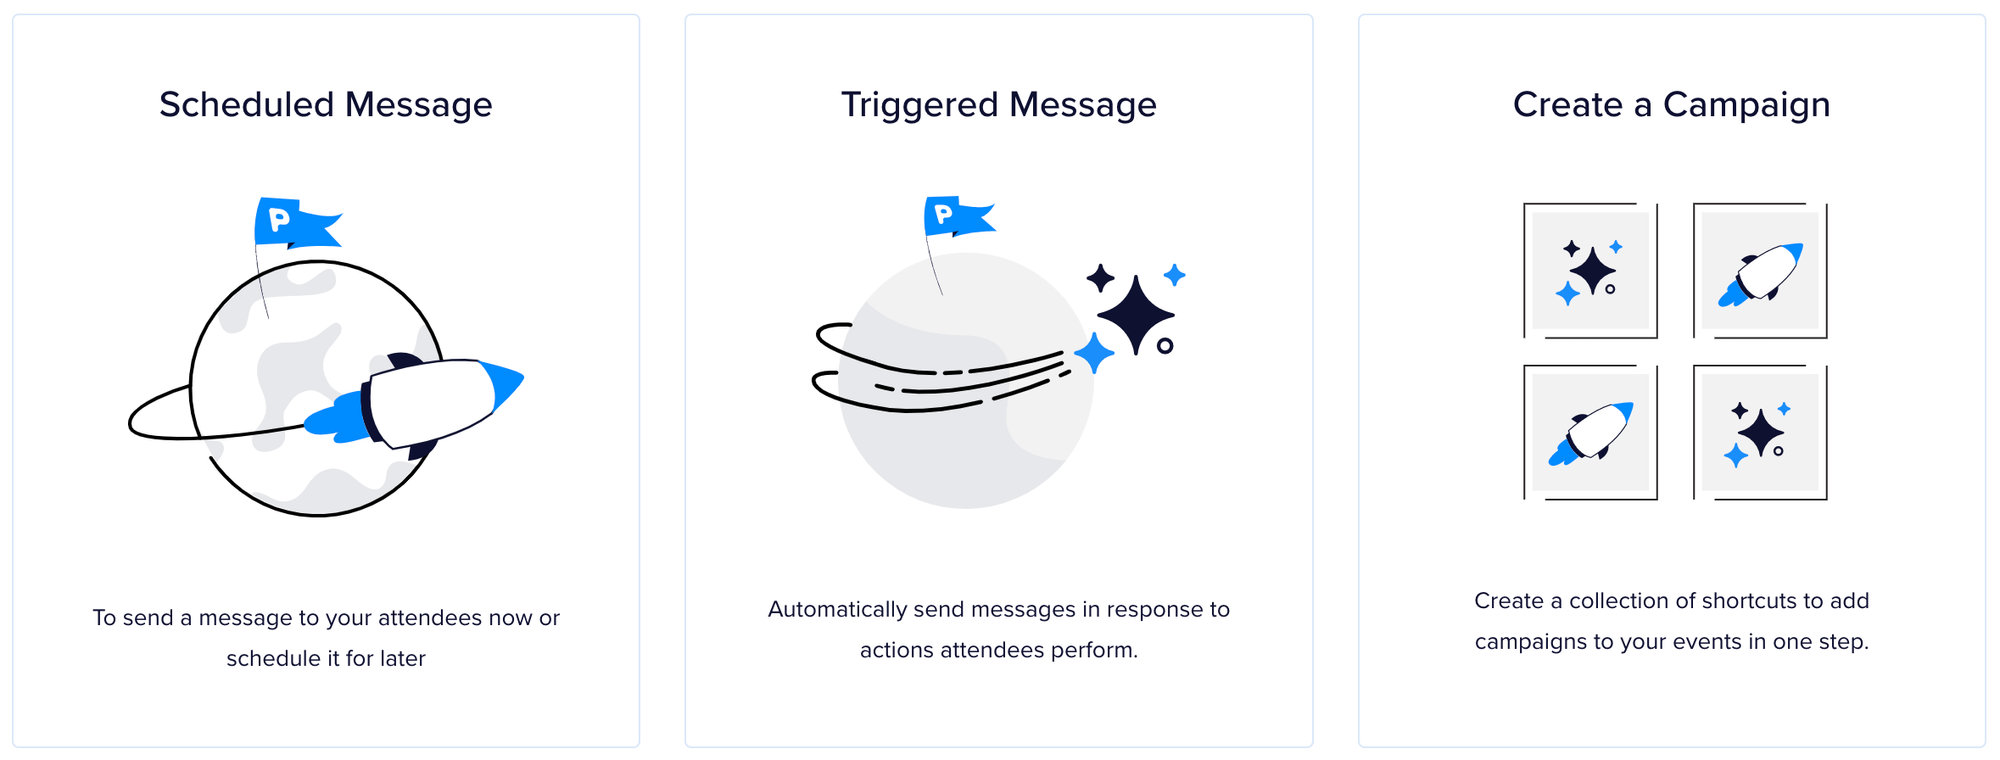
To begin creating your email marketing campaigns, click on the event you’d like to start with. There, you’ll see three options:
- Scheduled Message: allows you to send a message to your attendees now or schedule it for later.
- Triggered Message: automatically sends messages based on an action performed by an attendee.
- Create a Campaign: choose a collection of pre-made shortcuts to quickly generate a campaign for your events.
Next steps
Now that you’re all set up to send out your emails, there’s so much more to learn with Promoter. Check out our Promoter Guide for even more information on how to use our tools to customize your email marketing.