This guide will walk you through how to use an Elementor template for a single event page with the free versions of Elementor and The Events Calendar. All you need is the Elementor and The Events Calendar plugins and the Hello Elementor theme, though you have more options to add Elementor Pro if you want to have more control over dynamic templating.
If you are looking for dynamic Theme Builder templates, please check this article about how to set it up for Single Event.
Adjust Elementor Settings
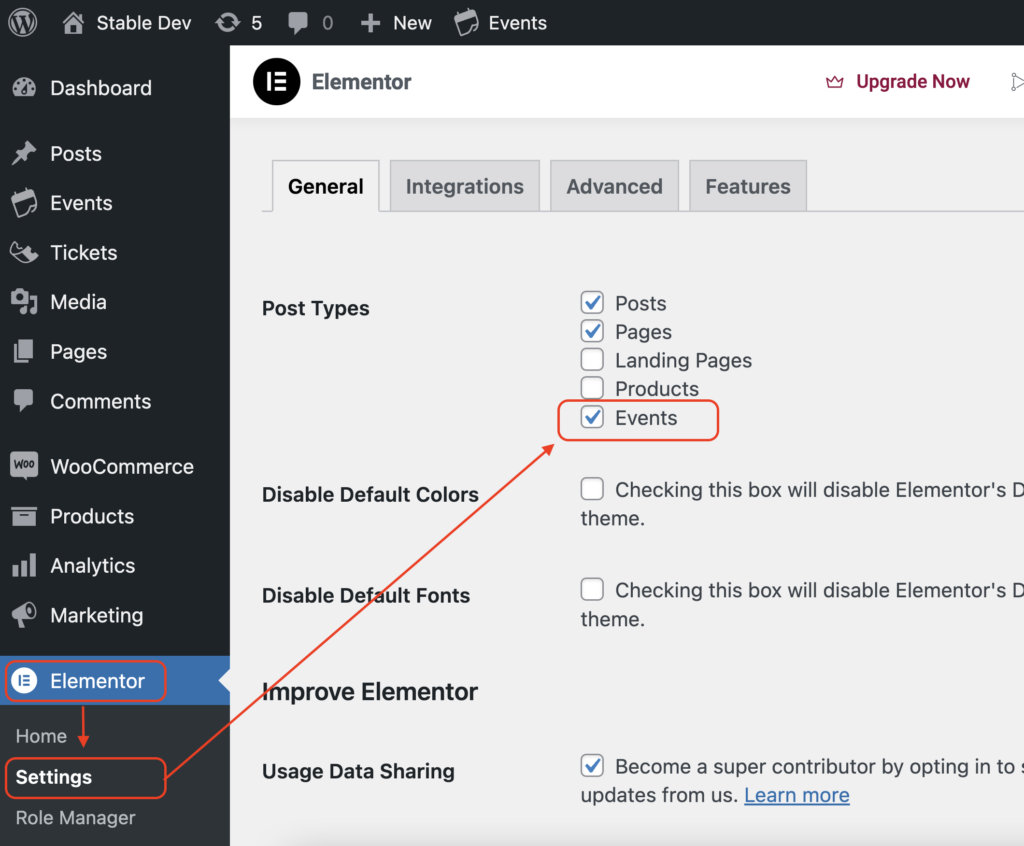
The first thing you need to do is go to Elementor > Settings and make sure “Events” are checked for post types. This will make the “Edit with Elementor” button appear on the “Edit Event” page.

Create Event
Next, add a new event like usual. The event content still comes from the Classic Editor page, but the style is what is edited in Elementor.
Once all the event content is added, save the event as a draft and then open the Elementor editor to apply the template to this event.
For technical reasons, “under the hood” only the classic editor works with Elementor for events. If you create an event using the block editor, it will be “forced” to the classic editor once the “Edit with Elementor” button is clicked. You don’t have to worry too much about this, but it’s something to keep in mind if you decide to switch back from using the Elementor template later.
Apply the starter event template with Elementor
Once the Elementor editor opens up, click on the folder icon to apply the “Single Event Starter Template” that is automatically added to “My Templates” when The Events Calendar and Elementor are activated together.
Style the Event
From here you can edit your single event just like you would any other Elementor page! It’s important to note that The Events Calendar Starter Template is static for Elementor’s free users. It acts as a “snapshot” that can be applied to a specific event at a specific time. The starter template can be tweaked, but those changes will not automatically affect existing events. Only new events where you apply the updated template will inherit the tweaks.
You may notice that the template has all event widgets automatically added. If you did not add any content to that part of the event, even though it is showing in the editor it will not appear on the frontend.
To apply your single event template to an existing event, the process is almost the same. From the “Edit Event” page, click the “Edit in Elementor” button, and apply the template as you did for a new event. Just keep in mind that any previous styling changes you had made will be overridden once the template is applied.
👋 Due to the way default templates work, you’ll notice that the description of the event gets bumped to the top of the page. To fix this, all you have to do is copy that element, paste it where you want it on the event, and then delete the original element.
You can make any adjustments you like to the single event now, just like any other Elementor page! Just note that these changes will NOT be applied to the starter template, they will only affect that specific single event.
Events with Tickets
If you have an event with tickets, you may notice that the starter template does not automatically include the Elementor Event Ticket widget. We have plans to dynamically add this to the template in the near future, but for now, all you have to do is add the ticket widget yourself.
To reiterate, the content comes from the “Edit Event” page and then the styling comes from the Elementor editor, so you should add the ticket first and then make sure to add the widget to the page so the tickets show on the frontend.
This is what this process looks like all together: