A Promoter campaign is a reusable collection of often-used shortcuts that you can assign to your events in one step.
Getting started
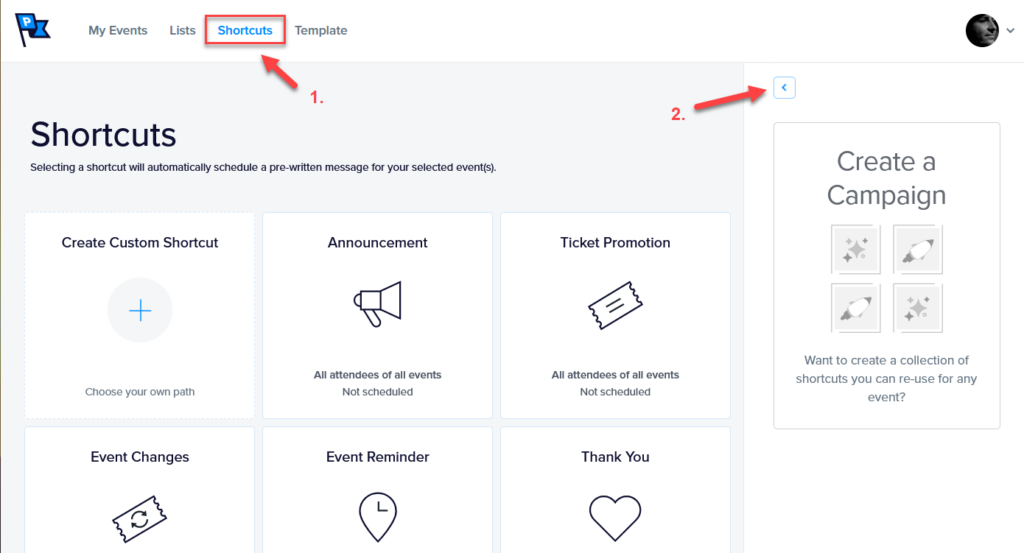
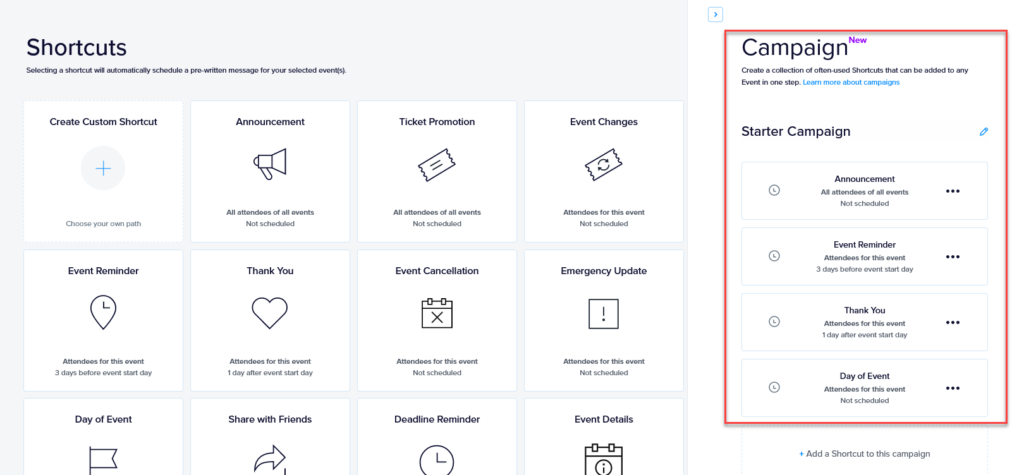
To create a Promoter campaign, head over to the shortcuts page and expand the “Create a campaign” sidebar
Shortcuts can be added to a campaign in one of two ways:
- Manually selecting shortcuts: these will most likely be the ones that you use the most often.
- Using our starter campaign: this is a set of the most commonly used default shortcuts for a successful event promotion (and, yes, the default shortcuts can be modified).
Manually selecting shortcuts
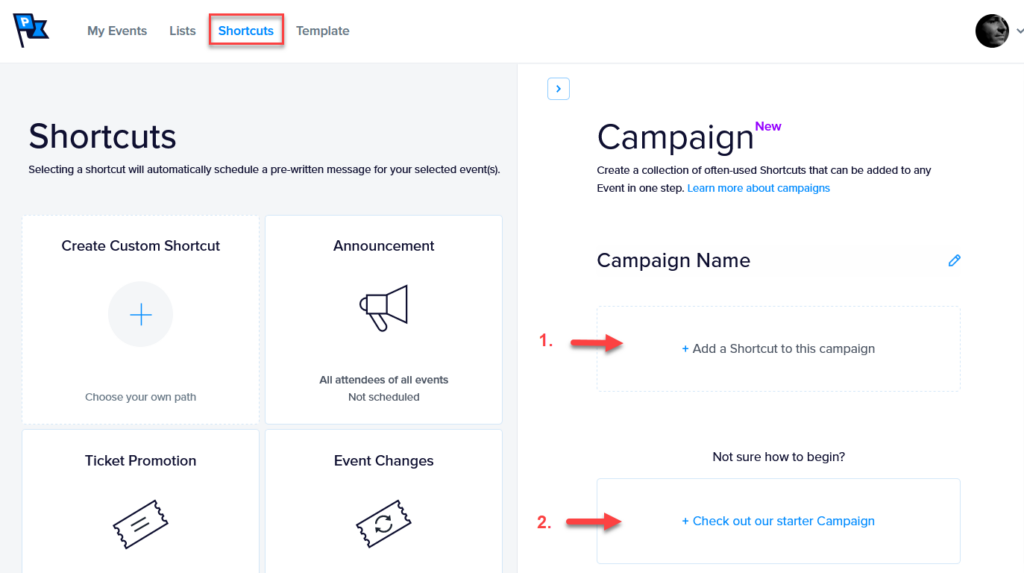
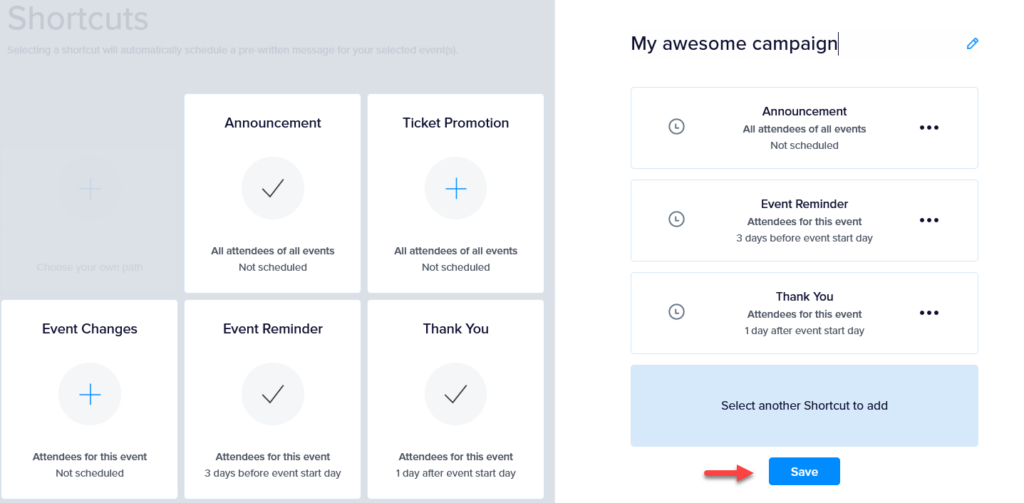
After clicking “Add a Shortcut to this campaign,” the screen will change and you will enter “Shortcut Adding Mode.”
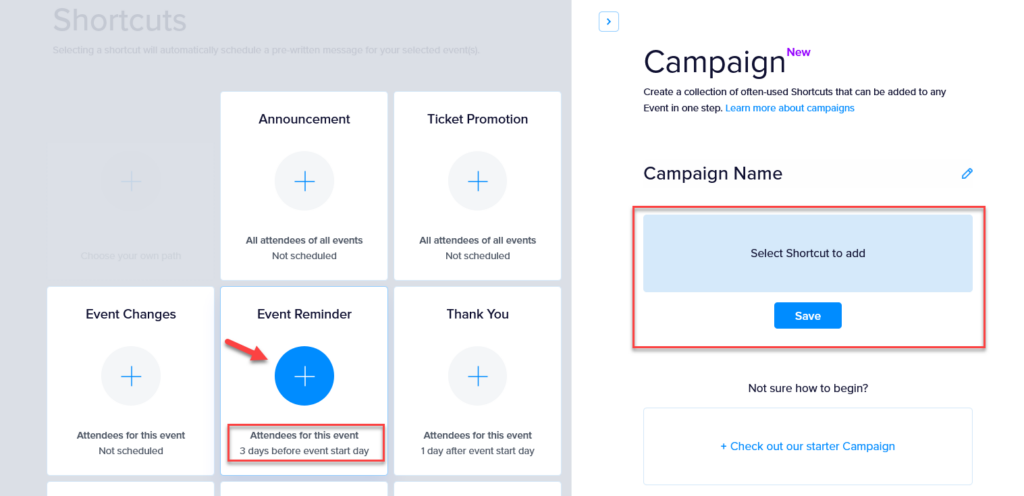
Simply click on the big plus (+) sign to add any given shortcut to the campaign. Once you are done with your selection, hit the “Save” button to exit “Shortcut Adding Mode” and start using your campaign.
Pro tips:
- Campaigns require a minimum of two shortcuts.
- The default audience and schedule (if any) is visible in each shortcut box to help you select which shortcut you want to add to the campaign.
Using the starter campaign
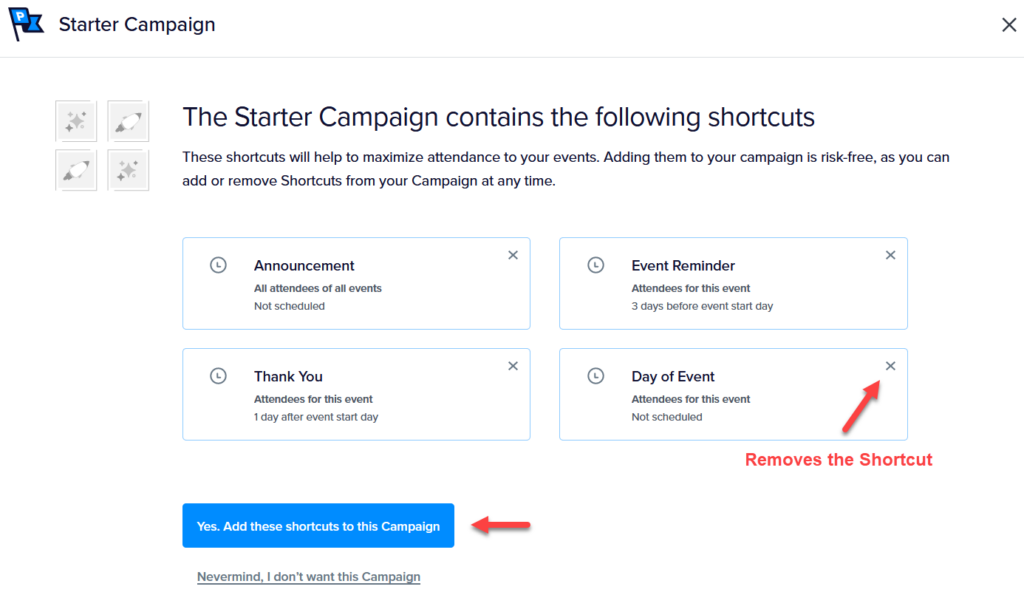
Click on “Check out our Starter Campaign” to preview shortcuts that are part of our starter campaign.
Click the “Add Shortcuts” button once you have reviewed the suggested shortcuts. You are now ready to use your campaign. Note that you can remove any suggested shortcut.
Removing shortcuts from a Promoter campaign
You can remove a shortcut from a campaign at any time by clicking the contextual menu and selecting the “Remove from campaign” option.

Be sure to save your campaign when you are done.
Similarly, more shortcuts can be added to a campaign by clicking the “Add a Shortcut to this campaign” link.
Using Promoter campaigns
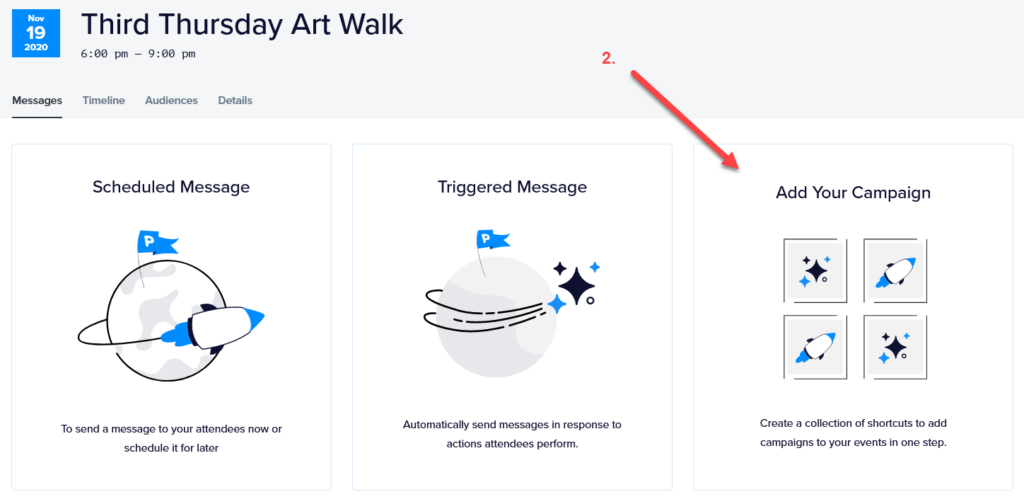
Campaigns are designed to be added to events. To add a campaign to an event:
- navigate to the event of your choice, and
- click on “Add Your Campaign” option.

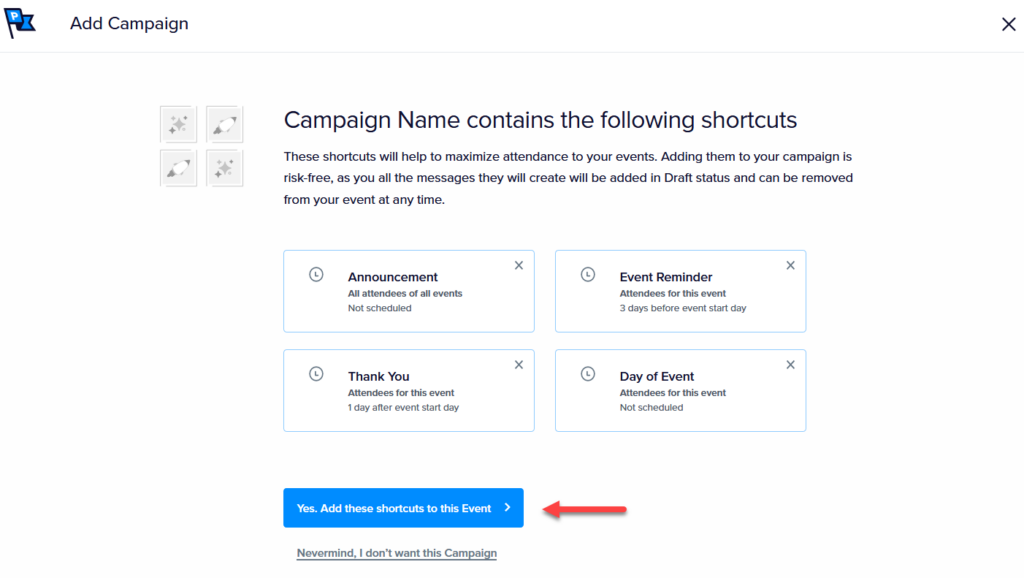
You will be taken to a screen to confirm your selection. It’s always a good idea to double-check before proceeding, just to make sure everything is correct.
Pro tips:
- You can adjust your shortcut selections at this step.
- You still have a chance to change your mind even after adding the shortcuts —there are enough safeguards for this to be a truly safe process.
Wrapping up
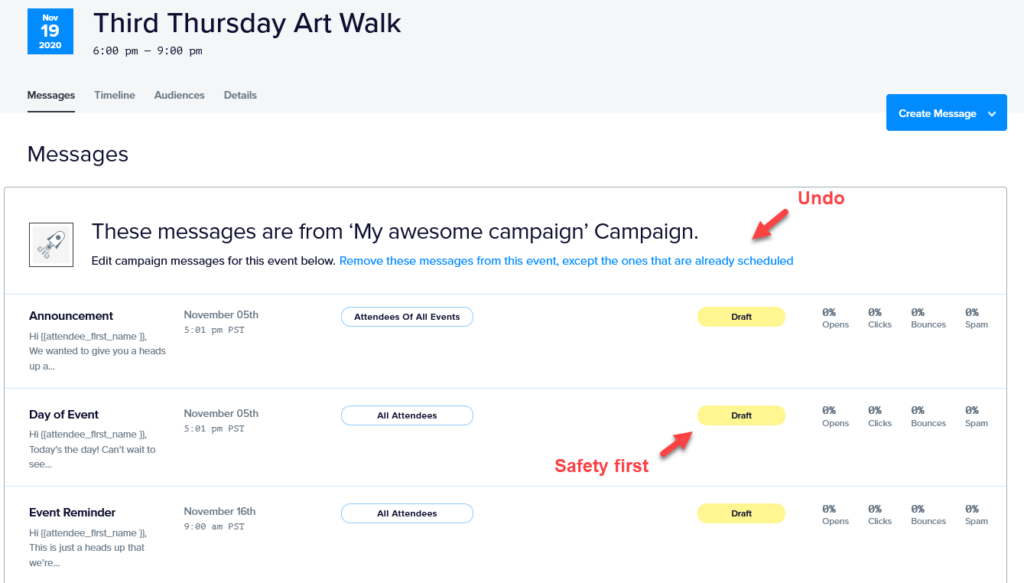
Kudos! You should now see a list of messages that were created as a result of adding the campaign to your event. Remember, you can still undo your changes and remove the campaign from the Messages screen. Plus, all of the messages are set to drafts and won’t actually send until they have been published.
