Sessions are the building blocks of your event schedule, as demonstrated in the [New User Primer].
Creating Sessions
You can create sessions in both the Classic and Block Editor as seen below. The following are the Essential fields to creating a Session.
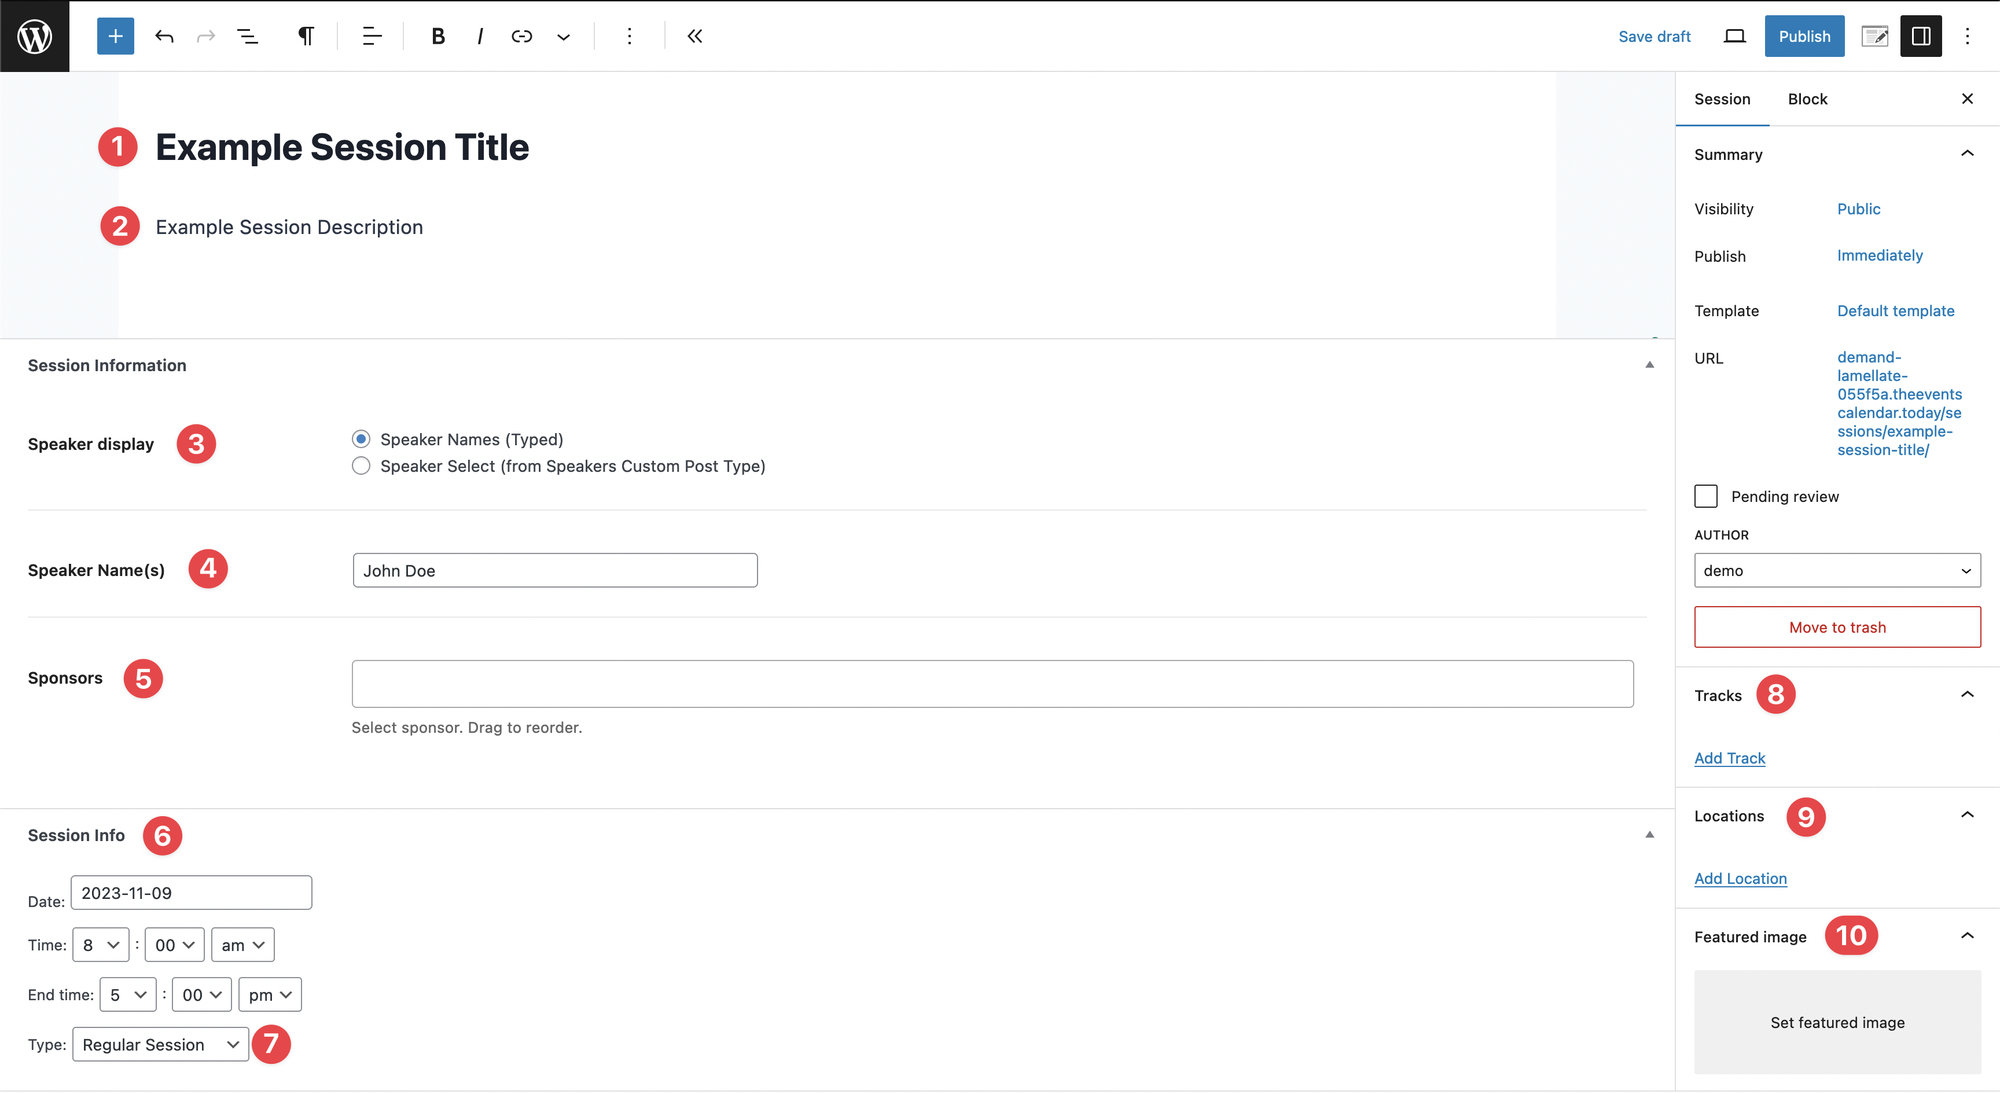
- The title of the Session
- The Session’s description
- You can choose whether the Speaker or Speakers are displayed with a typed name, or via the Speakers Custom Post Type. The Speakers KB article explains the difference between the two.
- The names of the Speakers presenting the Session
- You can add one or multiple Sponsors to a session. You can also drag and drop them to change their order.
- The date and time a session will take place.
- There are three types of Sessions. Regular, mainstage, and break&lunch. Mainstage sessions will be highlighted differently than regular and break sessions. Break&Lunch sessions are plain text.
- You can select which Tracks a session will be a part of. You can also Add Tracks.
- You can choose which location a Session will take place. For example, rooms that have specific names. You can also Add Locations from this area.
- You can add a Featured Image to make the Session stand out.
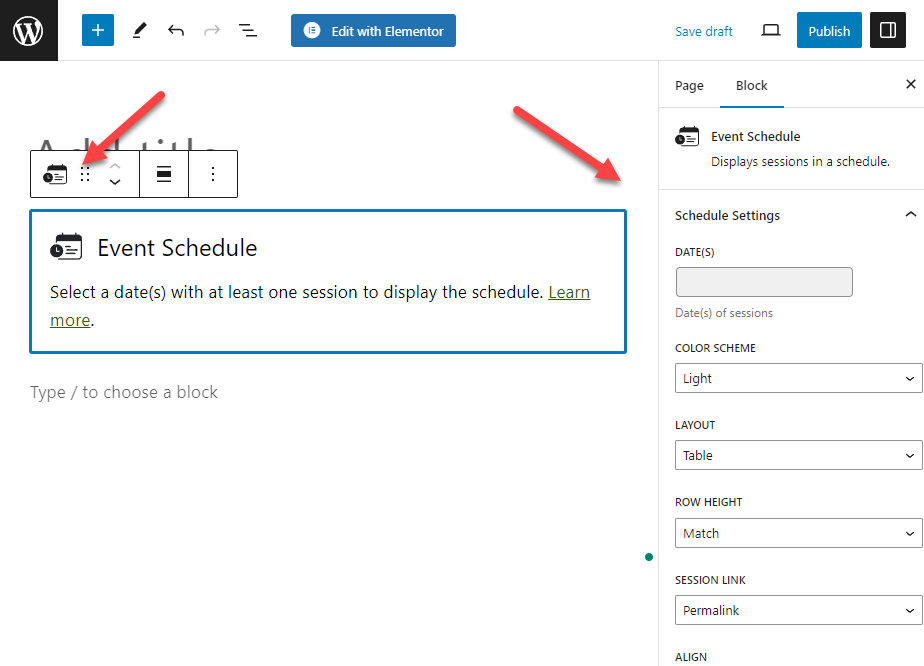
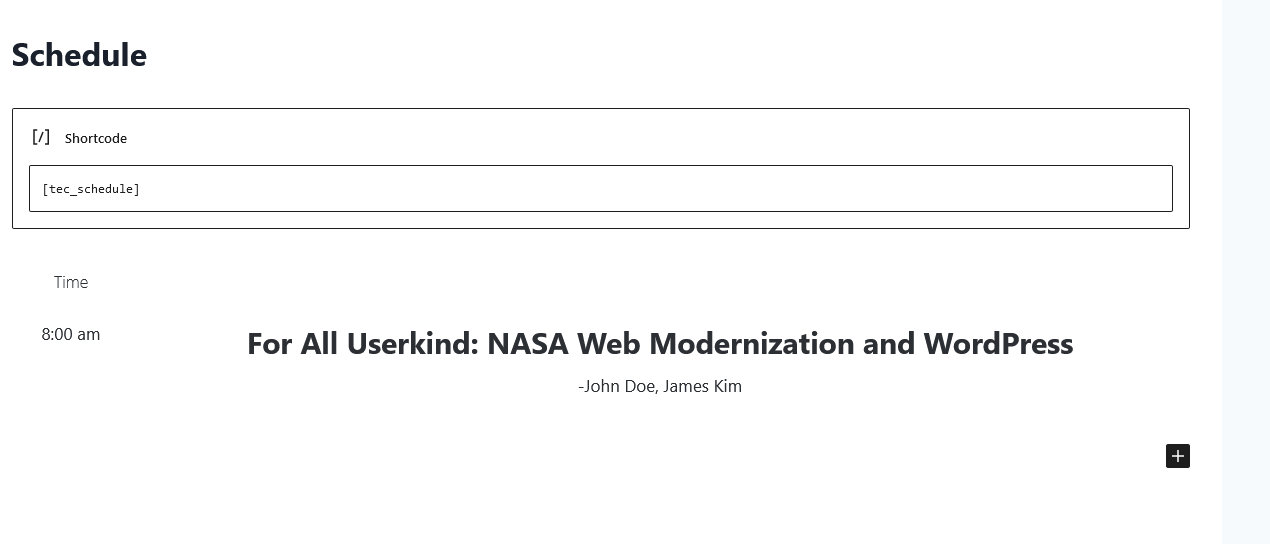
Displaying Sessions in context (aka schedule)
Once you created all of the sessions you need for your schedule, it’s time to display them on a page or post. This can be done in one of two ways:
Using the [tec_schedule] shortcode and its many, many parameters.
Or, using the schedule block (block editor)