Tickets Commerce is our e-commerce solution included with Event Tickets. You can set up Tickets Commerce with PayPal or Stripe. Setup is super easy, and we’ll walk you through all of the settings to get you started selling tickets for free with Tickets Commerce.
Enabling Tickets Commerce
The first thing you’ll want to do is head over to Tickets > Settings > Payments and toggle on the option to Enable Tickets Commerce. Once you do, you’ll see all of your Tickets Commerce options.
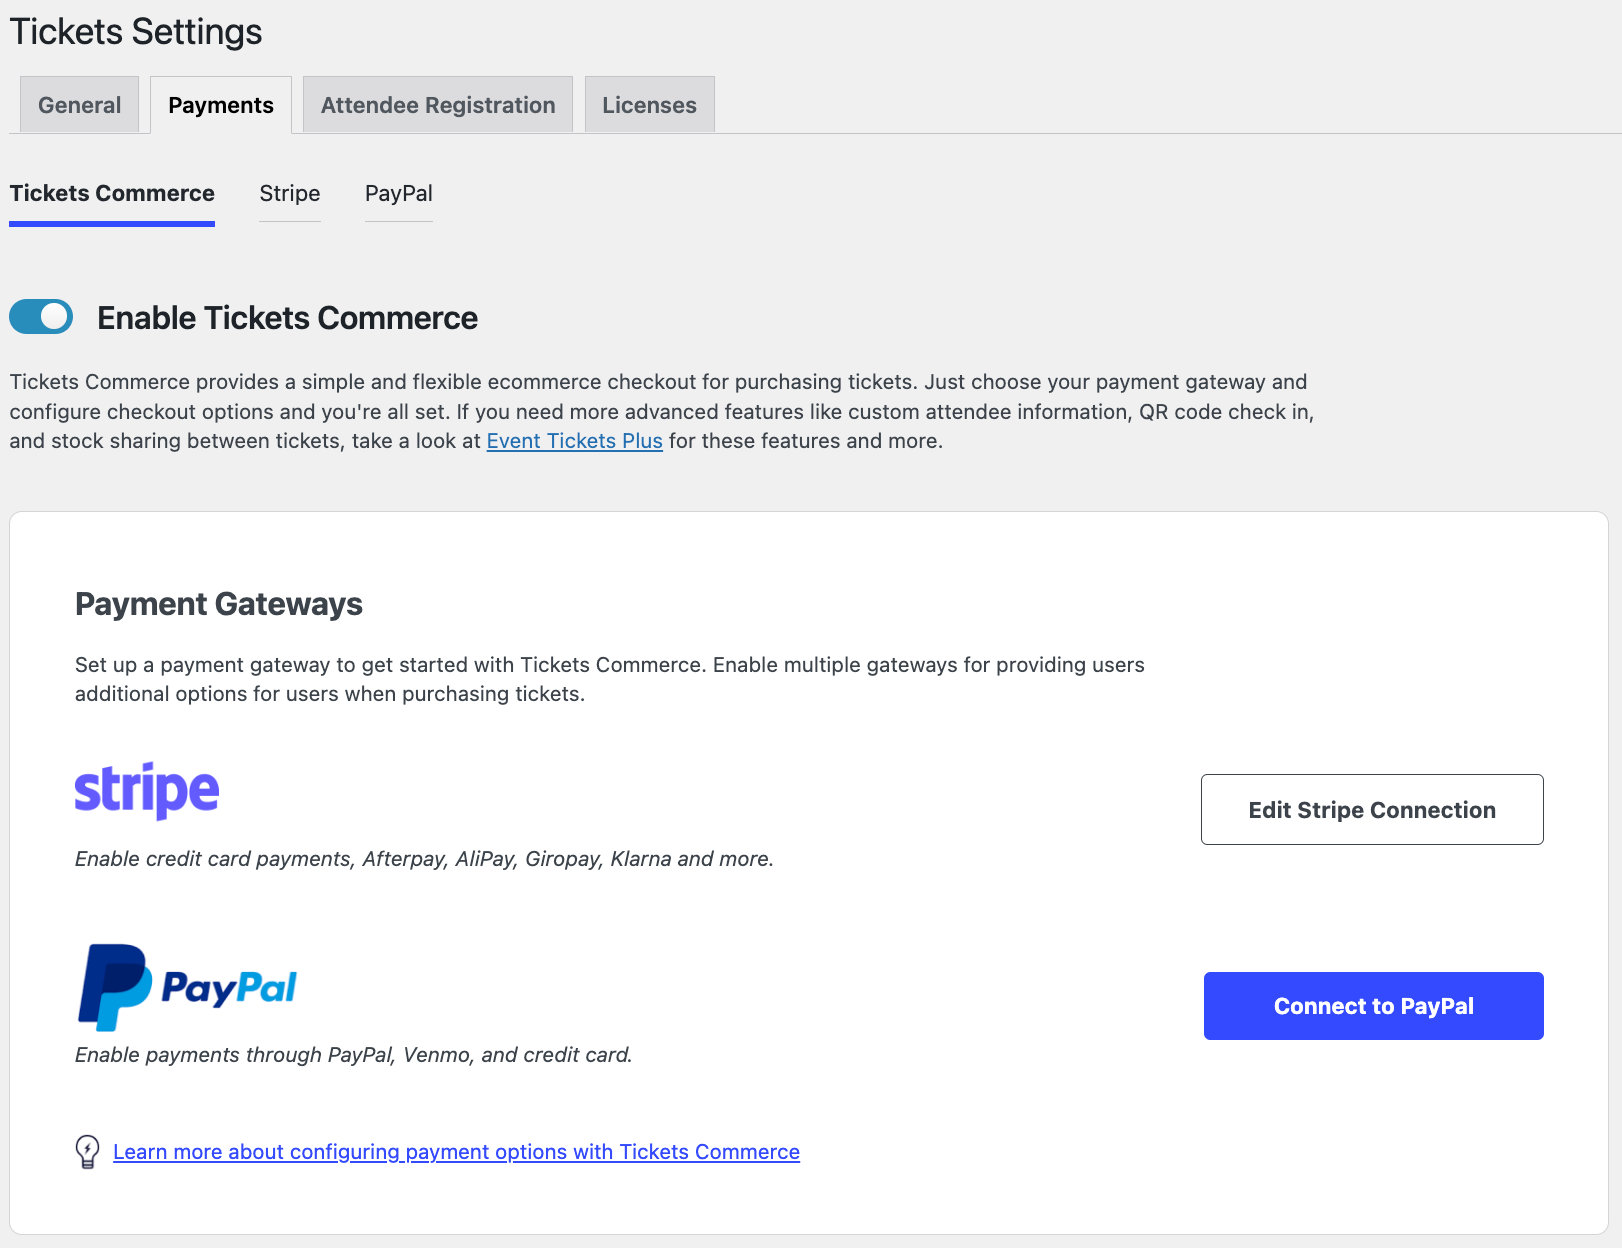
Next, you can configure PayPal and/or Stripe as your payment gateways.

Connecting to PayPal
Once you click Connect to PayPal, you’ll see a pop-up to log in to your PayPal account. Don’t worry if you don’t have one; you can also register for a PayPal account by following the prompts in the pop-up as well.
You can always refer back to your Payments tab to check your connection status to PayPal at any time.
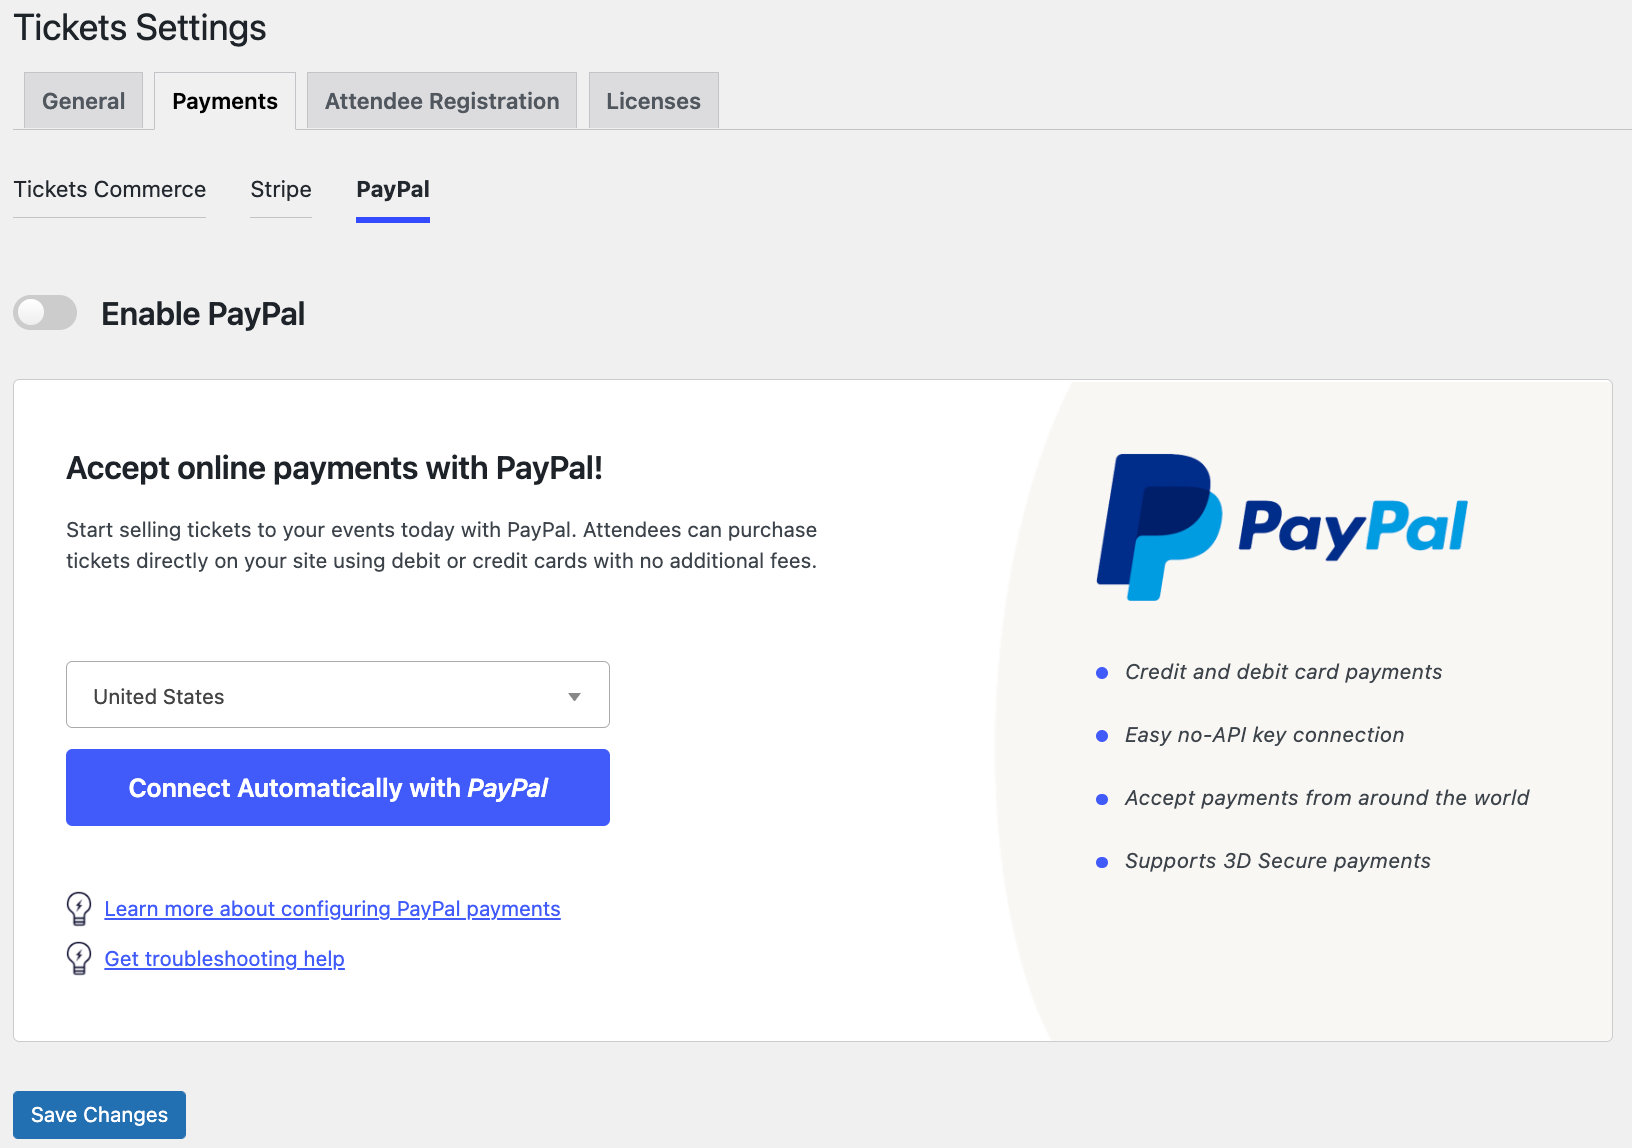
With PayPal, you can use Standard and Advanced Checkout options, which will give you additional choices like Venmo, depending on how you configure checkout.
Connecting to Stripe
Once you click on Connect to Stripe, follow the prompts to make the connection. Make sure that you enable all currencies that you’d like to use with Stripe. Don’t worry, you can always amend these settings later if you’d like to add additional currencies or remove some. You’ll see additional settings below, so fill those in as well and Save Changes.
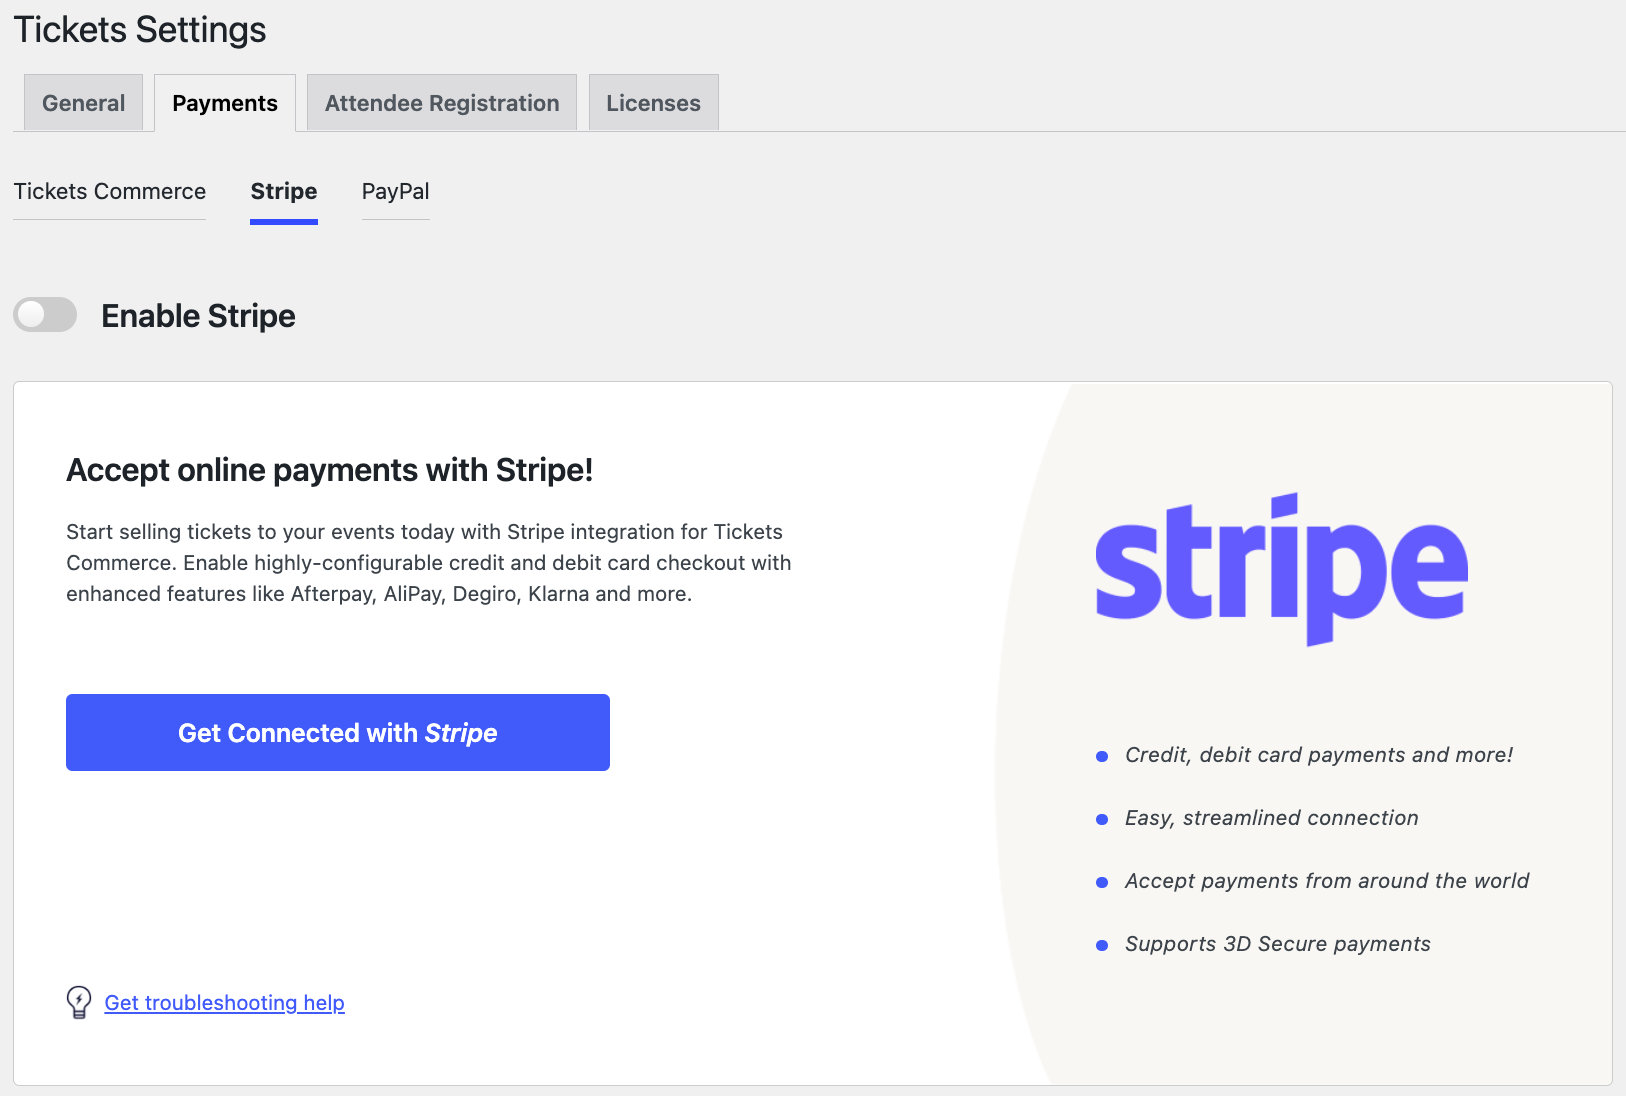
Note: There will be a 2% commission fee collected when using Stripe with Event Tickets (on top of Stripe’s fees). When using Event Tickets Plus, the commission fee is waived and you’ll only incur fees from Stripe.
Learn how to set up webhooks for Stripe here.
Collect payments using Digital Wallets (Apple Pay and Google Pay) when using Event Tickets Plus. You will have access to slightly different options when using Event Tickets vs Event Tickets Plus.
💡You can offer both Stripe and PayPal as payment options at the same time.
Payment Settings
Now that you’re connected to your payment gateway, you can begin to select your payment settings.
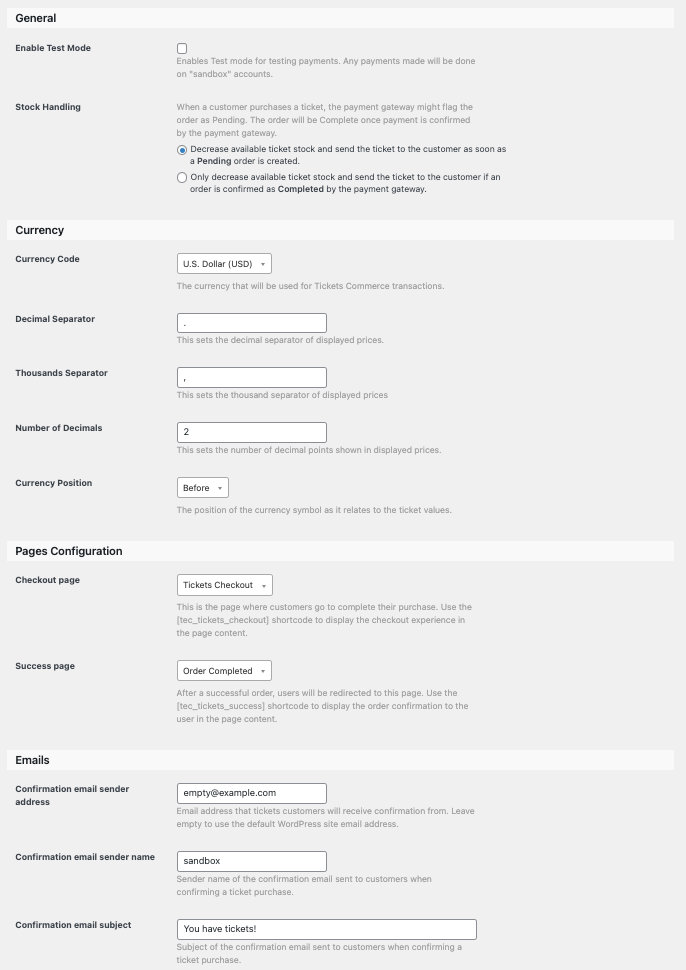
Enable Test Mode: This setting will allow you to test payments for your ticket sales. Test mode will be enabled by default.
Stock Handling: This lets you decide when in the ticket process the number of available tickets decreases.
Currency Code: Here you can choose which currency you’d like to use to collect payments with Tickets Commerce.
Decimal Separator: This sets the decimal separator of displayed prices.
Thousands Separator: This sets the thousands separator of displayed prices.
Number of Decimals: This sets the number of decimal points shown in displayed prices.
Currency Position: This settings lets you choose the position of the currency symbol, as it relates to the ticket value.
Checkout Page: You can select the page where customers go to complete their purchase. Display this page content with the [tec_tickets_checkout] shortcode.
Success Page: This is the page that users will be directed to once they complete the checkout experience. To display this to users in page content, use the [tec_tickets_success] shortcode.
Confirmation email sender address: This allows you to set the “from” email address that is used when purchase and ticket confirmations are sent to the user after a purchase. By default, it is set to the site email address in the WordPress settings.
Confirmation email sender name: This is the name that displays in an email inbox. For example, using “Event Tickets” would display that as the email sender name in a user’s inbox.
Confirmation email subject: This lets you set the subject line for the email a user receives containing their tickets.
Selling Tickets
To begin using Tickets Commerce, create a ticket and publish the event, page, or post where it is used.
Users will see the ticket on your website and add a ticket to their cart.
Now they can simply follow the prompts through the checkout process pages that you selected to complete their purchase.
And that’s it! You’re now selling tickets for free with Event Tickets and Tickets Commerce ✨