Once you’ve installed and activated The Events Calendar, you’re going to want to create some events.
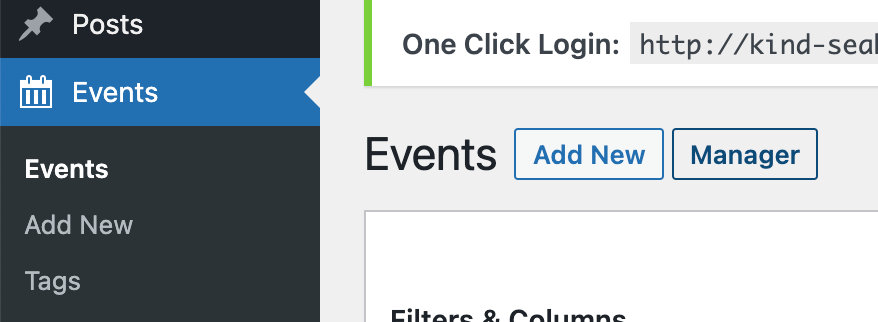
This is actually really easy. Let’s start in the WordPress dashboard – you should be able to find a menu entry called Events and, if you click on it, you should see the Add New link.
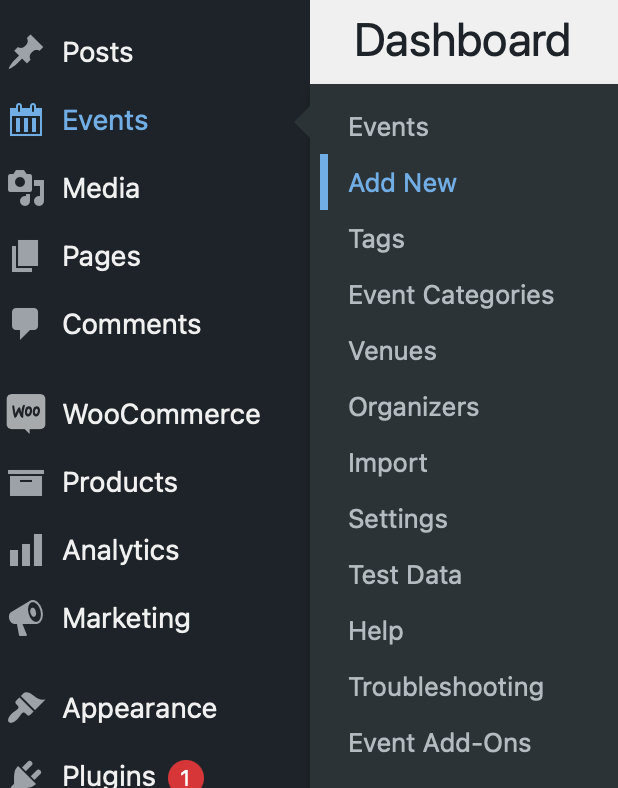
Once you’ve found it, go ahead and click on it! This should bring you to the event editor.
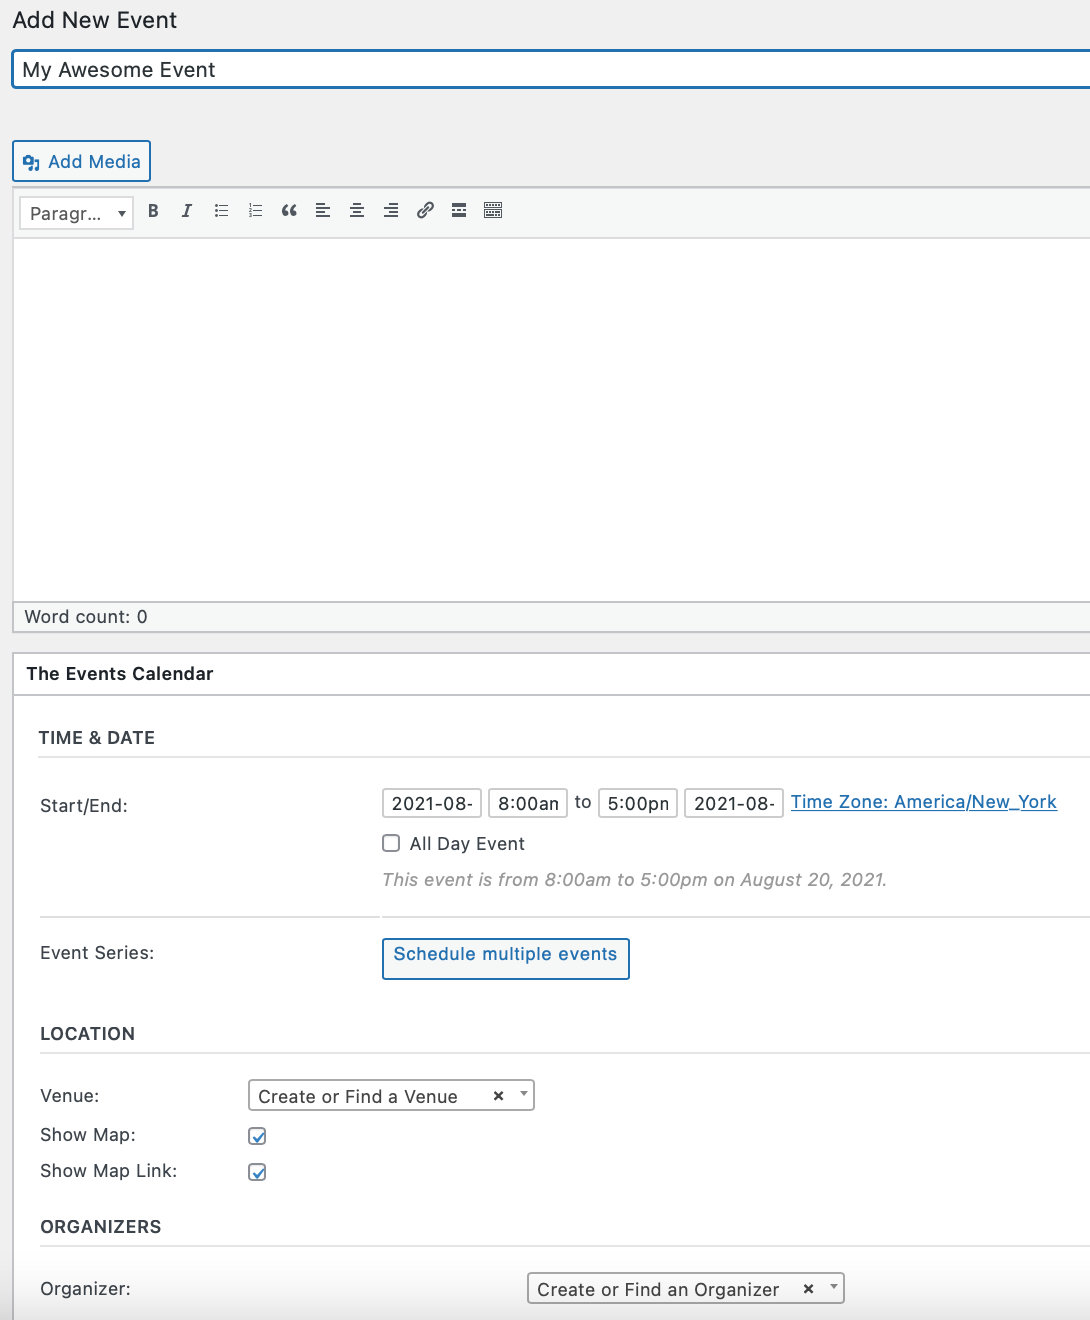
The event editor hopefully won’t contain too many surprises: it is intentionally almost identical – at least at first glance – to the regular page and post editor used by WordPress itself.
Just as with a page or post, you can add a title and description to your event. The expected controls for saving it as a draft or publishing it are present, too:
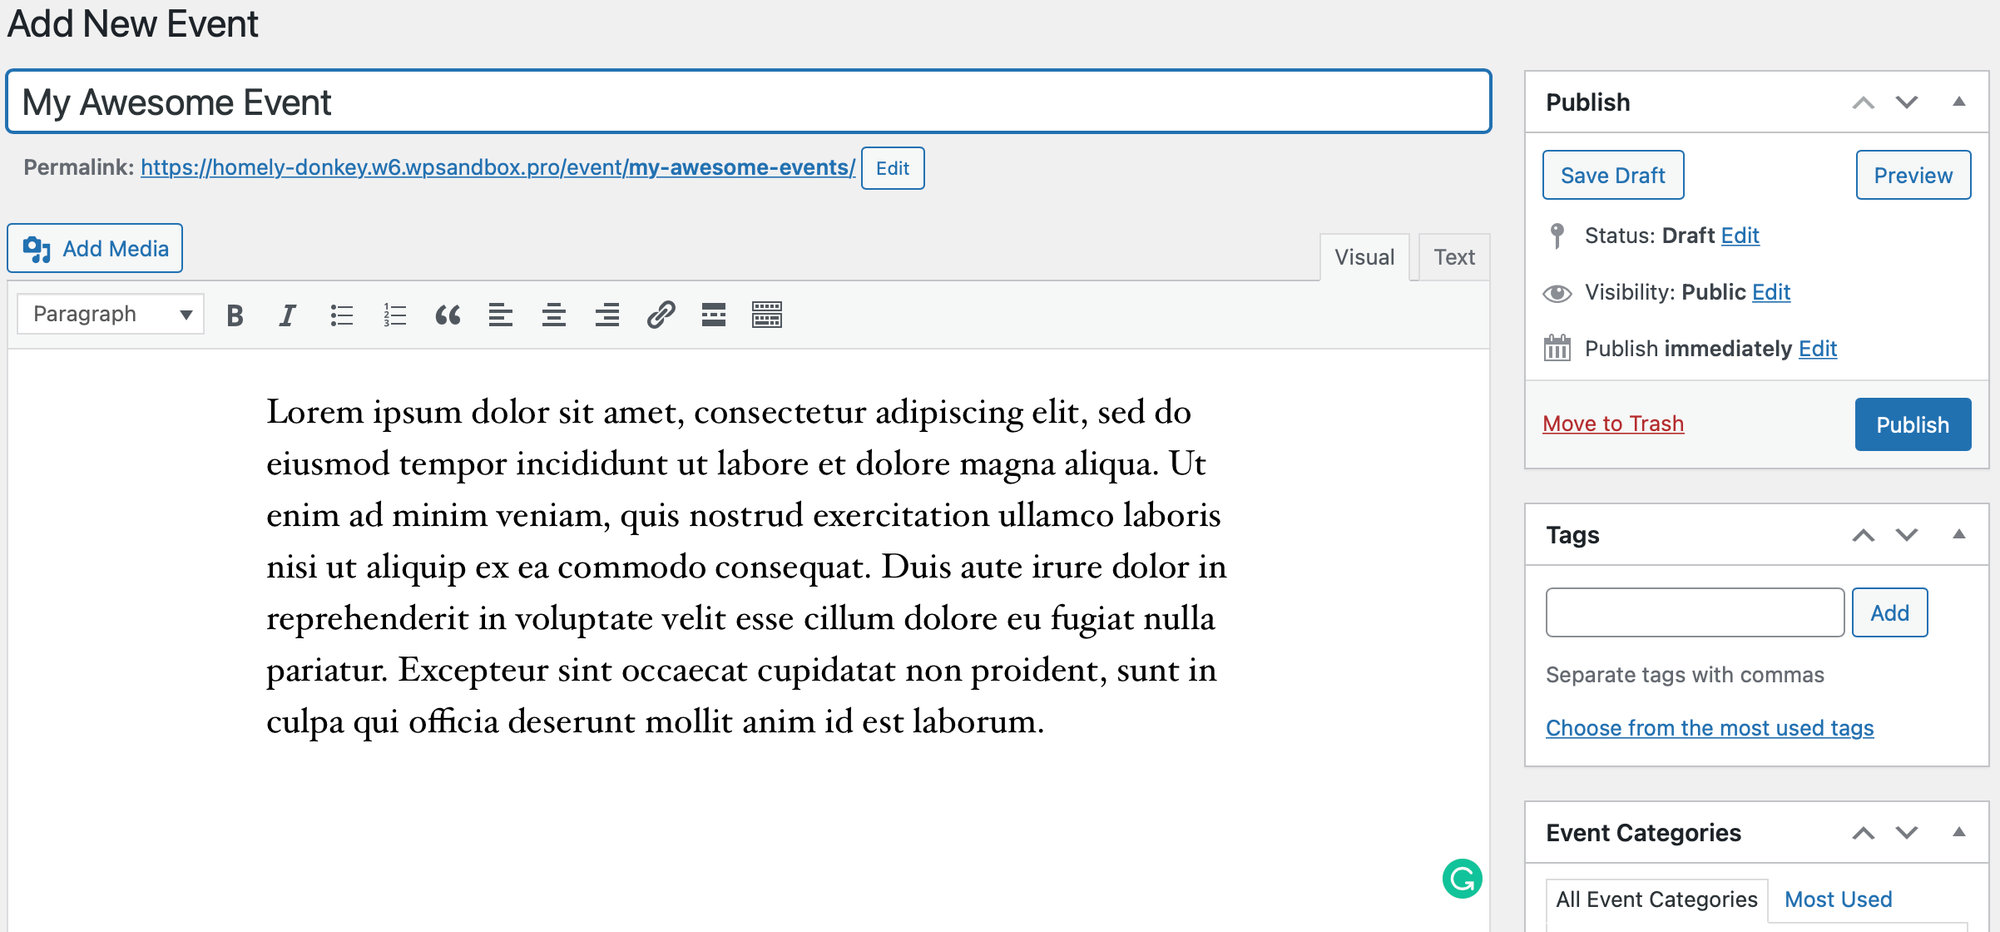
So, if you’re familiar with WordPress, you should feel right at home.
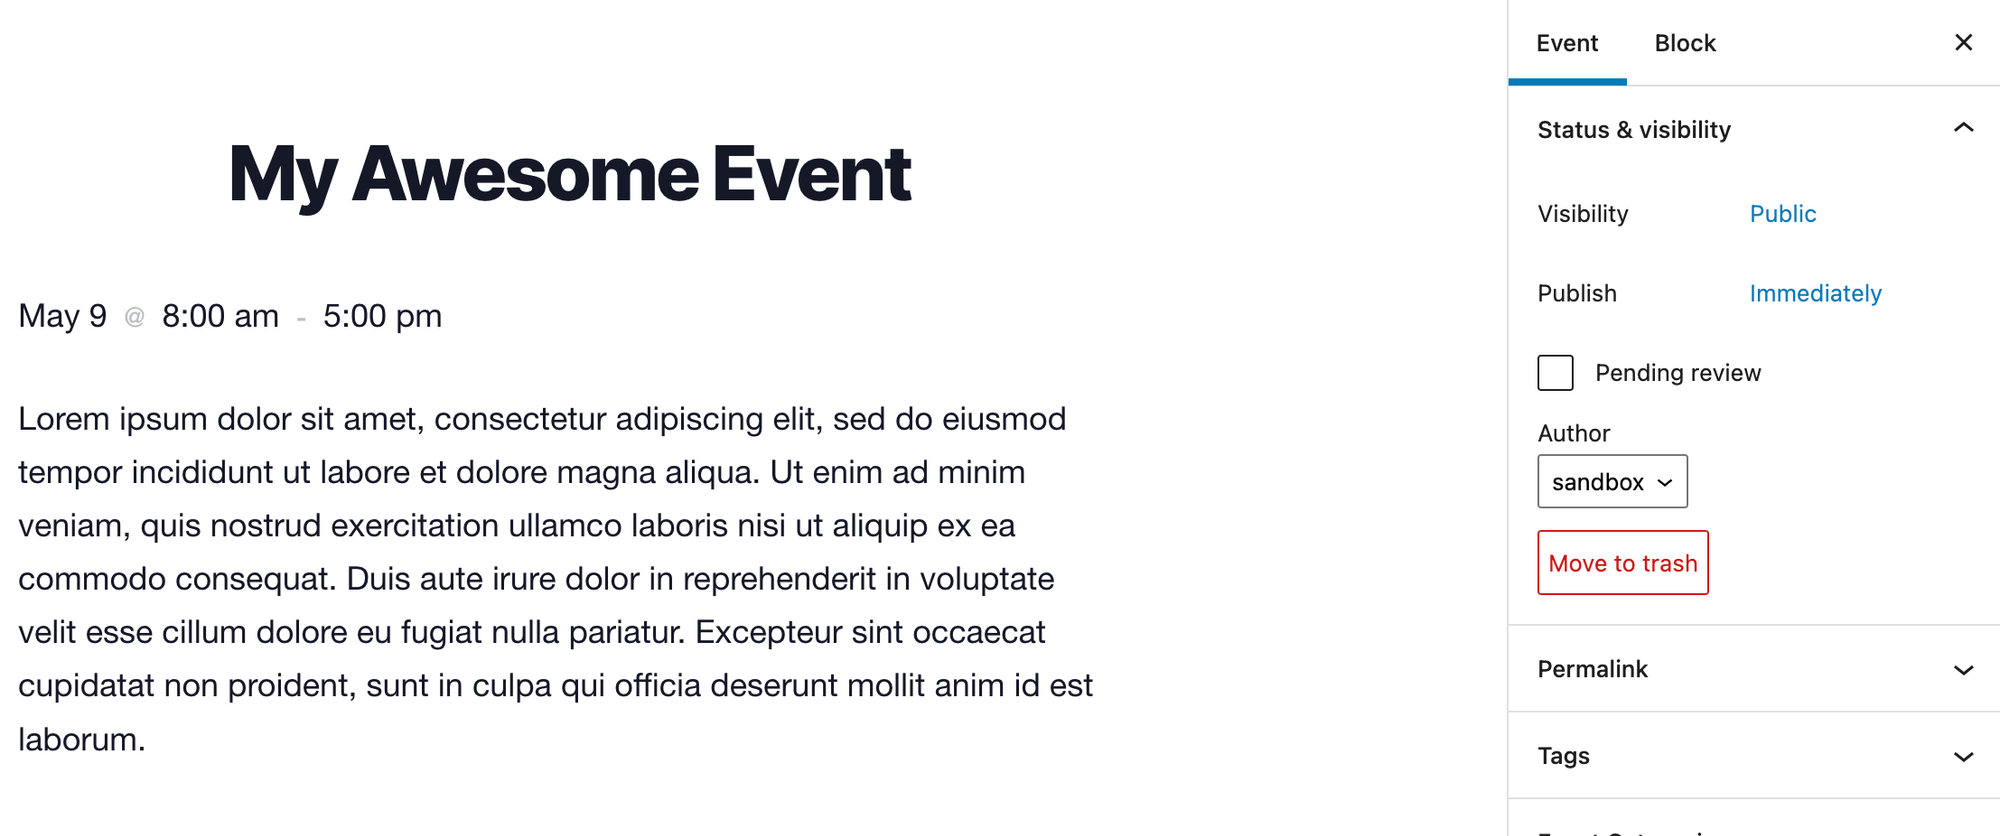
Event Time
Of course, events have specific bits of information associated with them that most pages and posts don’t require – start and end dates, for instance, not to mention venues and organizers.
Fields to set all of these things can be found below the description editor, in an area called the events meta box:
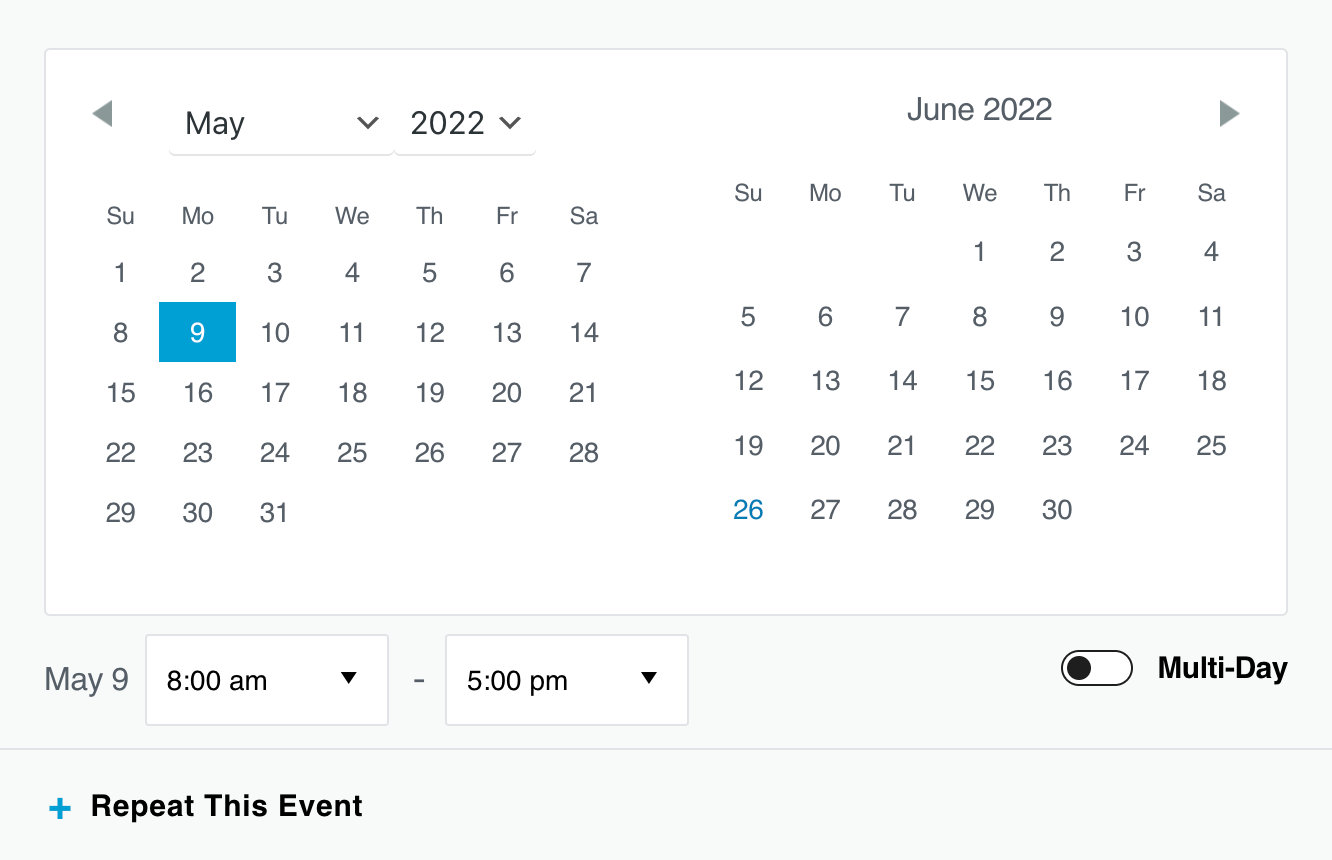
Let’s look at each of the settings in this area in turn. First, the date and time fields.
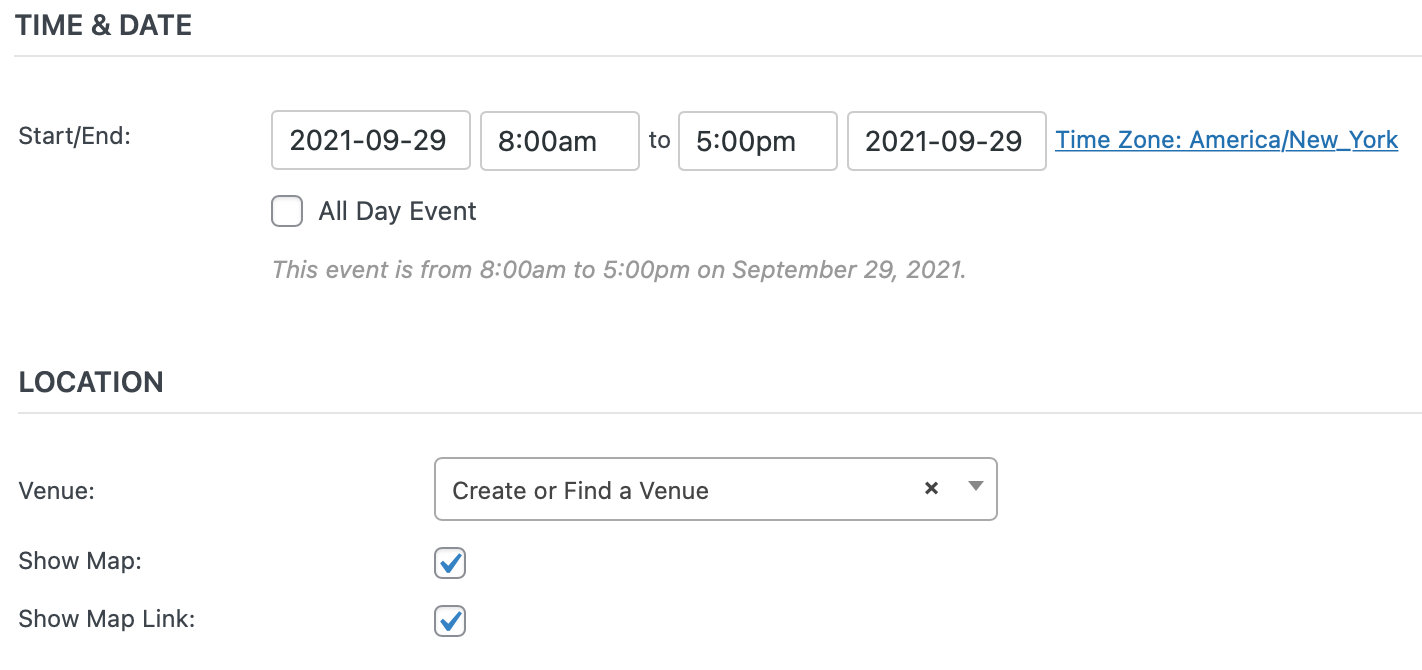
- The Start/End – this is simply when the event starts and finishes. Clicking into either date field will pop up a date picker, where you may select your desired dates from a calendar. Event start and end times may be selected from a drop-down menu, or you may enter your dates and times manually if you prefer. If you already checked the All Day Event box you will not be able to specify a time for your event
- The All Day Event checkbox is useful when the event is taking place on a particular date (or dates) – but you don’t really know when, or else feel that it is good enough to say it takes place “all day” without being more specific
The above covers creating a singular, non-recurring event. If you need help creating a Pro recurring event, you’ll want to read through our walkthrough tutorial on recurring events.
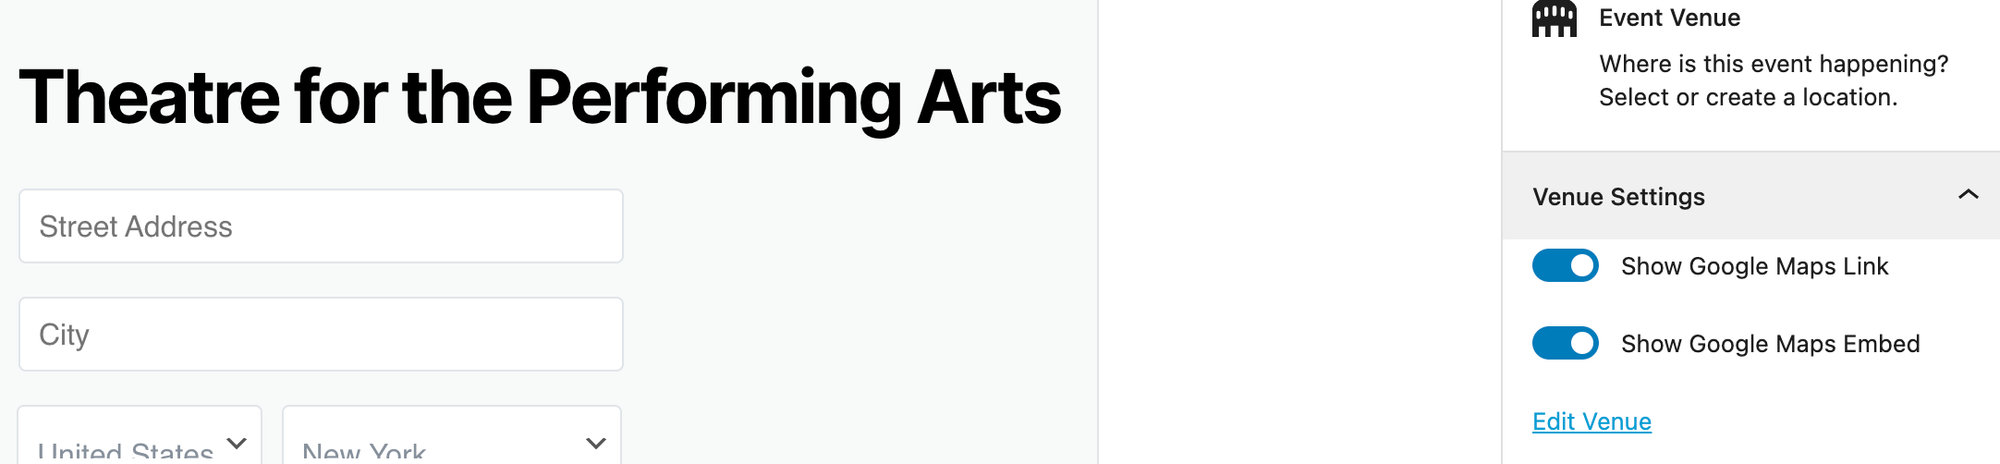
Event Venue
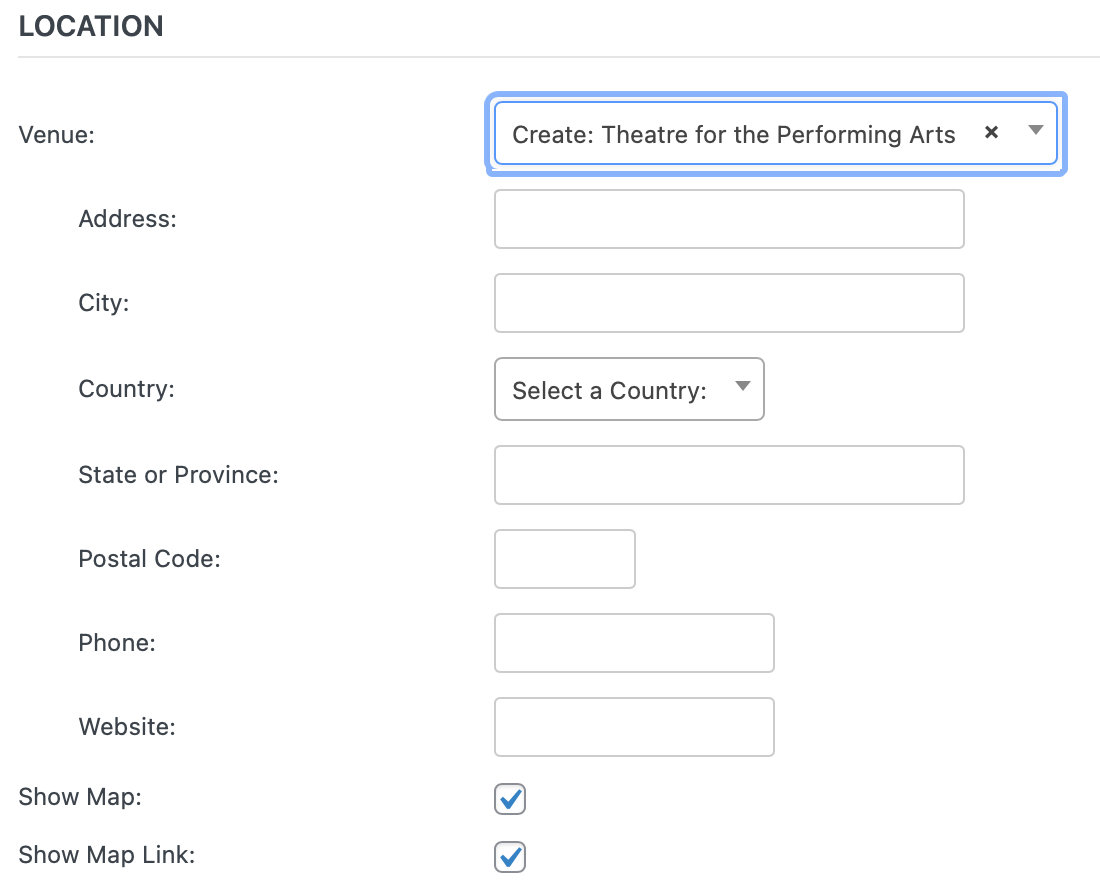
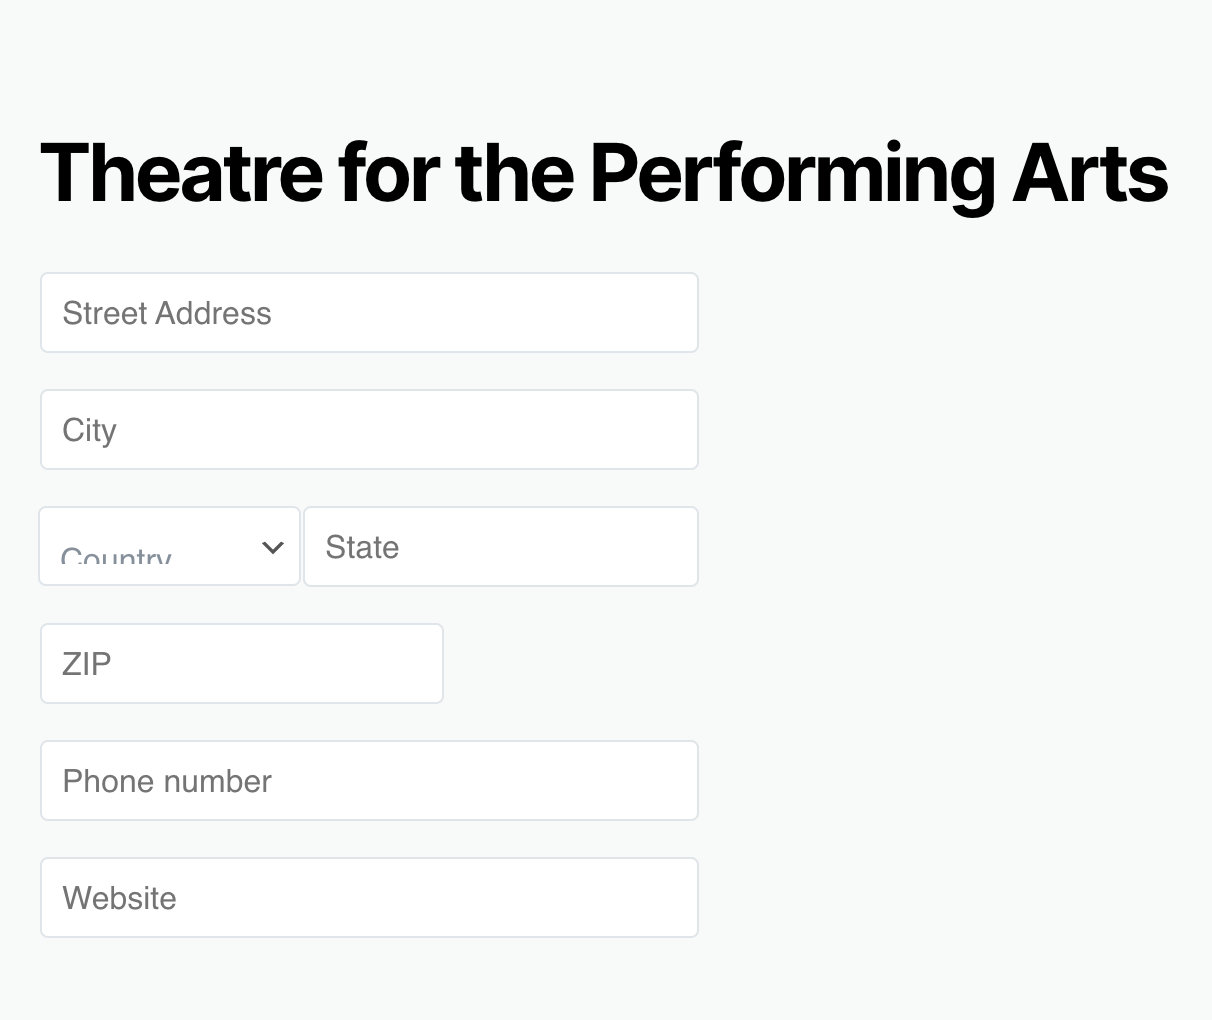
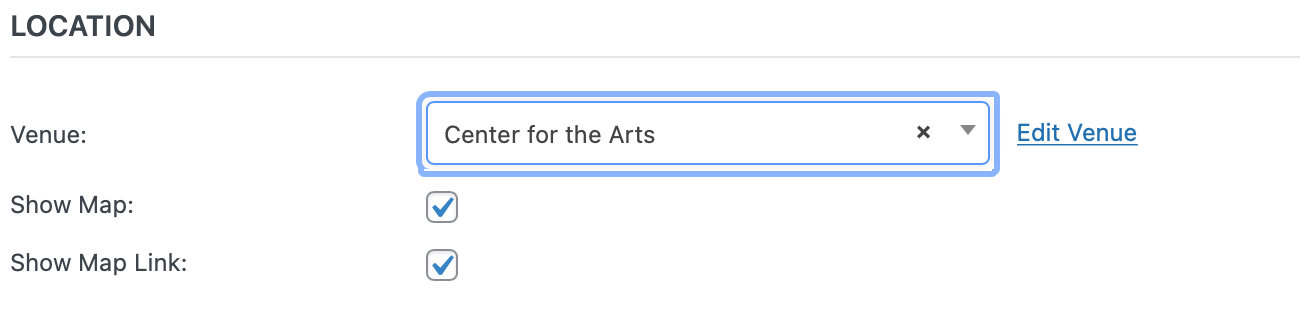
If this is your first time using The Events Calendar, you’ll see this list of fields for creating your first event venue. If you’ve created a venue for a previous event, you’ll have the option of selecting an existing venue from a drop-down menu (you may also type into the search box to narrow your options). Entering a new venue name and selecting the Create option from the menu options will display the new venue form fields below, allowing you to create a new venue for your event.
It’s also worth noting that you don’t need to create (or use) a venue. If you prefer not to specify a venue, simply move on to the next section.
Provide a name for the venue and any optional address details – if you like – a contact phone number and website. The last two checkboxes control whether a map should be shown to visitors and/or a link to a map should be displayed.
If your event is happening a little off the beaten path and there isn’t a mappable address, you can use latitude and longitude instead. To do this, leave the venue without an address. After you’ve created the event, go to Events > Venues and edit the Venue in question. You’ll see an option there for adding coordinates.
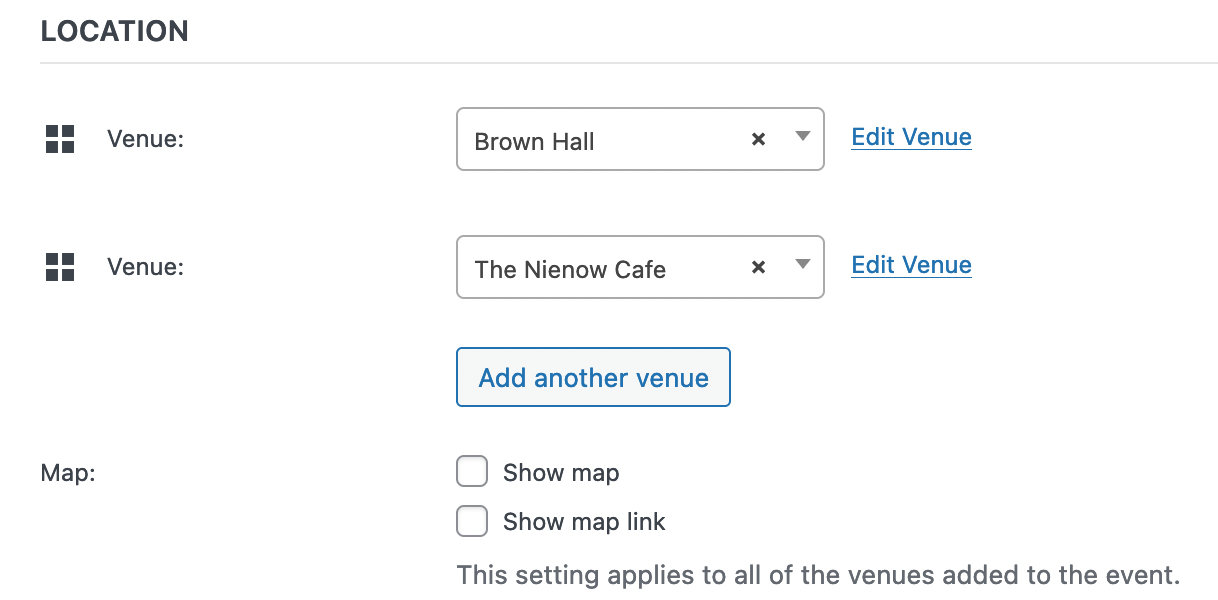
Multiple Venues
As of The Events Calendar 6.2.0, you can attach multiple venues to an event. To take advantage of this feature, you must be using Events Calendar Pro.
In the Classic Editor, click on the Add New Venue button. This will add a Venue area below the first.
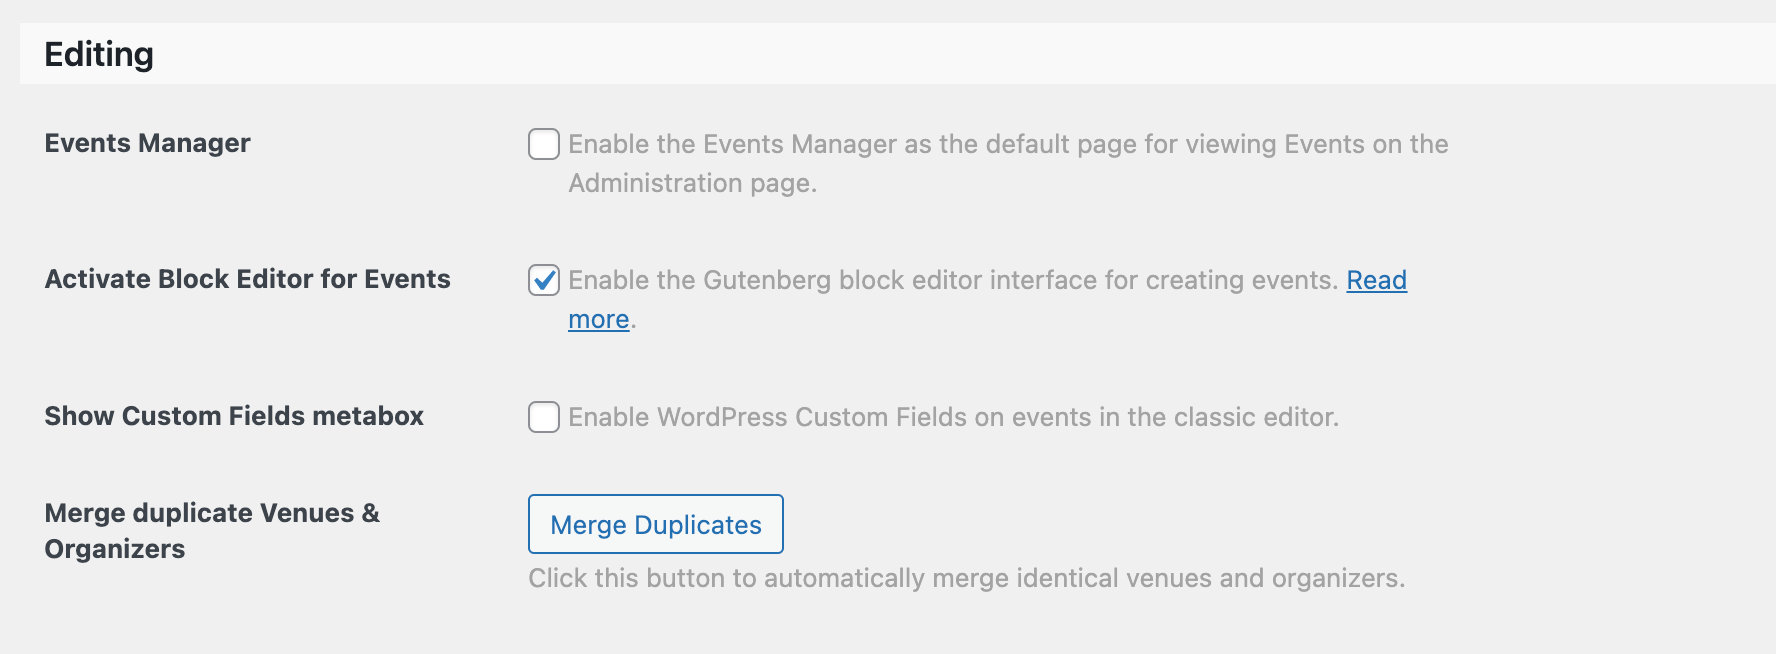
💡Note: If you are using Classic Editor please ensure that the Block Editor is deactivated in our settings to prevent any potential conflicts. Please go to Events > Settings > General > Activate Block Editor for Events and make sure this option is disabled. Enabling this option could lead to the Time & Date box disappearing in the Classic editor.
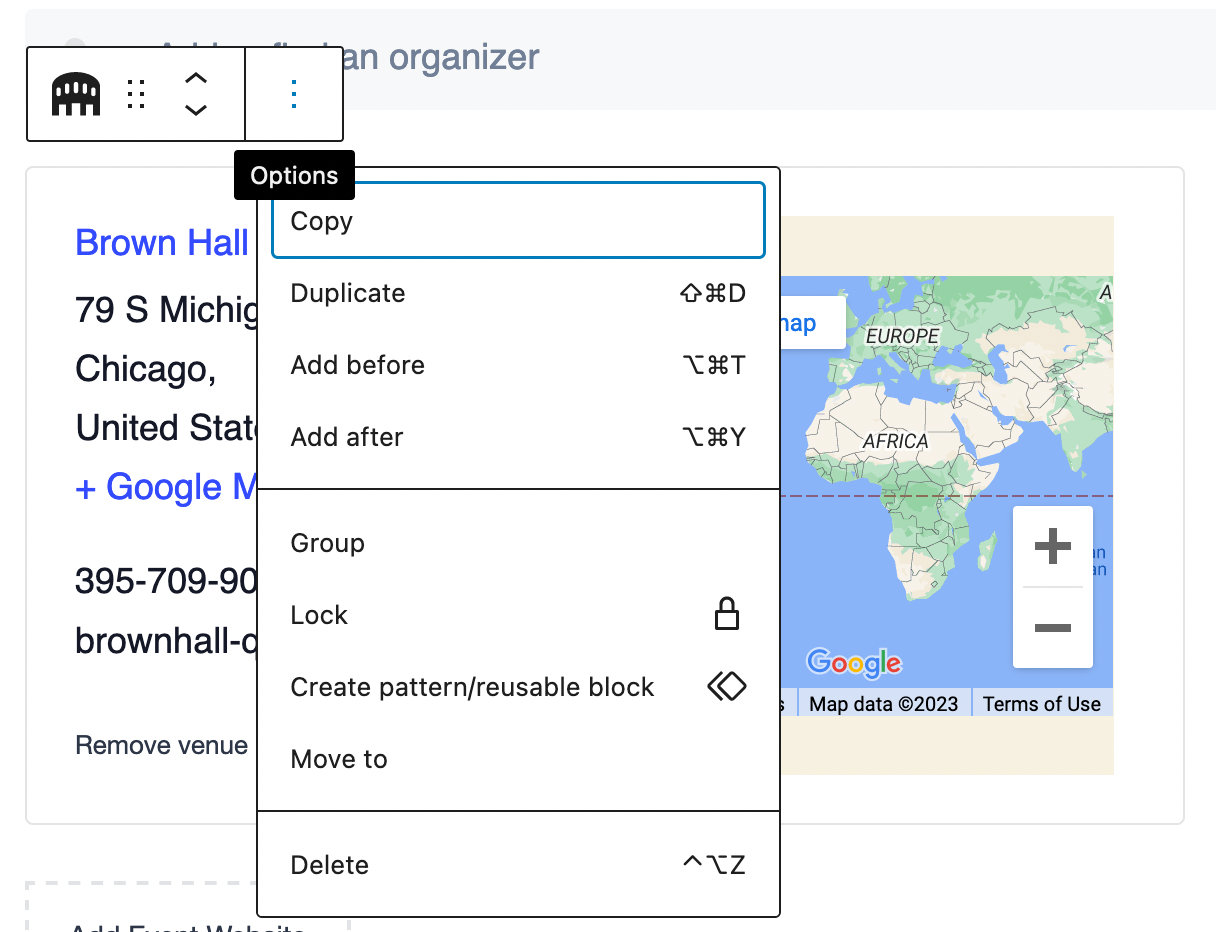
If using the Block editor, select the venue block, then click on the three vertical dots and select either Add After or Add Before.
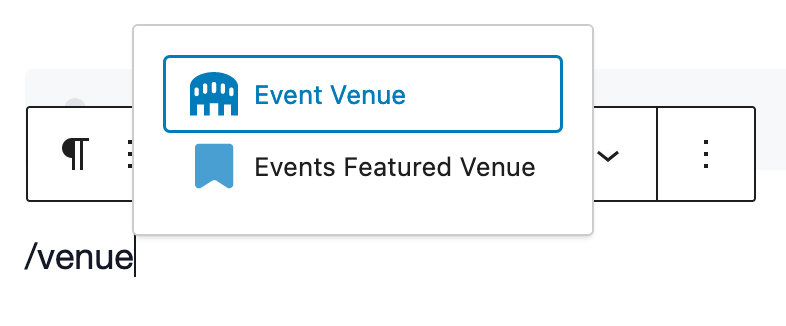
Type /venue into the box and select the Event Venue block.
Once you’re happy with the event’s venue you can move on to the next section: the organizer details.
Organizers
Similar to the venue details, you can select any pre-existing organizer details that you have already entered. Also – just as with the venue details – this area is completely optional.
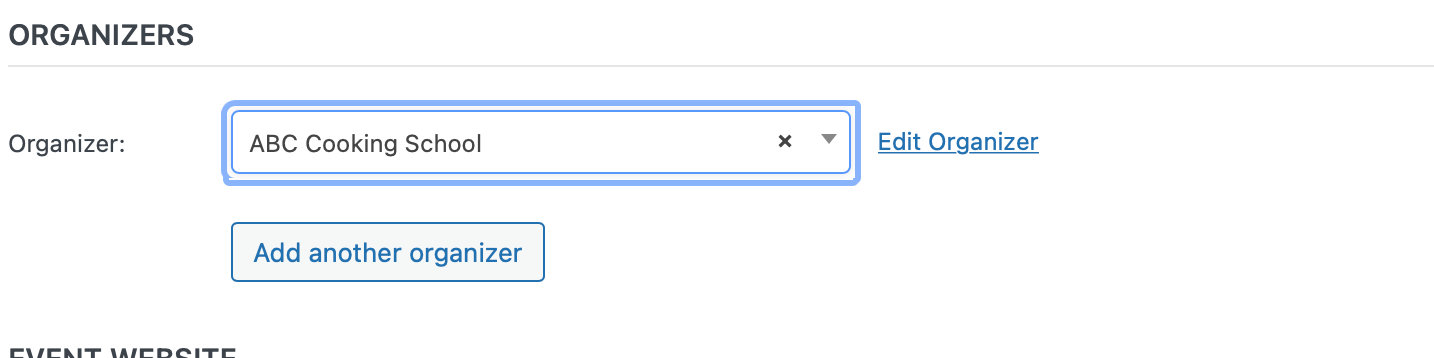
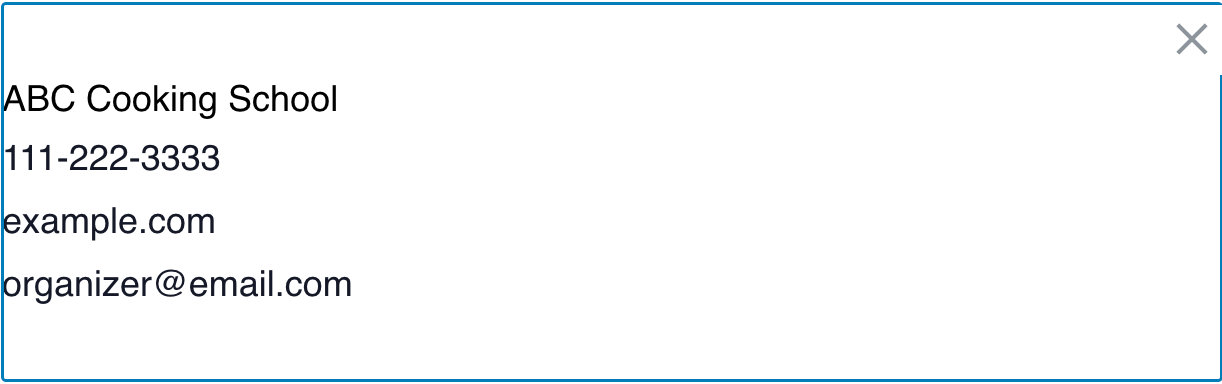
You do not need to provide organizer details and, if you do, you need only provide as much information as you want to. With The Events Calendar 3.11+, you can add multiple organizers to an event. Keep in mind that if you opt for multiple organizers, any organizer meta (like the phone number or email) will not show on the frontend-only the organizer names will be listed. If you have Events Calendar Pro, the listed names will link to the associated Organizer Page.
Event Website
The next section in the New Event Admin lets you (again, optionally) provide an event website:

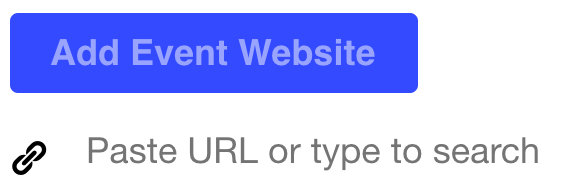
This is particularly useful if you are showcasing events organized by external organizations and they have a dedicated event website.
Event Cost
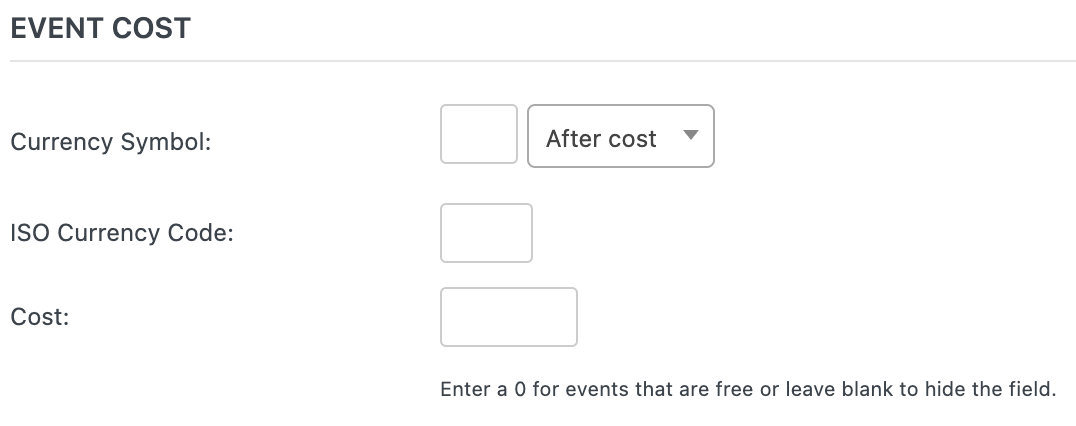
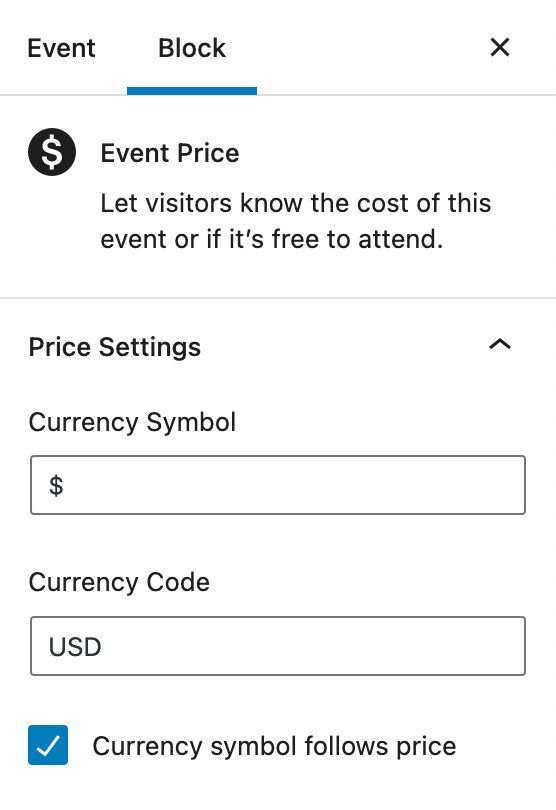
Once again you can pass on by and leave these alone if you like. If you don’t provide a cost, then no cost details will be shown to visitors. If the event is actually free then simply provide a cost of 0 (zero).
Do also note that, in the interests of being as internationally friendly as possible, you are able to make a currency symbol display either before or after the actual amount.
Depending on what is installed within your WordPress site you may see additional fields and settings in this area – particularly if you have purchased and activated one of our awesome ticketing plugins – but the above fields constitute the basic settings used to define an event.
If Event Tickets or Eventbrite Tickets is installed and active, it will hide The Events Calendar’s default Event Cost field on the wp-admin Add/Edit Event page (and the Community Events Add/Edit Event form, if activated).
For our premium plugins, please refer to our extension: Display the Event Cost Field When Ticket Plugins are Installed to reveal the Event Cost field.
For Event Tickets RSVP tickets, use the following code in your child theme’s functions.php file:
add_filter( 'tribe_events_admin_show_cost_field', '__return_true' );
Don’t leave just yet, there is still lots to explore!
Taxonomies
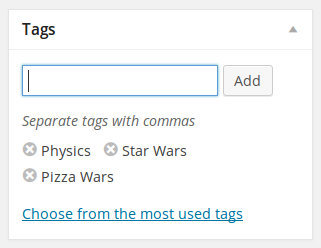
Just like regular WordPress posts you can tag events. These tags are in fact the very same tags used by WordPress itself.
This is a really useful feature: let’s say you have some blog posts about the laws of physics and are also promoting a group of events – lectures, perhaps – about the same thing. You can tag both with a suitable term like Physics and help visitors to the website find not only physics-related posts but events, too!
Besides tags, you can also categorize events:
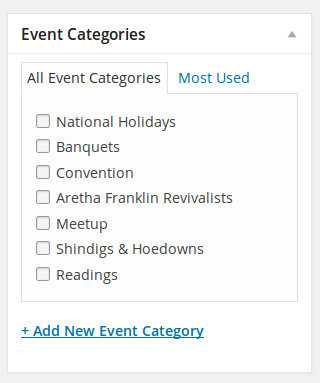
It is worth emphasizing, though, that these are not the same family of categories as used in posts. They definitely have a very similar (in fact, identical) user interface to regular post categories – but they are in fact a distinct family of categories.
In other words, if you happen to have an existing category you use for blog posts, you should not expect it to appear in the list of event categories – and if it does, well, it just happens to share the same name (but isn’t actually the same).
Event Options
Usually found close to the tag and event category meta boxes, you can find the Event Options:
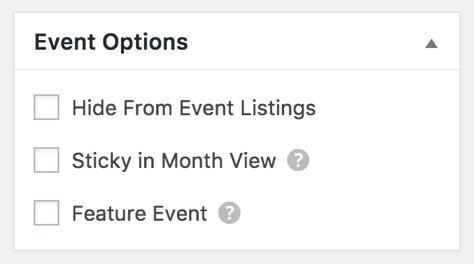
- Sometimes you want to be able to link to an event post (by email, or directly via a menu) but would prefer it isn’t included in the main event views – checking the Hide from Event Listings box accomplishes just that
- You might also happen to have a whole load of events taking place on the same day … naturally, that can cause some problems in month view – and so, at least by default, no more than 3 events per day are shown in that view – selecting Sticky in Month View helps you to ensure that this event is one of the ones that do show. The question mark’s help text reads, “When events are sticky in month view, they’ll display first in the list of events shown within a given day block.”
- The Feature Event option allows you to designate your most important events for extra emphasis on your pages. Featured events will be highlighted in event views, archives, and widgets, making it a great choice for special engagements that you’d like to have front and center.
Event Status
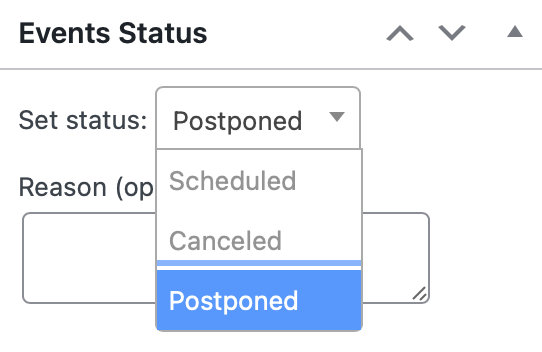
Usually found in the right sidebar directly under Event Options is the Event Status option. You can choose to select from one of the following options:
- Scheduled– Will list if the event is Scheduled
- Canceled– Will display the word Canceled at the top of your event page; you can opt to include a reason if you prefer.
- Postponed– Displays a Postponed label on your event; can include a reason if you’d like.
Managing Your Events
You can add, delete, and edit your events in a few different ways. You can either use the Events Manager to handle all of your events, use the standard list table, or use the Add Event single event option in the classic or block editor.
We’ll take a look at these options below, so you can see which one works best for your workflow.
Events Manager
You can find the Events Manager by clicking “Events” in the WordPress admin menu, then the “Manager” button at the top of the screen.
There, you’ll see what looks like the calendar that you typically see on the front end.
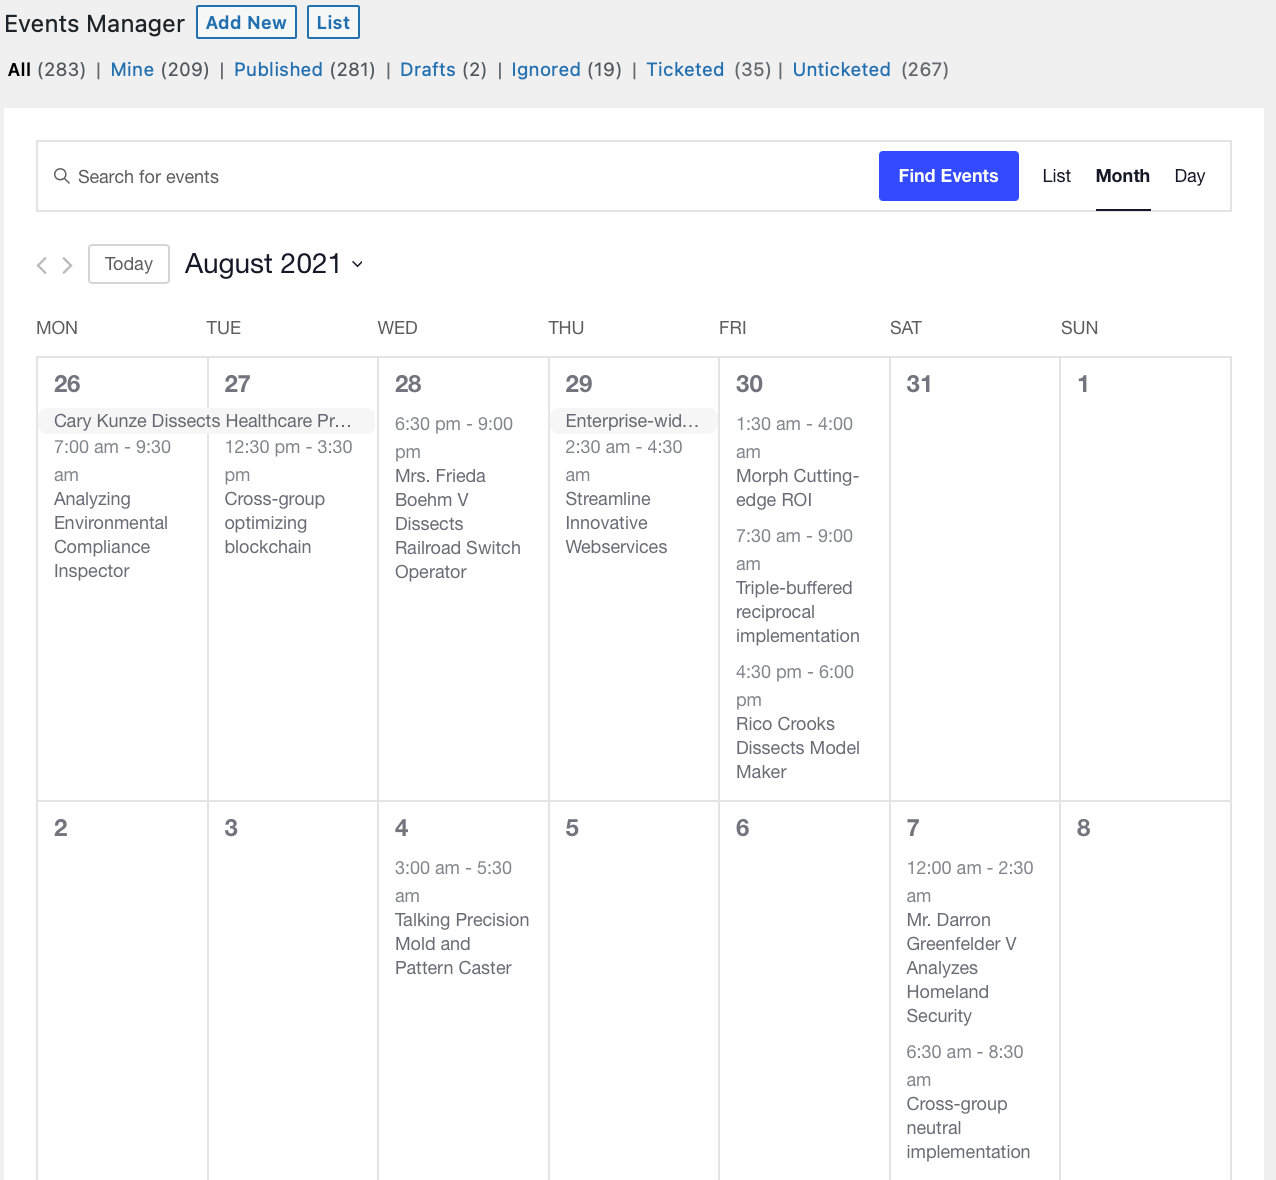
Hover over any one event, and you’ll see options to Edit the event, Trash the event, or View the event on the front end. You can add an event to any day by hovering over an individual day cell.

You can filter your events according to any of the available options under Events Manager. You can go directly to the classic single event page editor by clicking Add New at the top. You can see the standard list of events by clicking on List in the same place. If you have our Filter Bar add-on, you’ll see Filter Bar with Events Manager as well.

Standard Admin List
If you are using the free The Events Calendar plugin only, you will see a list of events instead of the Events Manager, which will look something like this:
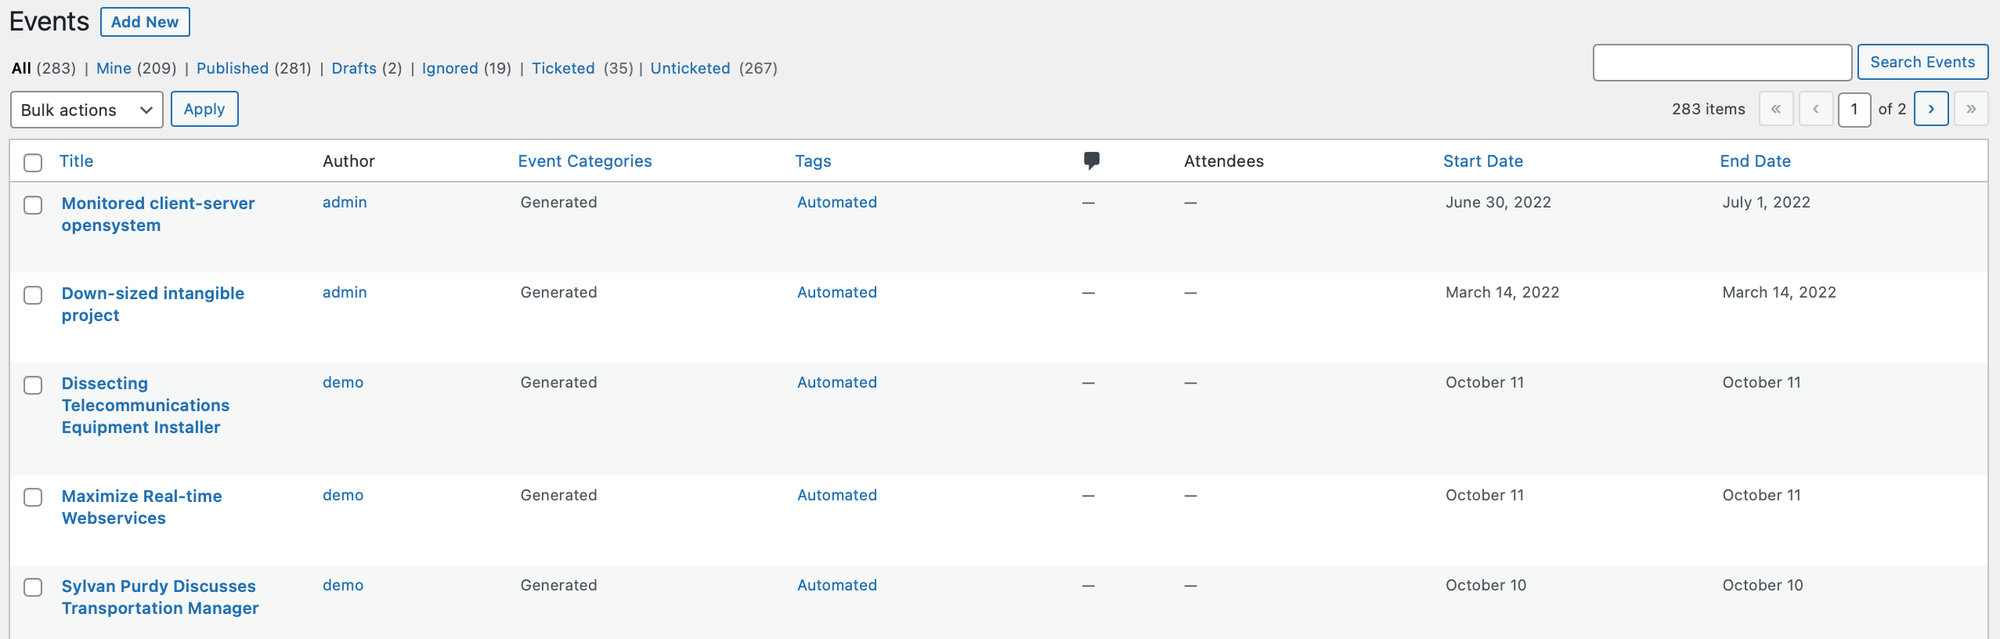
If you are using Events Calendar Pro, you may still prefer this way of editing your events instead. You can navigate to this view from the Events Manager by clicking on List next to Add New.
Using the Classic Editor
Alternatively, you can add a new event by navigating to Events > Add New in the WordPress Dashboard or by hovering over New > Event in the top toolbar when logged in.
This will take you directly to the classic Add Event page.
Using the Block Editor
If you’d prefer, you can use the Block Editor to add new events. You can change this setting under Events > Settings > General and check the box to activate the block editor for events.
You can also enable the Events Manager as the default page for viewing Events on the Administration page here.
This will affect anywhere you typically add events, whether it is through the Events Manager page or the classic Add Event page from the WordPress Dashboard.