This is an overview of the settings included in Event Tickets. We’ll first look at the settings available when the plugin is used as a standalone solution, then cover the additional settings that appear when Event Tickets is used alongside The Events Calendar.
All settings are found under Tickets → Settings in the WordPress dashboard.
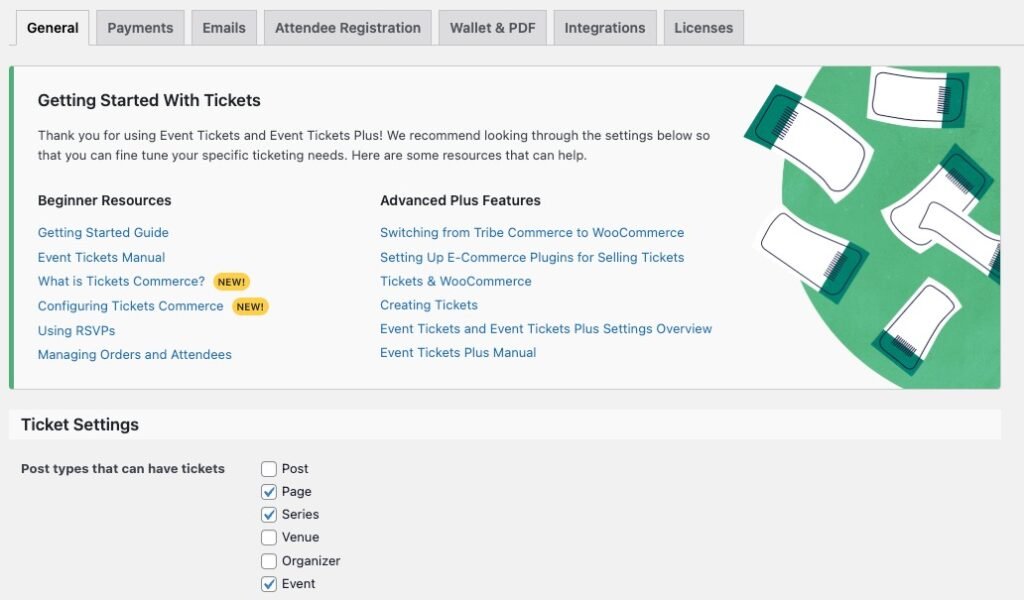
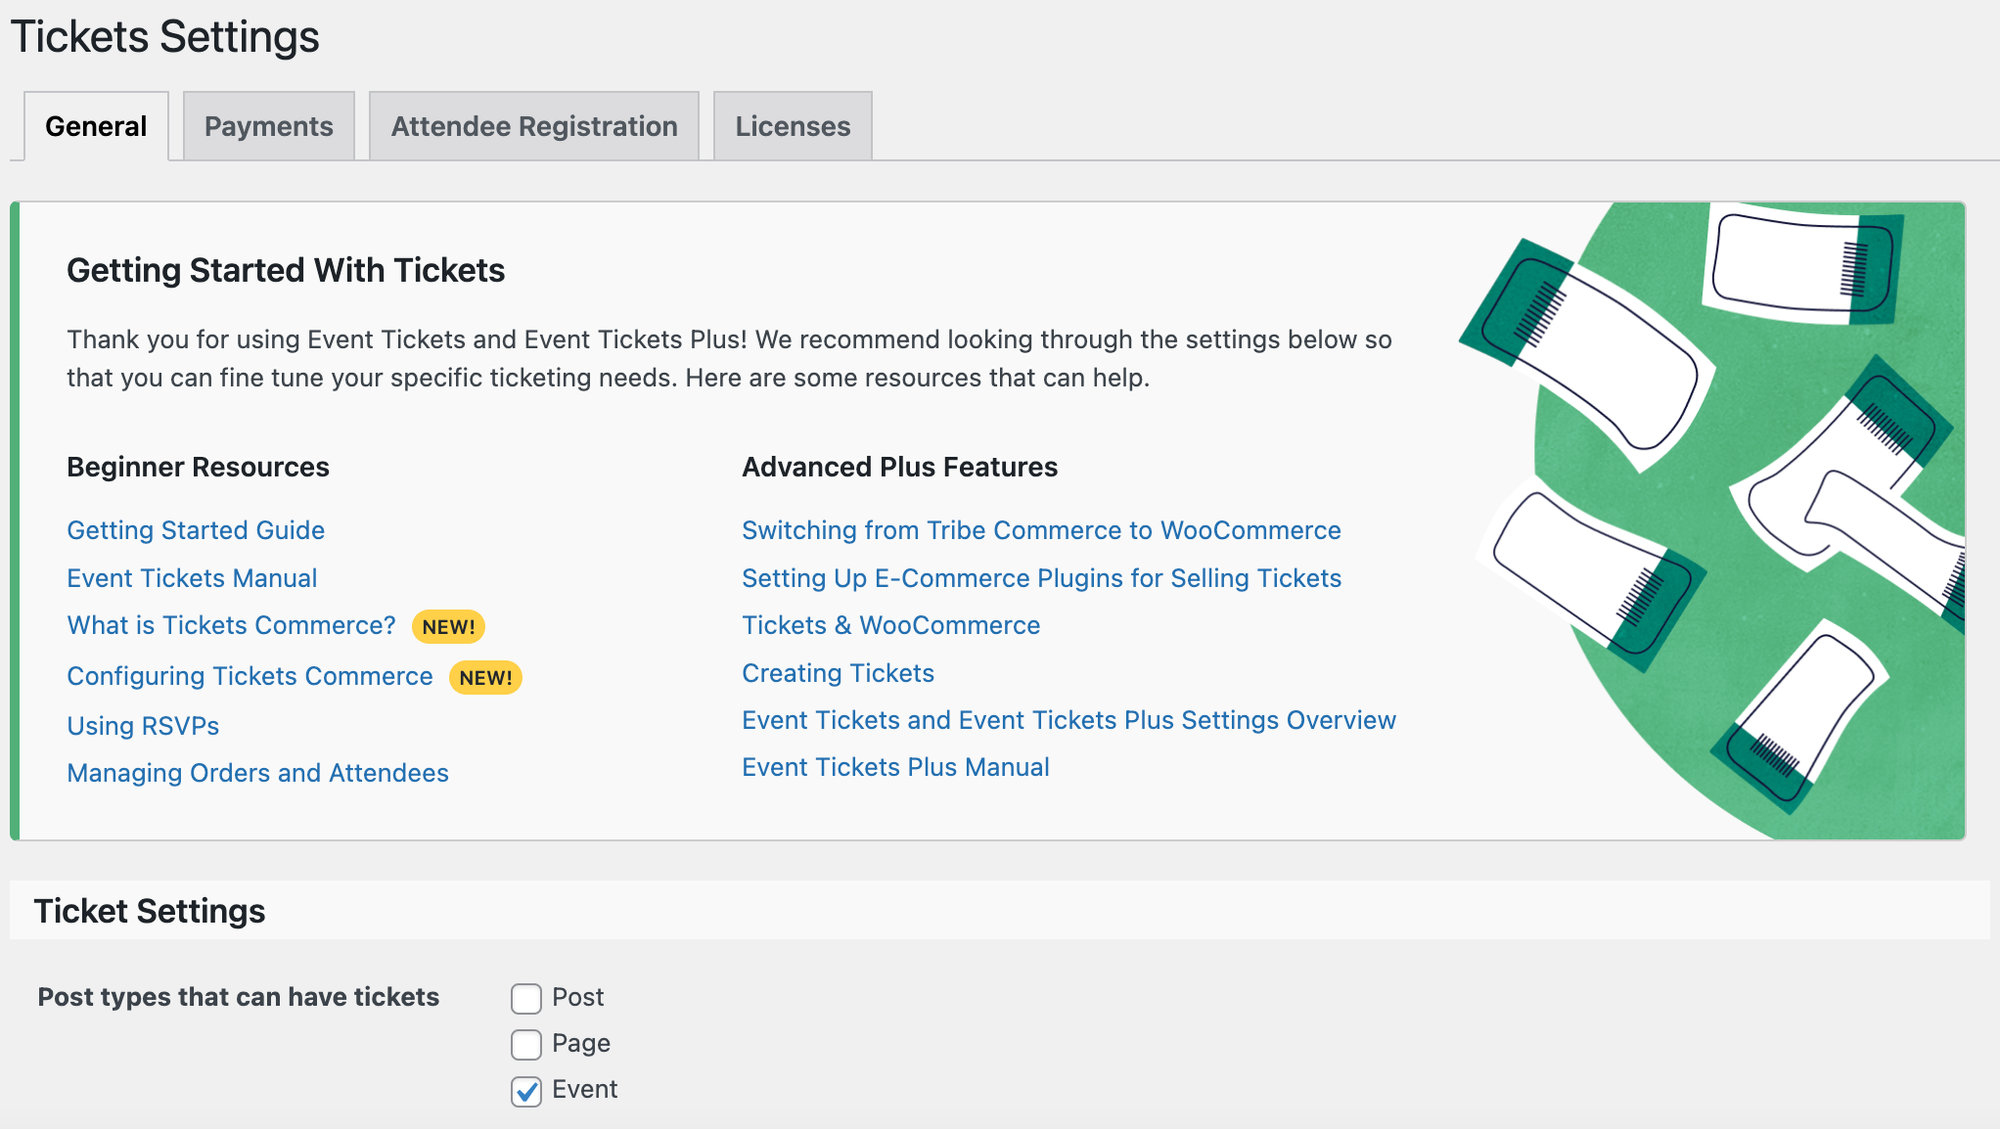
General Settings
- Post types that can have tickets — Determines which types of posts support creating tickets. Custom post types are supported and appear as options if available. When The Events Calendar is active, an “Event” option is added to this list. With Events Calendar Pro, a “Series” option also appears.
- Debug mode — Allows PHP errors to be logged to your site’s error log. Useful for troubleshooting. Disabled by default; only enable it for troubleshooting to maintain best performance.
- Compact Date Format — Sets how the date is formatted when selecting ticket start and end sale dates in the editor.
- RSVP Display Settings — Enables the updated RSVP experience, which changes the appearance and user flow of RSVPs.
Login Requirements
- Require users to log in before they RSVP — When enabled, users must be registered and logged in to complete an RSVP.
- Require users to log in before they purchase tickets — When enabled, users must be registered and logged in to purchase a ticket.
Payments

Here you can enable Tickets Commerce. Once enabled, you’ll see all Tickets Commerce options and a button to Connect Automatically with PayPal or Connect Automatically to Stripe.
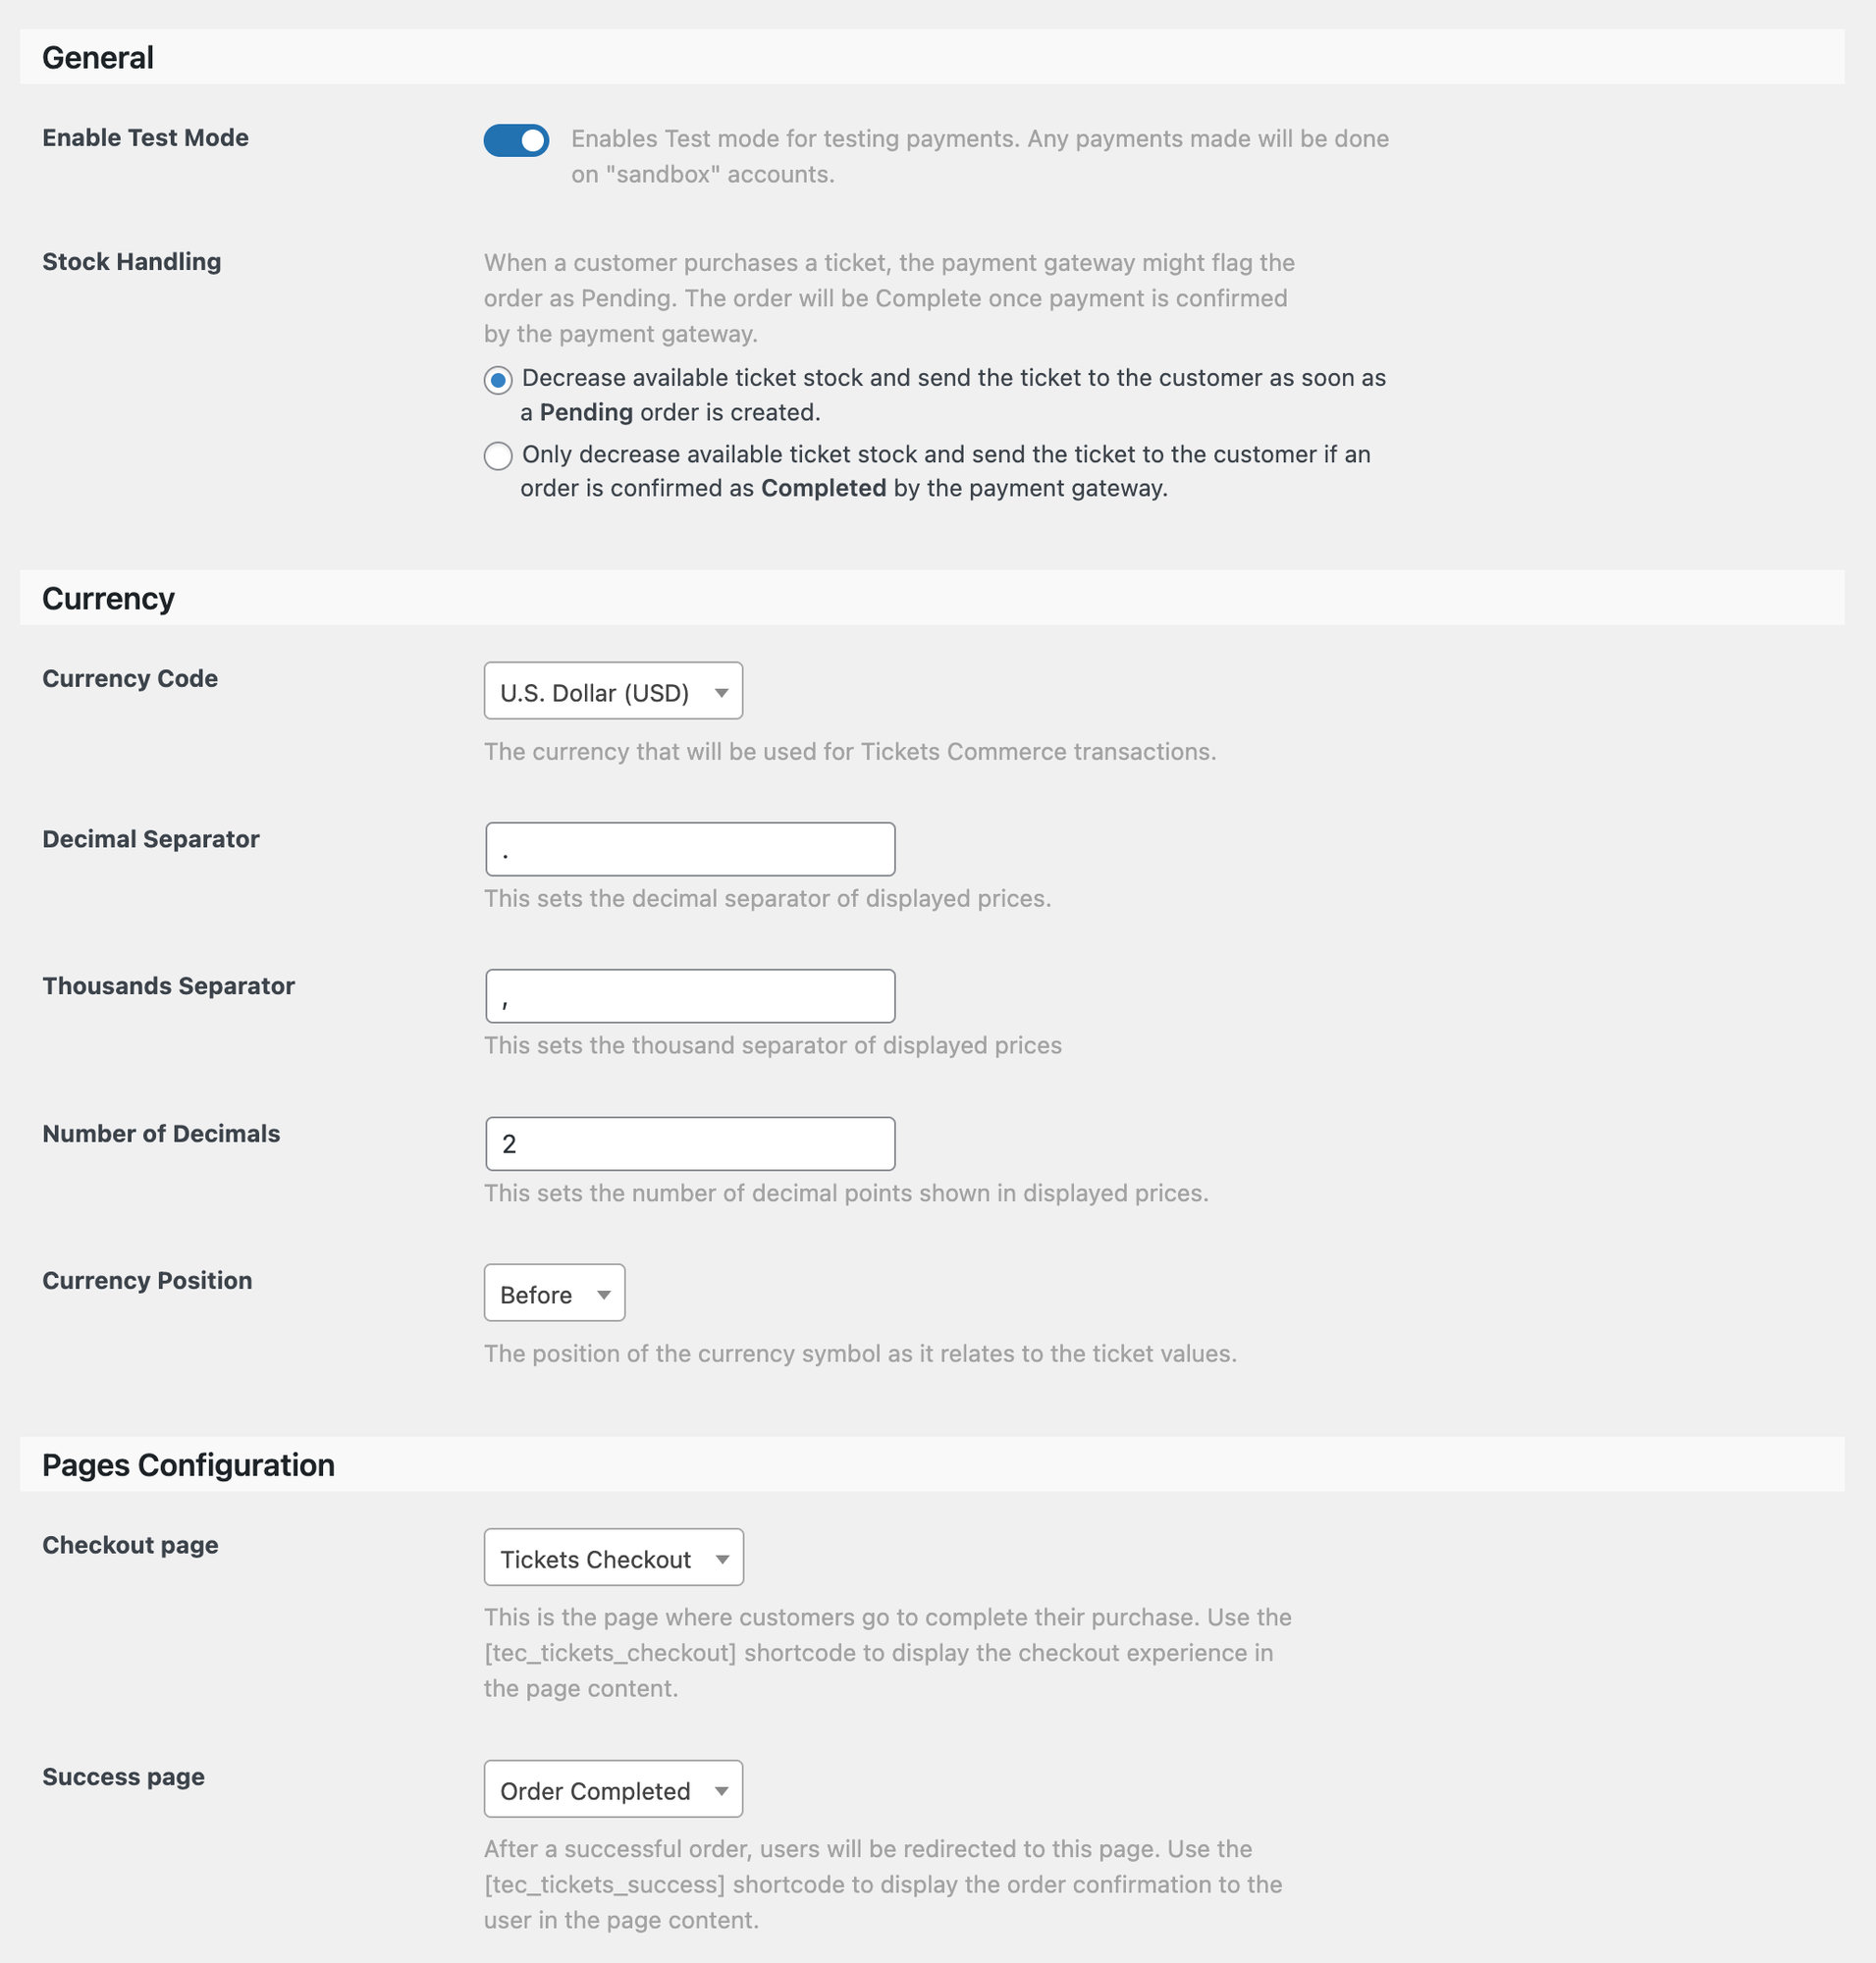
- Enable Test Mode — Allows you to test ticket sales without processing real payments. Enabled by default.
- Stock Handling — Controls at which point in the purchase process the available ticket count decreases.
- Currency Code — The currency used for Tickets Commerce payments.
- Decimal Separator — The decimal separator used when displaying ticket prices.
- Thousands Separator — The thousands separator used when displaying ticket prices.
- Number of Decimals — The number of decimal places shown in ticket prices.
- Currency Position — Sets whether the currency symbol appears before or after the price.
- Checkout Page — The page where customers complete their purchase. Display it using the
[tec_tickets_checkout]shortcode. - Success Page — The page users are directed to after completing checkout. Display it using the
[tec_tickets_success]shortcode. - Confirmation email sender address — Since version 5.6.0 this setting has moved to Tickets → Settings → Emails. Sets the “from” address for purchase and ticket confirmation emails. Defaults to the site email address in WordPress settings.
- Confirmation email sender name — Since version 5.6.0 this setting has moved to Tickets → Settings → Emails. The sender name that appears in the recipient’s inbox.
- Confirmation email subject — Since version 5.6.0 this setting has moved to each email’s individual settings under Tickets → Settings → Emails. Sets the subject line for ticket confirmation emails.
Emails
If your Event Tickets install was created before version 5.6.0, you can enable the Tickets Emails system here. For installs after version 5.6.0, this is enabled by default.
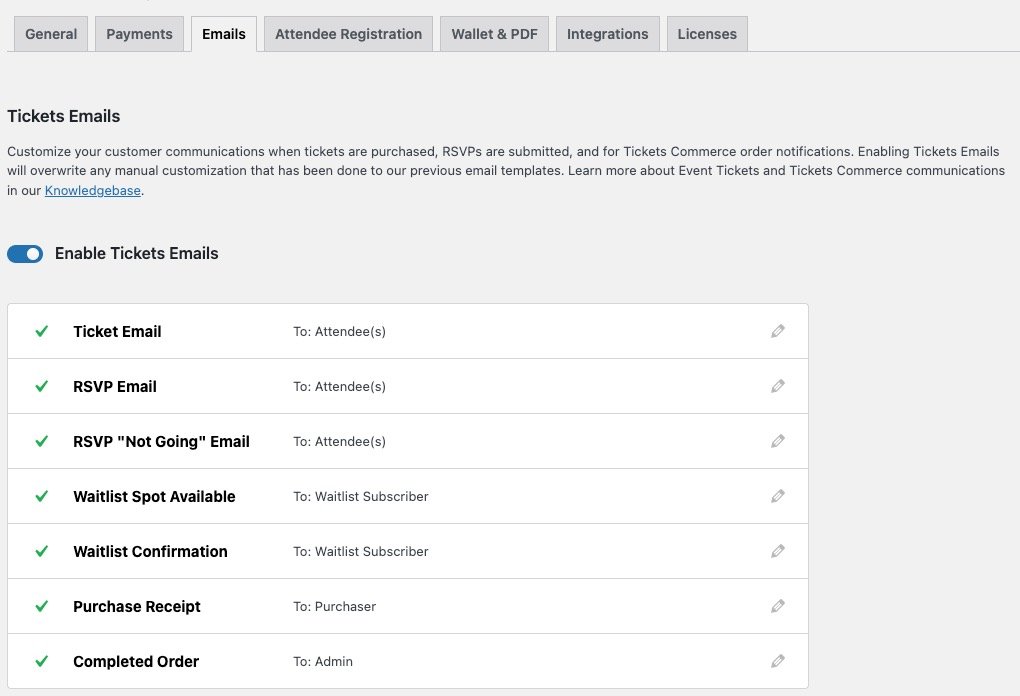
Event Tickets includes the following email types, each configurable independently:
- Ticket Email — Sent with the ticket(s) upon purchase.
- Series Pass Email — Sent with a series pass ticket upon purchase.
- RSVP Email — Sent when an RSVP is confirmed.
- RSVP “Not Going” Email — Sent when a user confirms they are not attending.
- Waitlist Spot Available — Sent when a waitlist spot opens, including a link to purchase.
- Waitlist Confirmation — Sent to confirm that a user has been added to the waitlist.
- Purchase Receipt — The purchase receipt sent to the buyer after a Tickets Commerce order.
- Completed Order — Sent to the site admin when a Tickets Commerce order is completed.
Settings for each email type are detailed in the Event Tickets Emails article. Below the email list, the following global email settings apply to all emails:
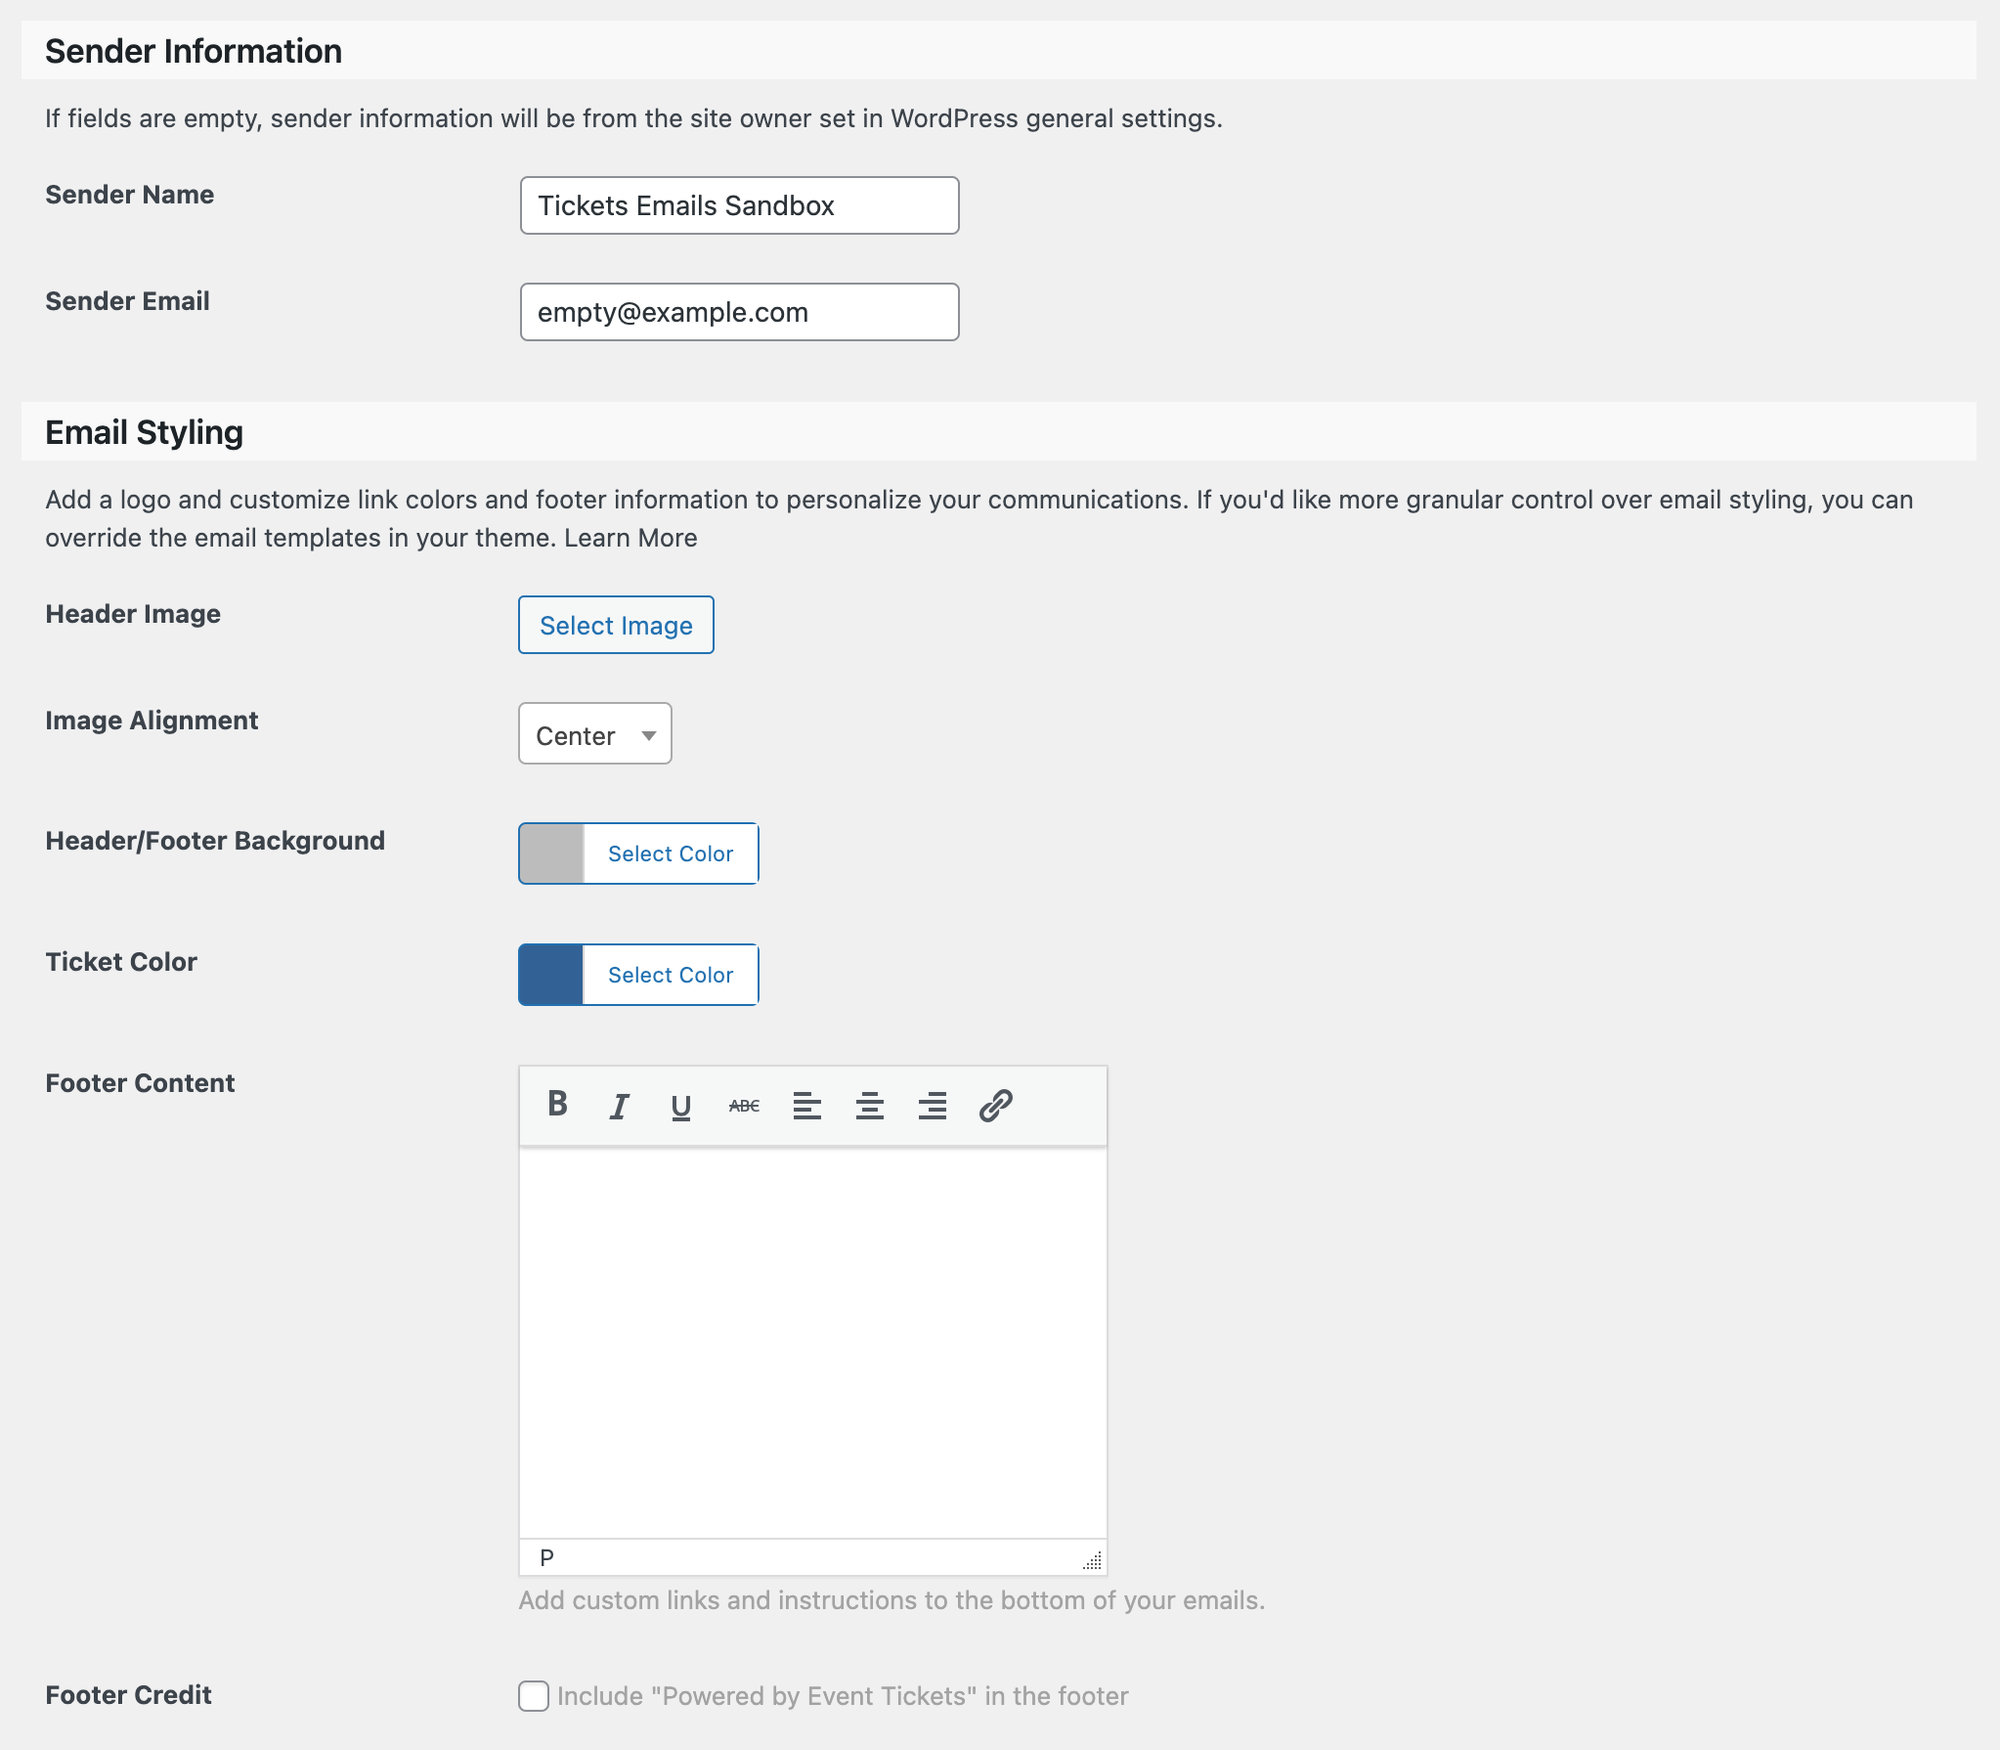
- Sender name — The name shown as the sender in the recipient’s inbox.
- Sender email — The email address used as the sender for all Event Tickets emails.
- Header image — The image displayed in the email header.
- Image alignment — Horizontal alignment of the header image.
- Header/Footer background — Background colors for the header and footer. Use
#50B078to revert to the original color. - Ticket color — Background color for the ticket section in Ticket and RSVP emails. The font color adjusts automatically for readability.
- Footer content — Additional text placed in the email footer.
- Footer credit — Available with Event Tickets Plus. Allows you to remove the “Powered by Event Tickets” credit.
A Preview button is available on each email’s settings page to show how the email will look before sending.
Attendee Registration
(Event Tickets Plus Only)
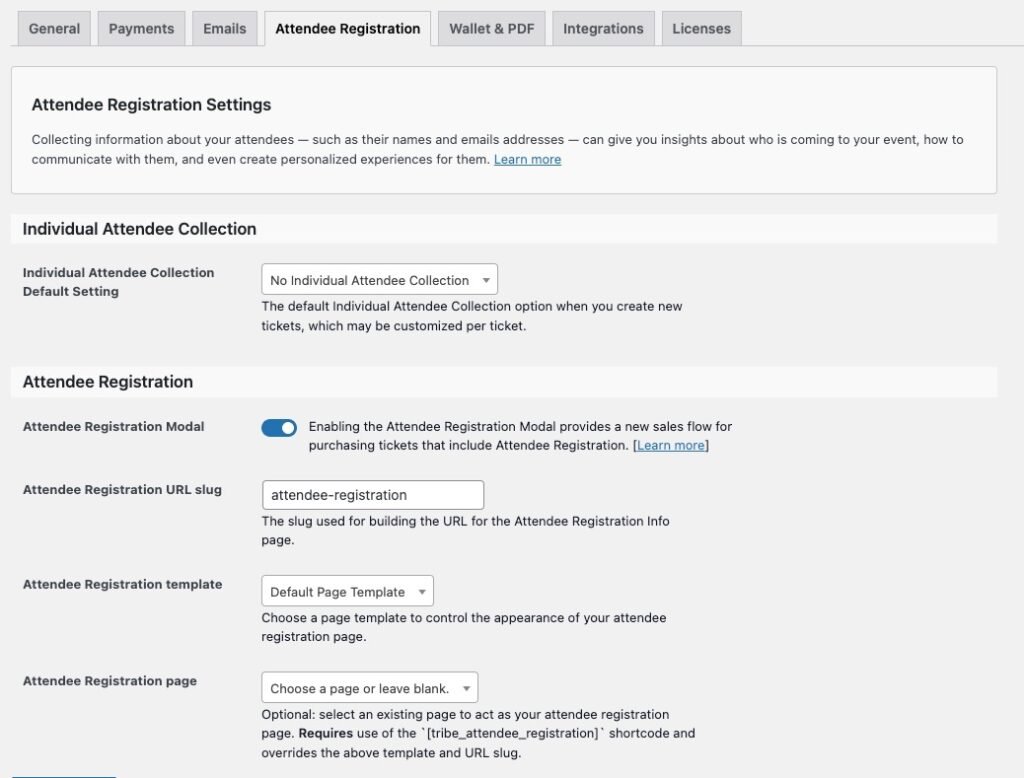
- Individual Attendee Collection Default Setting — The default attendee collection option when creating new tickets. Can be customized per ticket.
- Attendee Registration Modal — Enables a sales flow for purchasing tickets that includes attendee registration.
- Attendee Registration URL slug — The URL slug for the attendee registration page.
- Attendee Registration Template — The page template controlling the appearance of the attendee registration page.
- Attendee Registration Page — (Optional) Select an attendee registration page that uses the
[tribe_attendee_registration]shortcode.
Wallet & PDF
(Event Tickets Plus Only)
Apple Wallet Passes
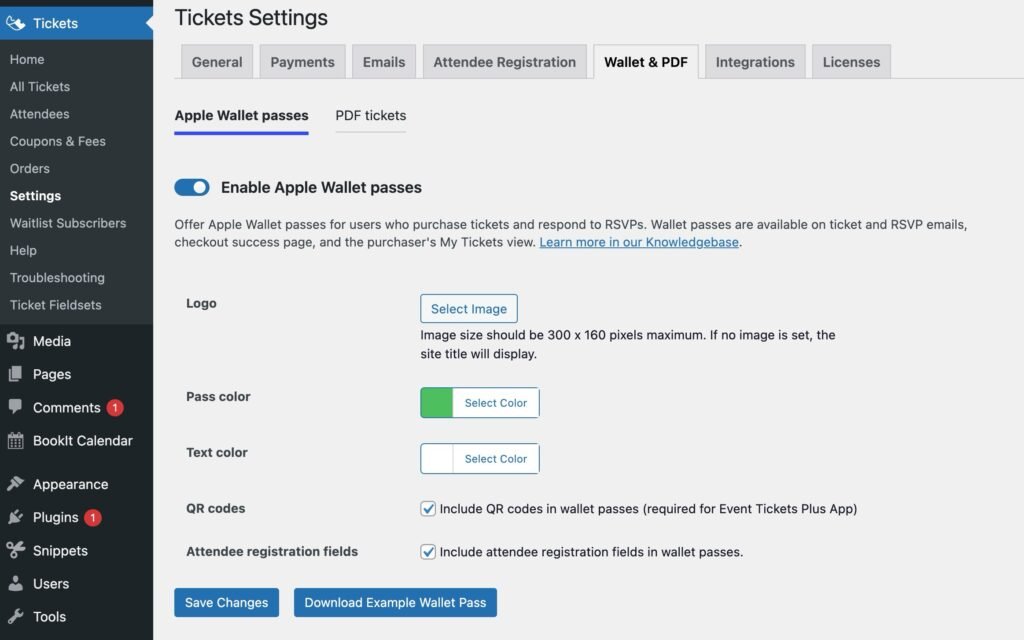
- Enable Apple Wallet Passes — Global toggle for Apple Wallet passes. When enabled, attendees can add passes to Apple Wallet after purchasing tickets or confirming RSVPs.
- Logo — The logo shown on the pass. Defaults to the logo set in Emails settings if defined. If no logo is set, the site title is used.
- Pass color — Background color of the pass.
- Text color — Color of text on the pass. Ensure sufficient contrast with the pass color.
- QR codes — Enable or disable QR codes on passes for use with the Event Tickets Plus App.
- Attendee registration fields — Enable or disable the inclusion of attendee registration fields on the back of the pass.
PDF Tickets

- Enable PDF tickets — Global toggle for PDF tickets. When enabled, attendees receive PDF tickets after purchasing or confirming RSVPs.
- Header image — The image shown in the PDF header. Defaults to the Emails settings logo if defined.
- Image alignment — Alignment of the header image: Left, Center, or Right.
- Header color — Background color for the PDF header. The header image displays on top of this color.
- Additional content — Any additional information to include on the PDF ticket, with basic formatting support.
- QR codes — Enable or disable QR codes on PDF tickets.
- Attendee registration fields — Enable or disable the inclusion of attendee registration fields on the PDF.
- Footer credit — Controls whether “Powered by Event Tickets” appears in the PDF footer.
Integrations
(Event Tickets Plus)
Event Tickets Plus App
- Use QR Codes — Whether to include QR codes in ticket emails. Requires Event Tickets Plus.
- Restrict Check-in — Whether to restrict check-in of QR tickets to the event’s date and time.
- Check-in Window — How far in advance to allow attendee check-in. Requires “Restrict Check-in” to be enabled.
WooCommerce Support
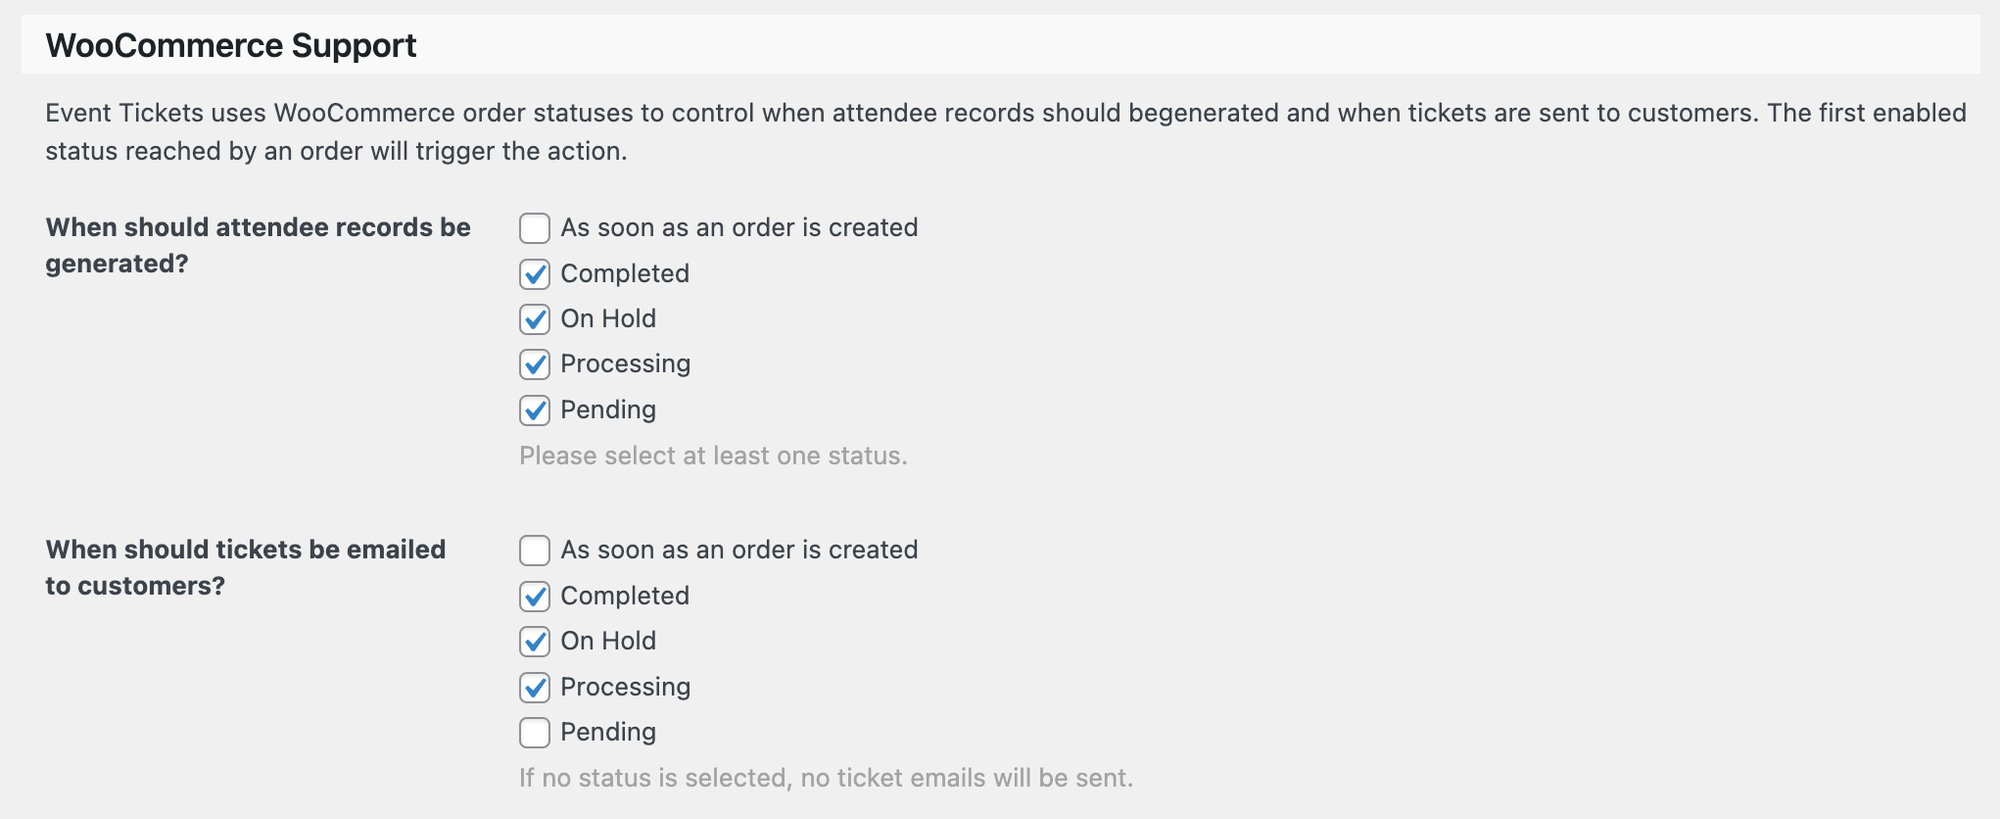
- When should attendee records be generated? — Choose the order status at which attendee records are created.
- When should tickets be emailed to customers? — Choose the order status at which ticket emails are sent. No email will be sent if no status is selected.
Licenses
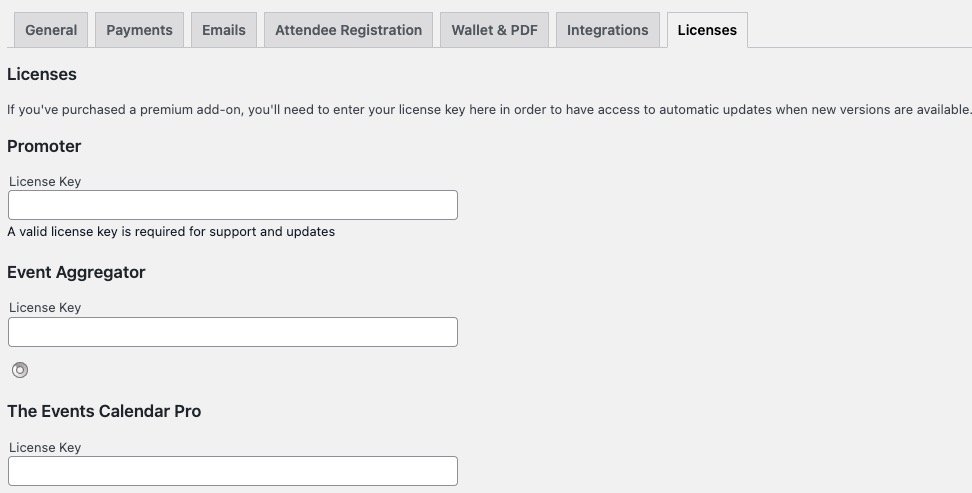
Event Tickets does not require a license. Event Tickets Plus requires a license key, which is entered here. If you use Promoter with Event Tickets, this is also where you enter the Promoter license key.
Event Settings
(with The Events Calendar)
When Event Tickets is used alongside The Events Calendar, additional settings appear under Events → Settings.
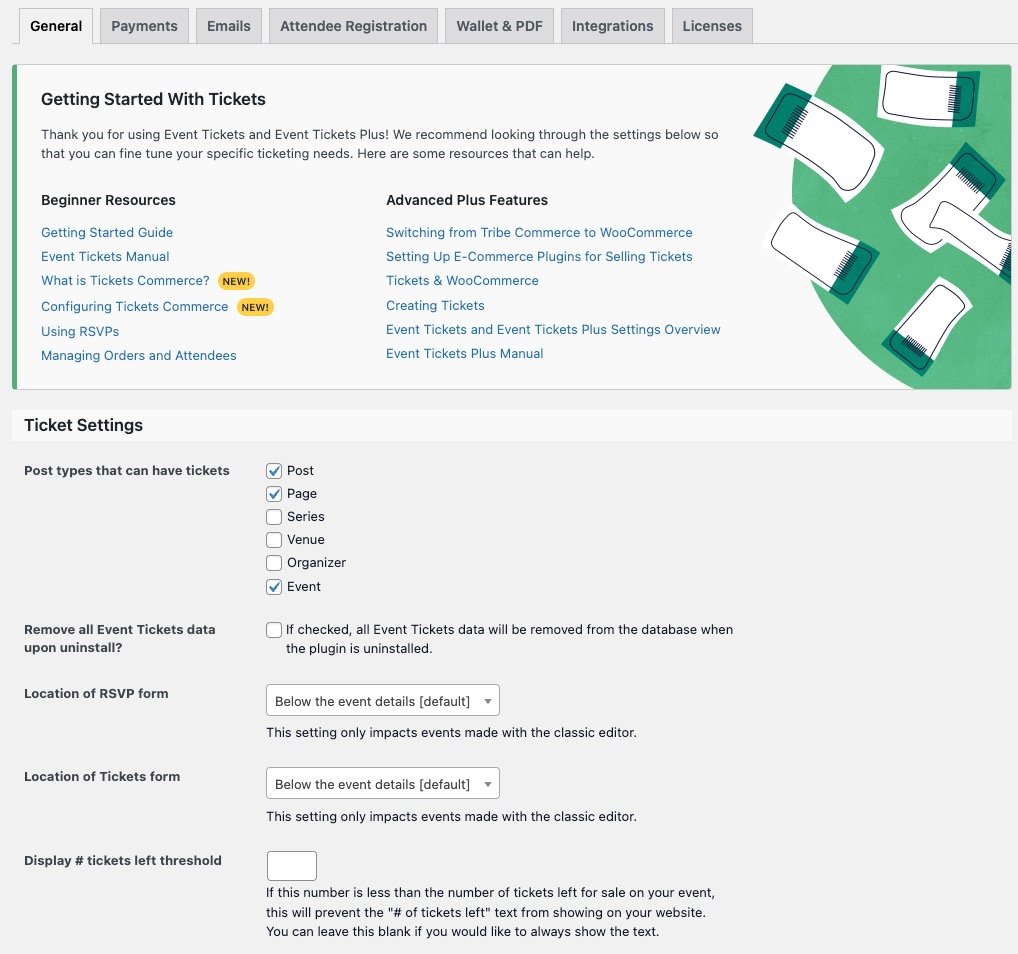
- Post types that can have tickets — An “Event” option is added to the list. With Events Calendar Pro, “Series” also appears.
- Location of RSVP form — Where the RSVP form displays on an event post. Options: Below the event details (default), Above the event details, Below the event description, Above the event description.
- Location of Tickets form — Where the Tickets form displays on an event post. Same options as the RSVP form.
- Display # tickets left threshold — The number at which the “X tickets left” text appears on the ticket form. Leave blank to always show the remaining count.
Adding Tickets to Custom Post Types
Once your custom post type is configured, create a new post of that post type in the WordPress admin. For example, if your post type is called “Portfolio” then you might see an item in the WordPress admin menu with that same name, along with an option under it create a new Portfolio post.
The first thing is to make sure that the Event Tickets plugin is configured to work with your custom post type. Event Tickets allows you to specify exactly which post types should be able to use tickets and RSVPs.
Navigate to Tickets → Settings → General from the WordPress dashboard. There is an option to enable tickets and RSVPs for specific post types.
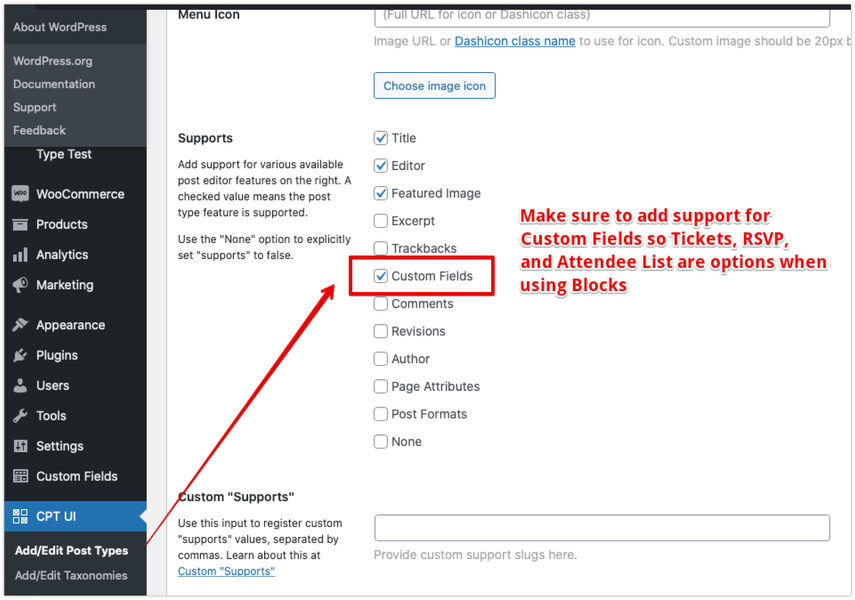
The next step is to check that the custom post type supports custom fields for posts. Custom post types do not support them right out of the box, so that is something we need to enable.
If you have registered your custom post type with a function, then custom fields can be enabled using the $supports argument:
'supports' => array( 'title', 'editor', 'author', 'thumbnail', 'excerpt', 'custom-fields' ),
However, if you’re using the Custom Post Type UI plugin, then navigate to CPT UI → Add/Edit Post Type → Edit Post Types from the WordPress dashboard. Select the custom post type your created from the Select drop down menu, then scroll down to the “Supports” section of the page.