Once events have been imported into The Events Calendar with Event Aggregator, there are a few different management surfaces to know about: the imported events themselves, the Ignored archive (for removing events from your calendar without losing them), and the Scheduled Imports tab (for managing repeating imports). This article covers all three.
For the import setup flow itself, see Importing Events with Event Aggregator.
Import History
Event Aggregator keeps a log of all import activity. Navigate to Events → Import and click the History tab to see a list of previous imports. You can filter the list by import source (e.g., only Google Calendar imports).
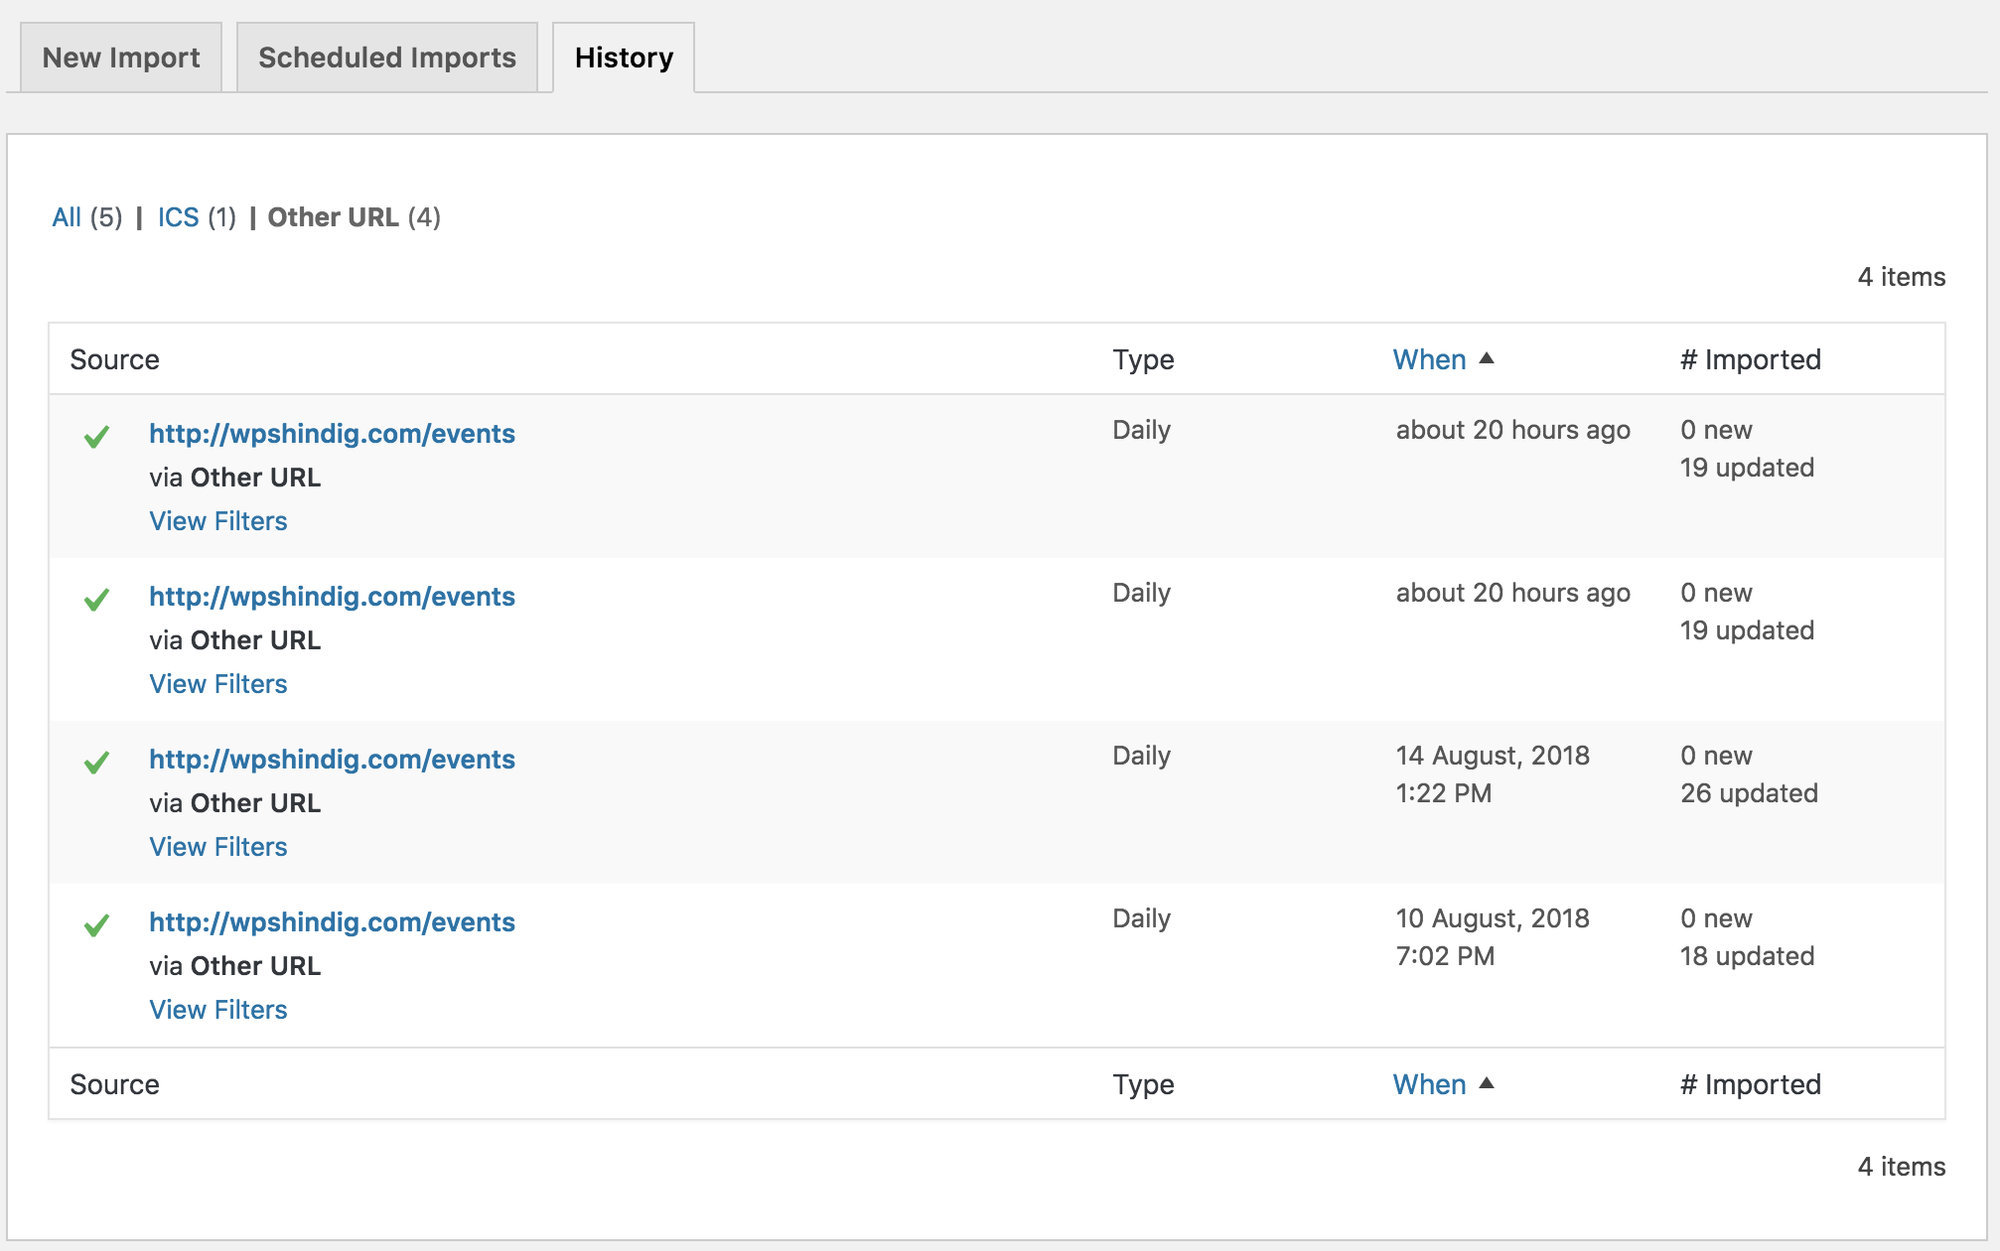
- Source — Where events were imported from (file name, source name, or URL).
- Type — Whether the import was one-time or scheduled.
- When — The time of the import.
- # Imported — How many events were imported in that instance.
Clicking the source of a scheduled import opens that schedule’s settings so you can review or edit them before the next run.
Viewing Imported Events
All imported events appear in the main Events screen in the WordPress dashboard alongside your manually-created events. When viewing an imported event in the admin, a metabox to the right of the editor shows import details:
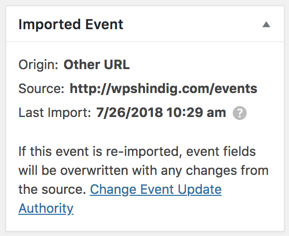
- Origin — The platform the event was imported from (Meetup, iCalendar, Eventbrite, etc.).
- Source — The specific URL or file the event came from.
- Last Import — When information for this event was last fetched from the source. If Event Aggregator is configured to preserve local changes, changes made at the source after this timestamp won’t override your local edits. You can adjust this behavior via the Change Event Update Authority link in the metabox.
Editing Imported Events
Editing an imported event works the same way as editing any other event in The Events Calendar: click the event, make your changes, and save.
The catch: if the event gets re-imported (either manually or via a scheduled import) and has been updated at the source, your edits may be overwritten. To protect local edits from being overwritten, go to Events → Settings → Imports and set Event Update Authority to one of the “preserve local changes” options:
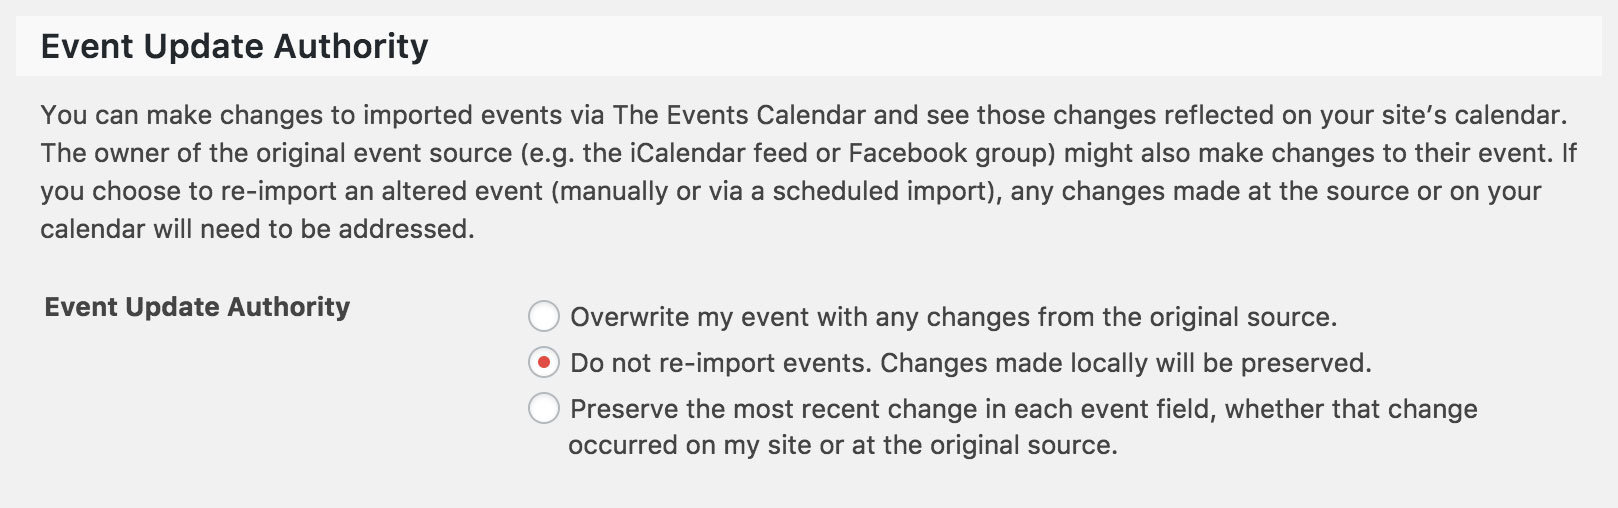
- Do not re-import events. Changes made locally will be preserved — Imports only new events; never updates existing ones.
- Import events but preserve local changes to event fields — Updates unchanged fields while keeping your custom edits intact.
⚠️ Note: Any other Event Update Authority option allows Event Aggregator to overwrite your edits to an event listing the next time that event is imported.
Ignoring Events
Marking an imported event as Ignored is similar to moving a regular event to the trash — the event record still exists, but the event is hidden from your calendar. Ignored events have their own archive in the events admin, just like Trash.
The key advantage: if an Ignored event is imported a second time (from the same source), it may update based on your import settings, but it won’t be duplicated or re-added to your calendar. This lets you safely run bulk or scheduled imports without worrying about unwanted events reappearing.
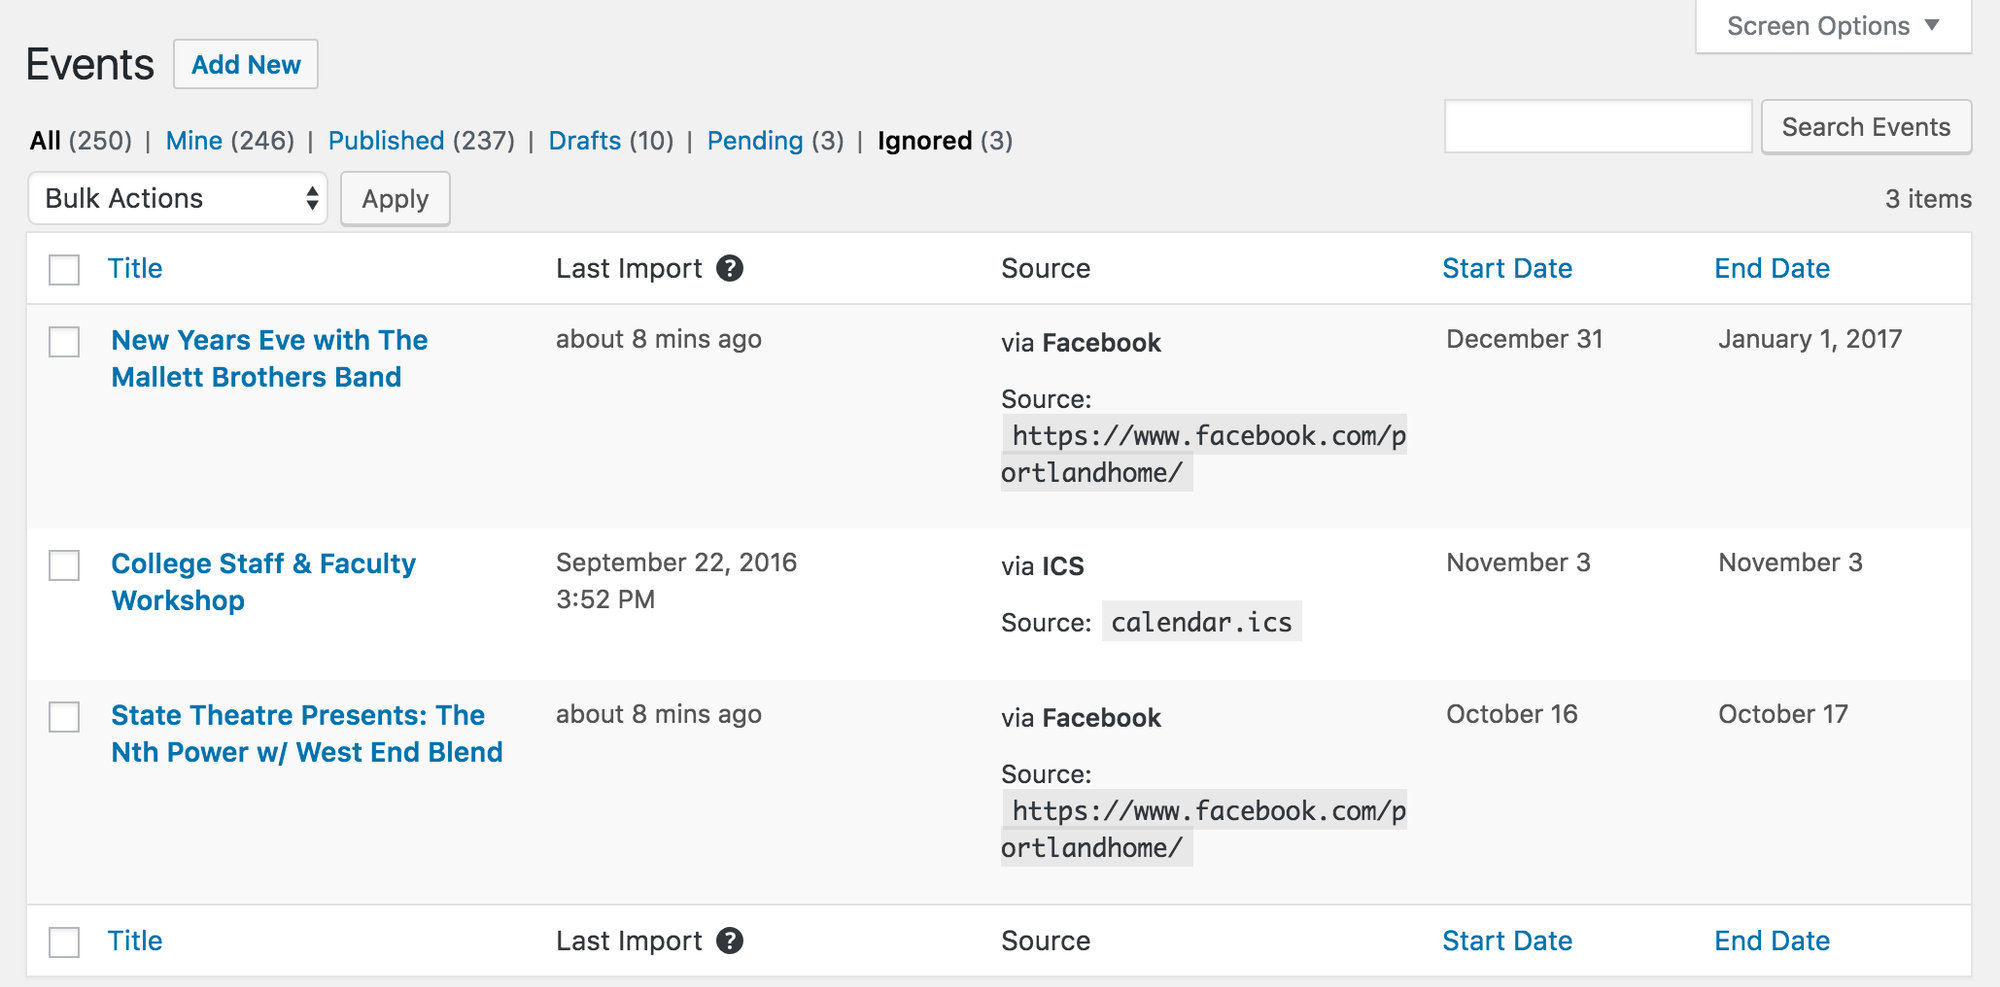
How to Ignore an Event
From the admin events list, click the red Hide & Ignore link under any individual event.
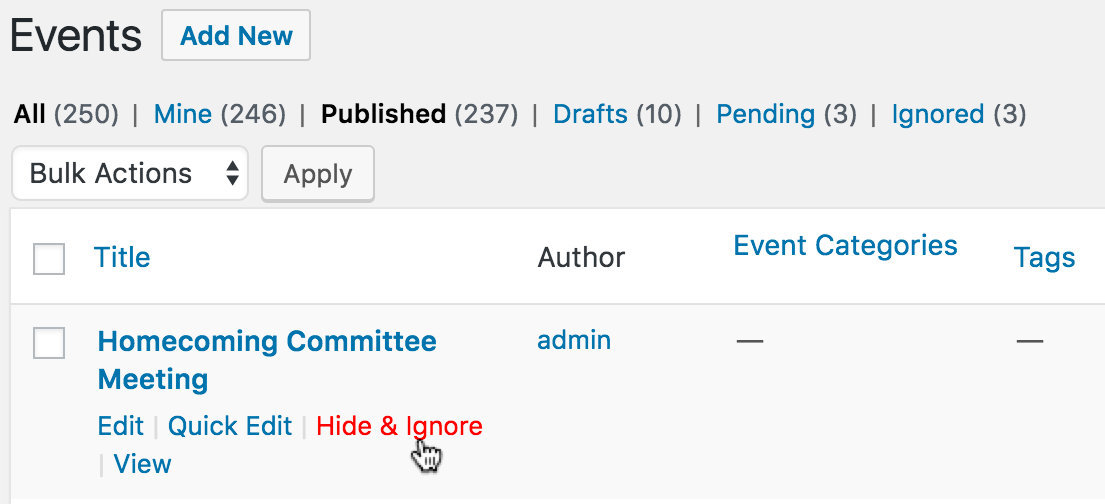
To ignore multiple events at once, select them and use the Move to Trash bulk action. Any imported events in the selection will be moved to Ignored; non-imported events will move to Trash as normal.
You can also ignore an event from inside the event editor — click the red Hide & Ignore link under Publish Options.
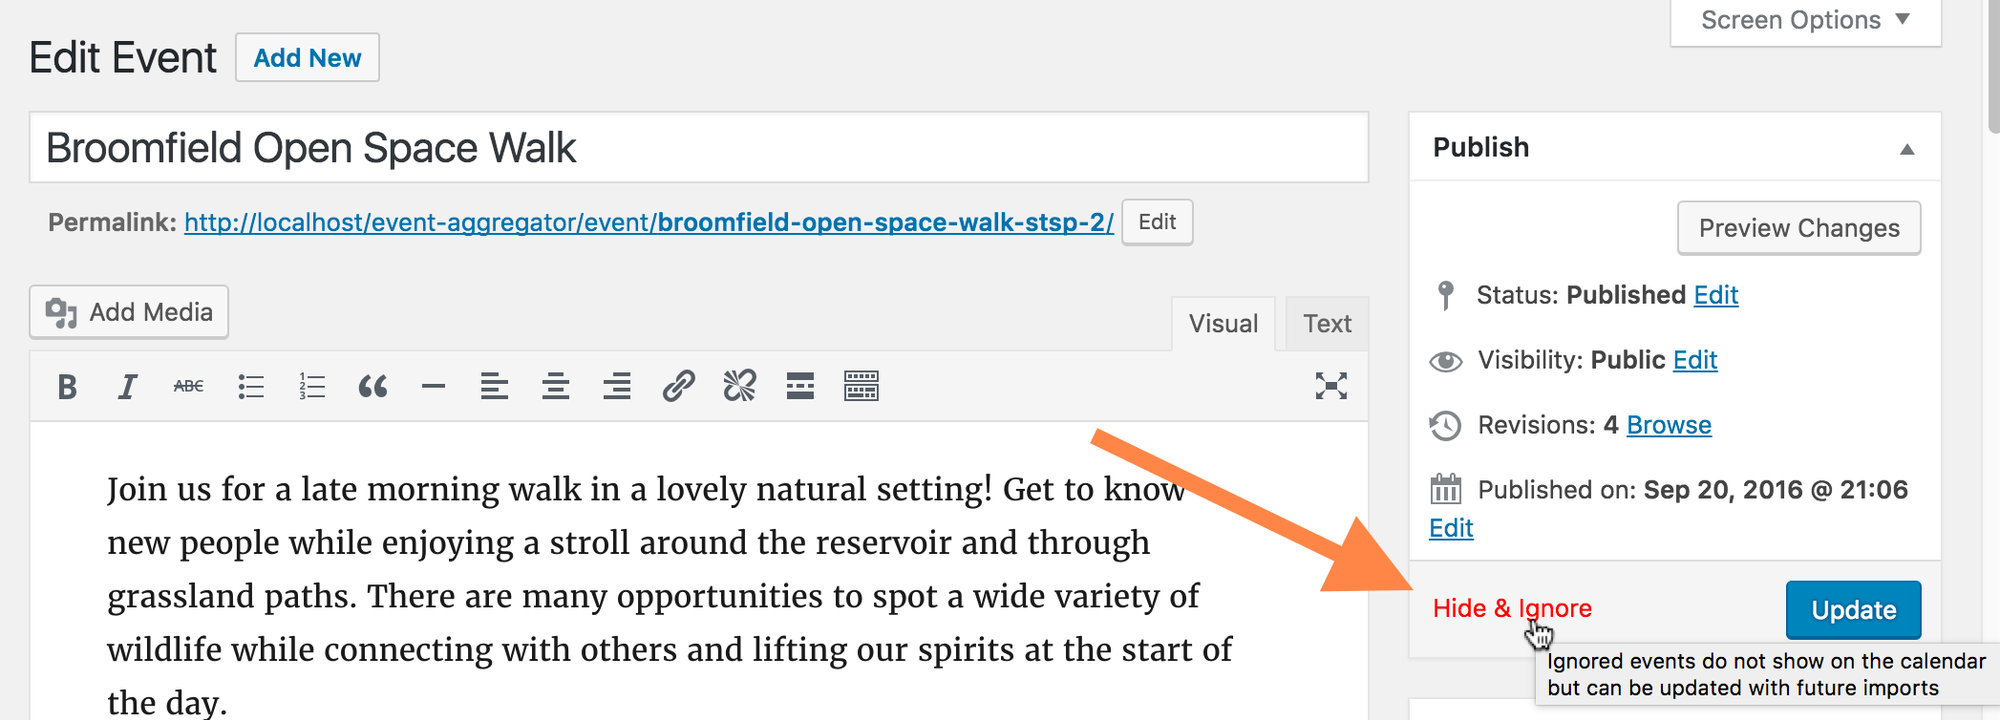
Ignored events can still be edited and updated like standard events. They’ll continue to be hidden from your calendar unless you specifically restore them.
Restoring an Ignored Event
From the Ignored archive, click Restore under an individual event to return it to Published status. Site visitors will be able to view the event again.

To restore multiple events at once, select them and use the Restore bulk action. From the single event editor, you can restore an event by clicking the blue Publish button.
Permanently Deleting Ignored Events
You can permanently delete ignored events, but consider carefully before doing so. If you permanently delete an ignored event and that same event gets re-imported (for example, through a scheduled import), the event will come back and appear on your calendar. To prevent duplication and keep the event off your calendar, the safer approach is to leave it as Ignored.
If you do want to delete permanently, hover over the event in the Ignored archive and click the red Delete Permanently link.

You’ll also see a Delete Permanently link on individual ignored events in the editor. Once an event is permanently deleted, it’s gone from your site and your database.
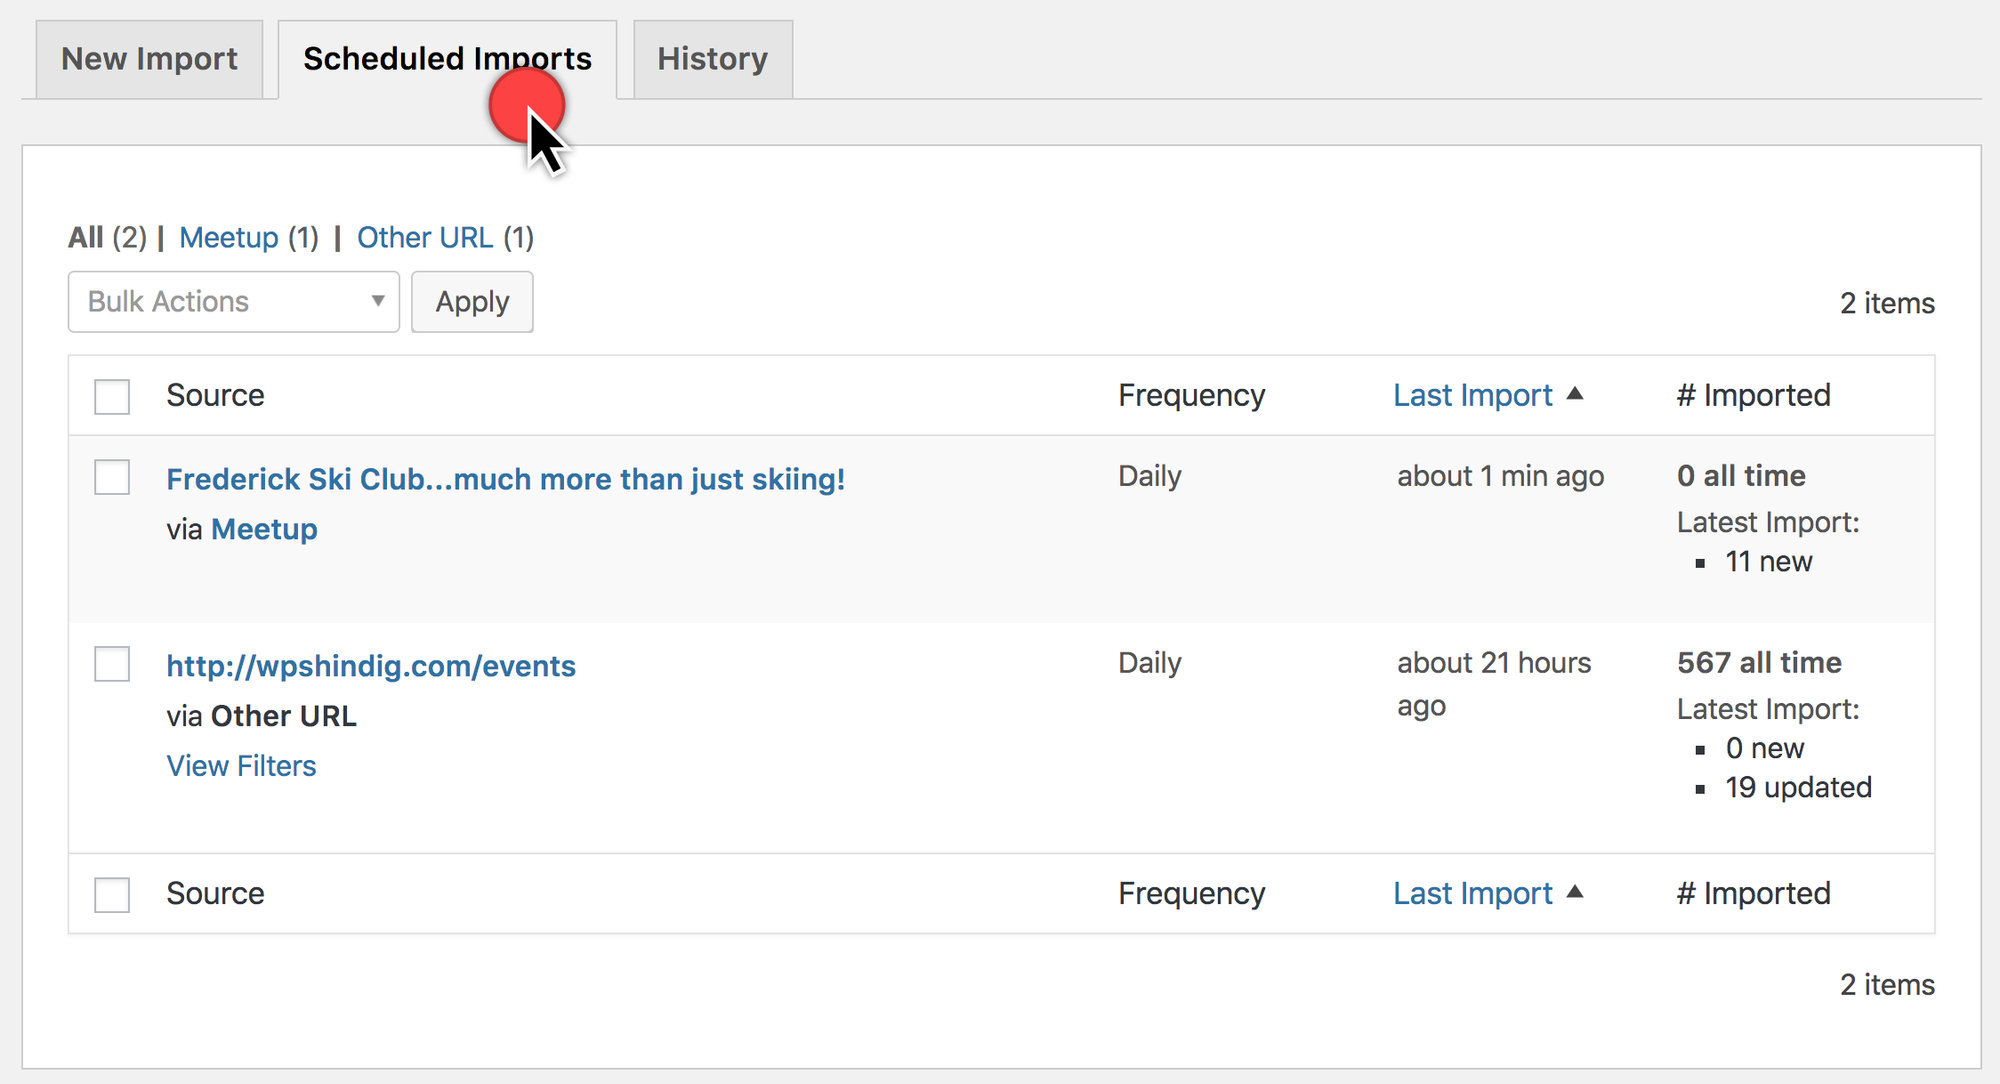
Managing Scheduled Imports
Scheduled imports are repeating imports that run on a schedule you define (hourly, daily, weekly, etc.). Once saved, you can find, edit, run, or delete them at any time.
Navigate to Events → Import and click the Scheduled Imports tab. This tab is only visible if you have at least one scheduled import.
Each scheduled import shows the time of the most recent run, the number of events imported and updated in that run, and an all-time total of events imported via that schedule. Scheduled imports are listed chronologically by most recent run.
Editing a Scheduled Import
Hover over a scheduled import and click Edit. Available settings:
- Schedule frequency — How often the import runs.
- URL — The source you’re importing from.
- Status — The status assigned to imported events (Published, Draft, Pending Review, Private).
- Category — The event category applied on import.

Manually Running a Scheduled Import
Scheduled imports run automatically, but you can trigger a run at any time by hovering over the import and clicking Run Import. The import queues up to run as soon as possible.

Deactivating or Deleting a Scheduled Import
To pause a scheduled import without deleting it, edit the import and change its frequency to On Demand. It stays in your list but doesn’t run automatically.
To remove a scheduled import permanently, hover over it and click Delete. Event Aggregator prompts for confirmation before deleting.

⚠️ Important: A scheduled import cannot be recovered once deleted. Deleting a scheduled import does not remove events already imported to your site — it only stops future runs.
Temporarily Disabling All Scheduled Imports
To pause all scheduled imports at once, go to Events → Settings → Imports and find the Event Aggregator Control section. Check Disable Event Aggregator imports to stop all scheduled imports until unchecked. Manual CSV imports still work while this setting is enabled; other import types do not.
This setting does not affect events already on your site — it only prevents future imports from running.
Import Limits
Your Event Aggregator license limits the number of scheduled import tasks you can run each day. Each successful run counts as a single import, regardless of how many events are included — a 100-import license allows 100 total scheduled tasks per day of any size.
What Counts Toward Your Daily Limit
- Scheduled imports — Every run of a scheduled import counts, whether automatic or manually triggered.
- Manually-triggered instances of scheduled imports — Clicking Run Import before the next scheduled run still counts.
- Staging sites — Each import request counts against your limit, whether from a live or staging site.
What Doesn’t Count
- Individual events — A single import of 90 new events counts as one import, not 90.
- Previews — Previewing an import’s contents before saving or running doesn’t count.
- One-time manual imports — Manual imports from any source don’t count against your daily limit.
- Initial saves of scheduled imports — The first submission that creates a scheduled import doesn’t count; only subsequent runs do.
For troubleshooting duplicate events, silently skipped imports, or “Other URL” REST API errors, see Troubleshooting Event Imports.