Event Aggregator imports events from other calendar sources, including Google Calendar, iCalendar, Meetup and Eventbrite, as well as ICS and CSV files. This article covers the step–by-step process for importing from another site using a feed or URL. Separate tutorials explain the process for importing from a CSV file or ICS file.
Before you can import from one of these sources, you’ll first need to have a valid license for Event Aggregator, which you can check in The Events Calendar settings in WordPress, under Events → Settings → Licenses. If you do have a valid license, then you can head over to the Events → Import screen and see additional calendar sources available in the Import Origin options.
Select the import source
Click the Import Origin field and select the source you are importing from.
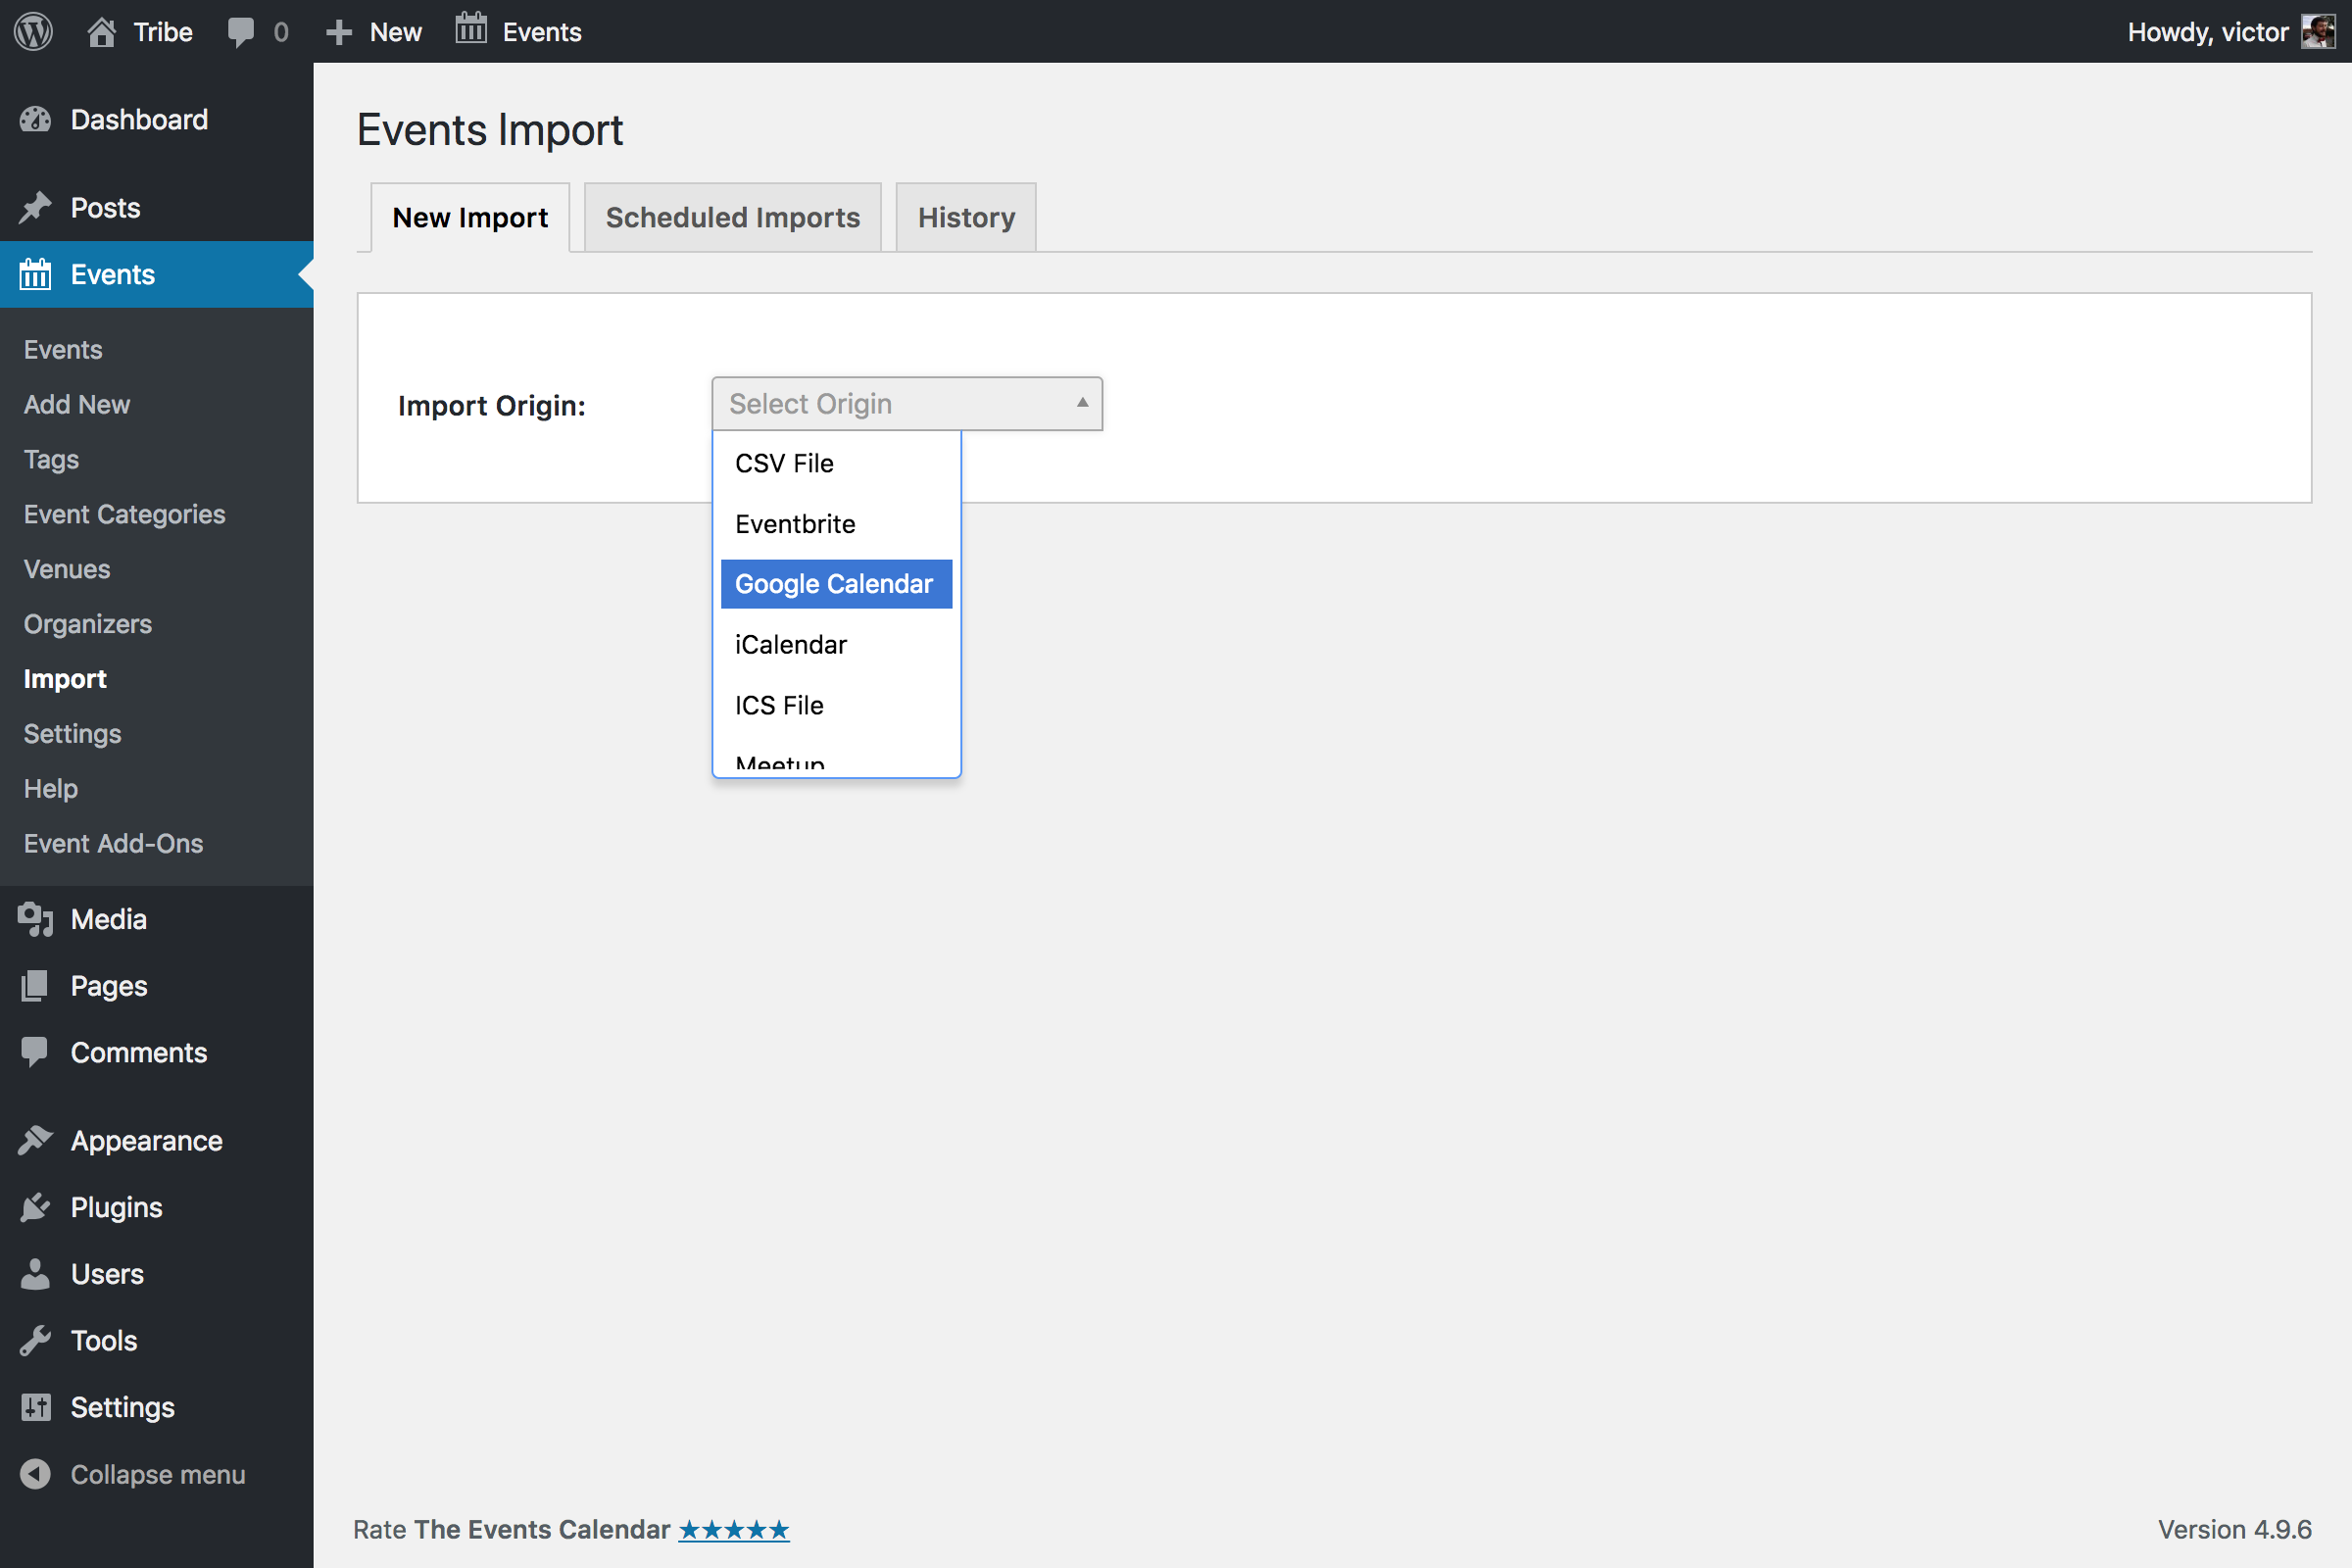
Event Aggregator currently has the following import options:
- CSV File: This is a filed type created from a spreadsheet. Importing from a CSV file is covered in this tutorial.
- Google Calendar: This fetches events that are published to a Google Calendar account. The URL you want to use is the one that links to the calendar’s
.icsfile. Example:https://calendar.google.com/calendar/ical/example/basic.ics. - iCalendar: This fetches events from any calendar application with an active and valid iCalendar feed, which is defined as a standardized format for exchanging calendar data between applications.
- ICS File: This is a file that contains iCalendar data. Importing from an ICS file is covered in this tutorial.
- Meetup: This fetches events that are published to a Meetup.com group.
- Eventbrite: This fetches events that are published on Eventbrite.com.
- Other URL: This fetches events that are published on another website using The Events Calendar.
Select the source you wish to import from, and the next set of options will appear.
Connecting to Meetup
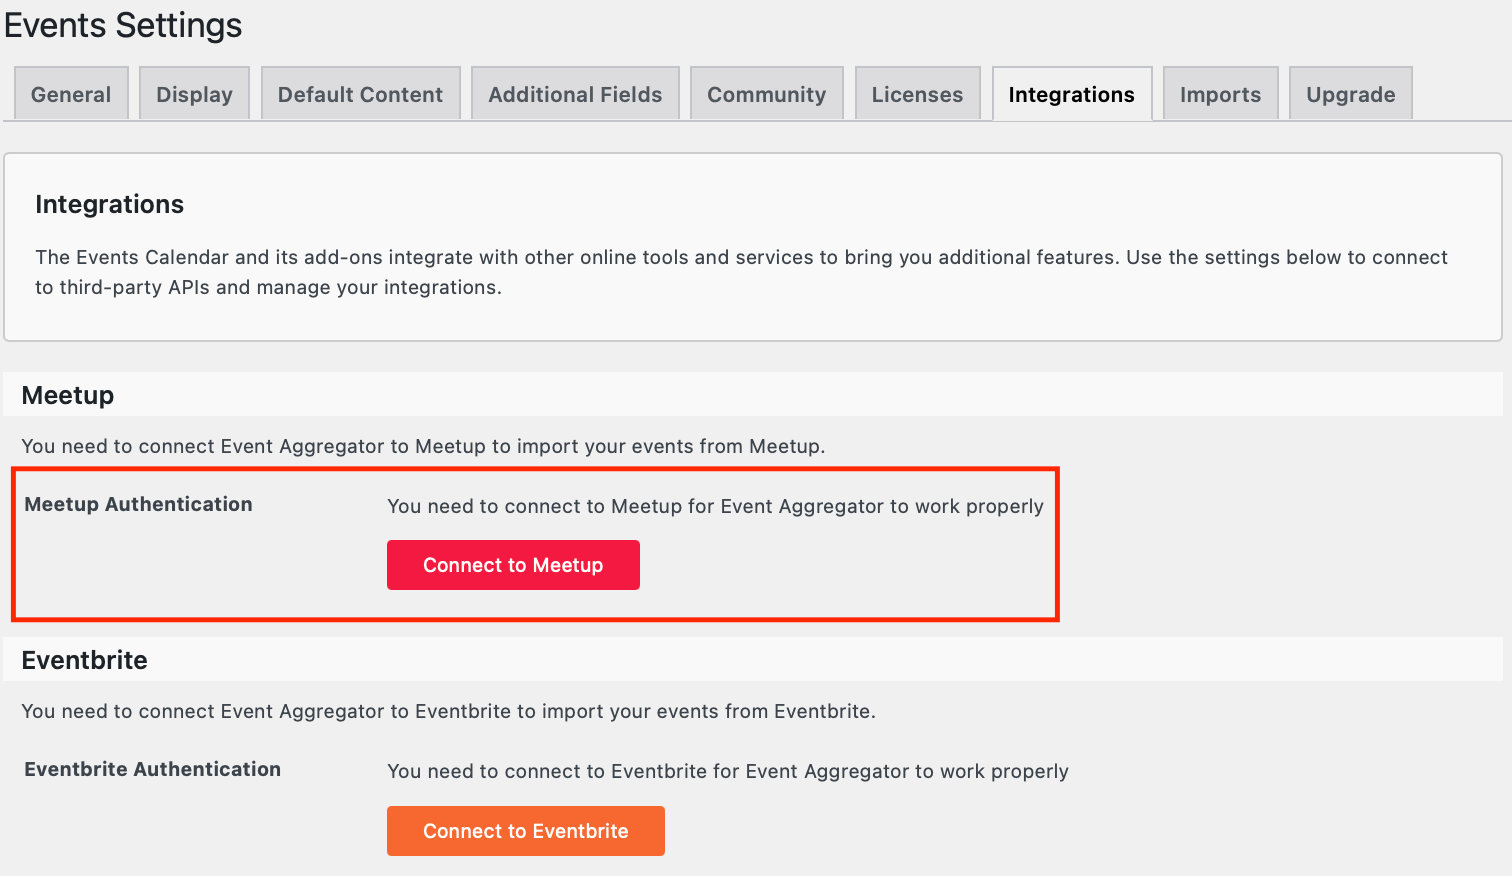
The first time you import from Meetup, you’ll be prompted to enter information that allows Event Aggregator to “talk” to Meetup and accurately gather event data. In order for this option to work, you will need to connect Event Aggregator to Meetup by going to Events → Settings → Integrations.
Connecting to Eventbrite
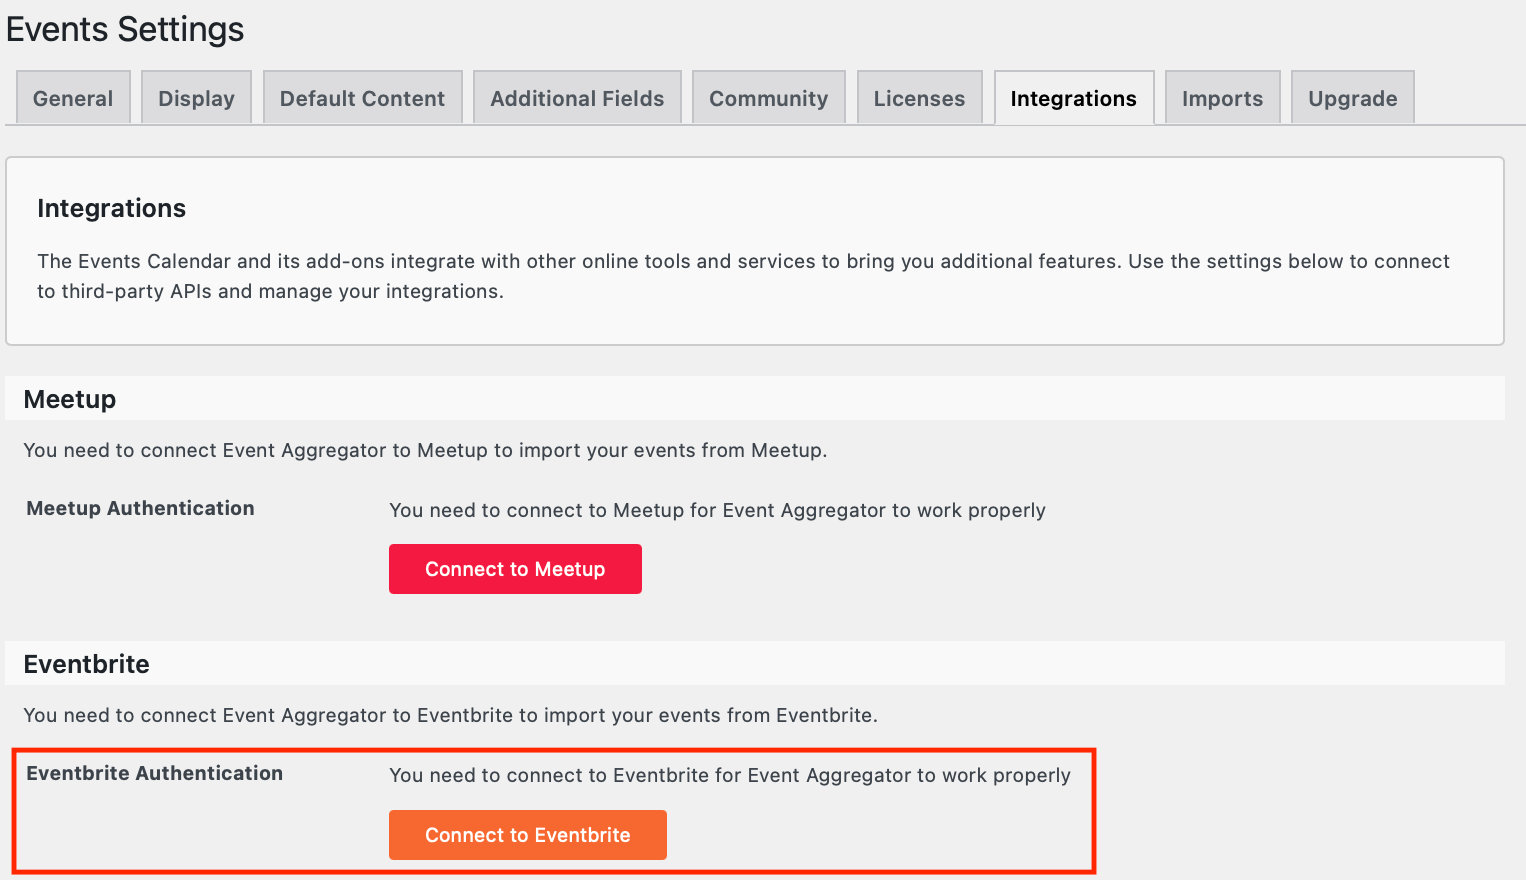
The first time you import from Eventbrite, you’ll be prompted to log in to Eventbrite and then allow Event Aggregator to connect with your Eventbrite account. This will allow Event Aggregator to “talk” to that source and gather events data.
You can also review your connection by going to Events → Settings → Integrations.
Select the import type
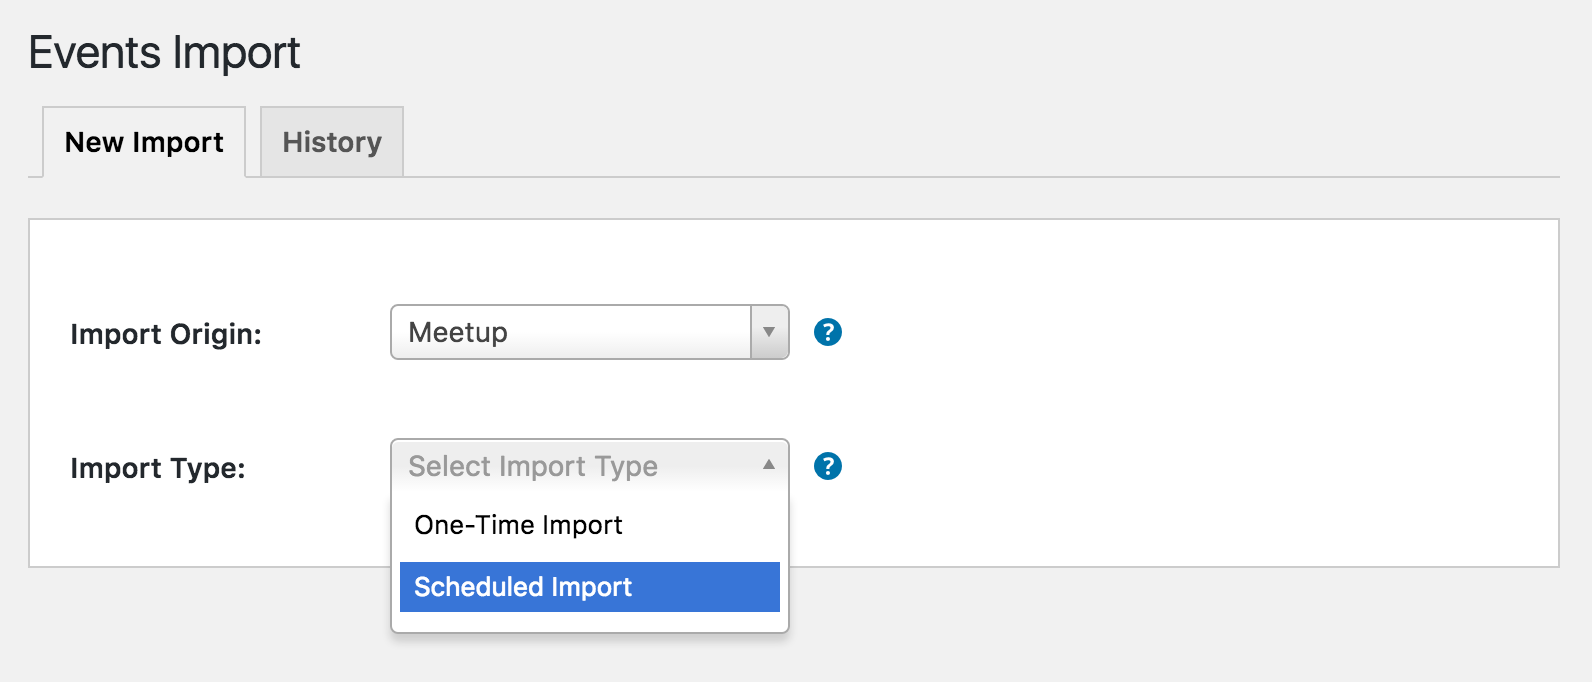
Will this be a one-time, manual import of events or a repeating import that runs on a schedule? This step allows you to choose the type of import you need.
If you select Scheduled Import, you will need to specify how frequently (daily, hourly, etc.) Event Aggregator looks for new or updated events and runs an automatic import. The first import will run immediately, and then on its set schedule.
Provide the import URL
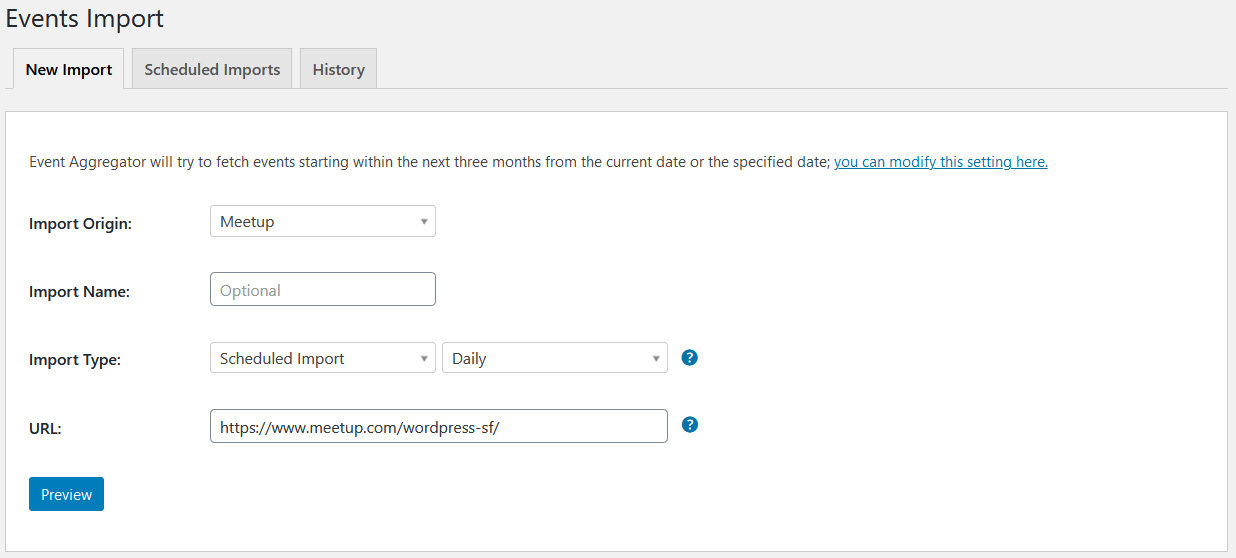
Name your import (optional): You can give your import a custom name. If you don’t the name will default to the feed’s name.
Provide the URL of the source that your events are being imported from. For example, if you have selected Meetup as the import source, then you will provide the URL of the Meetup group where the events being imported are located or the URL of a specific event. If you are not sure what URL to use, click the icon to read detailed instructions for the source you’re using.
💡 Importing from Google Calendar? You will want to use the “Public address in iCal format” URL in the calendar’s settings.
If you are importing from iCalendar or Google Calendar, you have the option of filtering the events feed. This is particularly useful for feeds with a very large number of events, especially if you are only interested in certain types of events.

Preview the import
Click the “Preview” button and Event Aggregator will produce a list of events that are available to import from the source you provided.
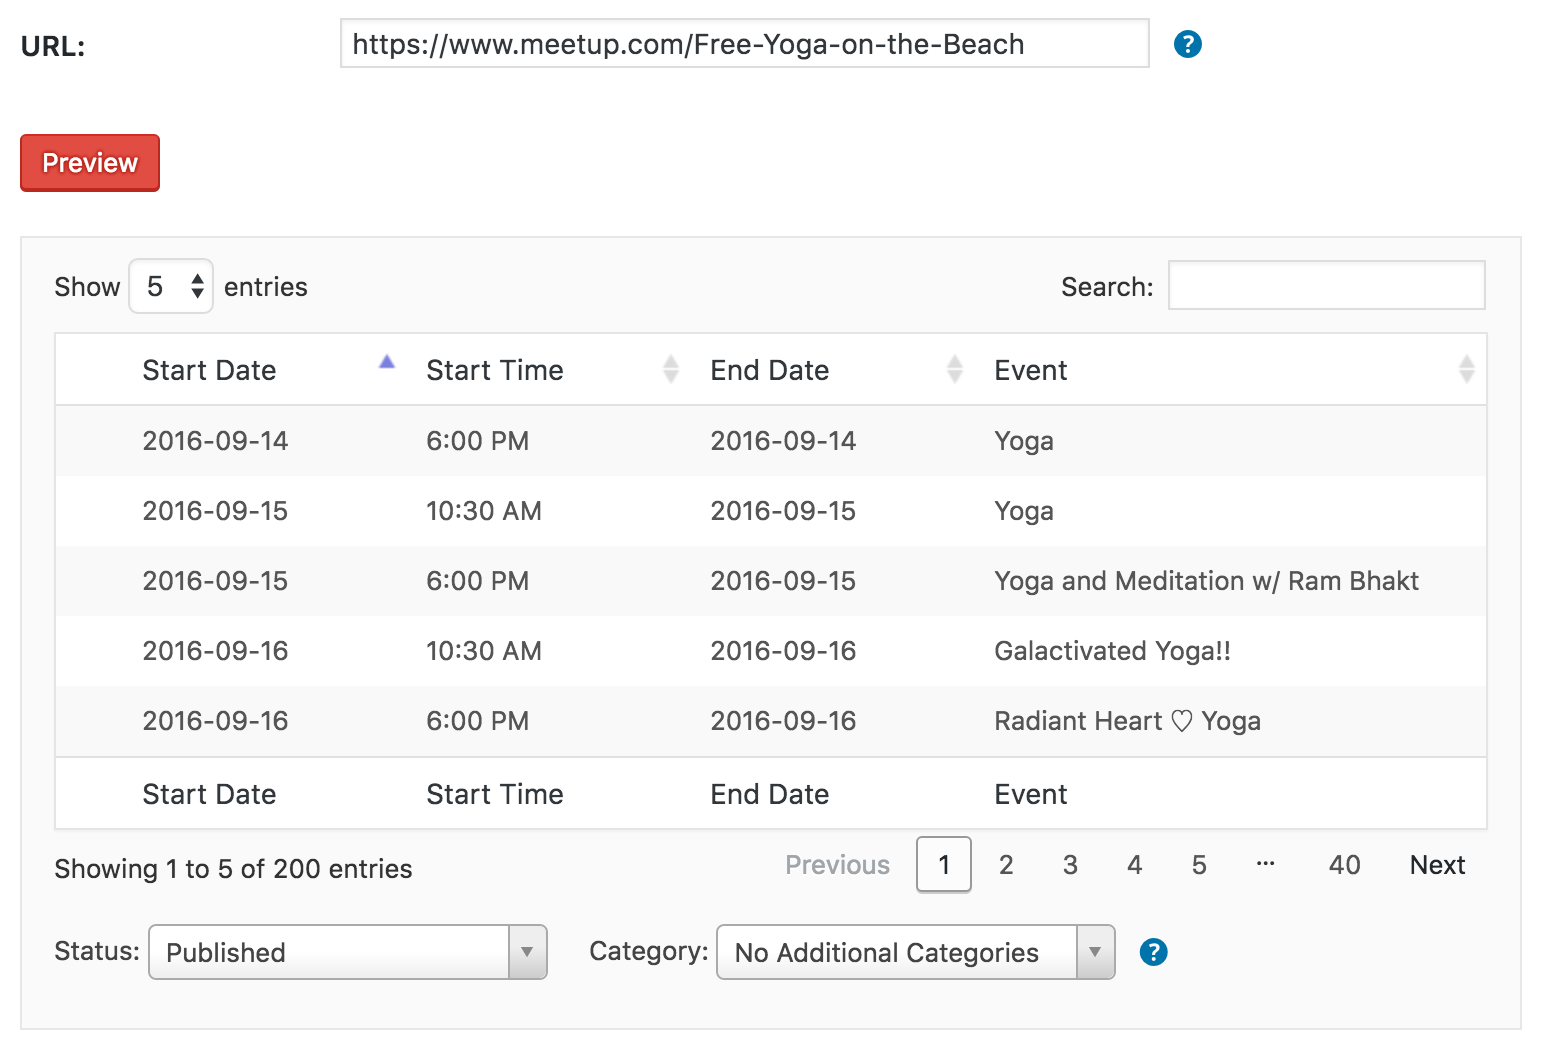
This preview shows you all the events available to you in the feed. It provides you with a chance to search for specific events, select only the events you want to import, or simply check the content before everything is imported.
During this step, you can also set the WordPress status of the events when they are imported:
- Published: The content will be published to your site right away.
- Draft: The content will not be published but available for editing after the import.
- Pending Review: The content will not be published or a draft, but labeled as being ready for a WordPress editor or administrator to review before it is published.
- Private: The content is published to your site right away, but only accessible to those who are logged into the site and with permissions to view the content.
The status you choose will apply to the event as well as any new organizer or venue created by the import.
You can also assign an Event Category for the imported events. This category will be added in addition to any categories defined by the feed itself.
Run the import

Once you’ve had a chance to preview your content and select what you would like to import, go ahead and click the Import All/Save Scheduled Import button below the preview panel (the text of the button is different for one-time imports and scheduled import). Click the button to start your import, and then sit back and watch Event Aggregator do the work!
Import limitations
Please note that Event Aggregator does not detect when an event that was imported in a previous import has been deleted at the origin, event if you re-import from that origin again. So, even if you imported an event from an iCalendar feed and it was later removed from that feed, a second import of that feed will not delete the event from your WordPress site.
If you need to track canceled or deleted events and you control the source calendar, the best strategy is to mark a canceled event as canceled or deleted in the event title instead of actually trashing the event. That way, when you re-import the source feed, the event can be updated in your WordPress calendar with the cancellation note. You could then choose to delete the event on both calendars, or simply leave it with the canceled notice.