The attendee list in Event Tickets shows who has registered, purchased tickets, or RSVP’d for each event. You may want to extend that list to surface additional information — particularly for check-in, reporting, or export. This article collects customizations for the attendee list in the WordPress admin.
The customizations in this article are all code snippets. Add them to your child theme’s functions.php file or use the Code Snippets plugin. If code snippets are new to you, start with Using Code Snippets to Customize The Events Calendar for a walkthrough.
Related Article: Customizing Attendee Registration
Export the Attendee List with Registration Fields
If you need to export an attendee list that includes all registration fields, simply exporting from the Attendees menu under the Tickets section may not capture all the data. Follow the steps below to ensure your export includes attendee responses to all custom fields.
Step 1: Navigate to Your Event
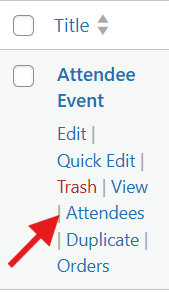
Go to your WordPress dashboard and navigate to Events > Events. Find the event for which you want to export the attendee data.
Step 2: Open the Attendees Page
Hover over the event and click Attendees. This will take you to the list of attendees for that specific event.
Step 3: Export the List
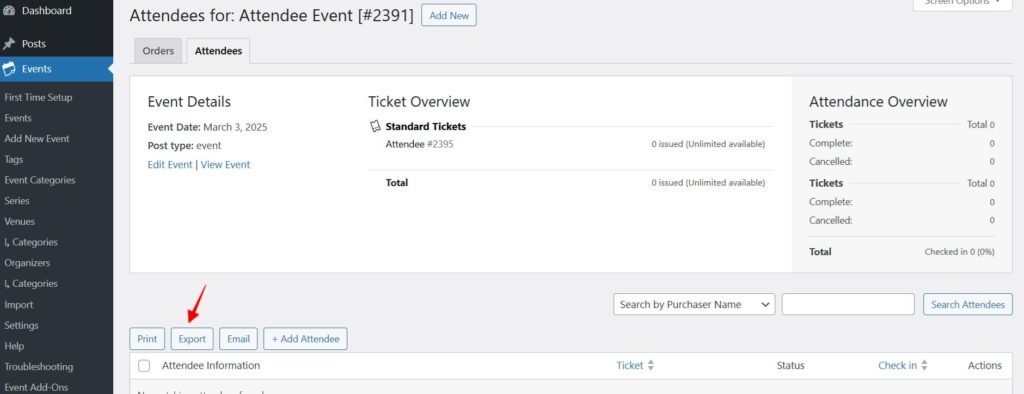
On the Attendees page, look for the Export button. Clicking this will generate a CSV file that includes all attendee details along with their responses to any registration fields, such as additional questions added via ticket fieldsets.
Add Columns for Attendee Registration Information
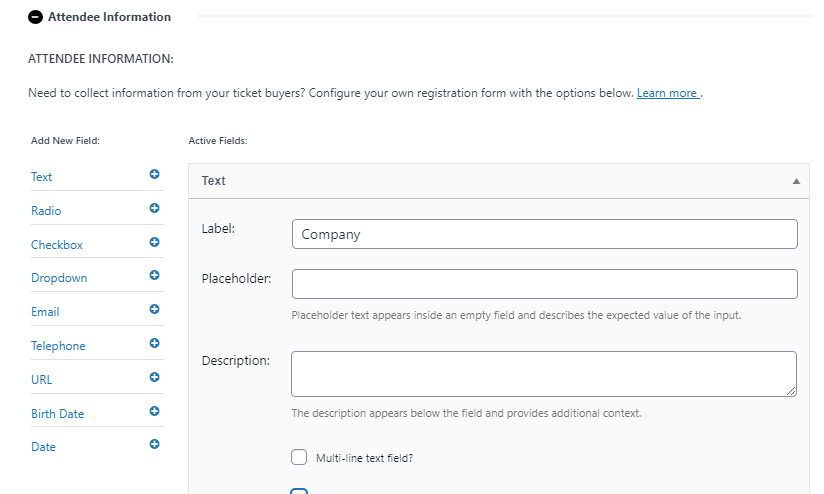
When you use additional fields for Attendee Information Collection via the Event Tickets Plus plugin, you may want to surface that information as a new column in the Attendees list.
As an example, let’s add a “Company” text field to an event ticket:
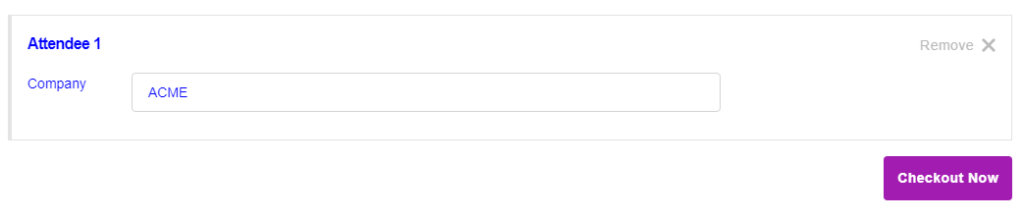
Attendees see the new field on their registration form and can provide this information:
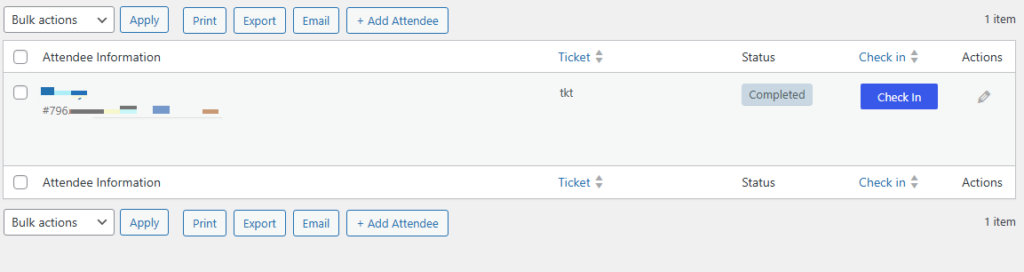
But when we view the Attendee List, the Company information doesn’t appear in the table by default:
The Snippet
Carefully insert the following PHP code at the end of your theme’s functions.php file (ensure not to overwrite any existing code there) or use the Code Snippets plugin:
add_filter( 'tribe_events_tickets_attendees_table_column', function ( $value, $item, $column ) {
    if ( $column === 'company' ) {
         $value = $item['company'];
    }
    return $value;
}, 100, 3 );

add_filter( 'manage_tribe_events_page_tickets-attendees_columns', function ( $column_headers ) {
    $new_column_headers = [];
    foreach ( $column_headers as $column_key => $column_name ) {
        $new_column_headers[ $column_key ] = $column_name;
        // Add the new column immediately after the ticket column.
        if ( 'ticket' == $column_key ) {
            $new_column_headers['company'] = 'Company';
        }
    }
    return $new_column_headers;
} );
Don’t forget to replace company with the name of the field you are using.
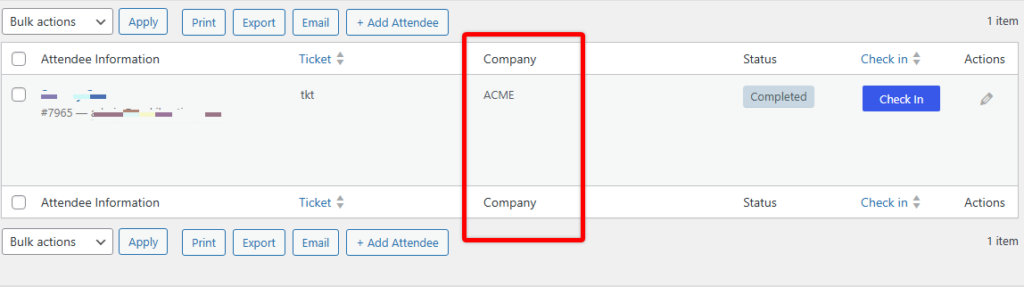
After saving the changes, you should see a new custom column on the Event Attendees list:
Display the Security Code
To add a Security Code column to the Attendees list, insert the following PHP code at the end of your theme’s functions.php file or use the Code Snippets plugin:
add_filter( 'tribe_events_tickets_attendees_csv_export_columns', function( $columns ) {
    $columns['security_code'] = 'Security Code';
    return $columns;
} );

add_filter( 'tribe_events_tickets_attendees_table_column', function ( $value, $item, $column ) {
    if ( $column === 'security_code' ) {
         $value = $item['security_code'];
    }
    return $value;
}, 100, 3 );

add_filter( 'manage_tribe_events_page_tickets-attendees_columns', function ( $column_headers ) {
    $new_column_headers = [];
    foreach ( $column_headers as $column_key => $column_name ) {
        $new_column_headers[ $column_key ] = $column_name;
        if ( 'ticket' == $column_key ) {
            $new_column_headers['security_code'] = 'Security Code';
        }
    }
    return $new_column_headers;
} );
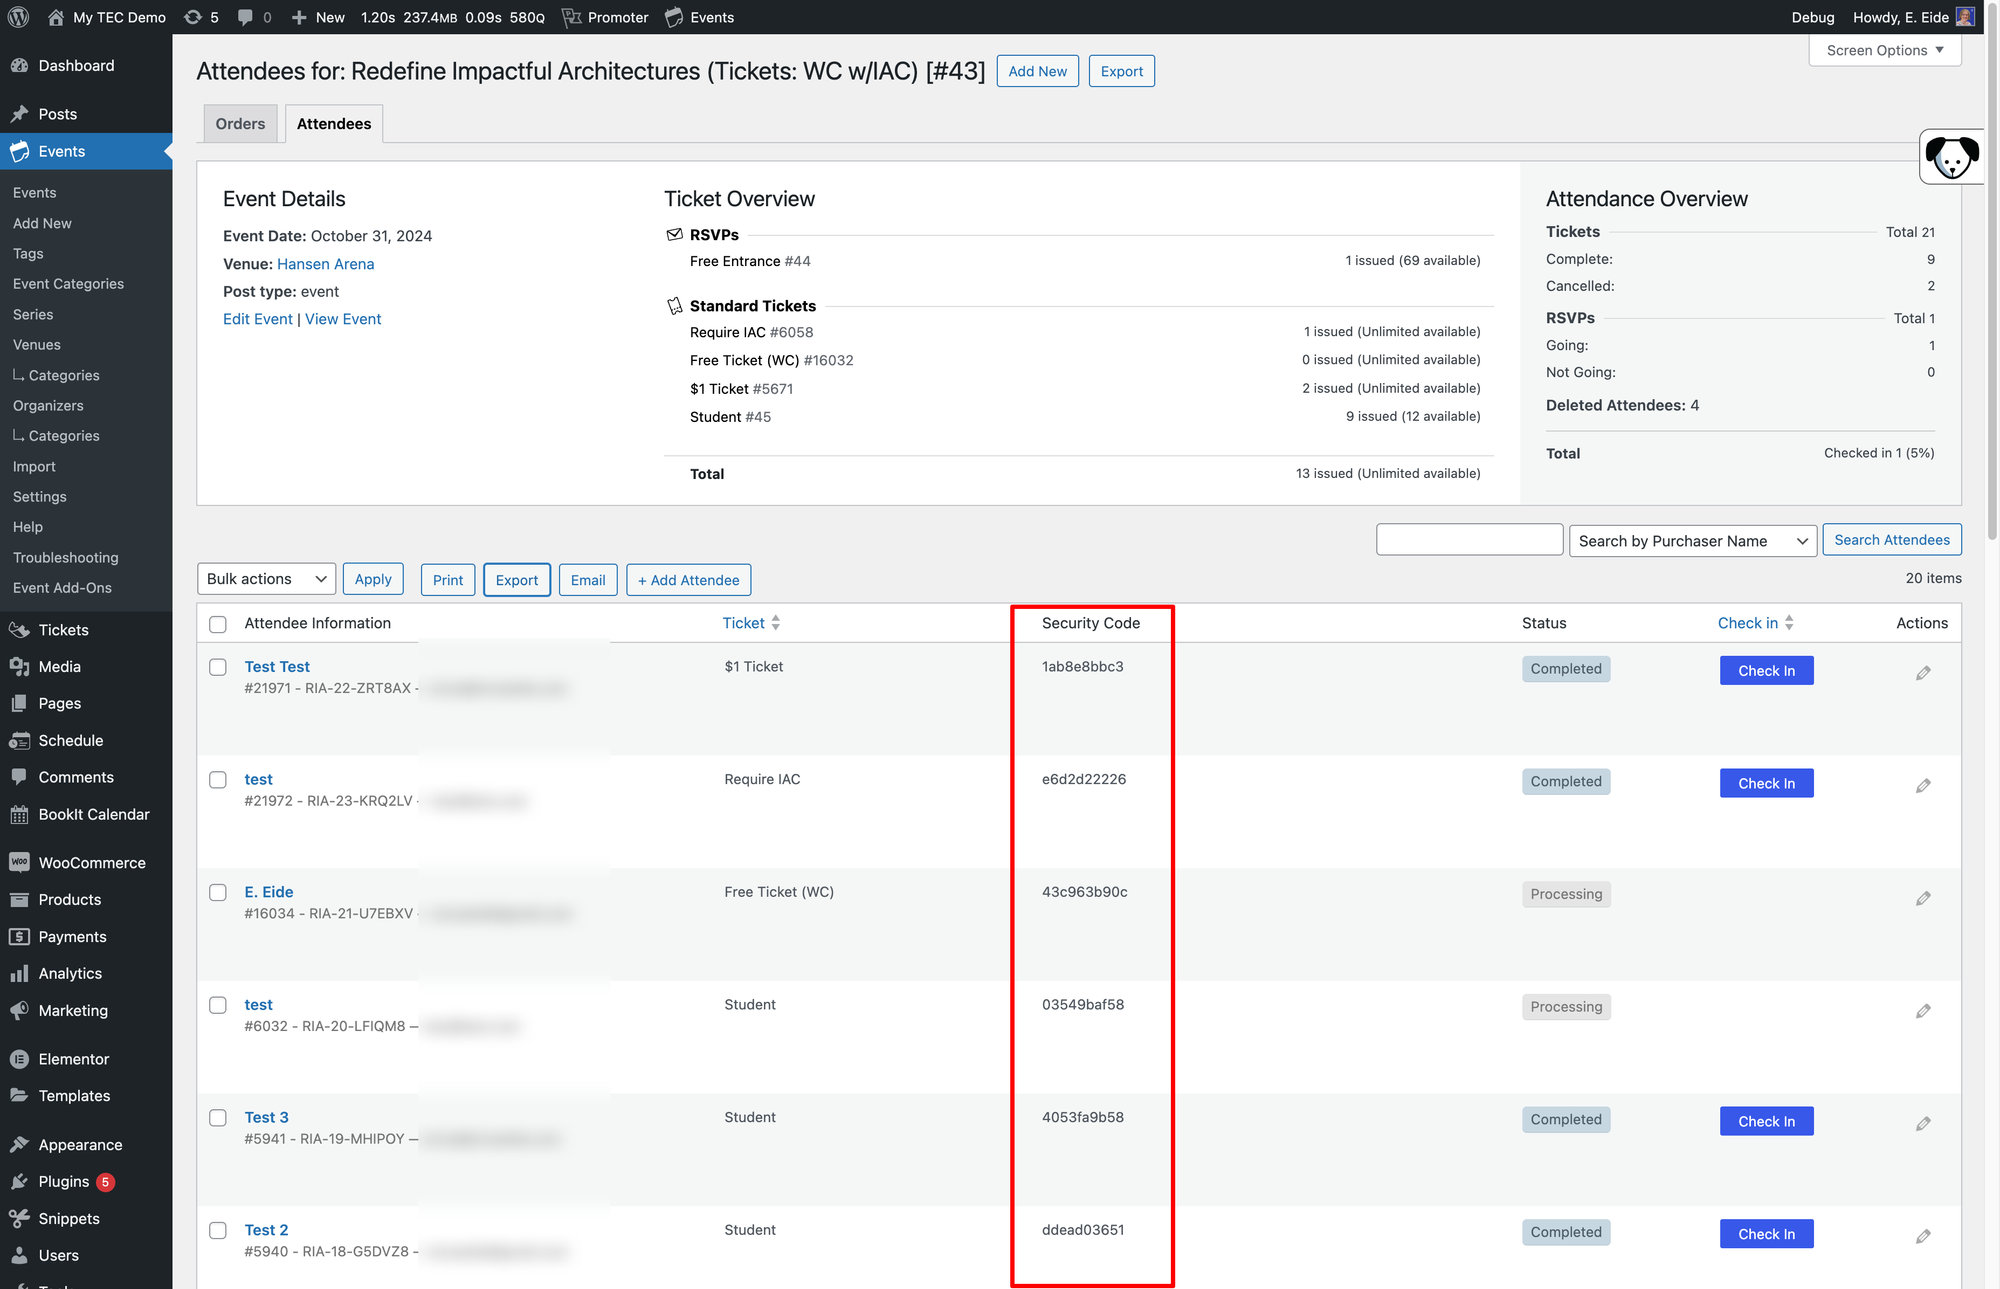
After inserting the code and saving:
- Go to the Attendees section under the Event Tickets menu in your admin panel.
- Verify that the columns for Security Code and Ticket ID are now present.
- Check a few entries to ensure the columns are populating correctly.
Show Registration and Purchase Time
By default, the Attendees page in Event Tickets doesn’t display the purchase time for tickets or RSVPs. The snippet below adds the time of registration or purchase beneath each attendee’s ticket information on the attendee list.
Copy the code below into your child theme’s functions.php file (or wherever you usually put custom code):
add_action( 'event_tickets_attendees_table_ticket_column', 'add_registration_time_to_attendee_details' );

function add_registration_time_to_attendee_details( $item ) {

    if ( ! isset( $item['order_id'] ) ) {
        return;
    }

    if ( $item['provider_slug'] == 'woo' ) {
        $order_id = $item['qr_ticket_id'];
    } else {
        $order_id = $item['order_id'];
    }

    $registration_time = get_the_date( 'F j, Y', $order_id );

    if ( empty( $registration_time ) ) {
        return;
    }

    printf(
        '<div class="event-tickets-ticket-registration-time">%1$s:<br/>%2$s</div>',
        esc_html__( 'Registration Time', 'tribe-extension' ),
        sanitize_text_field( $registration_time )
    );
}
Add WooCommerce Order Data
If you’re using Event Tickets Plus with WooCommerce, you may find it helpful to have WooCommerce order data in your Attendee list. For example, when processing offline payments and checking in attendees at the venue, you may want to know the payment method used. By default, the attendee list only includes basic attendee information and does not include billing details.
Use the guide below to add any WooCommerce order data to your attendee export.
How the Code Works
The code is designed for easy customization. To choose which fields appear in your attendee export, edit the $fields array at the top of the snippet. This list tells the rest of the code what values to pull in and which columns to populate — it is the only part you need to edit.
The list is pre-populated with the most common WooCommerce fields, which saves you from having to look up each field name. Delete any fields you don’t want, and the code will automatically update the export accordingly.
Note: The block below is only the editable portion of the code for illustration — you’ll still need the full snippet further down for it to work.
$fields = [
    'order_id'        => 'Order ID',
    'order_number'    => 'Order Number',
    'order_date'      => 'Order Date',
    'payment_method'  => 'Payment Method',
    'transaction_id'  => 'Transaction ID',
    'order_status'    => 'Order Status',
    'billing_name'    => 'Billing Name',
    'billing_email'   => 'Billing Email',
    'billing_phone'   => 'Billing Phone',
    'billing_address' => 'Billing Address',
    'shipping_address'=> 'Shipping Address',
    'order_total'     => 'Order Total',
    'coupon_codes'    => 'Coupon Codes',
];
Using the payment-method example, the pared-down list would look like this:
$fields = [
    'payment_method' => 'Payment Method',
];
And here’s how it would appear on the export:

The Snippet
add_filter( 'tribe_events_tickets_attendees_csv_export_columns', function( $columns ) {
    // Defines the fields to add. Remove the ones you don't want in the export.
    $fields = [
        'order_id'        => 'Order ID',
        'order_number'    => 'Order Number',
        'order_date'      => 'Order Date',
        'payment_method'  => 'Payment Method',
        'transaction_id'  => 'Transaction ID',
        'order_status'    => 'Order Status',
        'billing_name'    => 'Billing Name',
        'billing_email'   => 'Billing Email',
        'billing_phone'   => 'Billing Phone',
        'billing_address' => 'Billing Address',
        'shipping_address'=> 'Shipping Address',
        'order_total'     => 'Order Total',
        'coupon_codes'    => 'Coupon Codes',
    ];

    return array_merge( $columns, $fields );
} );

add_filter( 'tribe_events_tickets_attendees_table_column', function( $value, $item, $column ) {
    // Static cache retains its value between function calls.
    static $order_cache = [];

    if ( empty( $item['order_id'] ) ) {
        return $value;
    }

    if ( ! isset( $order_cache[ $item['order_id'] ] ) ) {
        $order_cache[ $item['order_id'] ] = wc_get_order( $item['order_id'] );
    }

    $order = $order_cache[ $item['order_id'] ];

    if ( ! $order ) {
        return $value;
    }

    switch ( $column ) {
        case 'order_id':
            return $order->get_id();
        case 'order_number':
            return $order->get_order_number();
        case 'order_date':
            return $order->get_date_created() ? $order->get_date_created()->date( 'Y-m-d H:i' ) : '';
        case 'payment_method':
            return $order->get_payment_method_title();
        case 'transaction_id':
            return $order->get_transaction_id();
        case 'order_status':
            return $order->get_status();
        case 'billing_name':
            return $order->get_formatted_billing_full_name();
        case 'billing_email':
            return $order->get_billing_email();
        case 'billing_phone':
            return $order->get_billing_phone();
        case 'billing_address':
            return $order->get_formatted_billing_address();
        case 'shipping_address':
            return $order->get_formatted_shipping_address();
        case 'order_total':
            return $order->get_total();
        case 'coupon_codes':
            return implode( ', ', $order->get_coupon_codes() );
        default:
            return $value;
    }
}, 10, 3 );
For guidance on implementing custom snippets, see our best practices guide.
Finding Other Fields
In most cases, the fields above will be enough. If you need a different order field in the export, you can add your own.
The code uses the WC_Order object, which is the official way to access order data in WooCommerce.
For standard WooCommerce fields: A comprehensive list of available methods and properties is on the official WooCommerce WC_Order Class Reference page. Look for methods that start with get_ (like get_billing_phone() or get_total()). The name after get_ is what you’ll use as the key in the $fields array.
For example, to include the billing country: the reference shows a get_billing_country() method. Strip the get_ prefix and you’re left with billing_country. Add it to the $fields array like so:
'billing_country' => 'Billing Country',
Then add a matching case to the switch statement in the second filter:
case 'billing_country':
    return $order->get_billing_country();
Place it just before the default statement:
    default:
        return $value;
}
Using Custom Fields
Many plugins and custom snippets add data to an order using meta keys. These are often prefixed with an underscore (_), but not always.
The easiest way to find these keys is to look at the raw order data. In the WordPress dashboard, go to WooCommerce > Orders, open an order, and look for a “Custom Fields” section.
Once you know the meta key (for example, _my_custom_field), retrieve its value using $order->get_meta(). The case would look like this:
case 'my_custom_field':
    return $order->get_meta( '_my_custom_field' );
Then add it to the $fields array:
'my_custom_field' => 'My Custom Field Name',
Important: The key in the $fields array (my_custom_field in this example) must match the case statement in the switch.