Event Tickets Plus integrates tightly with WooCommerce, which means you can take advantage of the broader WooCommerce extension ecosystem to add capabilities that aren’t built into the plugins directly. This article covers some common extensions that work well with Event Tickets Plus, including quantity-based discounts, name-your-price tickets, multi-currency support, and member-only access. Note that while these extensions have been tested and documented here, we can’t guarantee compatibility with every third-party WooCommerce extension — if you run into issues, try deactivating the extension to confirm whether it’s the source of the conflict.
Note that we do not actively monitor and test these extensions with our own plugins. (To do so would be a herculean task.) There are, however, some general rules of thumb for testing and confirming whether The Events Calendar and WooCommerce extensions are compatible. Let’s look at those together.
Compatibility with The Events Calendar
There generally should be no conflicts between WooCommerce and The Events Calendar, since the calendar’s features rarely overlap those of WooCommerce. Where The Events Calendar provides the ability to post, edit and manage events posts, WooCommerce handles transactions for a completely different post type of its own creation called Products. Events and Products do not touch each other right out of the box, so no conflicts are expected.
Compatibility with Event Tickets Plus
Similar to the above, we never expect a conflict between WooCommerce and Event Tickets Plus. WooCommerce allows you to create tickets as Products directly in the event editor and displays those Products on the single event view when published.
Once a ticket has been added to the cart, WooCommerce takes the wheel and drives the rest of the transaction with no interaction from Event Tickets Plus. In other words, if you notice a transaction does not go through once a ticket has been added to the cart, it’s likely on the WooCommerce side of things.
The Best Solution: Try it out
Until you actually have all the plugins in question running on your site, there is no definitive answer about whether a given WooCommerce extension will work with The Events Calendar or Event Tickets Plus. Your best option is just to try things out directly on your test site.
In the event that something doesn’t work out the way you’d expect, we do offer a full refund on all products within 30 days of purchase. That should give you plenty of time to give things a whirl (hopefully in a test environment) and see if things play well together.
WooCommerce has a generous refund policy of its own, so there is next to no risk to give things a go.
Using CURCY – Multi Currency for WooCommerce
In some specific cases, you may want to offer tickets in different currencies. From your WordPress Dashboard > Plugins > Add New, search for the CURCY – Multi Currency for WooCommerce by VillaTheme.
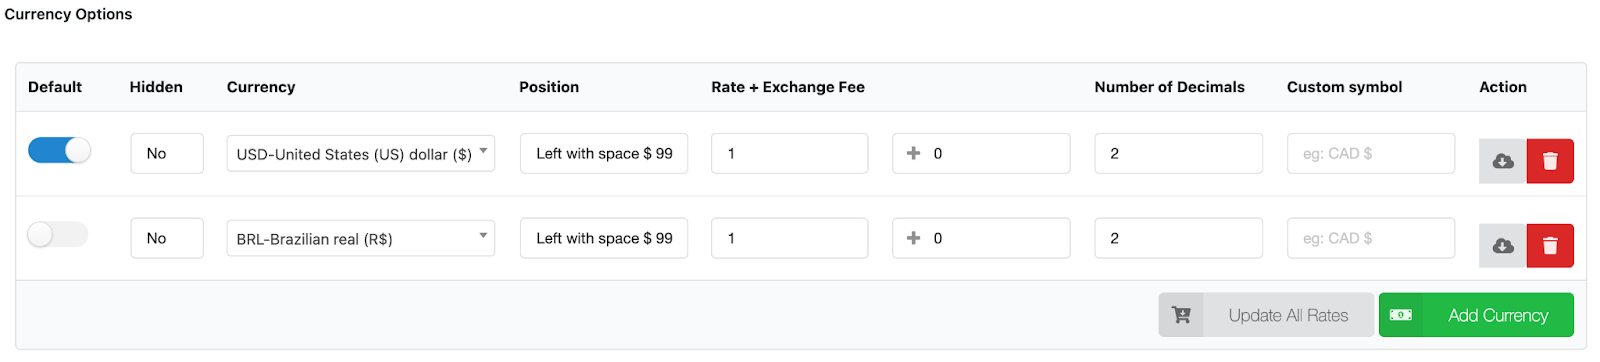
Go to WordPress Dashboard > Multi Currency > General tab, and define a default and secondary currency as you need.
Still from the multi currency settings, you have the option to set a currency switcher right from Multi Currency > Design tab. By default, the currency switcher is hidden from the cart and checkout page, you have the option to change that from this tab as well.
Creating a Multi-Currency Ticket
The process for creating a multi-currency ticket is the same as for any other standard ticket. Add a new page or post. If you’re using The Events Calendar plugin, you can also add a new ticket to an event post.
From the post editing screen, add a new ticket block and ensure you select WooCommerce from the ticket block settings. This is required when you have Tickets Commerce enabled in your WordPress Dashboard > Tickets > Settings > Payment settings.

Proceed with the ticket creation process as usual. Nothing changes at this step. You only need to enter the ticket details and save them.
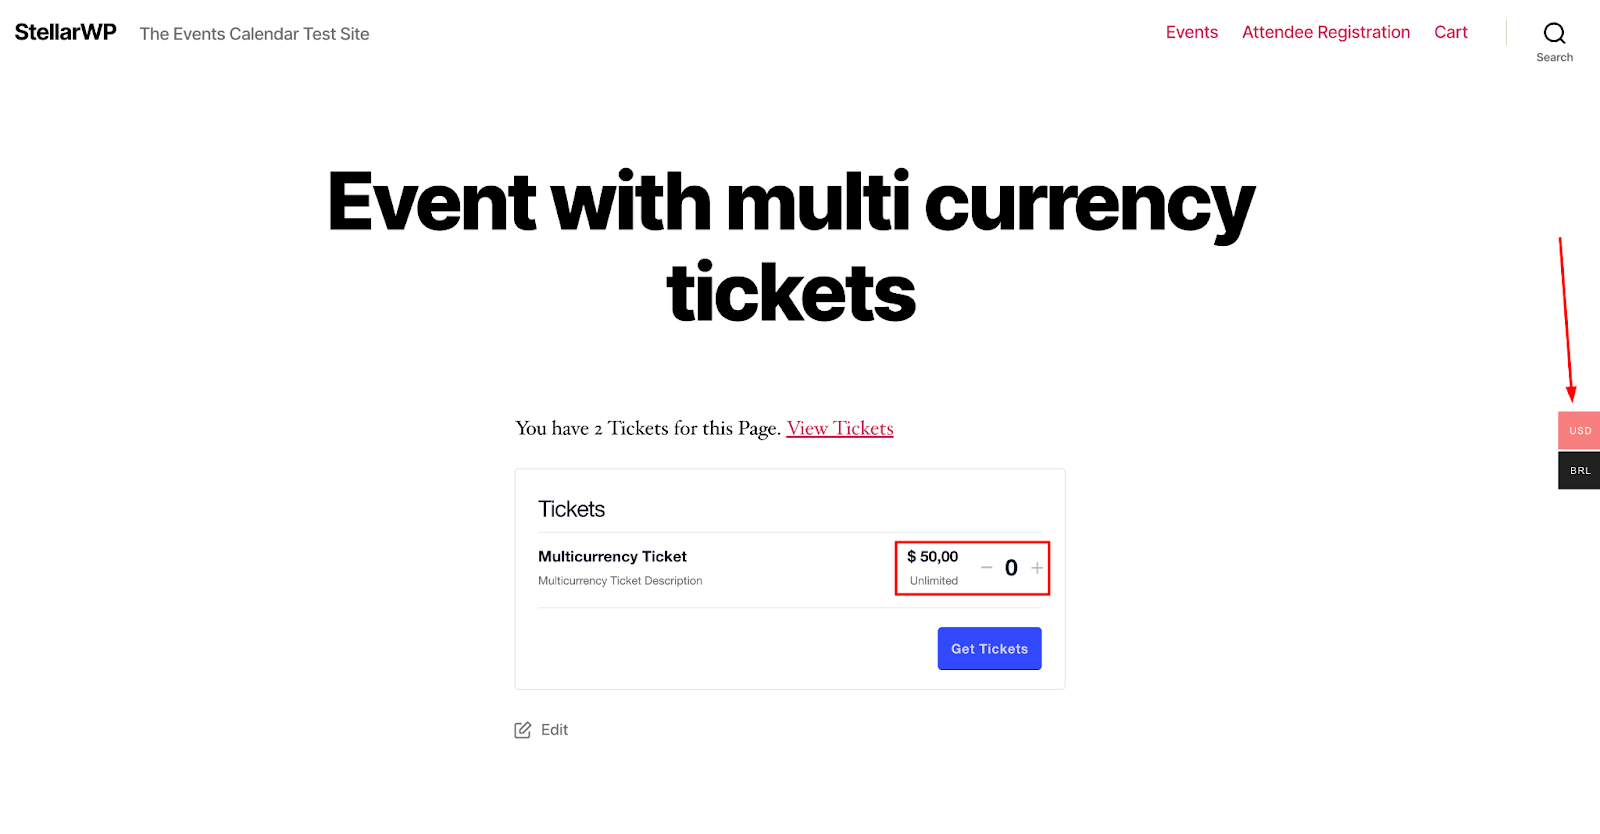
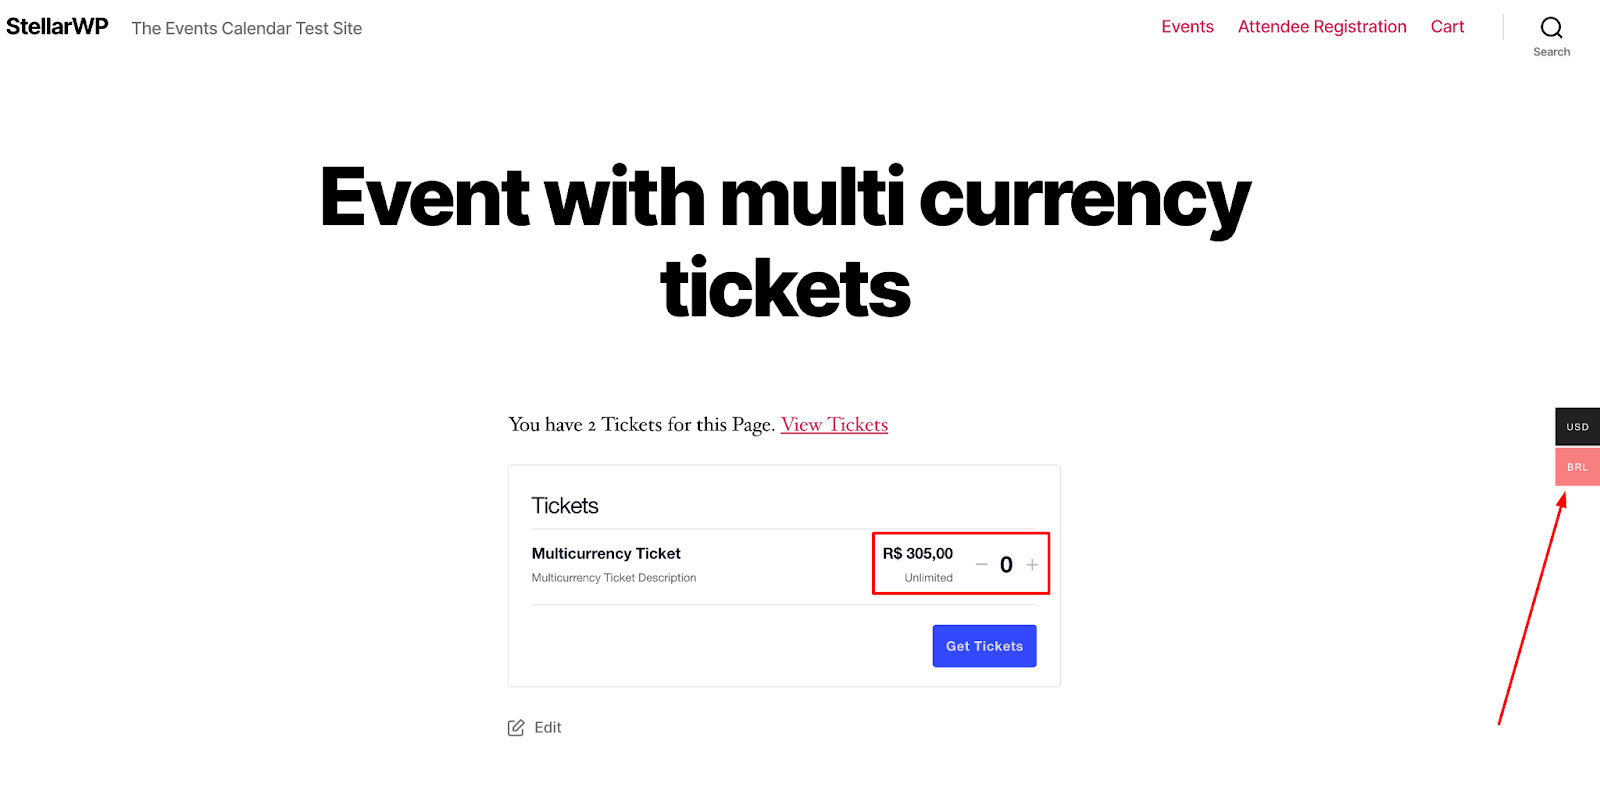
Now, when you browse a page, post, or event post from your website front-end, you will see a currency switcher, which your attendees can use to proceed with a purchase in the desired currency.
Please note that the free Curcy multi-currency plugin version is pretty limited.
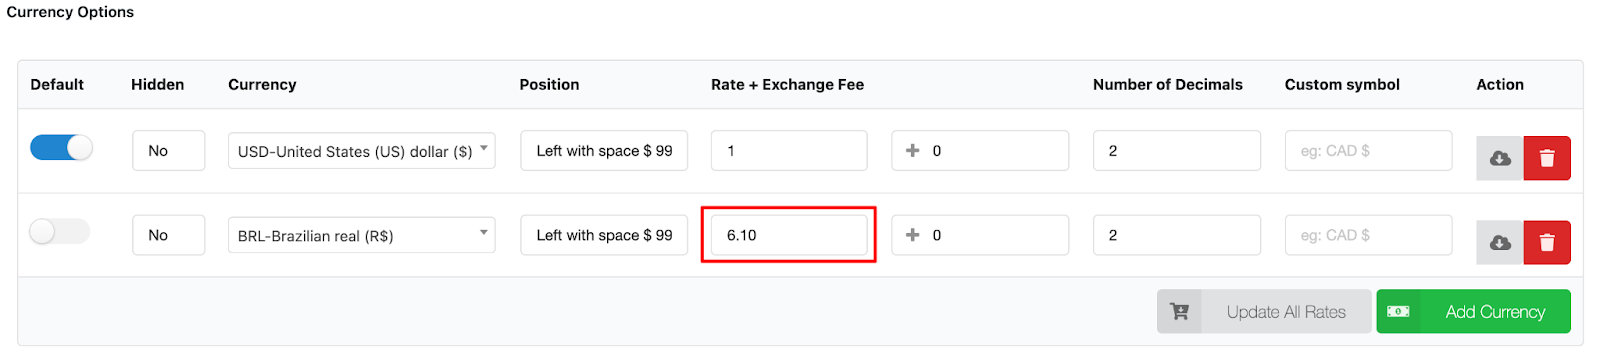
For example, the exchange rate must be manually entered from WordPress Dashboard > Multi Currency > General > Rate + Exchange Fee.
Using their premium version, you can set it to automatically update from the Update tab.
A multi-currency purchase experience can add value to your attendees and target a broader audience.
It is especially beneficial for customers/attendees from different locations and countries who expect to be able to shop seamlessly in their local currency. It eliminates the need to convert prices or mentally worry about exchange rate fluctuations.
Using WooCommerce Name Your Price
You can easily integrate WooCommerce’s Name Your Price plugin with Event Tickets Plus. With the integration plugin installed, you can allow your users to insert their own price at checkout when purchasing tickets with Event Tickets Plus and WooCommerce. You’ll need WooCommerce Name Your Price and Name Your Price bridge plugin.
Once you have Event Tickets and Event Tickets Plus installed and activated on your site, you’ll want to configure WooCommerce as your e-commerce solution. Now add WooCommerce’s Name Your Price extension. This will add the option to let users define their product price.
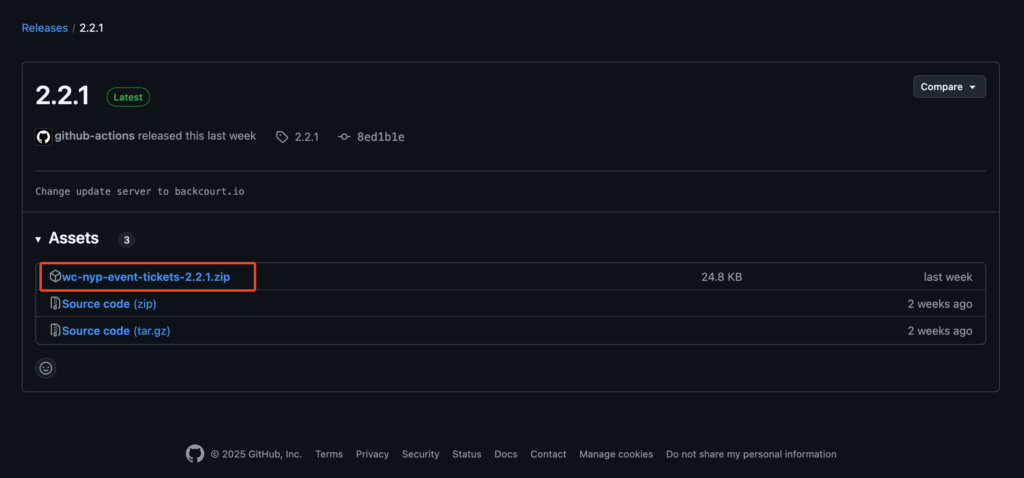
Lastly, you’ll want to download the Name Your Price bridge plugin from the GitHub repo. To do this, click on this link to download a .zip file of the plugin. The file you need to download is wc-nyp-event-tickets-x.x.x.zip (x.x.x being the current version number, which may be different from the image below).
You can install the plugin from the Plugins > Add New menu in the WordPress Dashboard by uploading the .zip file.
Create Name Your Price Tickets
Now that you have all the plugins ready, you can create your name-your-price tickets. To do this, create your ticket as your normally would. You’ll now see an option to add Name Your Price in the ticket form in the ticket area. Check that box to add the option before publishing your ticket.
It’s important to note that this option will only appear when using the Classic Editor to create your ticket. When used in conjunction with events, you can enable the Classic Editor by unchecking the Activate Block Editor option under Events Setting > General.
Once you have this set up, you’ll see the Name Your Price option appear as part of the ticket workflow:

Using Discount Rules for WooCommerce
This guide will walk you through the process of setting up quantity-based discounts for your event tickets using a combination of plugins.
This setup allows you to offer special pricing (e.g., “Buy 3 tickets, get 10% off” or “Buy 5 tickets, get $25 off”) directly within your Event Tickets Plus and WooCommerce-powered ticketing system.
Before you begin, ensure you have the following plugins installed and activated on your WordPress website:
- The Events Calendar (Free) – In other cases where tickets are not attached to events, this is optional.
- Event Tickets (Free)
- Event Tickets Plus (Premium) – Essential for WooCommerce integration
- WooCommerce (Free)
- Discount Rules for WooCommerce (Free or Pro version by Flycart) – This guide assumes you are using this specific plugin for discount rules.
Step-by-Step Guide
1. Create Your Event and Ticket as you normally would
At this point, your ticket is a standard WooCommerce product associated with your event.
2. Configure the Ticket as a WooCommerce Product
While Event Tickets Plus creates the WooCommerce product automatically, it’s good practice to verify and adjust its settings.
- Access the Product
- You can directly edit the product by hovering over your ticket in the “Tickets” meta box on the Event edit screen and clicking “Edit.” (when in block editor mode) or editing the ticket and clicking on “Edit ticket in WooCommerce” link (when in classic editor mode).
- Alternatively, go to Products > All Products in your WordPress dashboard, find your ticket product (it will usually have the ticket name as the product title), and click “Edit.”
- Product Data
- Ensure the “Product Data” is set to “Simple Product.” (Variable products are not directly supported for quantity discounts on Event Tickets Plus tickets)
- Review the “General” tab for price.
- Review the “Inventory” tab (though ticket capacity is usually managed by Event Tickets Plus, this can sometimes overlap).
- Ensure “Sold individually” is unchecked on the “Inventory” tab since you would want users to buy multiple tickets.
- Update the product as needed.
3. Set Up Quantity Discounts using Discount Rules for WooCommerce
This is where the magic happens for quantity-based pricing.
- Navigate to Discount Rules: From your WordPress dashboard, go to WooCommerce > Discount Rules.
- Add New Rule: Click “Add New Rule.”
- Rule Name: Give your rule a descriptive name (e.g., “Ticket Name Bulk Discount,” “Buy 3 Get 10% Off”)
- Rule Type:
- Under the “Condition” tab, select “Product Quantity based discount” or “Cart Quantity based discount,” depending on whether the discount applies per product or to the total quantity in the cart. For ticket quantity discounts, “Product Quantity based discount” is usually preferred if you only have one ticket type.
- Configure the Condition:
- Choose Products: In the “Products” section, select your specific event ticket product(s). You can search for the name you gave your ticket (e.g., “General Admission Ticket for [Your Event Name]”).
- Quantity Range and Discount Type: Define your tiers:
- Min Quantity / Max Quantity: Enter the range of tickets needed to trigger the discount.
- Discount Type: Choose between:
- Percentage Discount: (e.g., “10%” for 10% off)
- Fixed Discount: (e.g., “5” for $5 off per ticket, or “25” for $25 off the total if using a cart discount)
- Fixed Price: (e.g., if you want each ticket to cost a specific amount in that tier, like “$20” when buying 5 or more).
- Add More Tiers: Click “Add Range” to create multiple discount tiers (e.g., 3-4 tickets get 10% off, 5+ tickets get 15% off).
- Rule Status: Set the rule to “Active.”
- Save the Rule.
Important Considerations & Troubleshooting
- Plugin Compatibility: Always ensure all your plugins are up-to-date to maintain compatibility.
- Discount Rules Version: The Free version of “Discount Rules for WooCommerce” provides basic quantity discounts. The Pro version offers more advanced conditions and discount types (e.g., BOGO, category-based, user-role based).
- “Sold Individually”: Double-check that your WooCommerce ticket product does NOT have “Sold individually” checked under Product Data > Inventory. If it’s checked, users can only add one ticket at a time to their cart.
- Cache: If discounts aren’t applying, clear your website’s cache (plugin cache, server cache, browser cache).
- Conflicting Rules: If you have multiple discount rules, ensure they don’t conflict or that their priority is set correctly within the Discount Rules plugin settings.
- Display on Product Page: Some discount rules plugins have settings to display the discount tiers directly on the product page. Check the settings of “Discount Rules for WooCommerce” for this option to make users aware of the savings.
Using WooCommerce Memberships
WooCommerce Memberships does exactly what it says: it enhances WooCommerce by allowing you to create paid membership plans that, when purchased, can be used to grant exclusive access to pages, posts, or even complete sections of your site, while blocking non-members from accessing the same content.
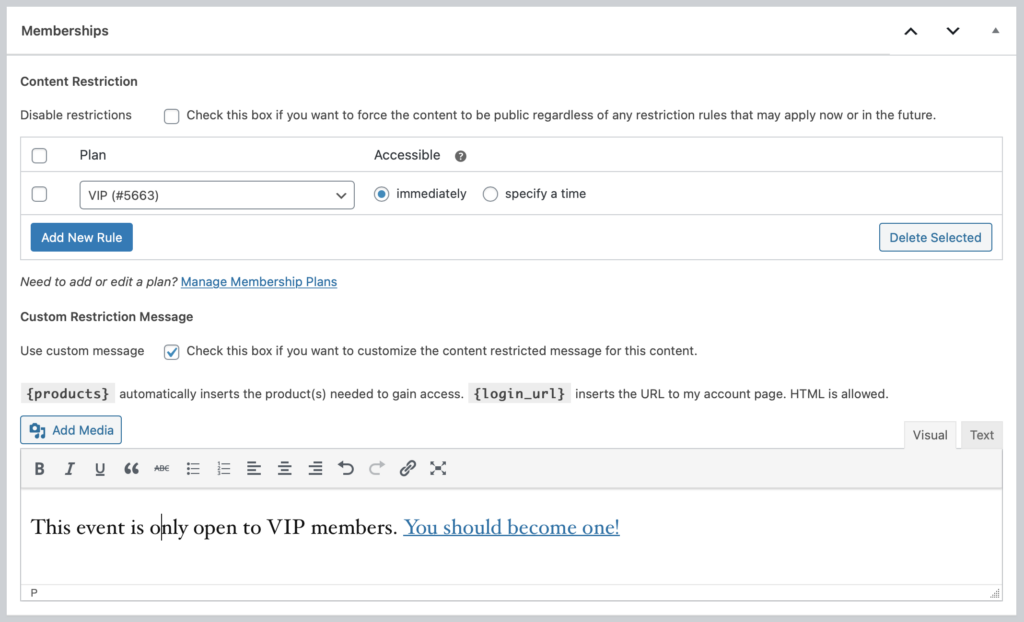
What makes this so cool is that it integrates smoothly with WooCommerce and requires almost no setup. Just create a membership plan and set which content members have access to.
We can even set restrictions right in the post editor.
We’re going to look at some examples of how WooCommerce Memberships can be used with The Events Calendar and our other products. There are tons of possibilities, of course. But let’s look at a few key use cases to give you an idea of what’s possible.
Calendar and Events
WooCommerce Memberships works perfectly alongside The Events Calendar. Events are a custom post type in WordPress, and WooCommerce Memberships is able to control access to custom post types, in addition to products created in WooCommerce.
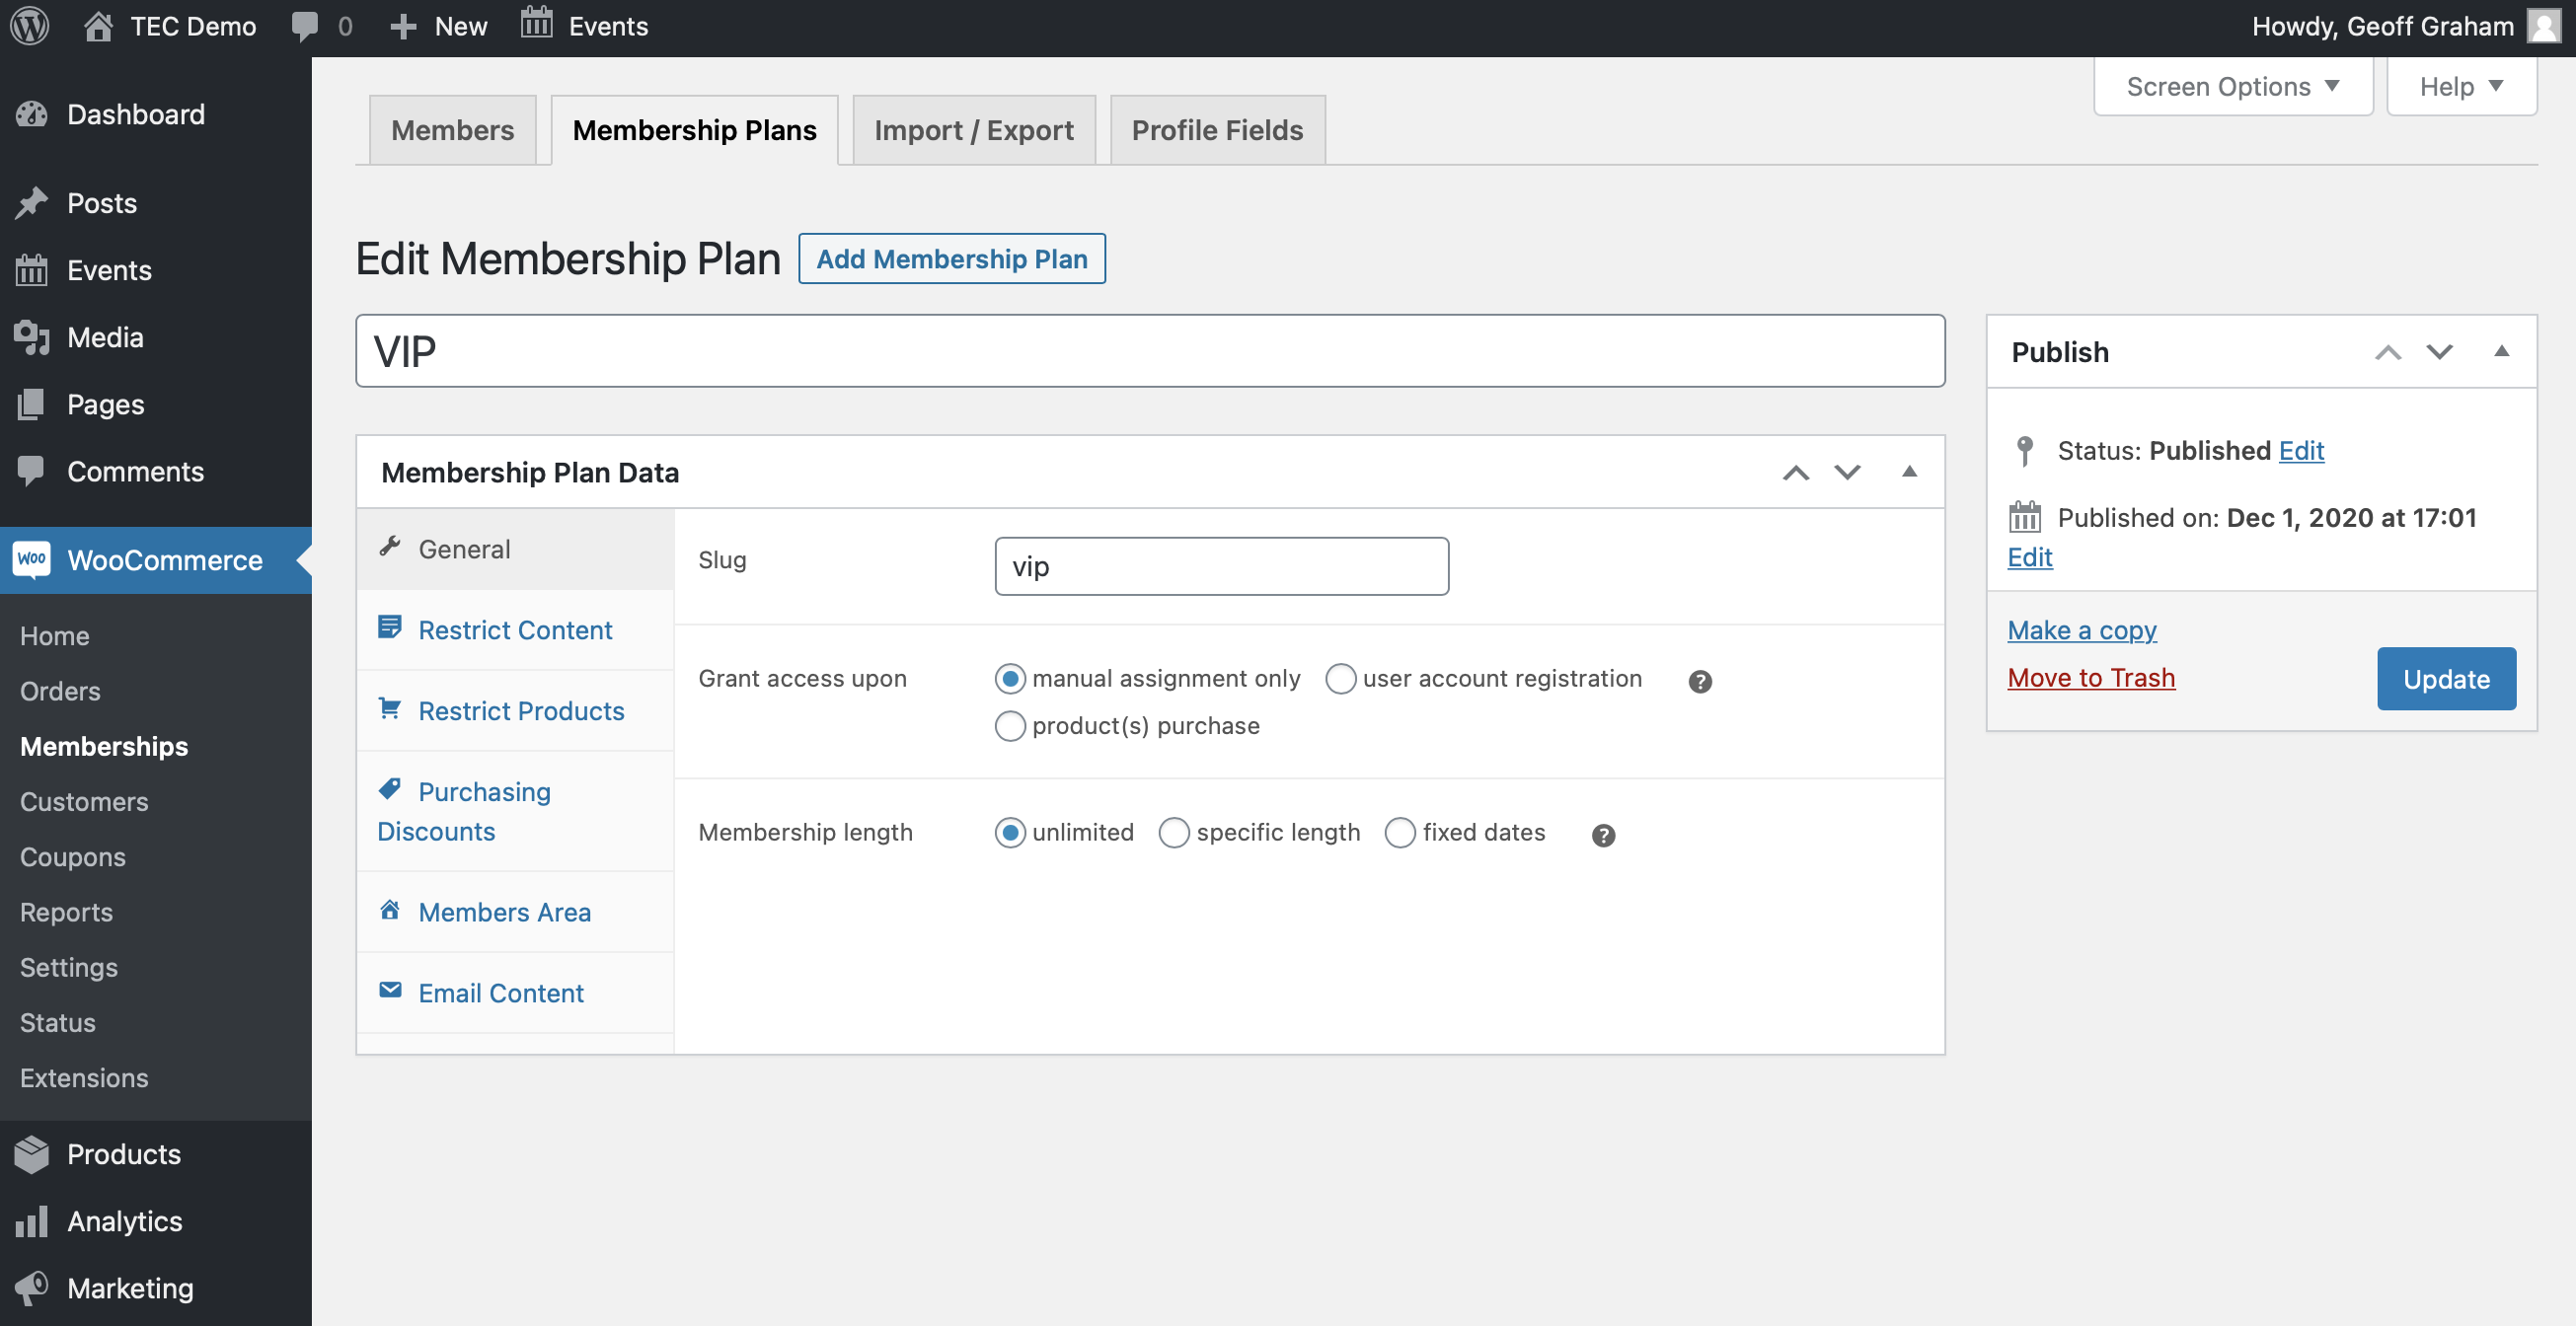
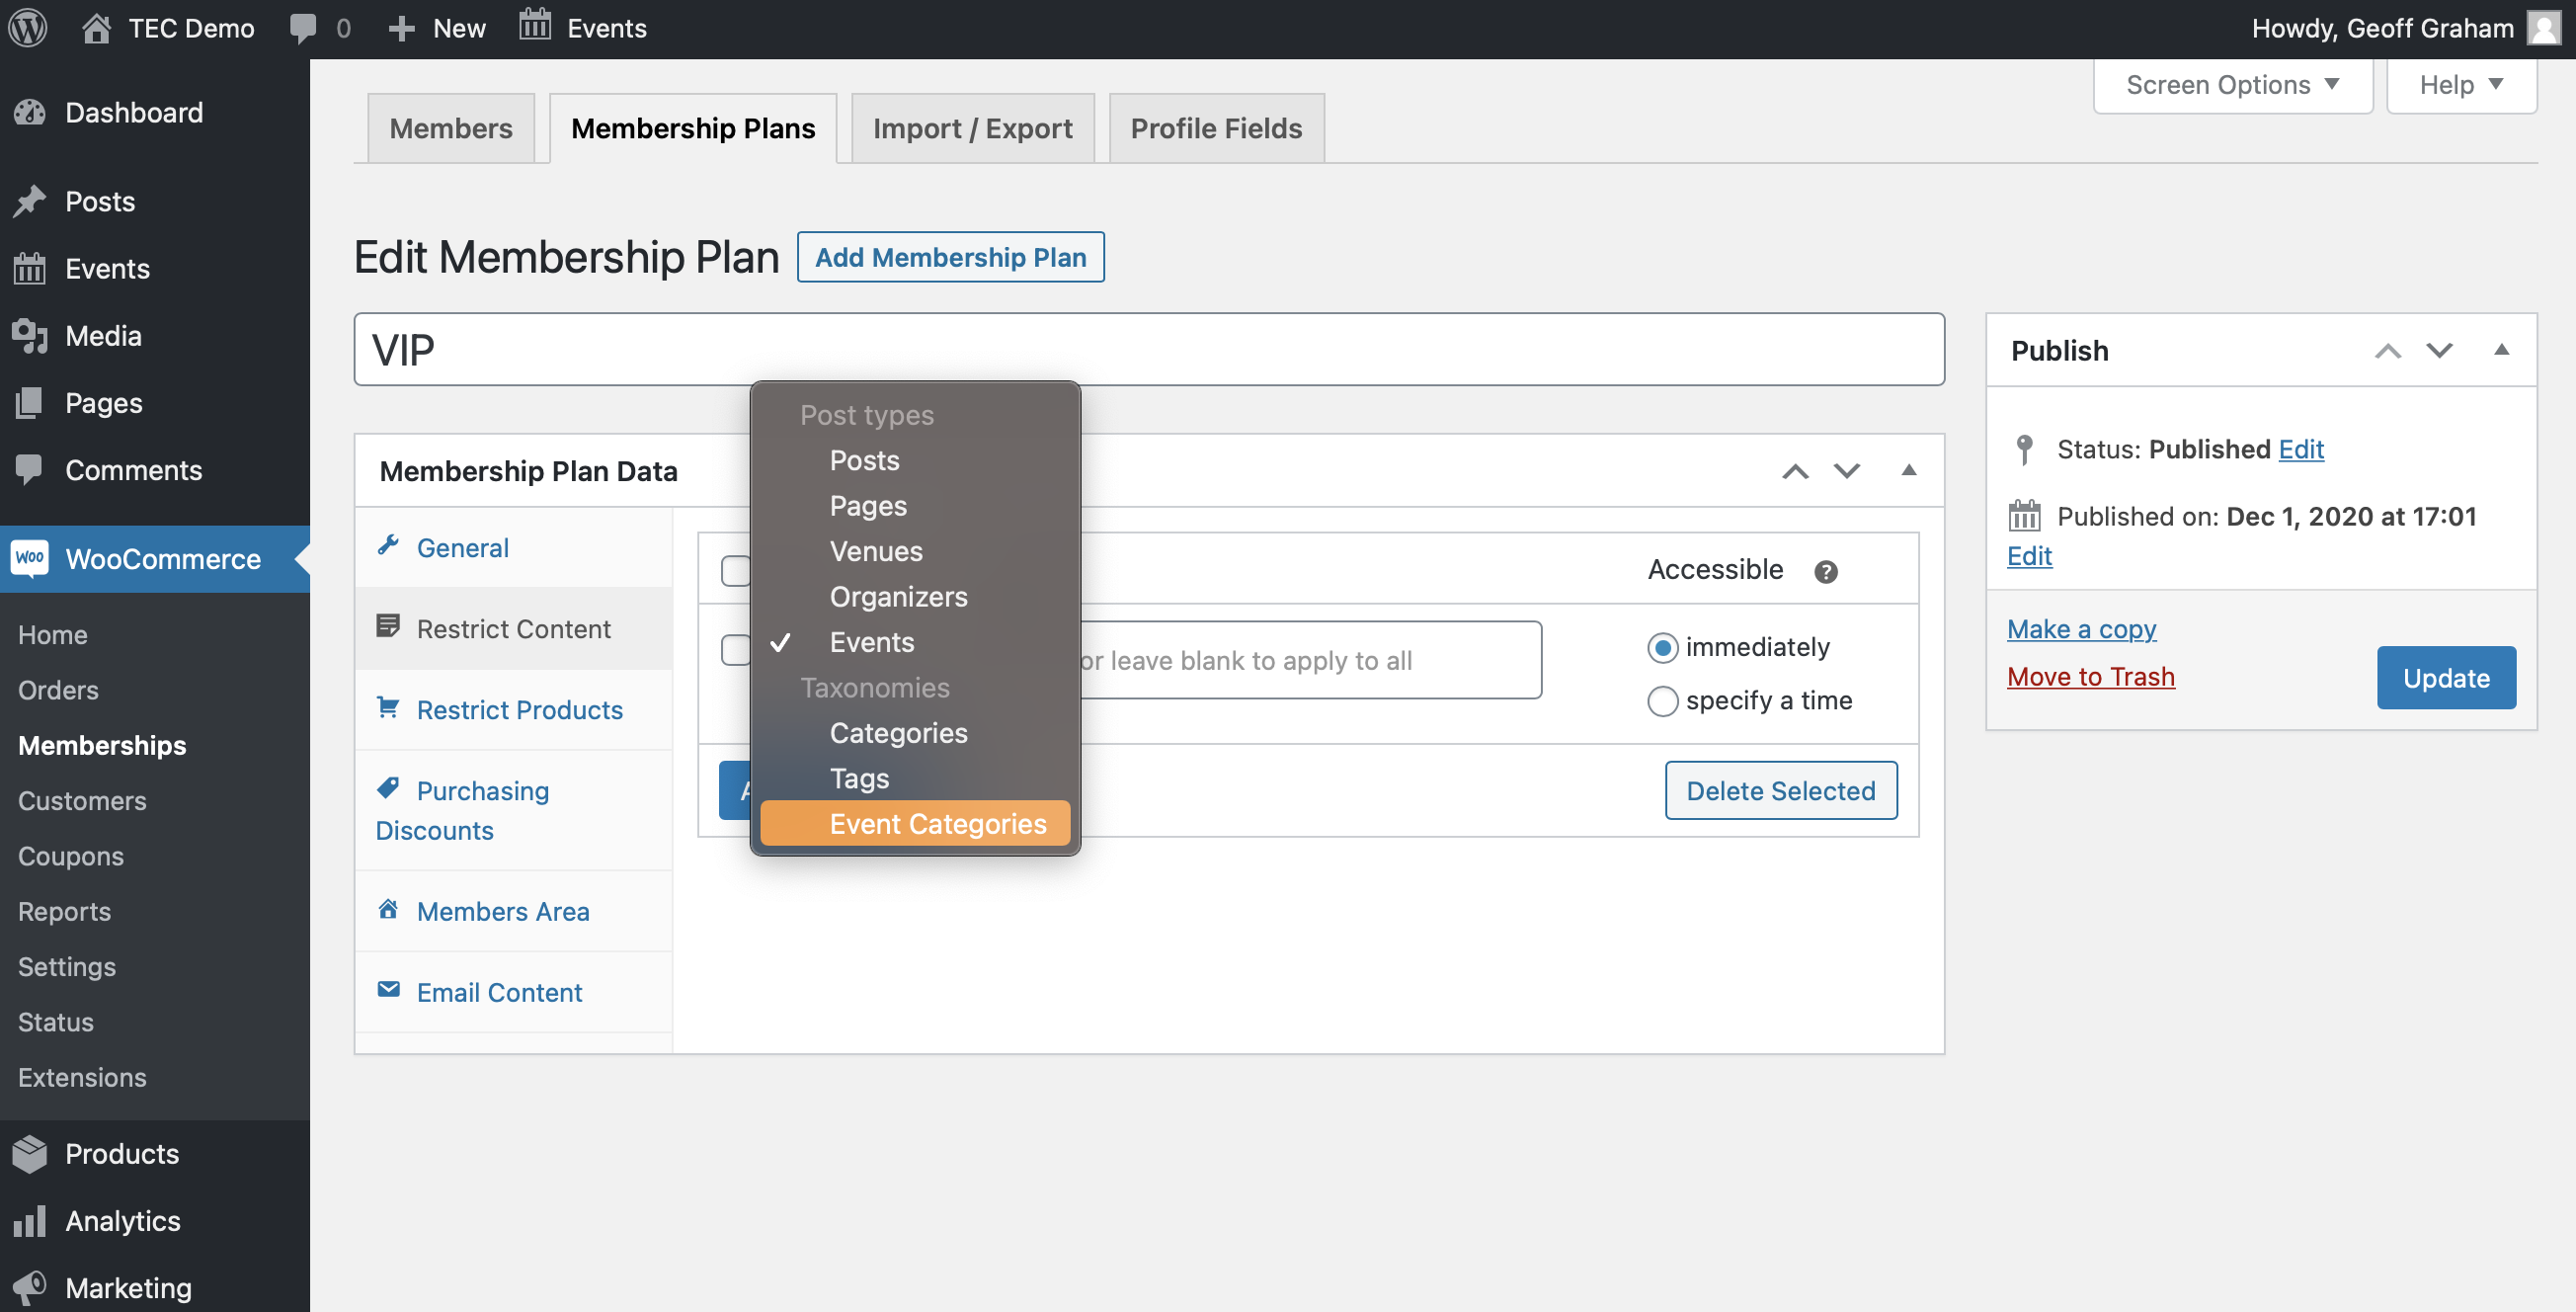
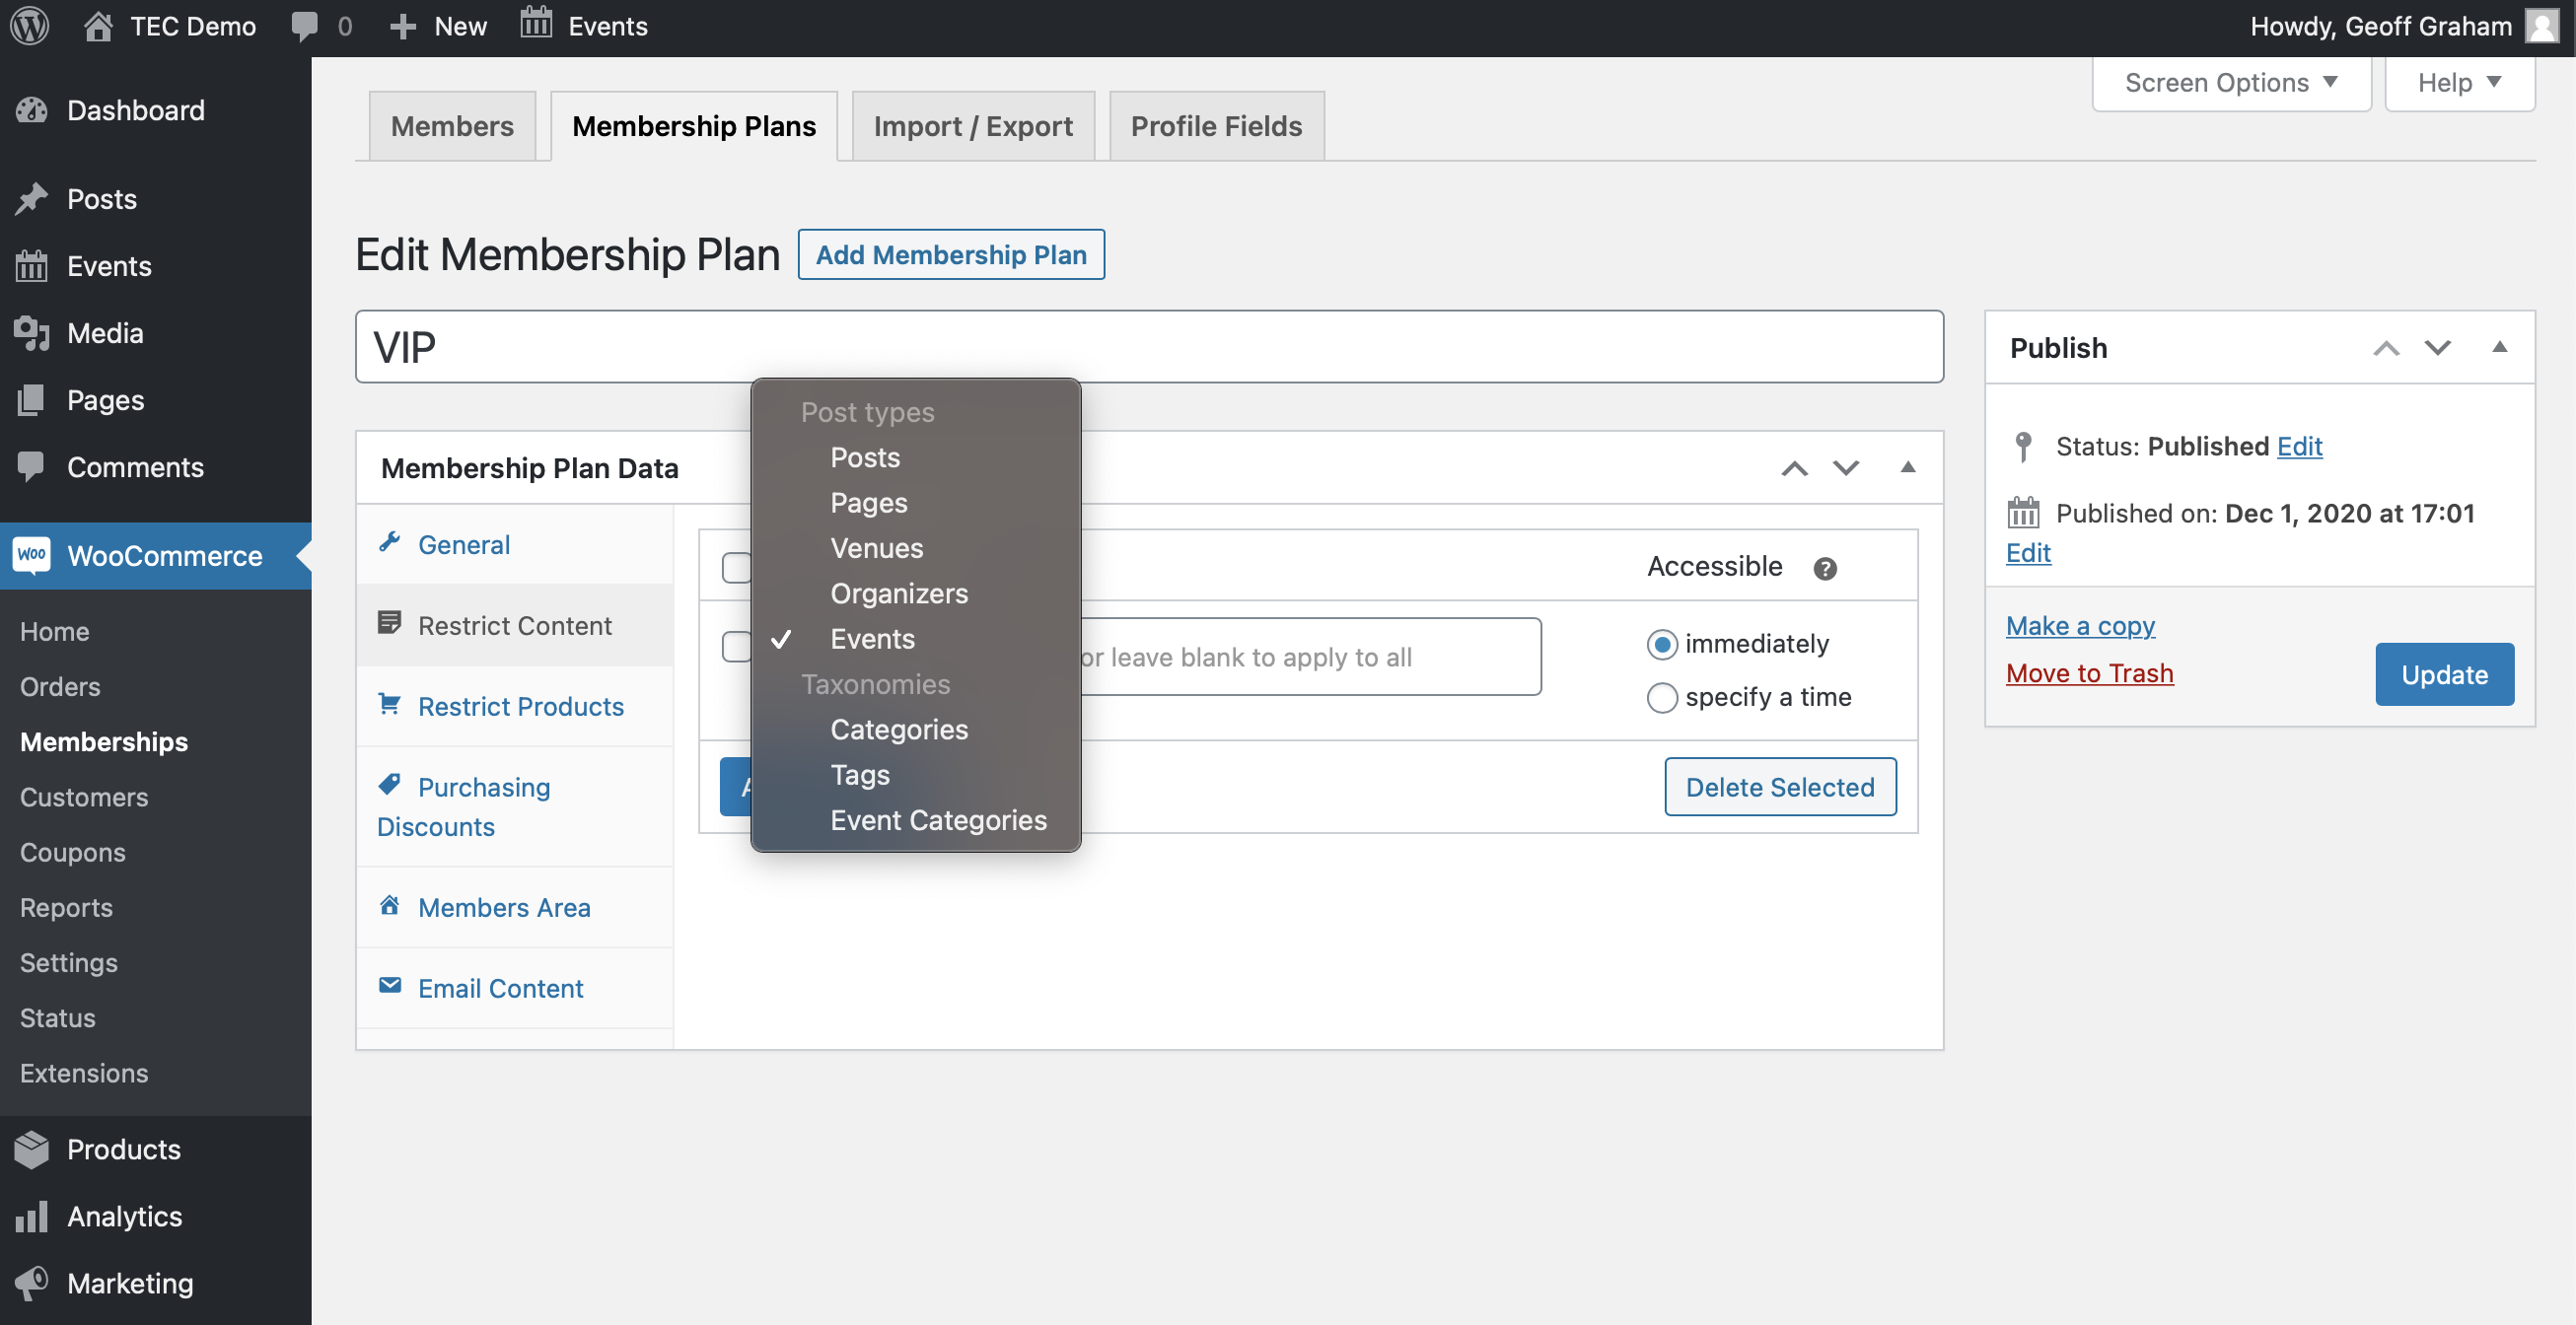
That gives us a lot of flexibility to use memberships with the calendar and events. For example, it’s possible to limit access to the entire calendar to members only. Once a membership plan has been created, open it up in the WordPress admin, then choose “Events” in the “Restrict Content” settings. Leaving the “Title” field empty restricts access to all events for non-members. Or, use it to add specific events that only members on this particular membership plan can view.
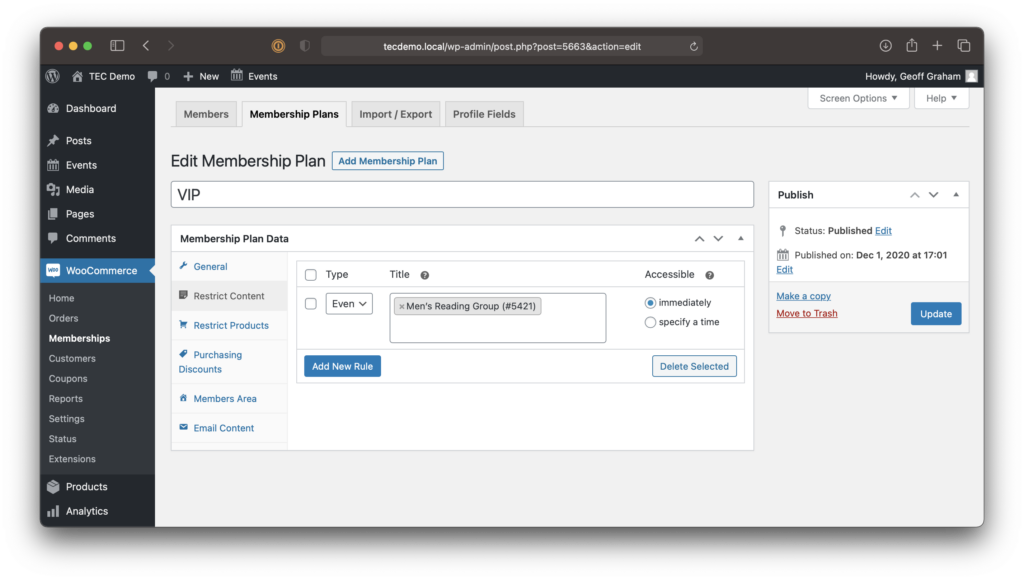
It’s worth noting that we can limit access to specific event categories as well. Imagine how useful that could be for creating an entire archive or events that only paying members can access!
Venues and Organizers
The venues and organizers that are created in The Events Calendar are also WordPress custom post types, just like events. And, you guessed it, we can limit access to all of them or certain ones only to members the same way we covered with events.
Just note that, while venues and organizers are a feature in The Events Calendar, you will need to add Events Calendar Pro in order to get pages for them.
Tickets
One of the things customers often request is a way to grant members exclusive access to tickets for an event. By allowing members access to tickets that are unavailable to non-members, it’s possible to offer a special discount, early-bird access, or even VIP access to an event.
That’s exactly what we can do with WooCommerce Memberships, Event Tickets, and Event Tickets Plus. All three plugins are required in addition to WooCommerce:
- Event Tickets is free and provides the functionality for adding tickets to events.
- Event Tickets Plus integrates Event Tickets with WooCommerce so that tickets are registered as WooCommerce products.
And since WooCommerce products are a custom post type, WooCommerce Memberships gives us options to control access to them.
Start by adding a Ticket block to an event in the WordPress editor. (It’s also possible to add tickets to pages and posts instead of events.)
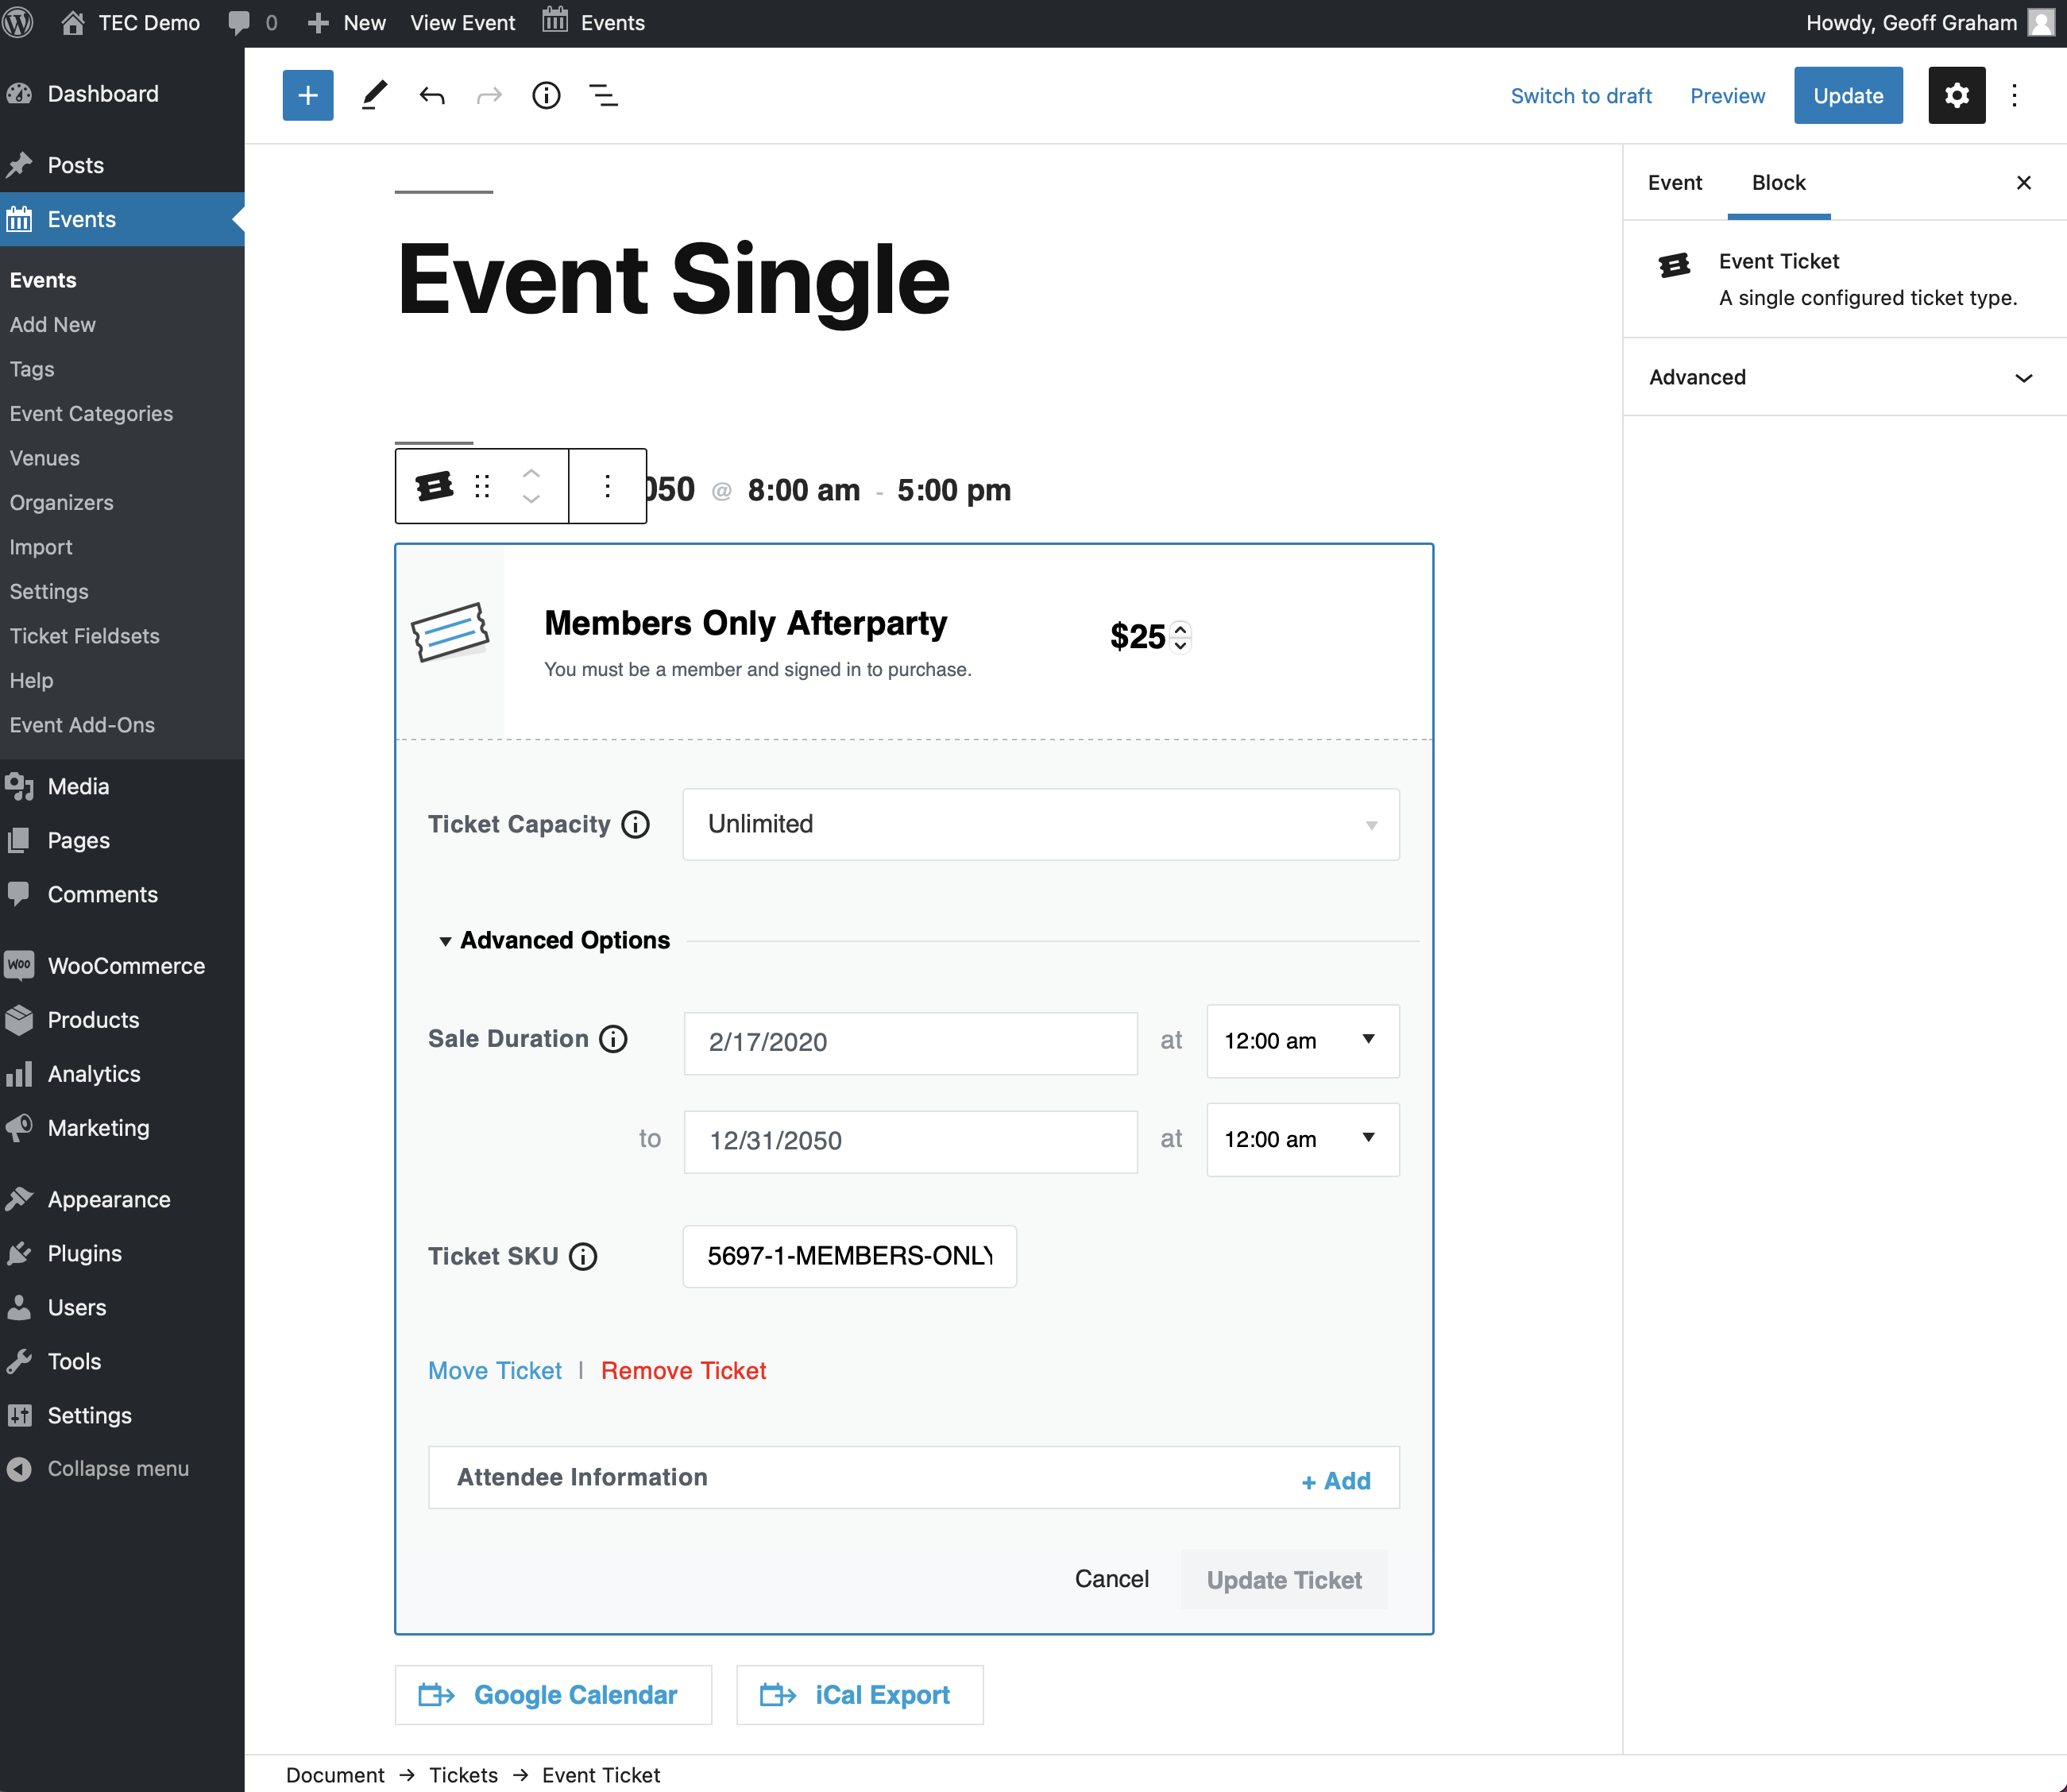
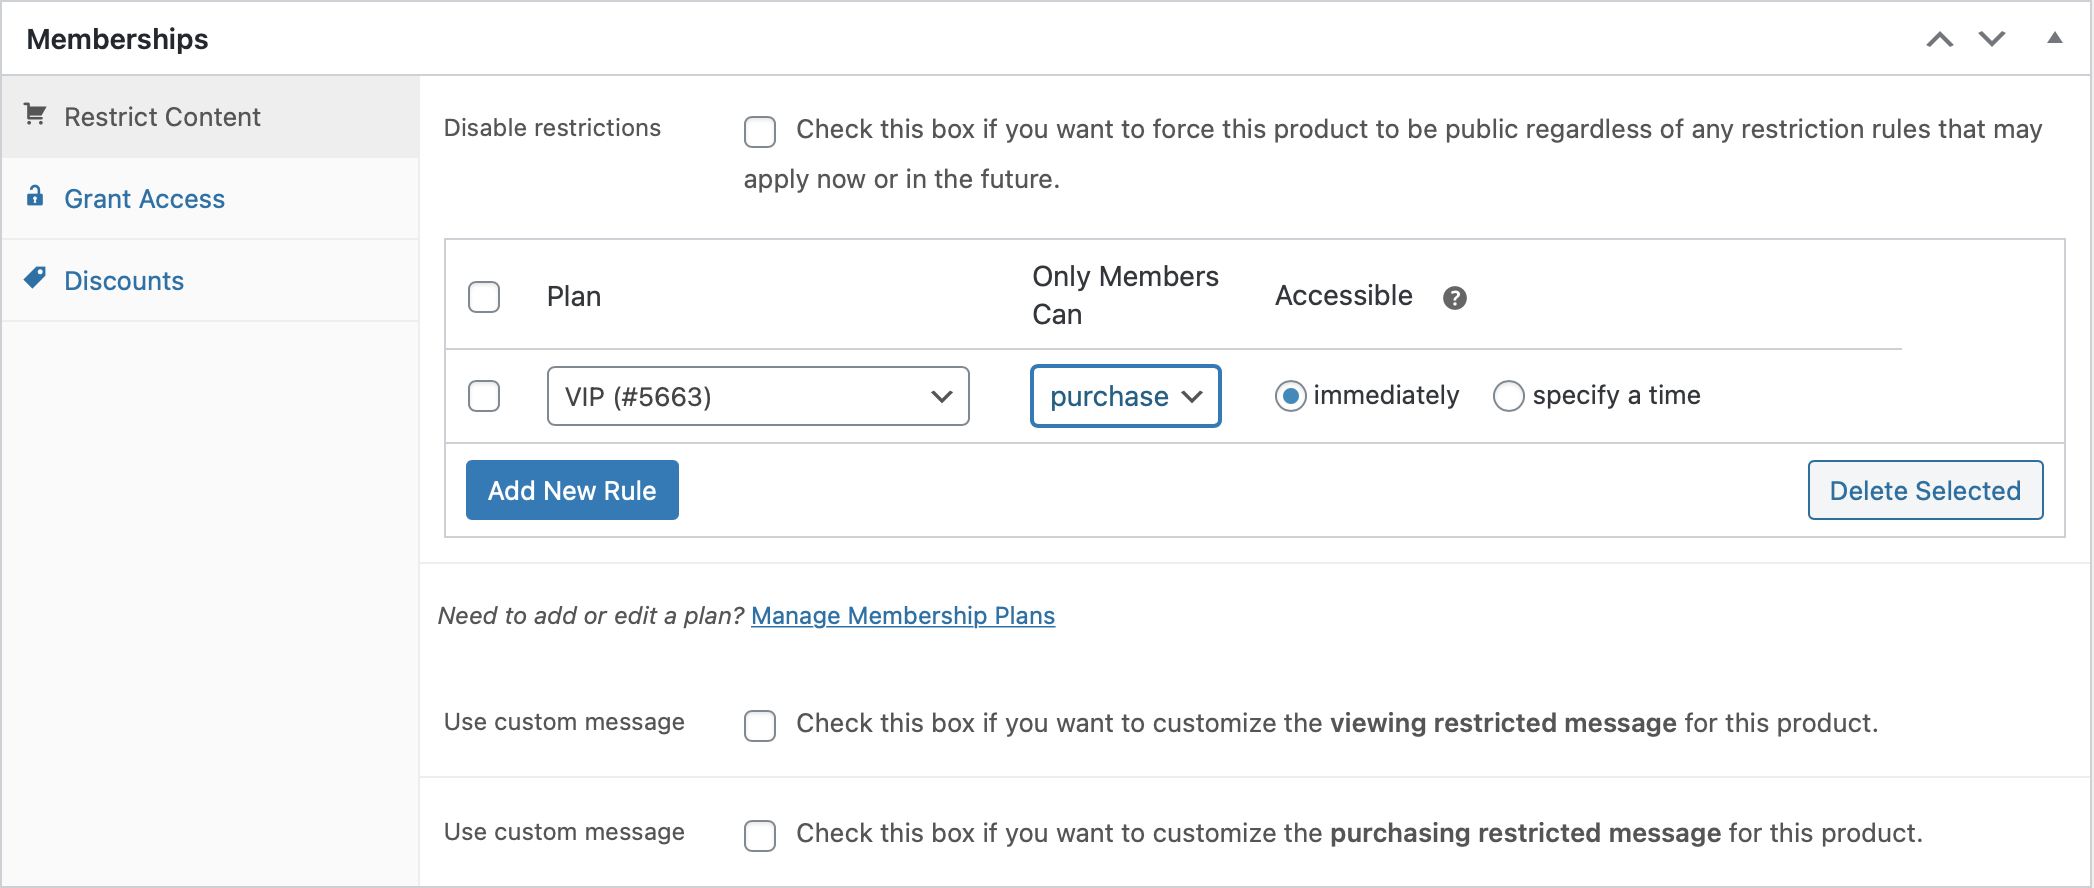
Now that the ticket has been created, we can head to the Products screen in WordPress and locate the ticket. Select it and we get an entire set of options that control access to the tickets in a “Memberships” section of the page.
To make this integration even easier, we’ve got a handy extension to help you create members-only tickets.
Event Submissions
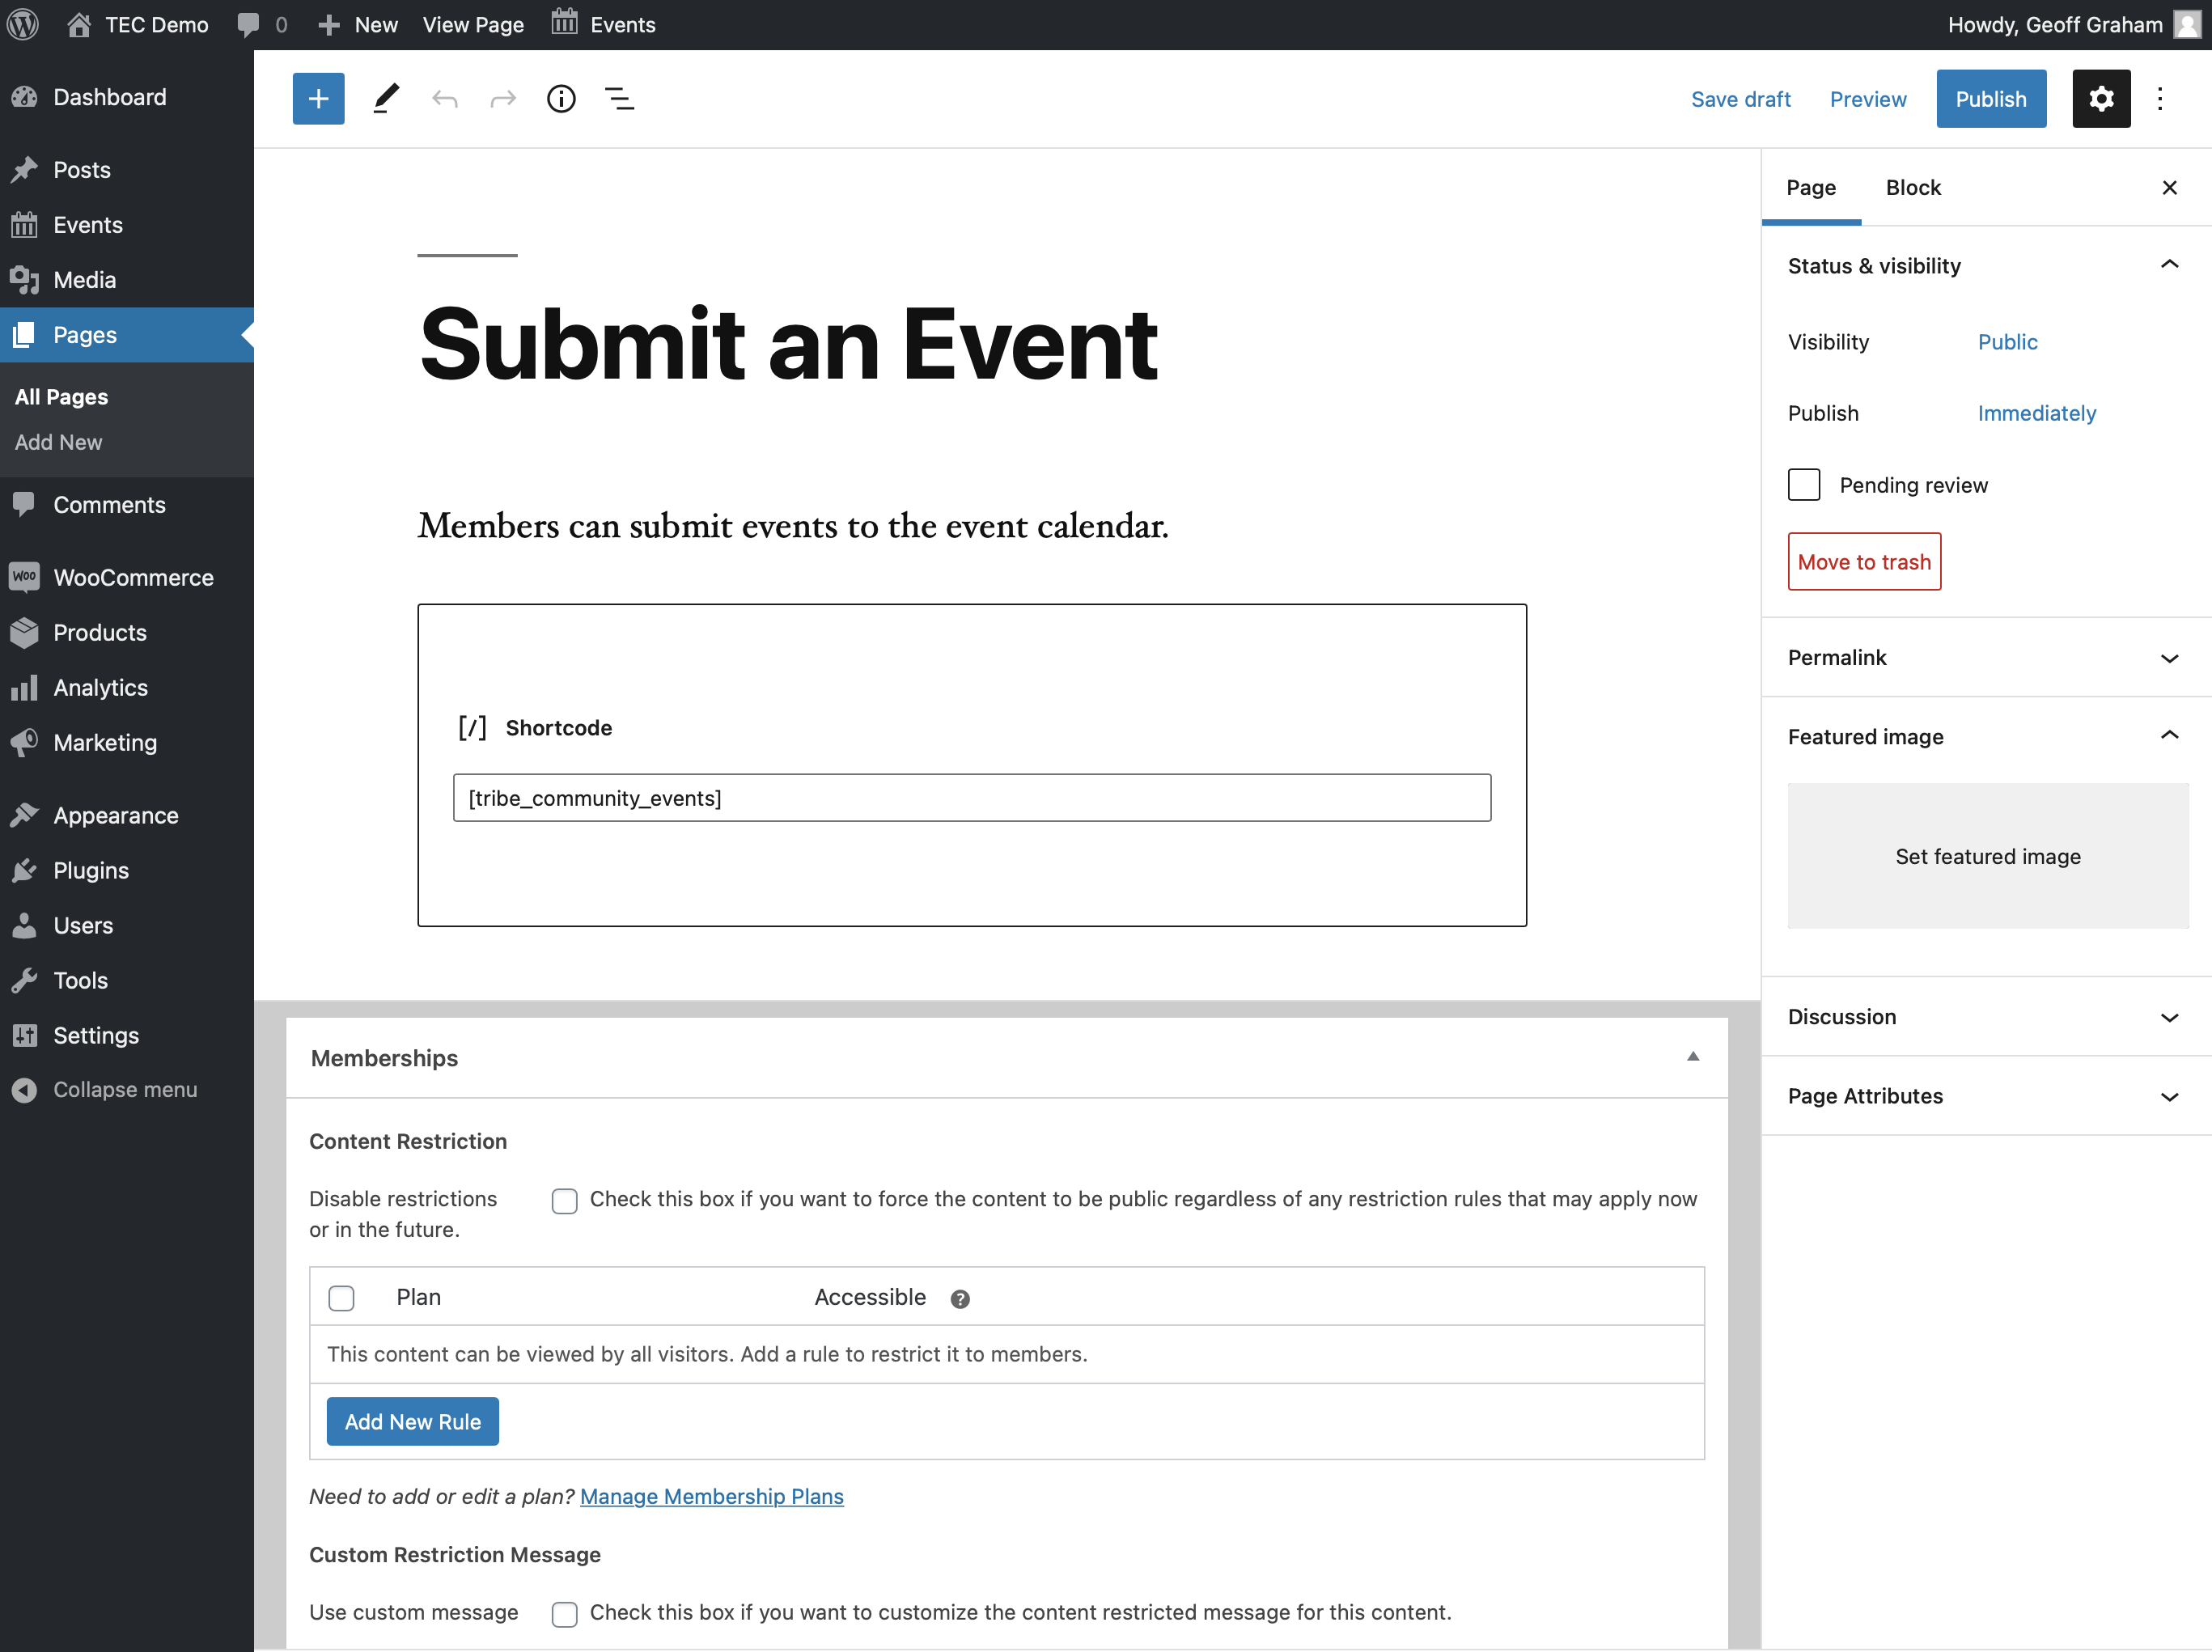
Hey, here’s an idea: let members post events to the calendar! With our Community Events add-on to The Events Calendar, an event submission form can be added to the front end of the website. And, since WooCommerce Memberships can give members exclusive access to any WordPress page or post, we can give exclusive access to the submission form as well.
Add [tribe_community_events] to a Shortcode block in the WordPress page editor, save the page, and we get the event submission form.
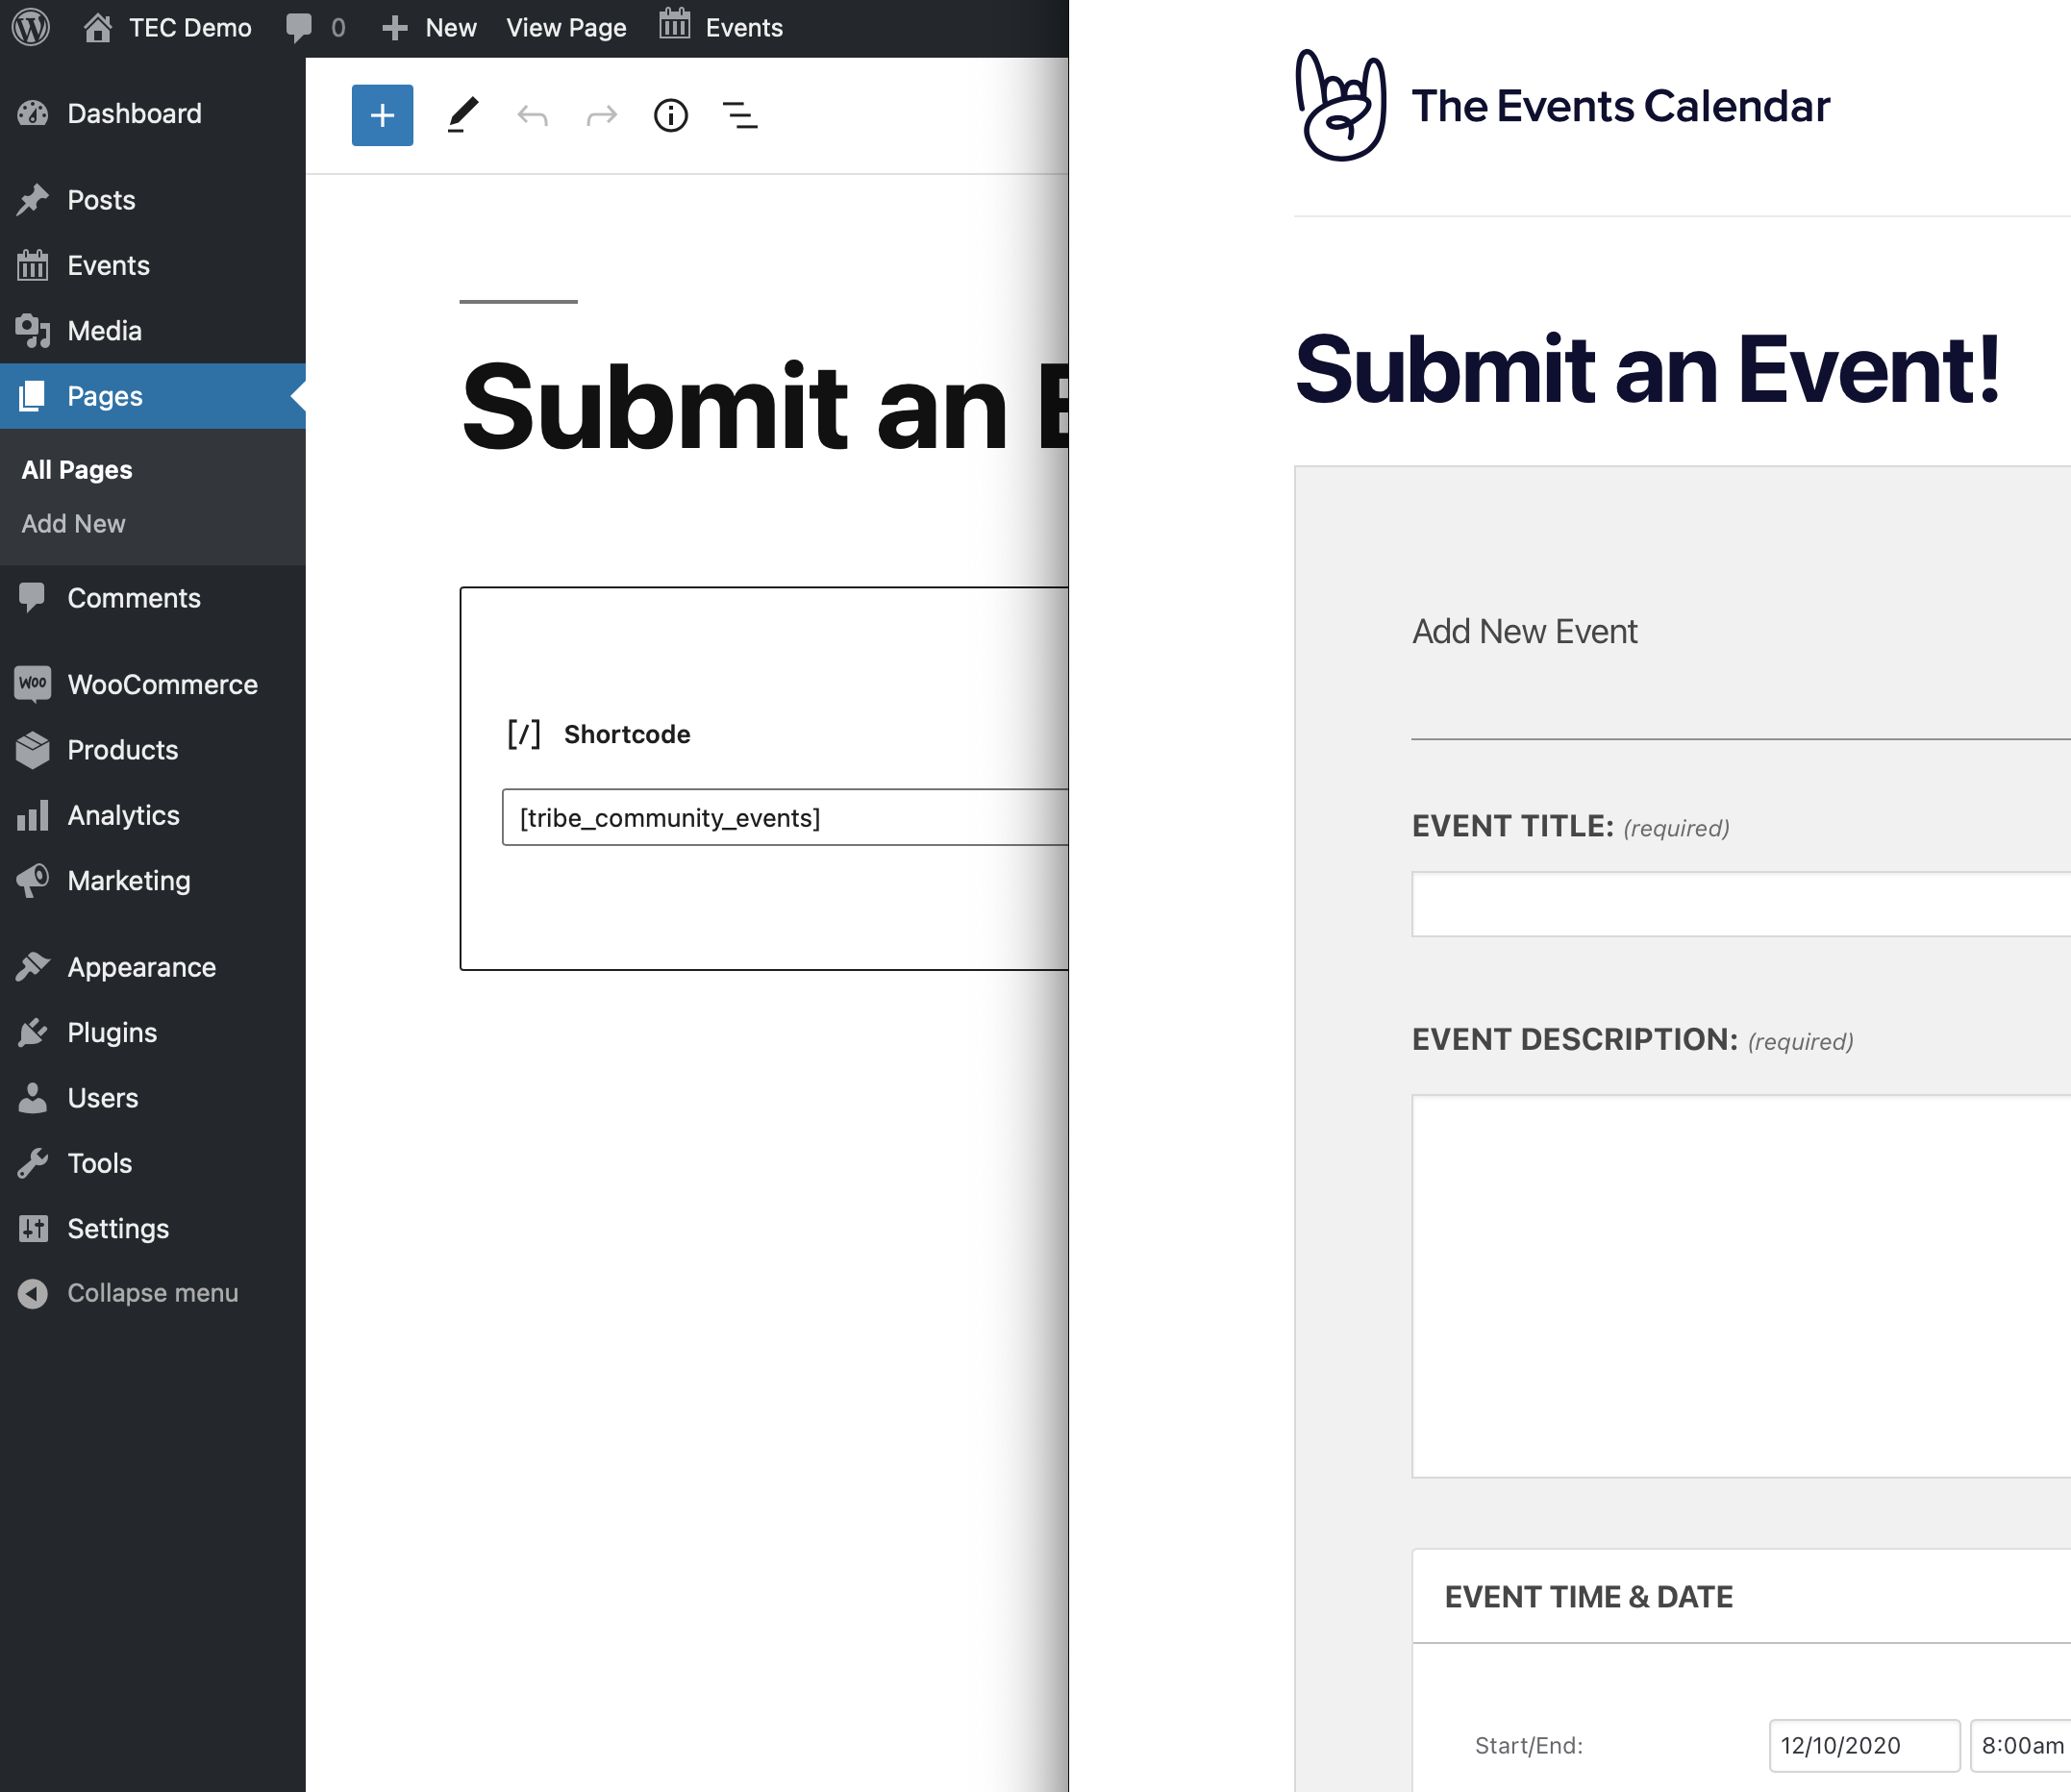
Now, this becomes a page like any other, which means WooCommerce Memberships can limit access to it based on a user’s membership plan.
Here’s another idea: create one membership plan that allows members to submit events, and create an additional plan that allows members access to view and edit their events. We can do that the exact same way we just did for the event submission form, only adding a parameter to the shortcode we used before, like this: [tribe_community_events view=”my_events”]. That embeds a list of the events a user has submitted if they are logged in, and we can use WooCommerce Memberships to limit access to it.
Conflicts with Extensions
Do you notice a conflict with a WooCommerce extension and The Events Calendar or Event Tickets Plus? If so, try deactivating the WooCommerce extension – if The Events Calendar and Event Tickets Plus work fine with the extension disabled, then the extension itself is the culprit. We do not provide any support for WooCommerce extensions, so your best bet is to contact the support team behind that extension directly.