Promoter includes two features for reusing message configurations across events: shortcuts and campaigns. Shortcuts are individual reusable message templates. Campaigns are collections of shortcuts that can be applied to an event all at once. This article covers both.
Promoter Shortcuts
A shortcut is a message template you can use to quickly create emails over and over again. With a shortcut, you pre-define:
- Subject line and message content — copy and merge tags
- Default audience — attendees of this event, or attendees of all events
- Scheduling (optional) — when the message will be sent relative to the event’s date, start time, or end time
For example, instead of manually writing a reminder to attendees 3 days before every event, you can use the “Event Reminder” shortcut. In one click, your reminder is ready to go.
Shortcuts are accessible from two places:
From the Shortcuts menu — there is a link to your shortcuts in the main Promoter navigation.

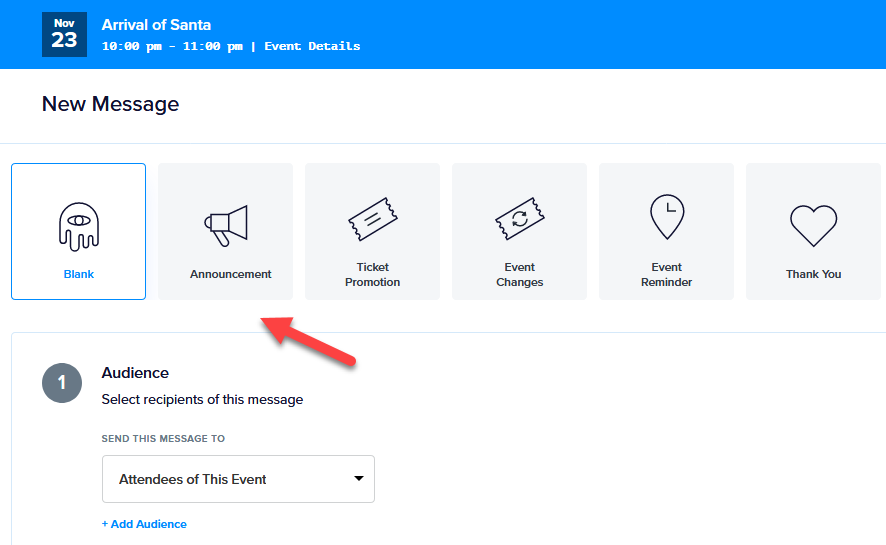
From the message editor — shortcuts are also accessible while creating a new message.
Working with Shortcuts
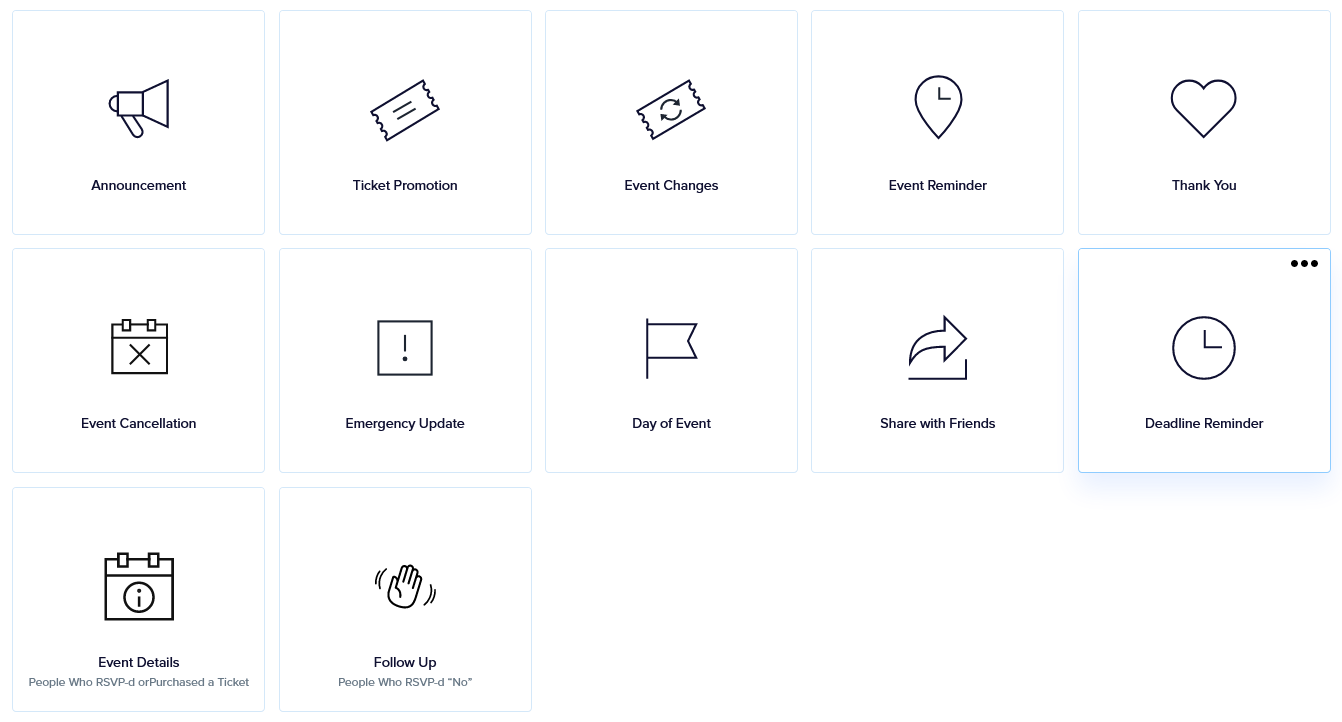
The Shortcuts page lists Promoter’s twelve default shortcuts.
Default Shortcut Actions
Each default shortcut supports the following actions:
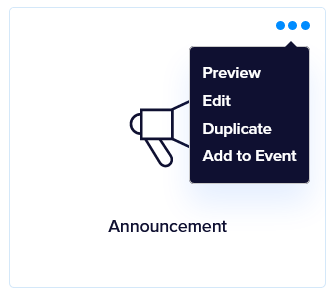
- Preview — View the shortcut’s message before using it.
- Edit (aka Customize) — Modify the shortcut’s content, audience, or schedule.
- Duplicate — Create a copy of the shortcut as a starting point for a custom version, without modifying the original.
- Add to event — Automatically schedule the pre-written message for selected events.
Creating Custom Shortcuts
Custom shortcuts can be created in one of three ways from the Shortcuts page:
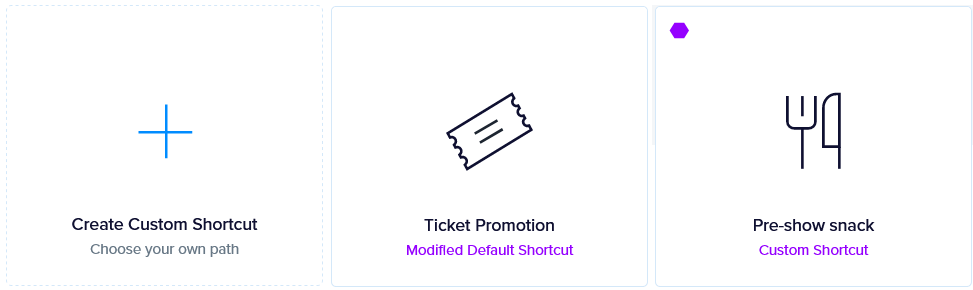
- Click the Create Custom Shortcut block to start from scratch.
- Select Edit from a default shortcut’s action menu to customize that default shortcut directly.
- Select Duplicate from a default shortcut’s action menu to create a custom copy.
Custom Shortcut Actions
Custom shortcuts support the same four actions as default shortcuts, plus two additional ones:
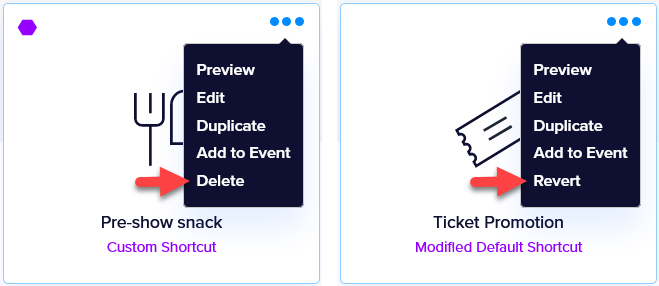
- Delete — Permanently removes a custom shortcut. Applies only to shortcuts created from scratch or duplicated from a default.
- Revert — Undoes any customization applied to a default shortcut, restoring it to its original factory settings. Applies only to default shortcuts that were edited.
Promoter Campaigns
A campaign is a reusable collection of shortcuts that you can assign to an event in one step. Rather than adding shortcuts to an event one at a time, a campaign lets you apply a curated set of messages — your pre-event reminder, day-of message, post-event follow-up, and so on — all at once.
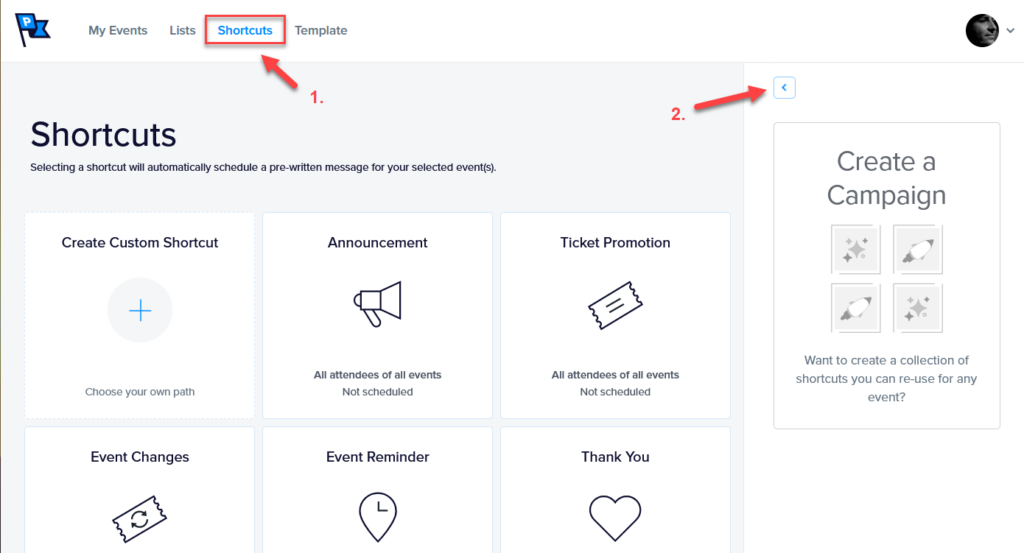
Creating a Campaign
Head to the Shortcuts page and expand the Create a campaign sidebar.
Shortcuts can be added to a campaign in one of two ways:
- Manually selecting shortcuts — choose the shortcuts you use most often.
- Using the starter campaign — a set of commonly used default shortcuts for a successful event promotion (the default shortcuts can be modified).
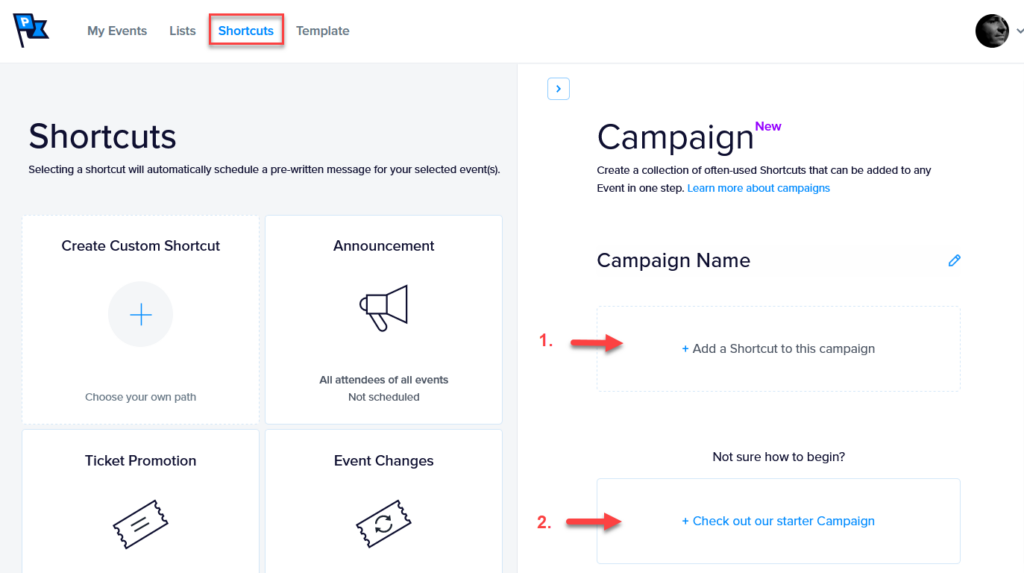
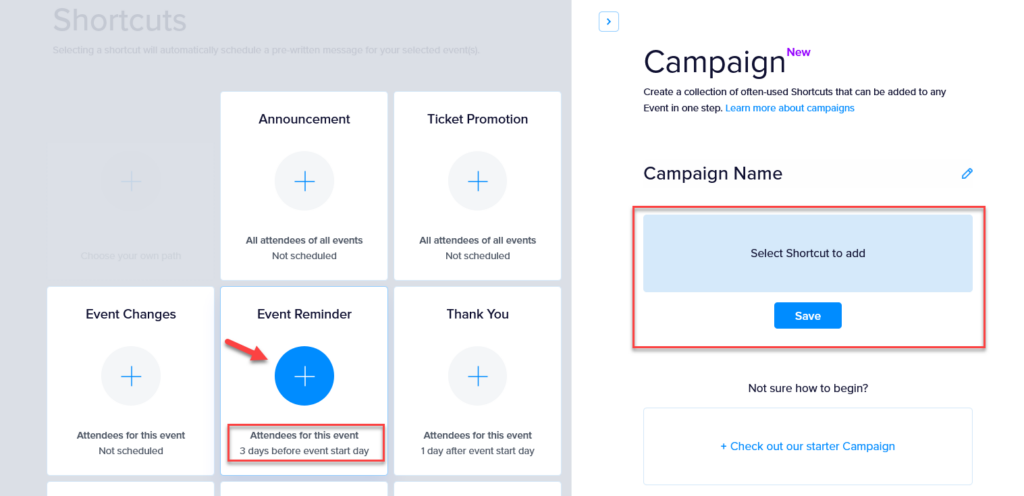
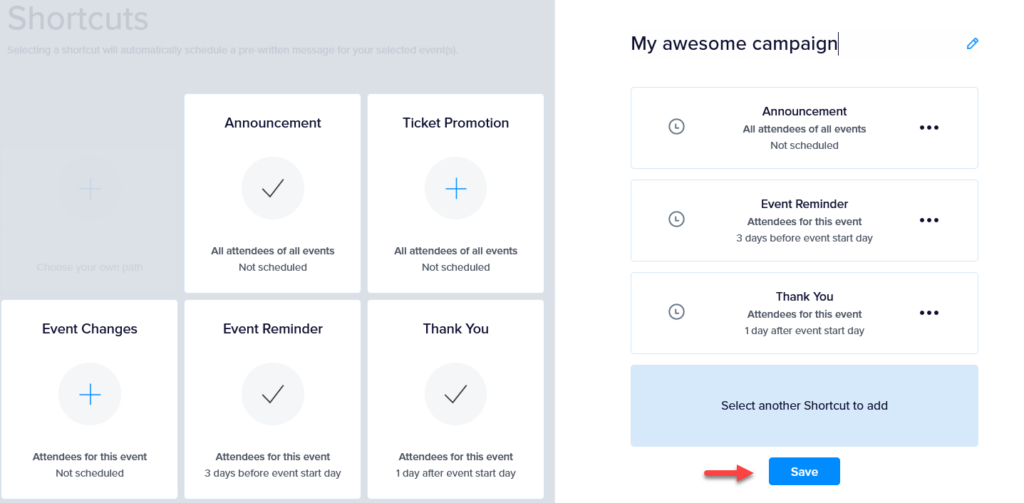
Manually Selecting Shortcuts
Click Add a Shortcut to this campaign. The screen will switch to Shortcut Adding Mode. Click the large plus (+) icon on any shortcut to add it to the campaign. When you’re done with your selection, click Save to exit Shortcut Adding Mode.
Pro tips:
- Campaigns require a minimum of two shortcuts.
- The default audience and schedule (if any) are shown in each shortcut box to help you decide which ones to include.
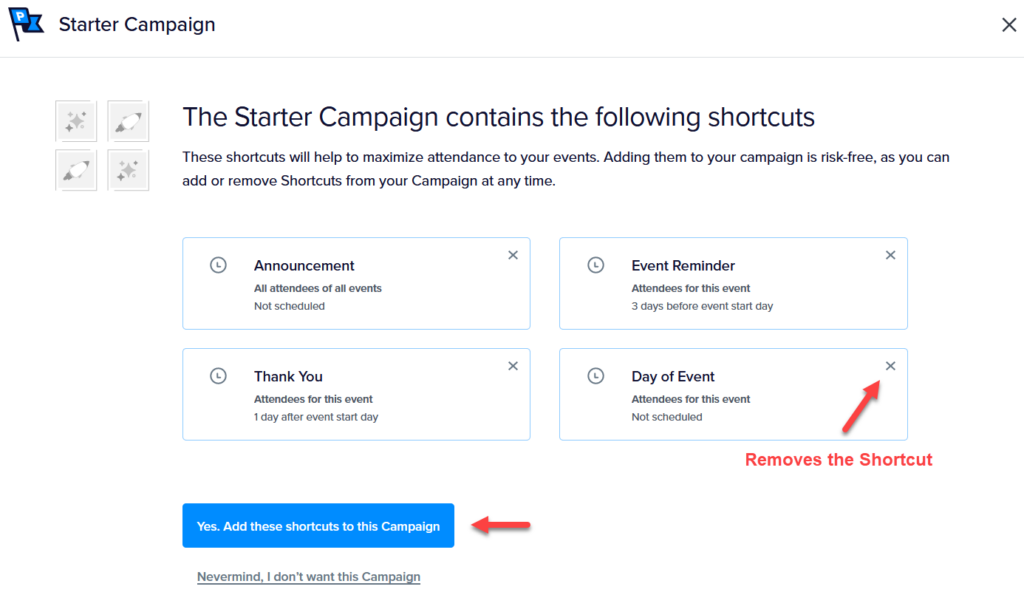
Using the Starter Campaign
Click Check out our Starter Campaign to preview the suggested shortcuts. Click Add Shortcuts once you’ve reviewed them. You can remove any suggested shortcut after adding it.
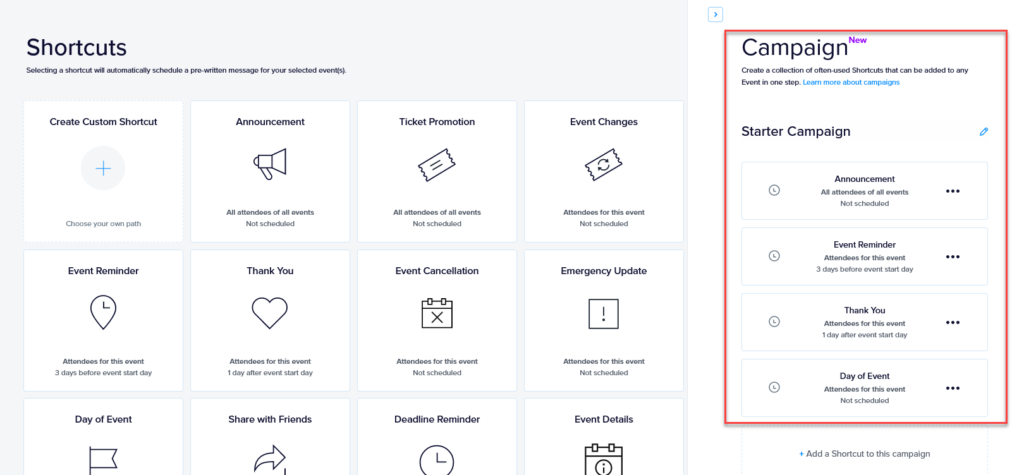
Removing Shortcuts from a Campaign
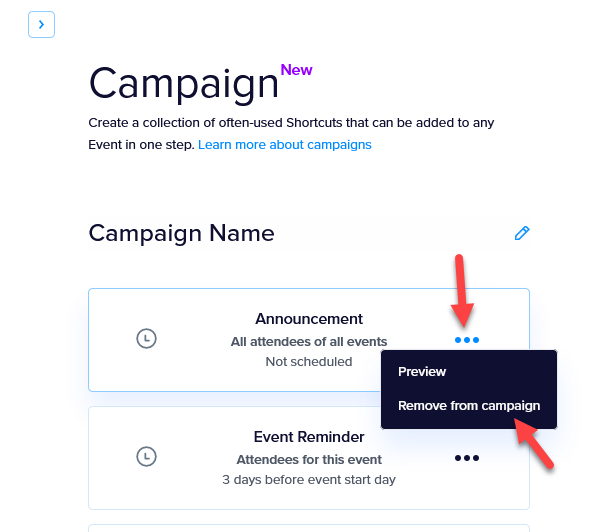
You can remove a shortcut from a campaign at any time by clicking its contextual menu and selecting Remove from campaign.
Save the campaign when you’re done. Additional shortcuts can be added at any time by clicking Add a Shortcut to this campaign.
Applying a Campaign to an Event
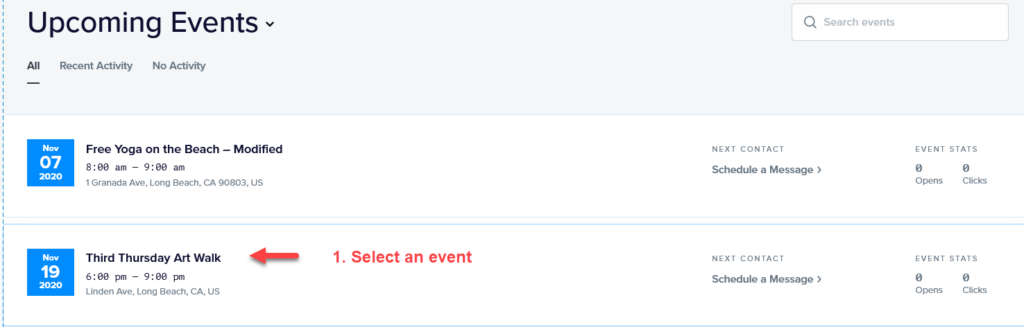
Campaigns are designed to be applied to events. To add a campaign to an event:
- Navigate to the event of your choice.
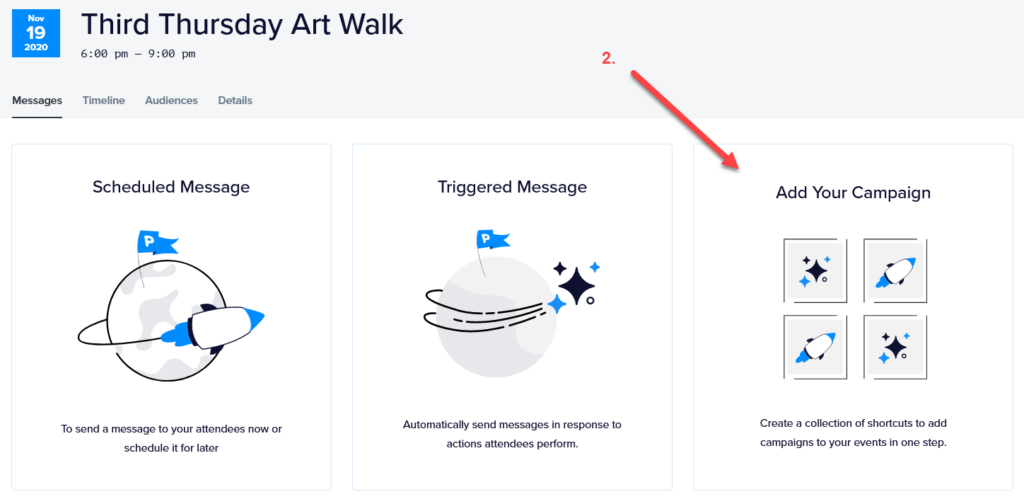
- Click the Add Your Campaign option.
You’ll be taken to a confirmation screen. Review your shortcut selections carefully before proceeding — you can still adjust them at this step.
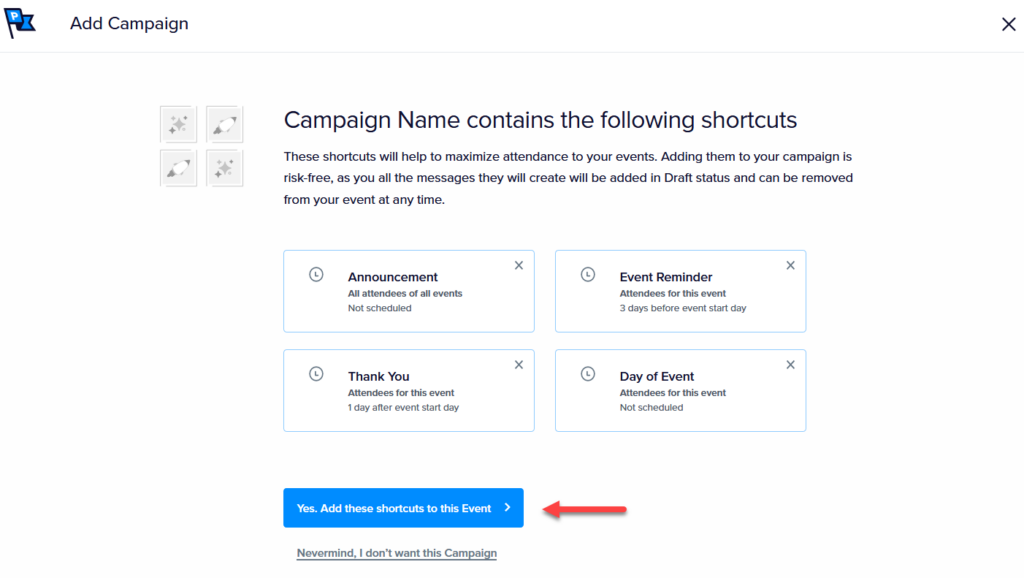
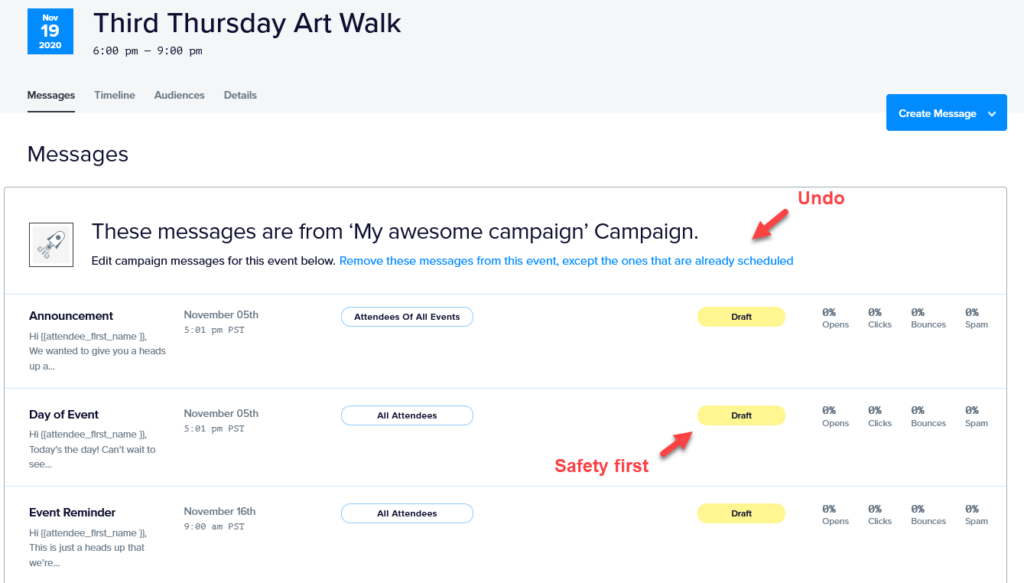
After confirming, you’ll see a list of messages that were created as a result of adding the campaign to the event. All messages are set to Draft status and won’t send until they have been published. You can still undo the campaign at this stage by removing the messages from the Messages screen.