In some African countries, namely Ghana, Nigeria, and South Africa, there aren’t many payment gateway options when it comes to using Event Tickets with ticket payments. Now, Paystack has made it easy to connect to Event Tickets with using their third-party integration.
Registering an Account With Paystack
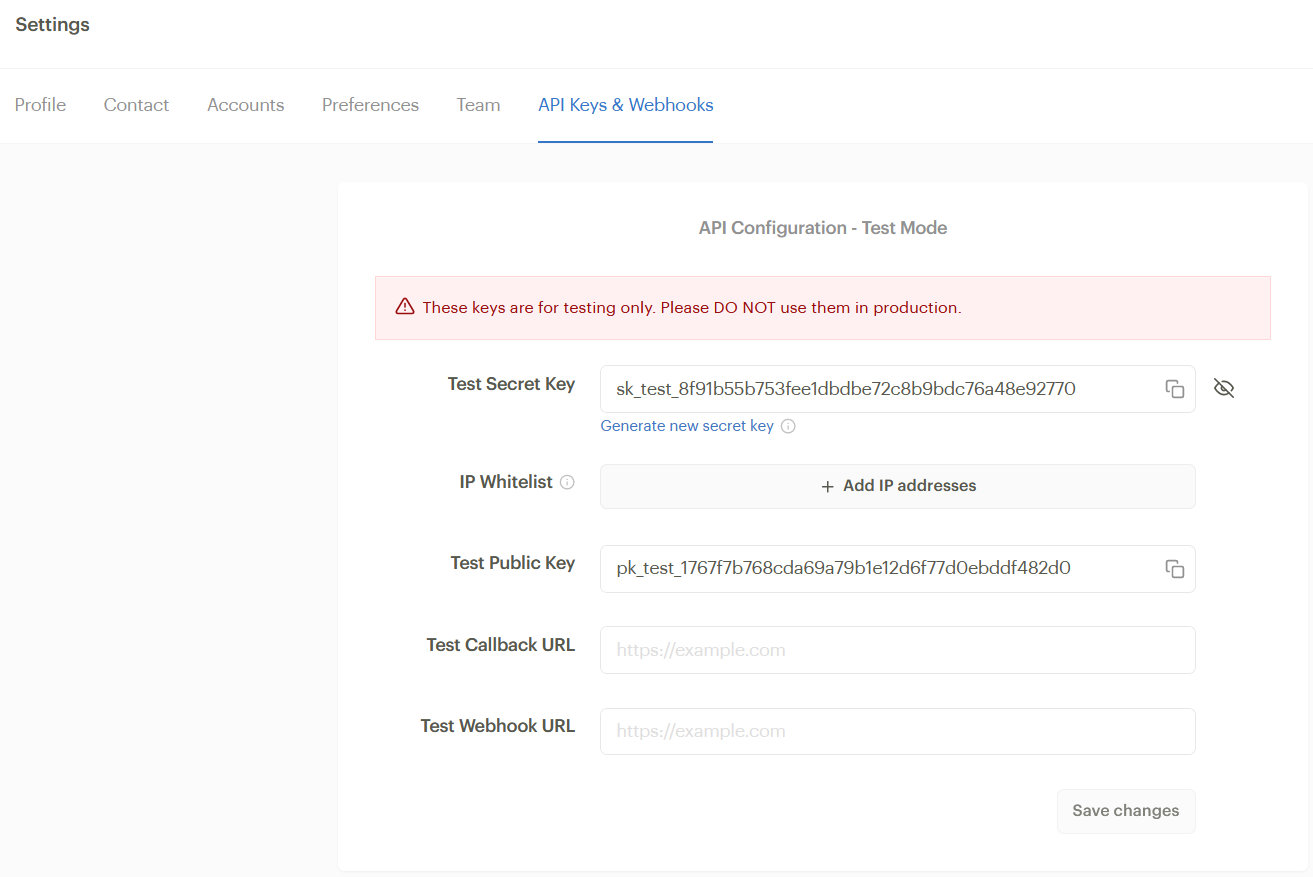
Using Tickets Commerce with Paystack requires a Paystack account. Without it, you can’t generate the necessary API keys. Once you’ve created an account, browse to Settings and click on the API Keys and Webhooks tab. This is where the API keys are generated. For this guide, the API keys are for testing purposes only.
Using Tickets Commerce with Paystack
To use Event Tickets with Paystack, you can install the “Paystack for The Events Calendar” integration, which you can find here.
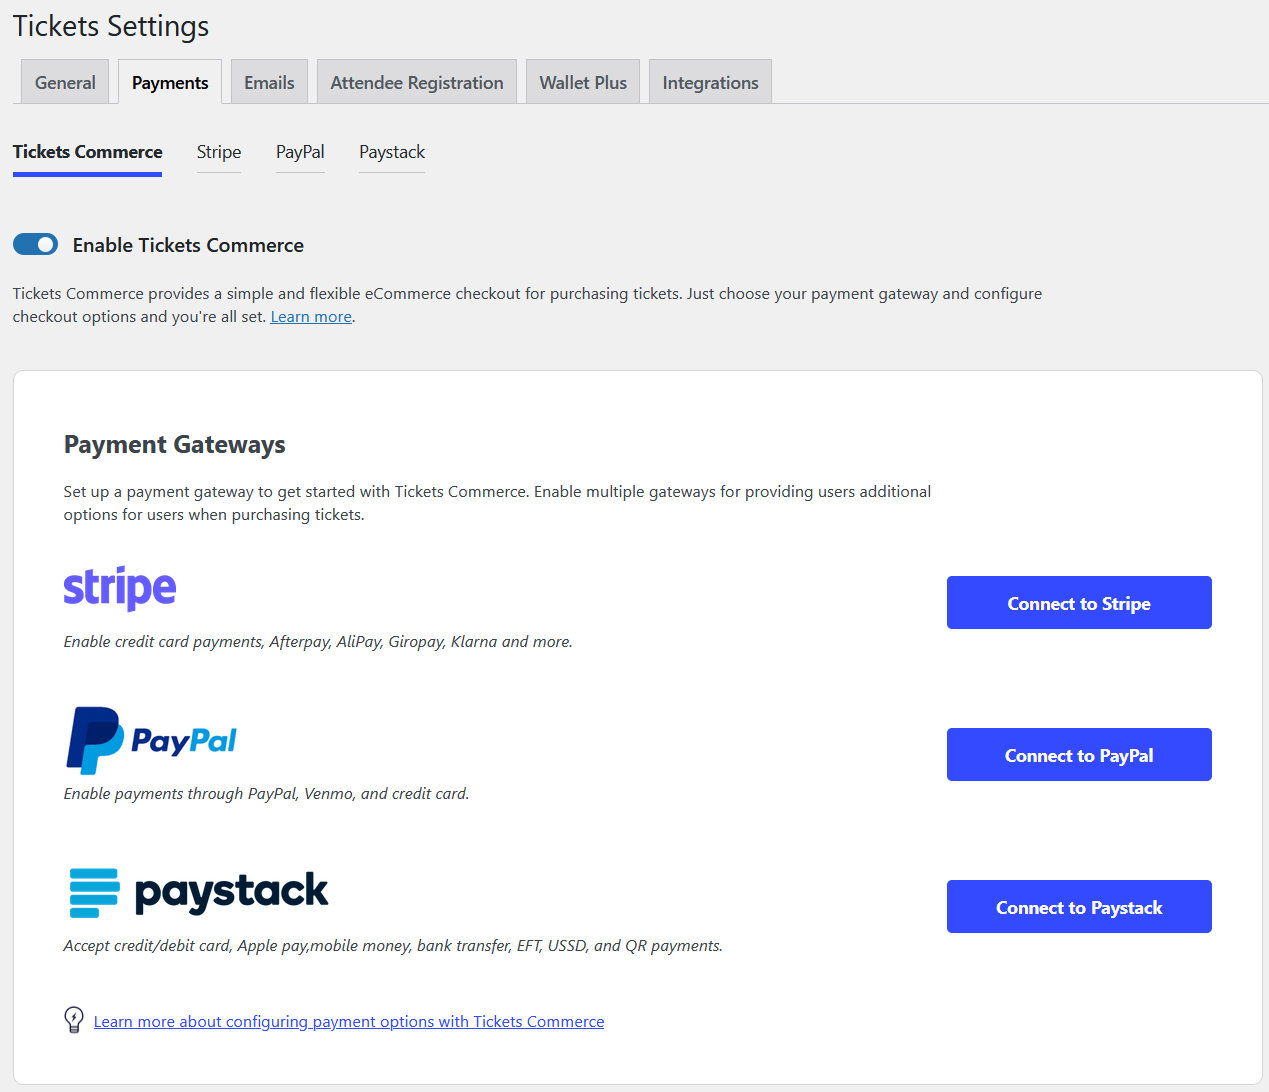
You’ll want to ensure that you already have the free Event Tickets plugin. From there, go to the Event Tickets Plugin Settings on the menu tab of your WordPress site, click the Payments tab, and make sure that you have Tickets Commerce enabled. You will also see other tabs containing all the Payment options on your site. If you have installed the plugin correctly, you should see Paystack on that list. This is where you can configure the Paystack Plugin. Click Connect to Paystack.
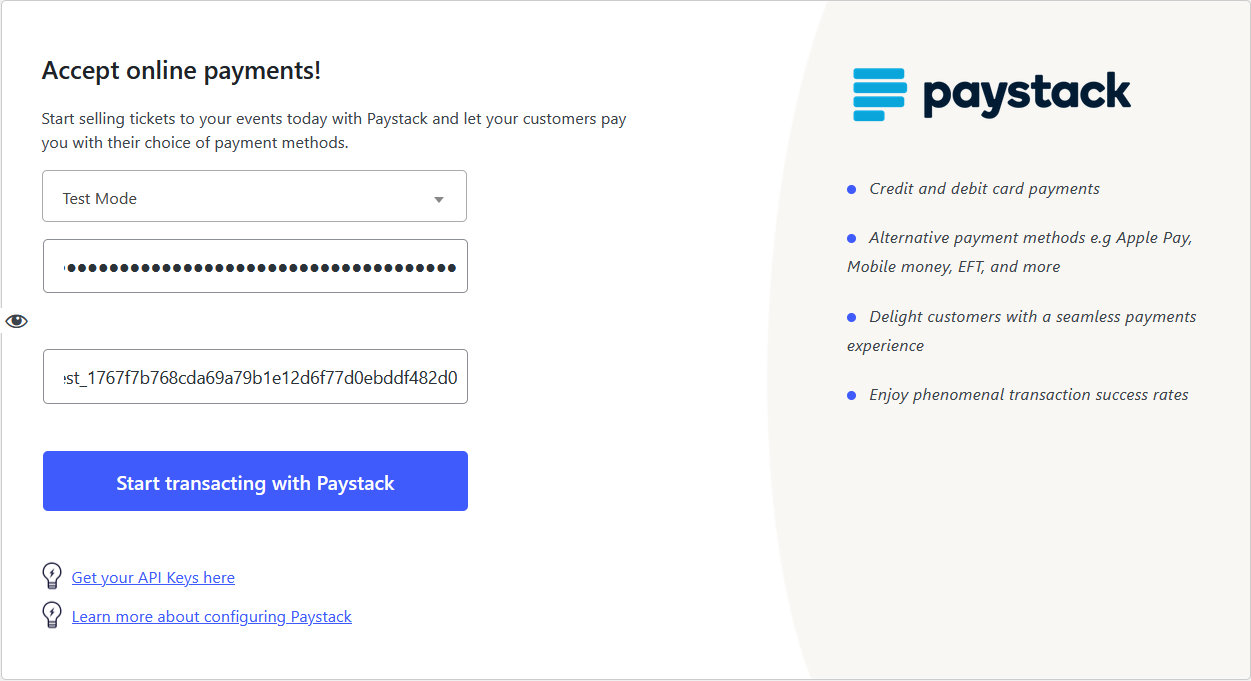
Copy the API keys from your Paystack account and paste them into the appropriate fields. Note that in this guide, the mode is set to Test. If you don’t save the changes, the Secret and Public Keys might be saved for the wrong mode. Once the API keys are entered, click the Start transacting with Paystack button. On the next screen, click the toggle to Enable Paystack.
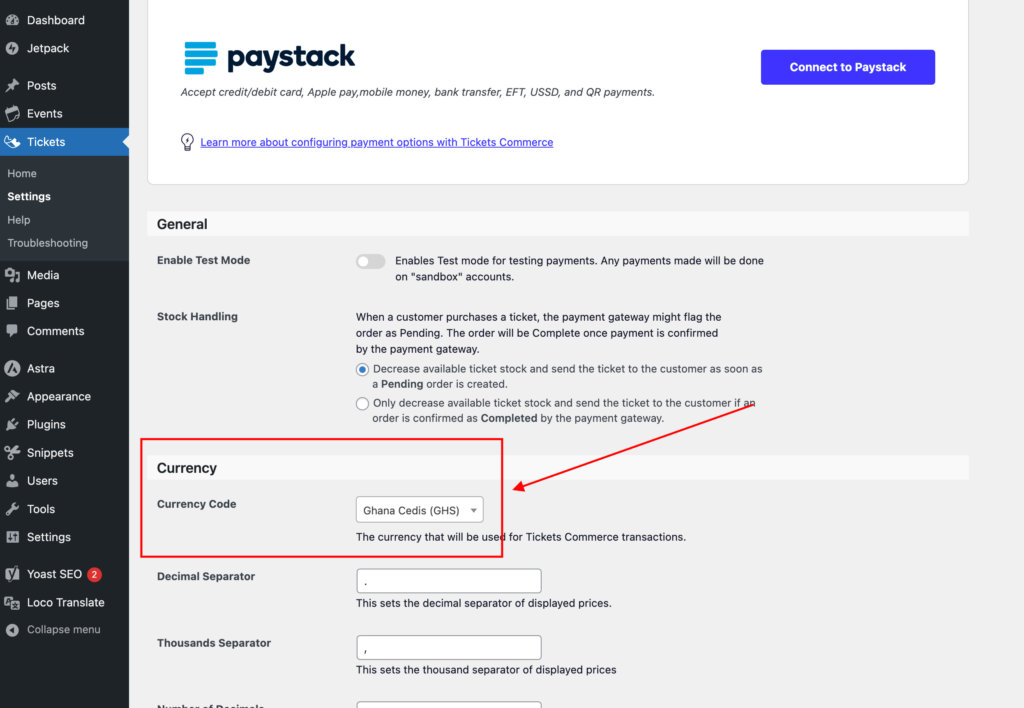
By default, the Event Tickets plugin only includes currencies accepted by PayPal and Stripe. So, if you want to use another currency that is not included on the default currency list available at wp-admin > Tickets > Settings > Payments > Currency code, you will need a custom snippet to add that new currency.
Here’s a custom snippet showing how to include Ghana Cedis (GHS) currency on that list:
add_filter( 'tec_tickets_commerce_default_currency_map', function( $currencies ) {

    $currencies['GHS'] = array(
        'name'                  => __( 'Ghana Cedis (GHS)', 'event-tickets' ),
        'symbol'                => 'GH₵',
        'thousands_sep'         => ',',
        'decimal_point'         => '.',
        'decimal_precision'     => 2,
    );

    return $currencies;
} );
You can add it to your theme’s function PHP file or by using the Code Snippets plugin, then the new currency will be available:
From there, you should be ready to begin creating tickets and accepting payments.