The folks at Beaver Builder have rolled out some pretty incredible features for the page builder, including integration with The Events Calendar and Event Tickets.
For these features, you’ll need to use The Events Calendar, Beaver Builder Plugin, and Beaver Themer.
If you’d like to make use of Events Calendar Pro shortcodes with Beaver Builder Page Builder, check out our article to ensure compatibility.
Default Event, Organizer, and Venue Layouts
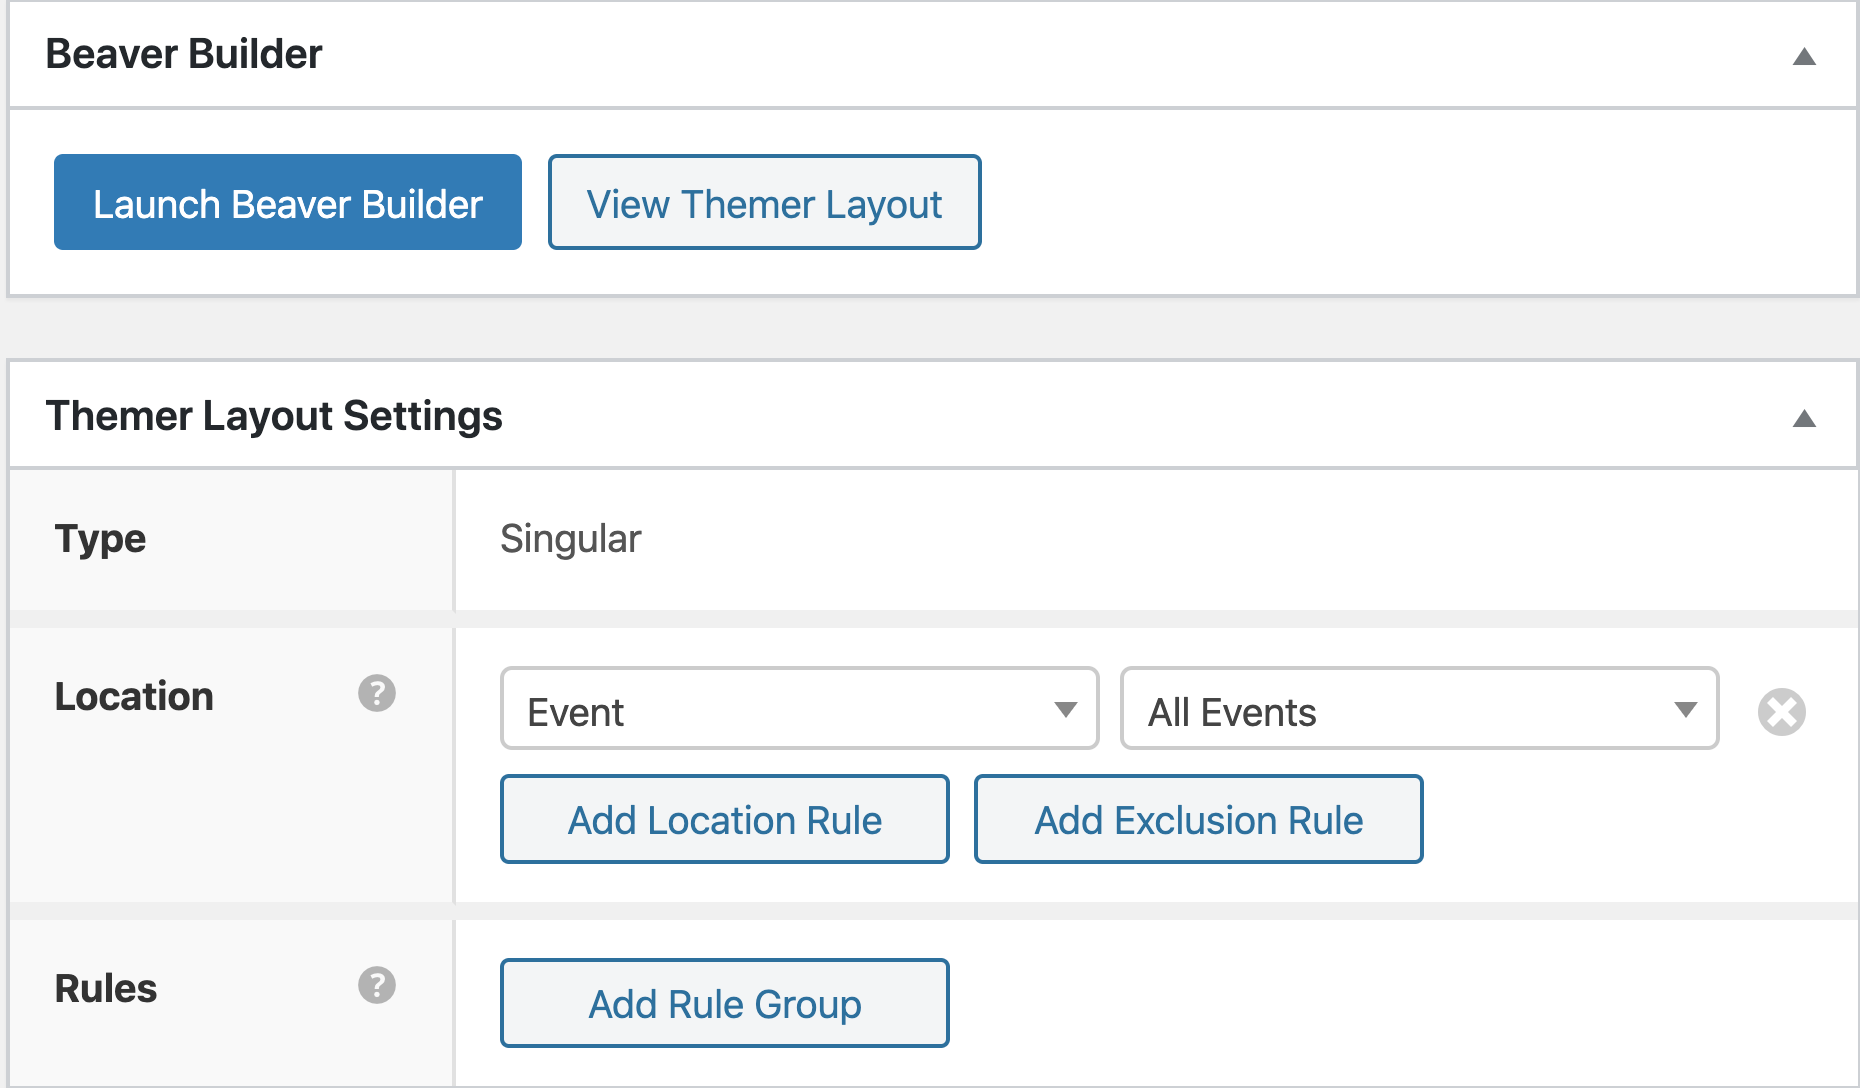
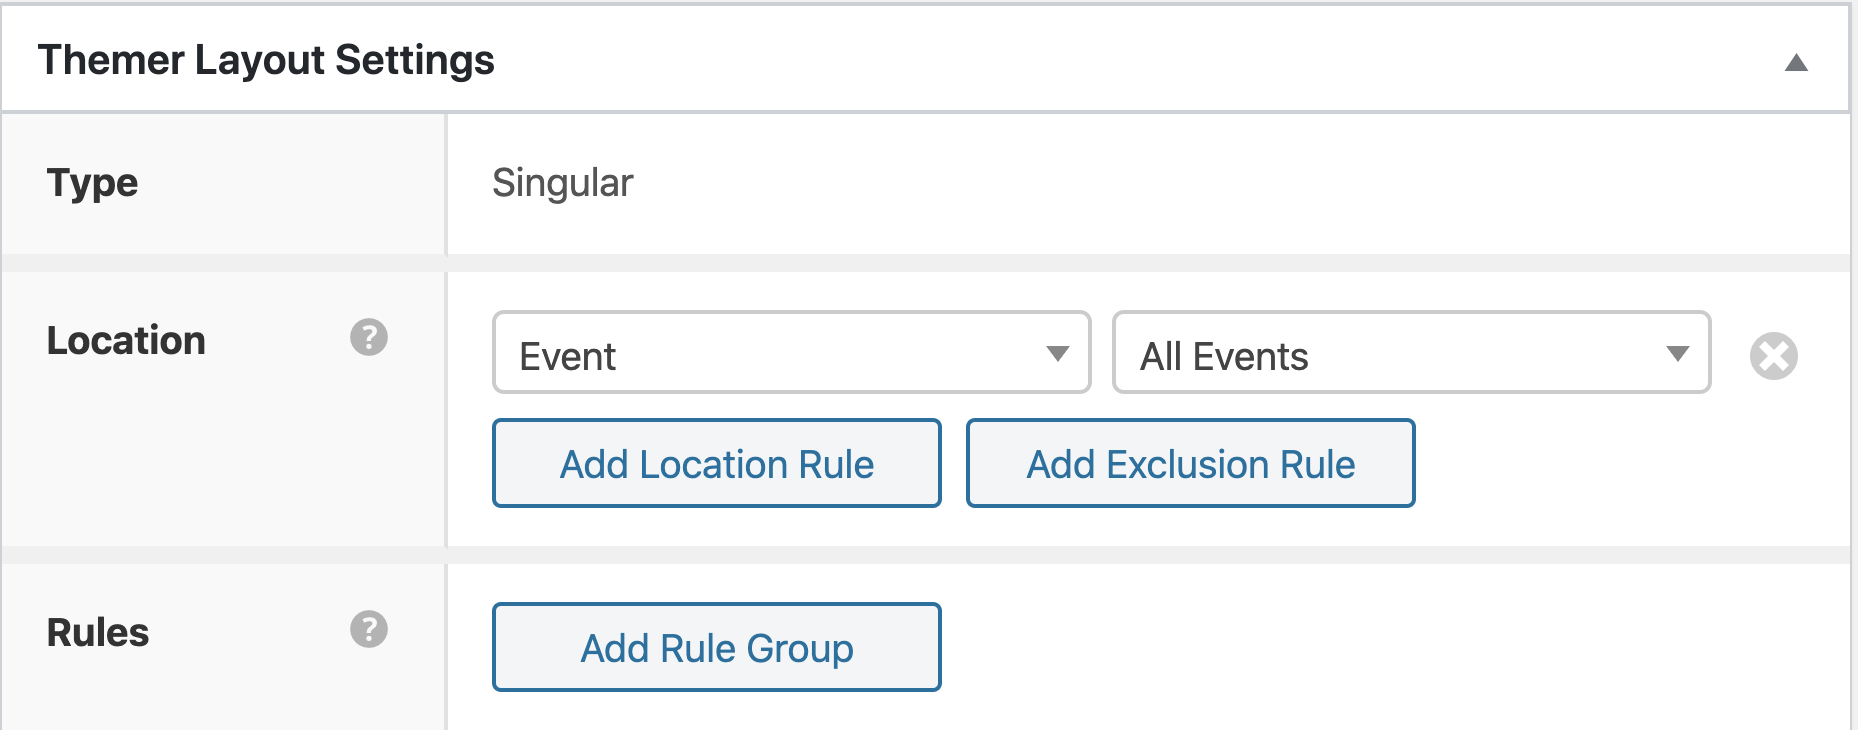
To get a fast start on layouts, you can use the default layouts created by Beaver Builder. Go to Beaver Builder → Themer Layouts → Add New. Select a Singular type with Event for the location and All Events. Then Launch Beaver Builder.
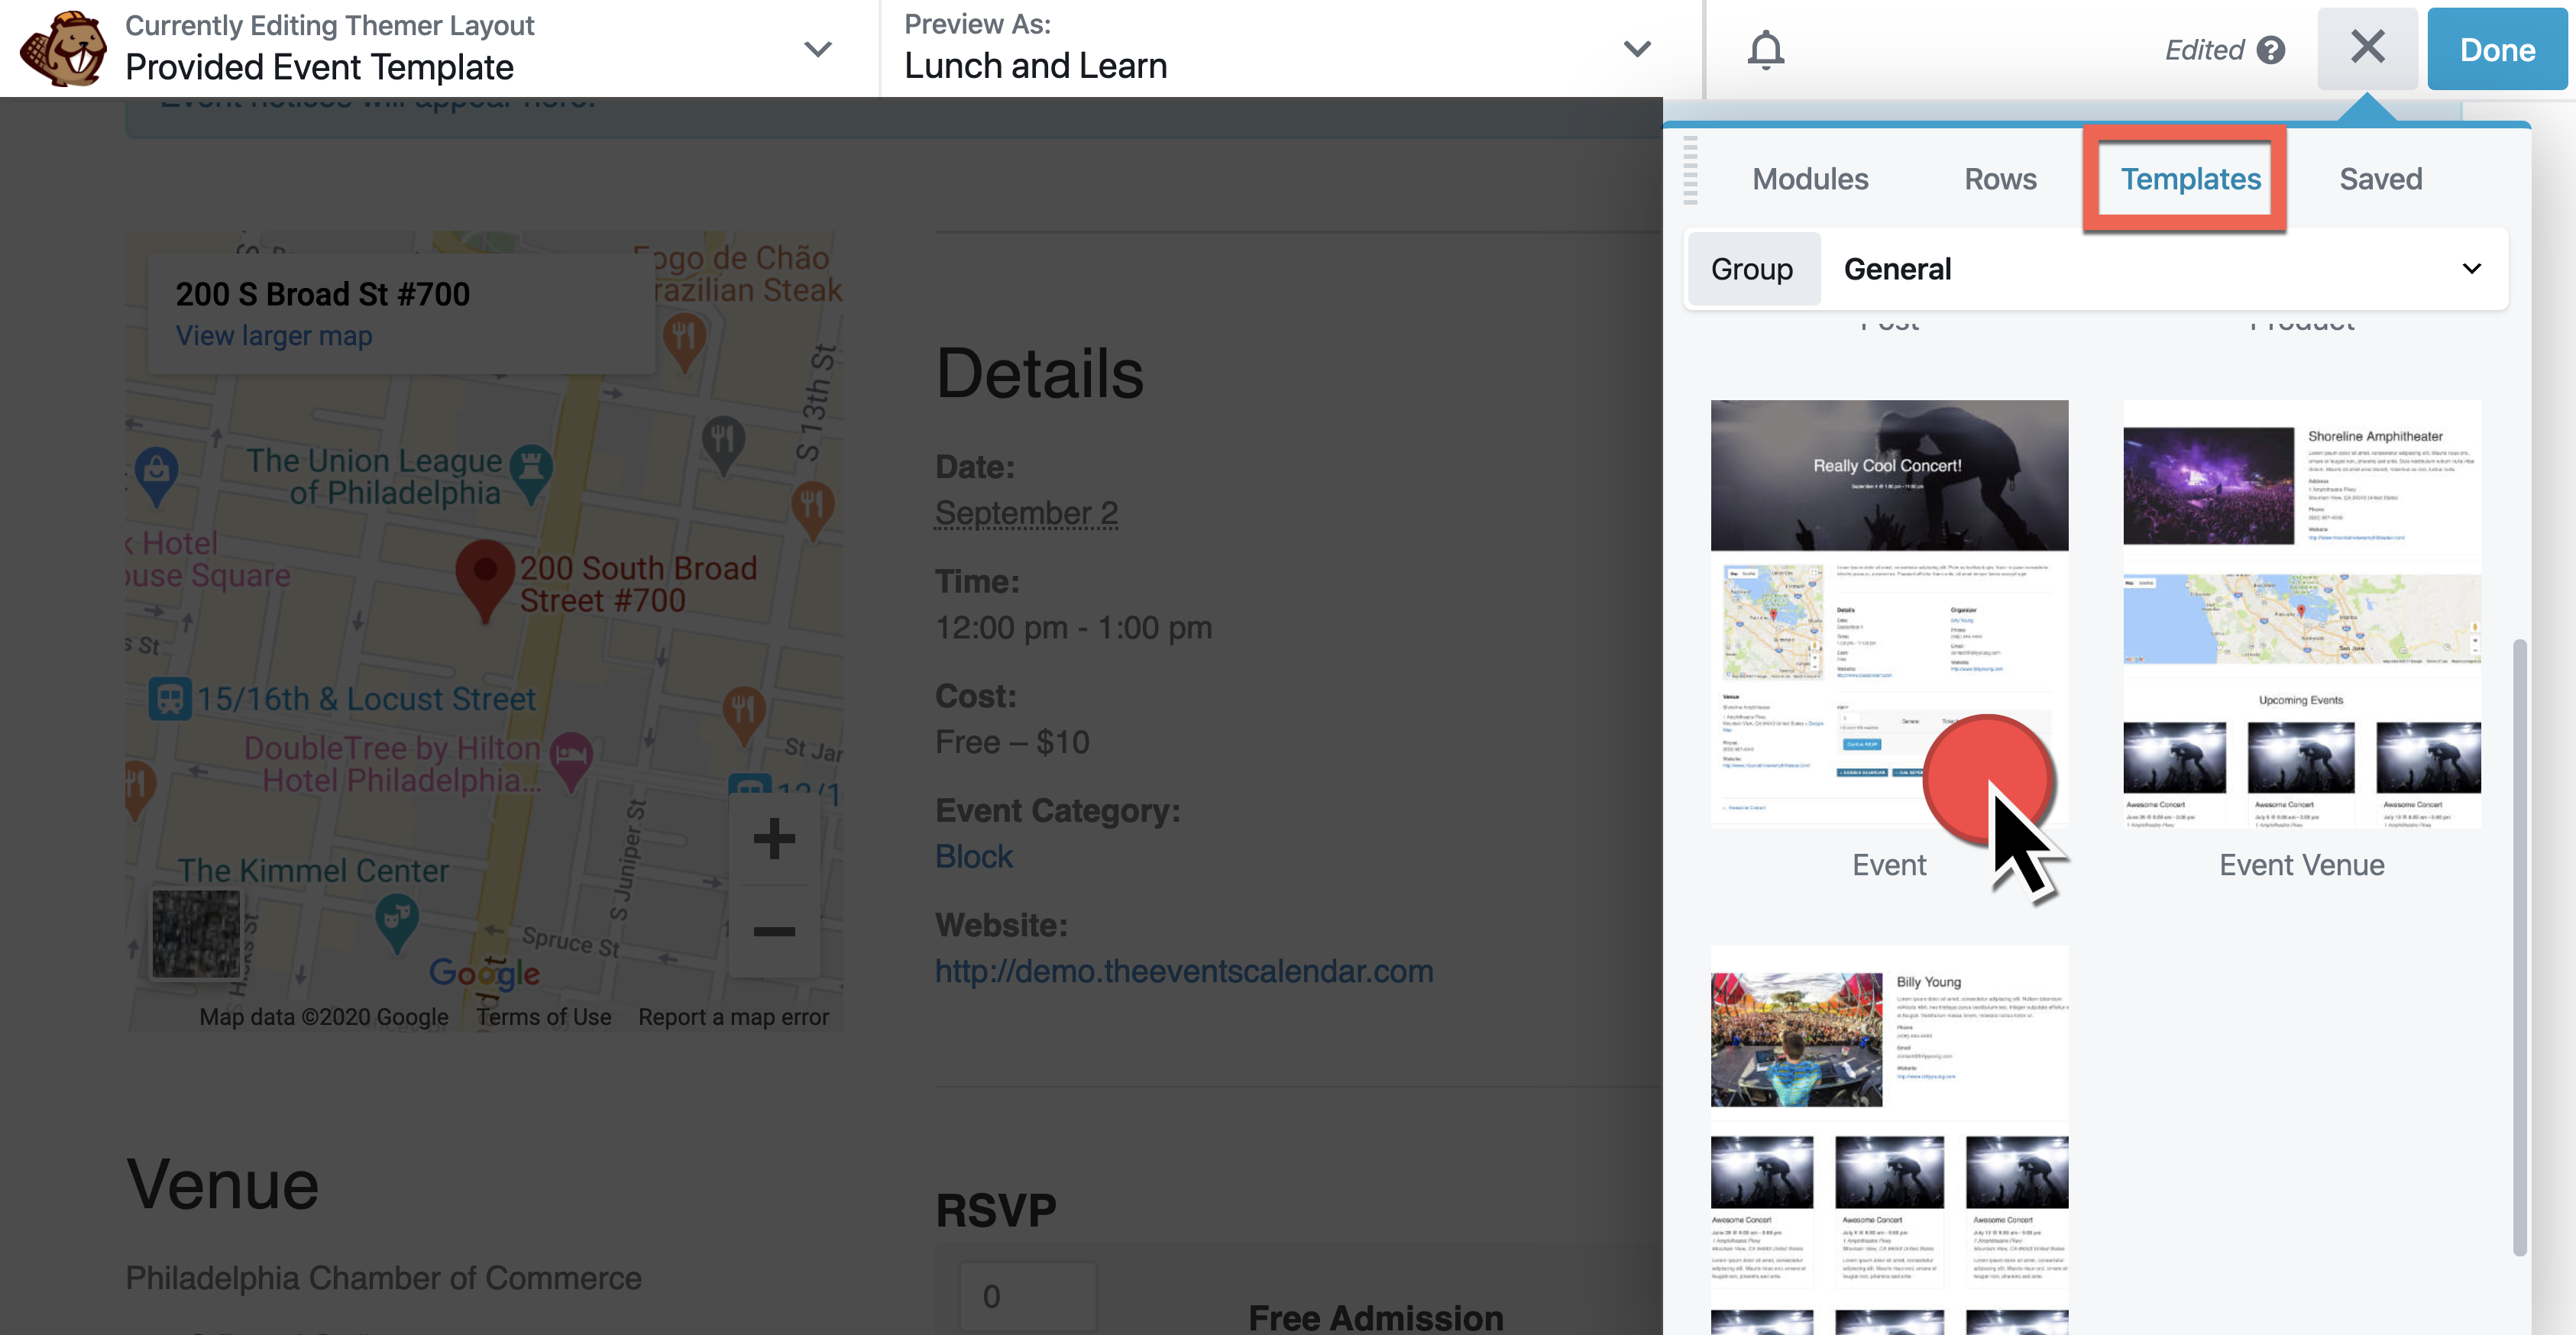
From there, you can delete all the content that displays and add a template layout by going to + → Templates → General → Event.
This same method will work to quickly create layouts for Venues and Organizers as well. You can use these as a way to layout most of the content for these templates, and customize specific content from there.
Customizing Single Events
Do you want to rearrange and customize the look of each event listing? For that, we’ll use a singular event layout as well but add each element manually.
Events Widgets
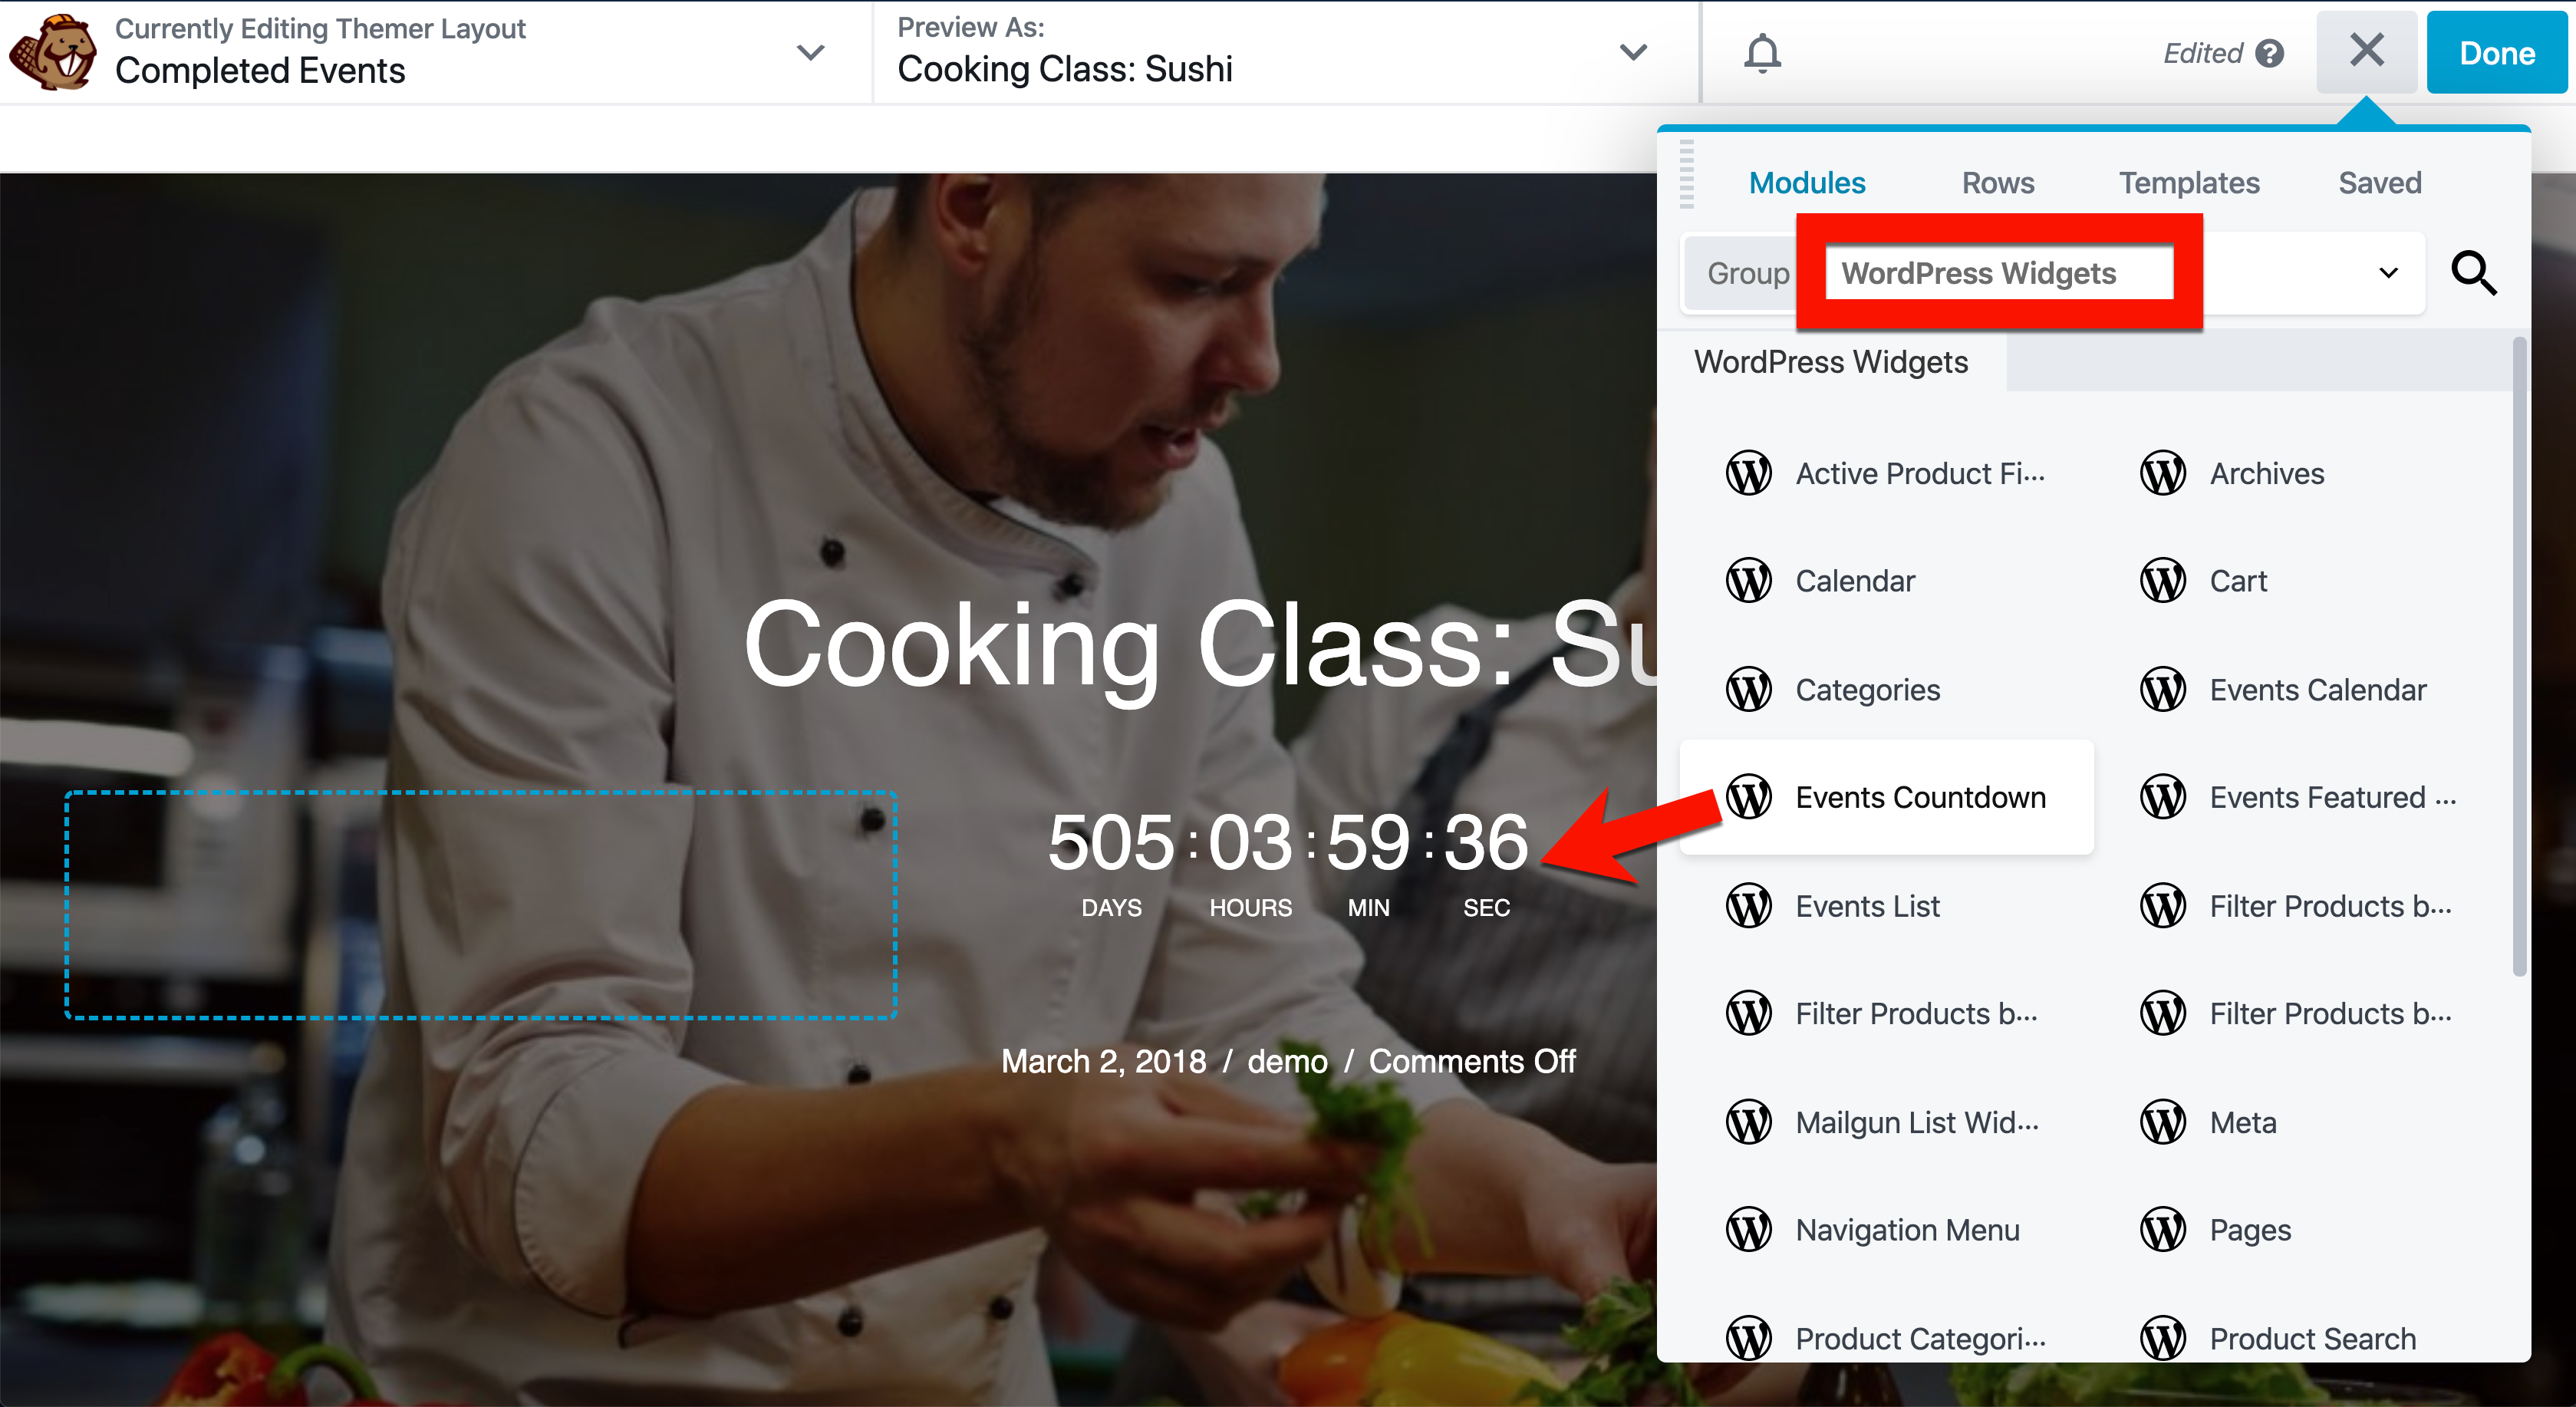
The Event Calendar widgets (in Appearance → Widgets) can be added within single event layouts. Use the Beaver Builder’s WordPress Widgets group to drag and drop widgets such as the Events Countdown to your event.
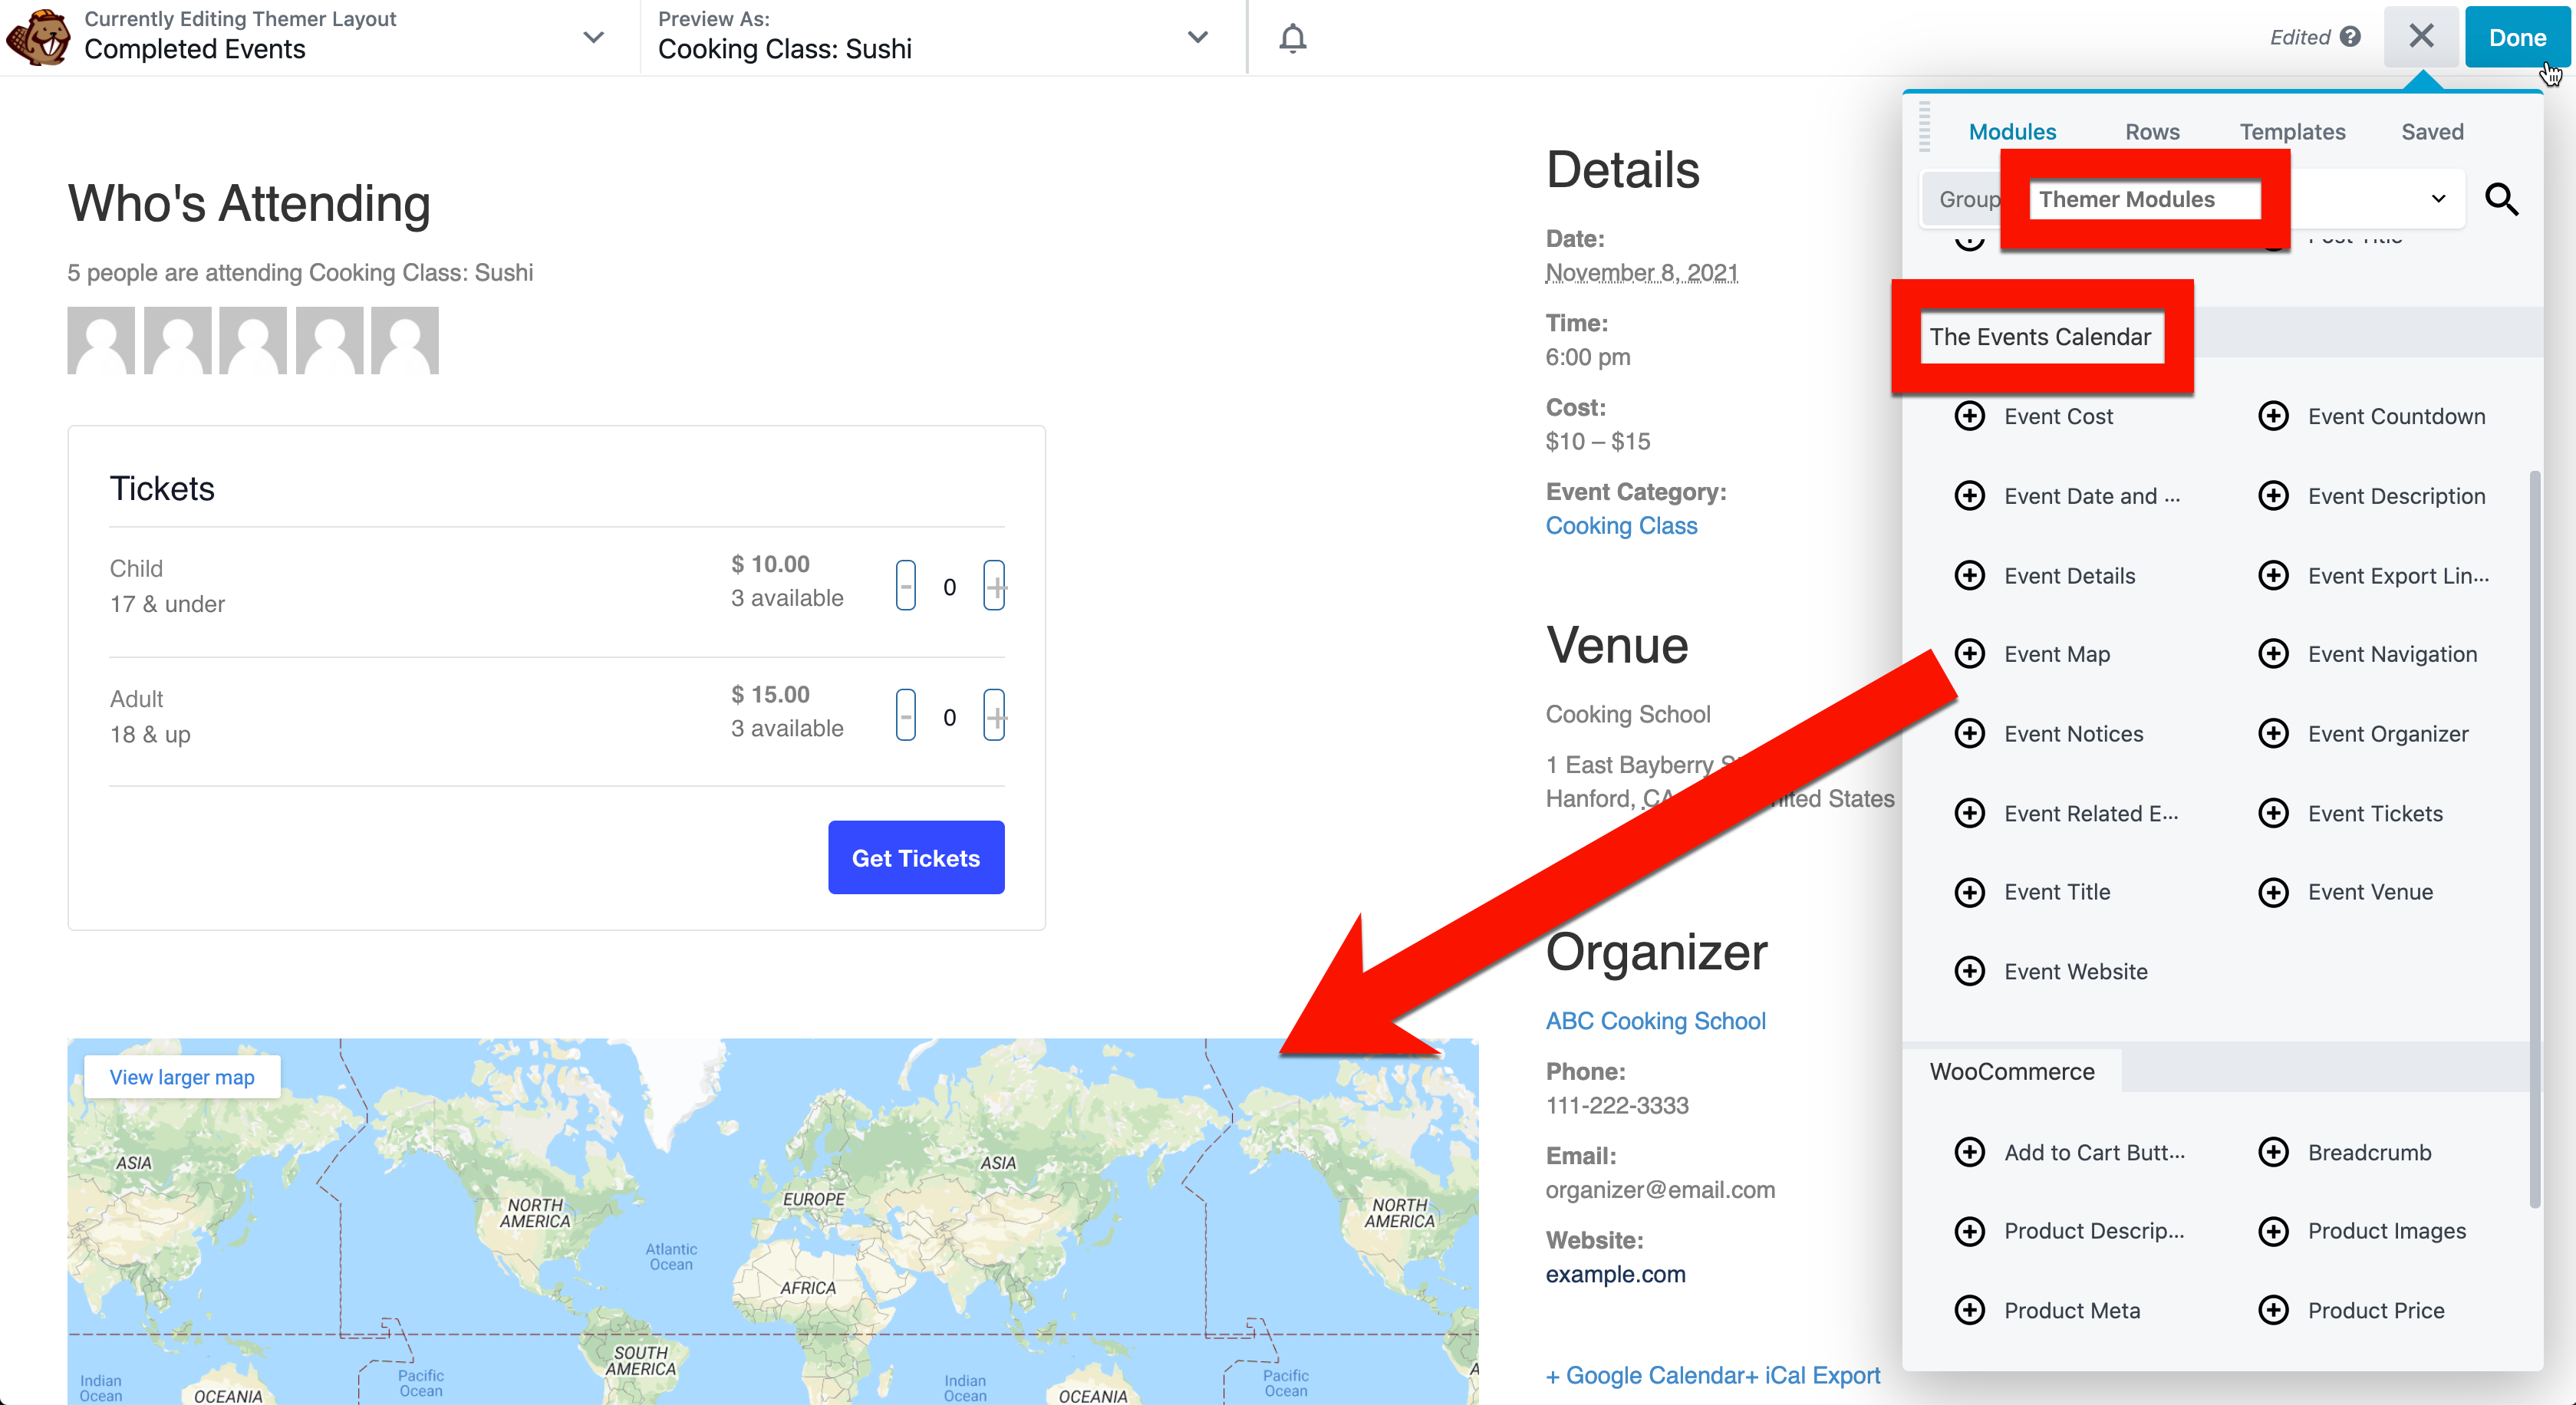
Themer Events Modules
To lay out each element on the remainder of your single events post, switch over to Themer Modules and Scroll down to The Events Calendar. Add rows and columns, then start adding in elements for the look you want. If you’ve activated Event Tickets, unique modules for displaying Tickets and RSVPs will display as well.
Customizing the Events Page
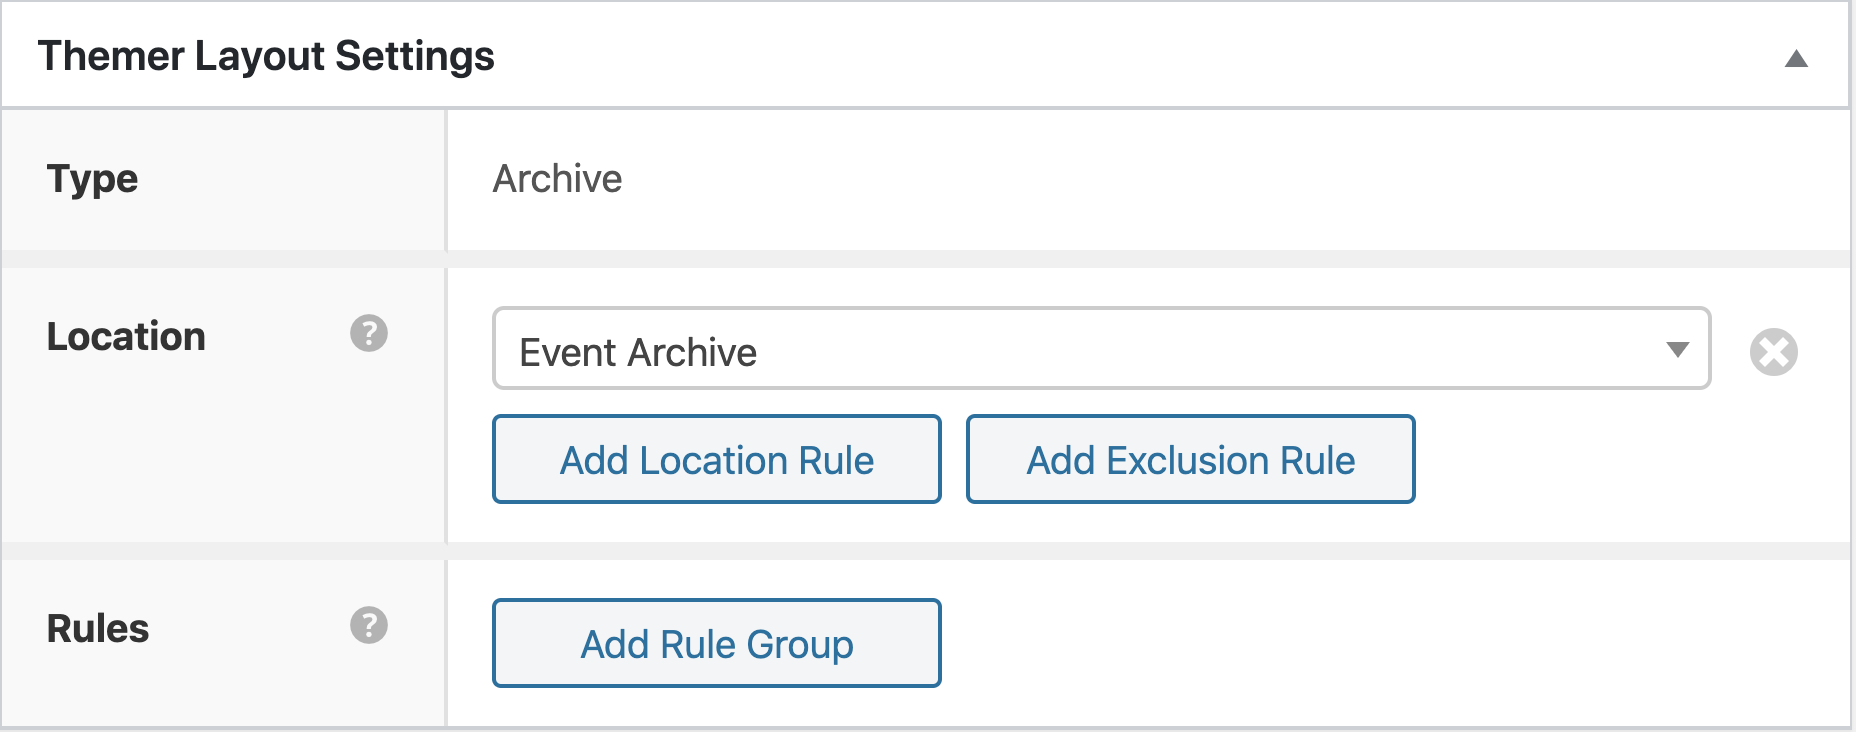
Let’s say you want to customize what displays on the main Events page. For that, you’ll still want to select your default view. After that, create a new Themer Layout that is an Archive with a location of Event Archive.
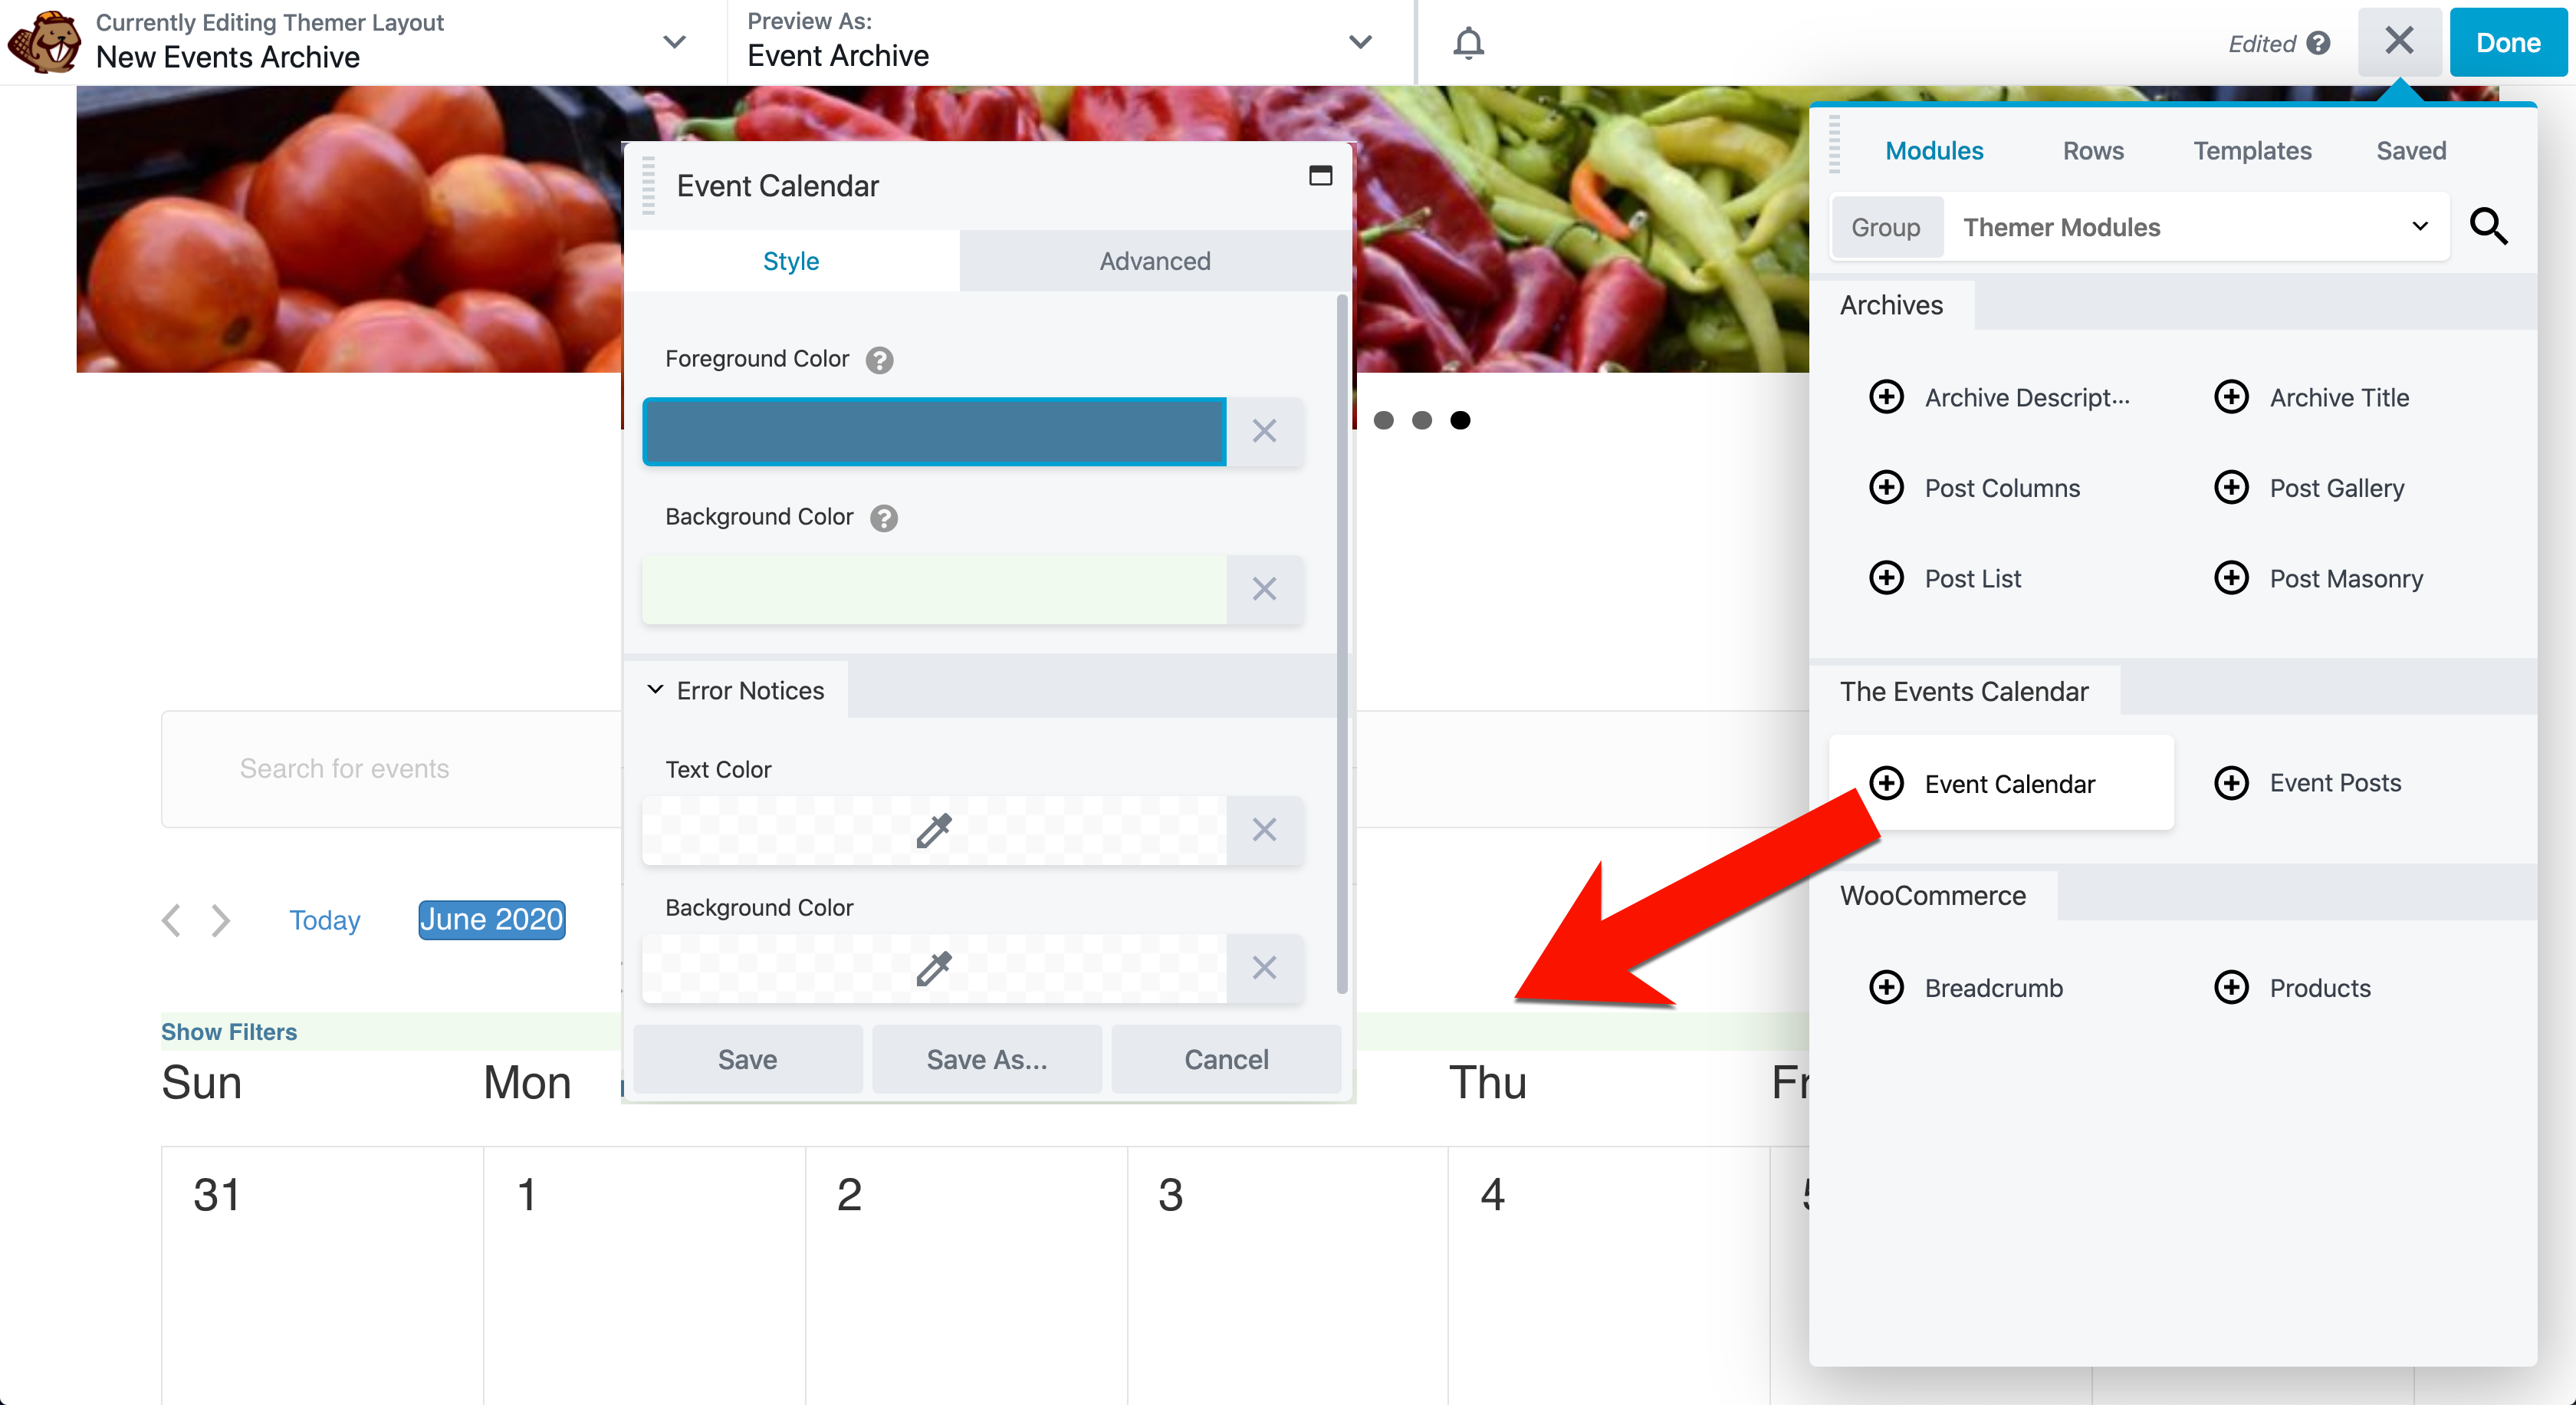
From there, use the Event Calendar module and style as needed. Beaver Builder has additional information on adding the Event Calendar module to your custom archive.
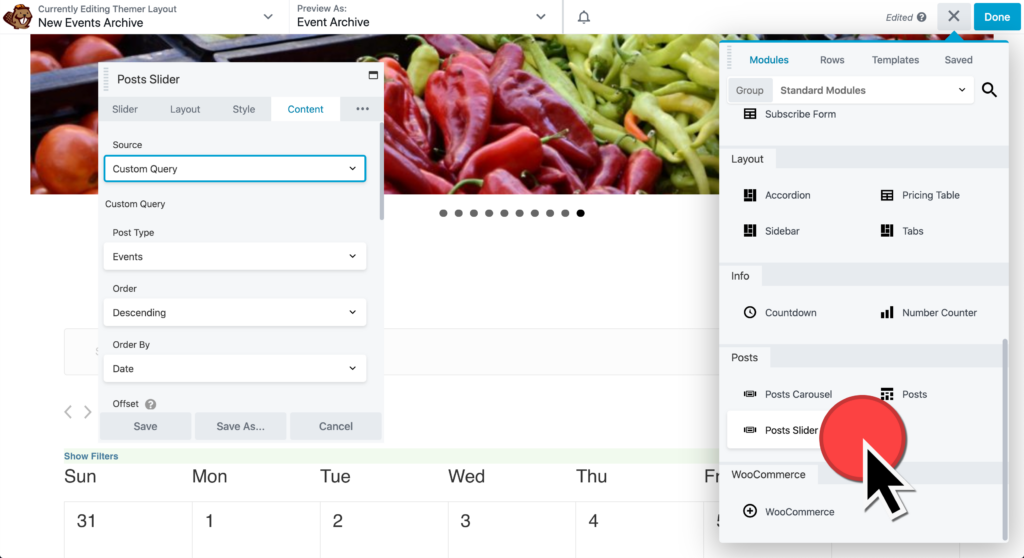
You can also add other modules as you’d like. In this example, we’ve added a slider previewing upcoming events above the month view.
Custom Events Layouts
This is where the more advanced power comes into play.
By using the Posts module with a Masonry layout, you can customize the content to display Event previews. This will work with a variety of layouts and custom content queries.
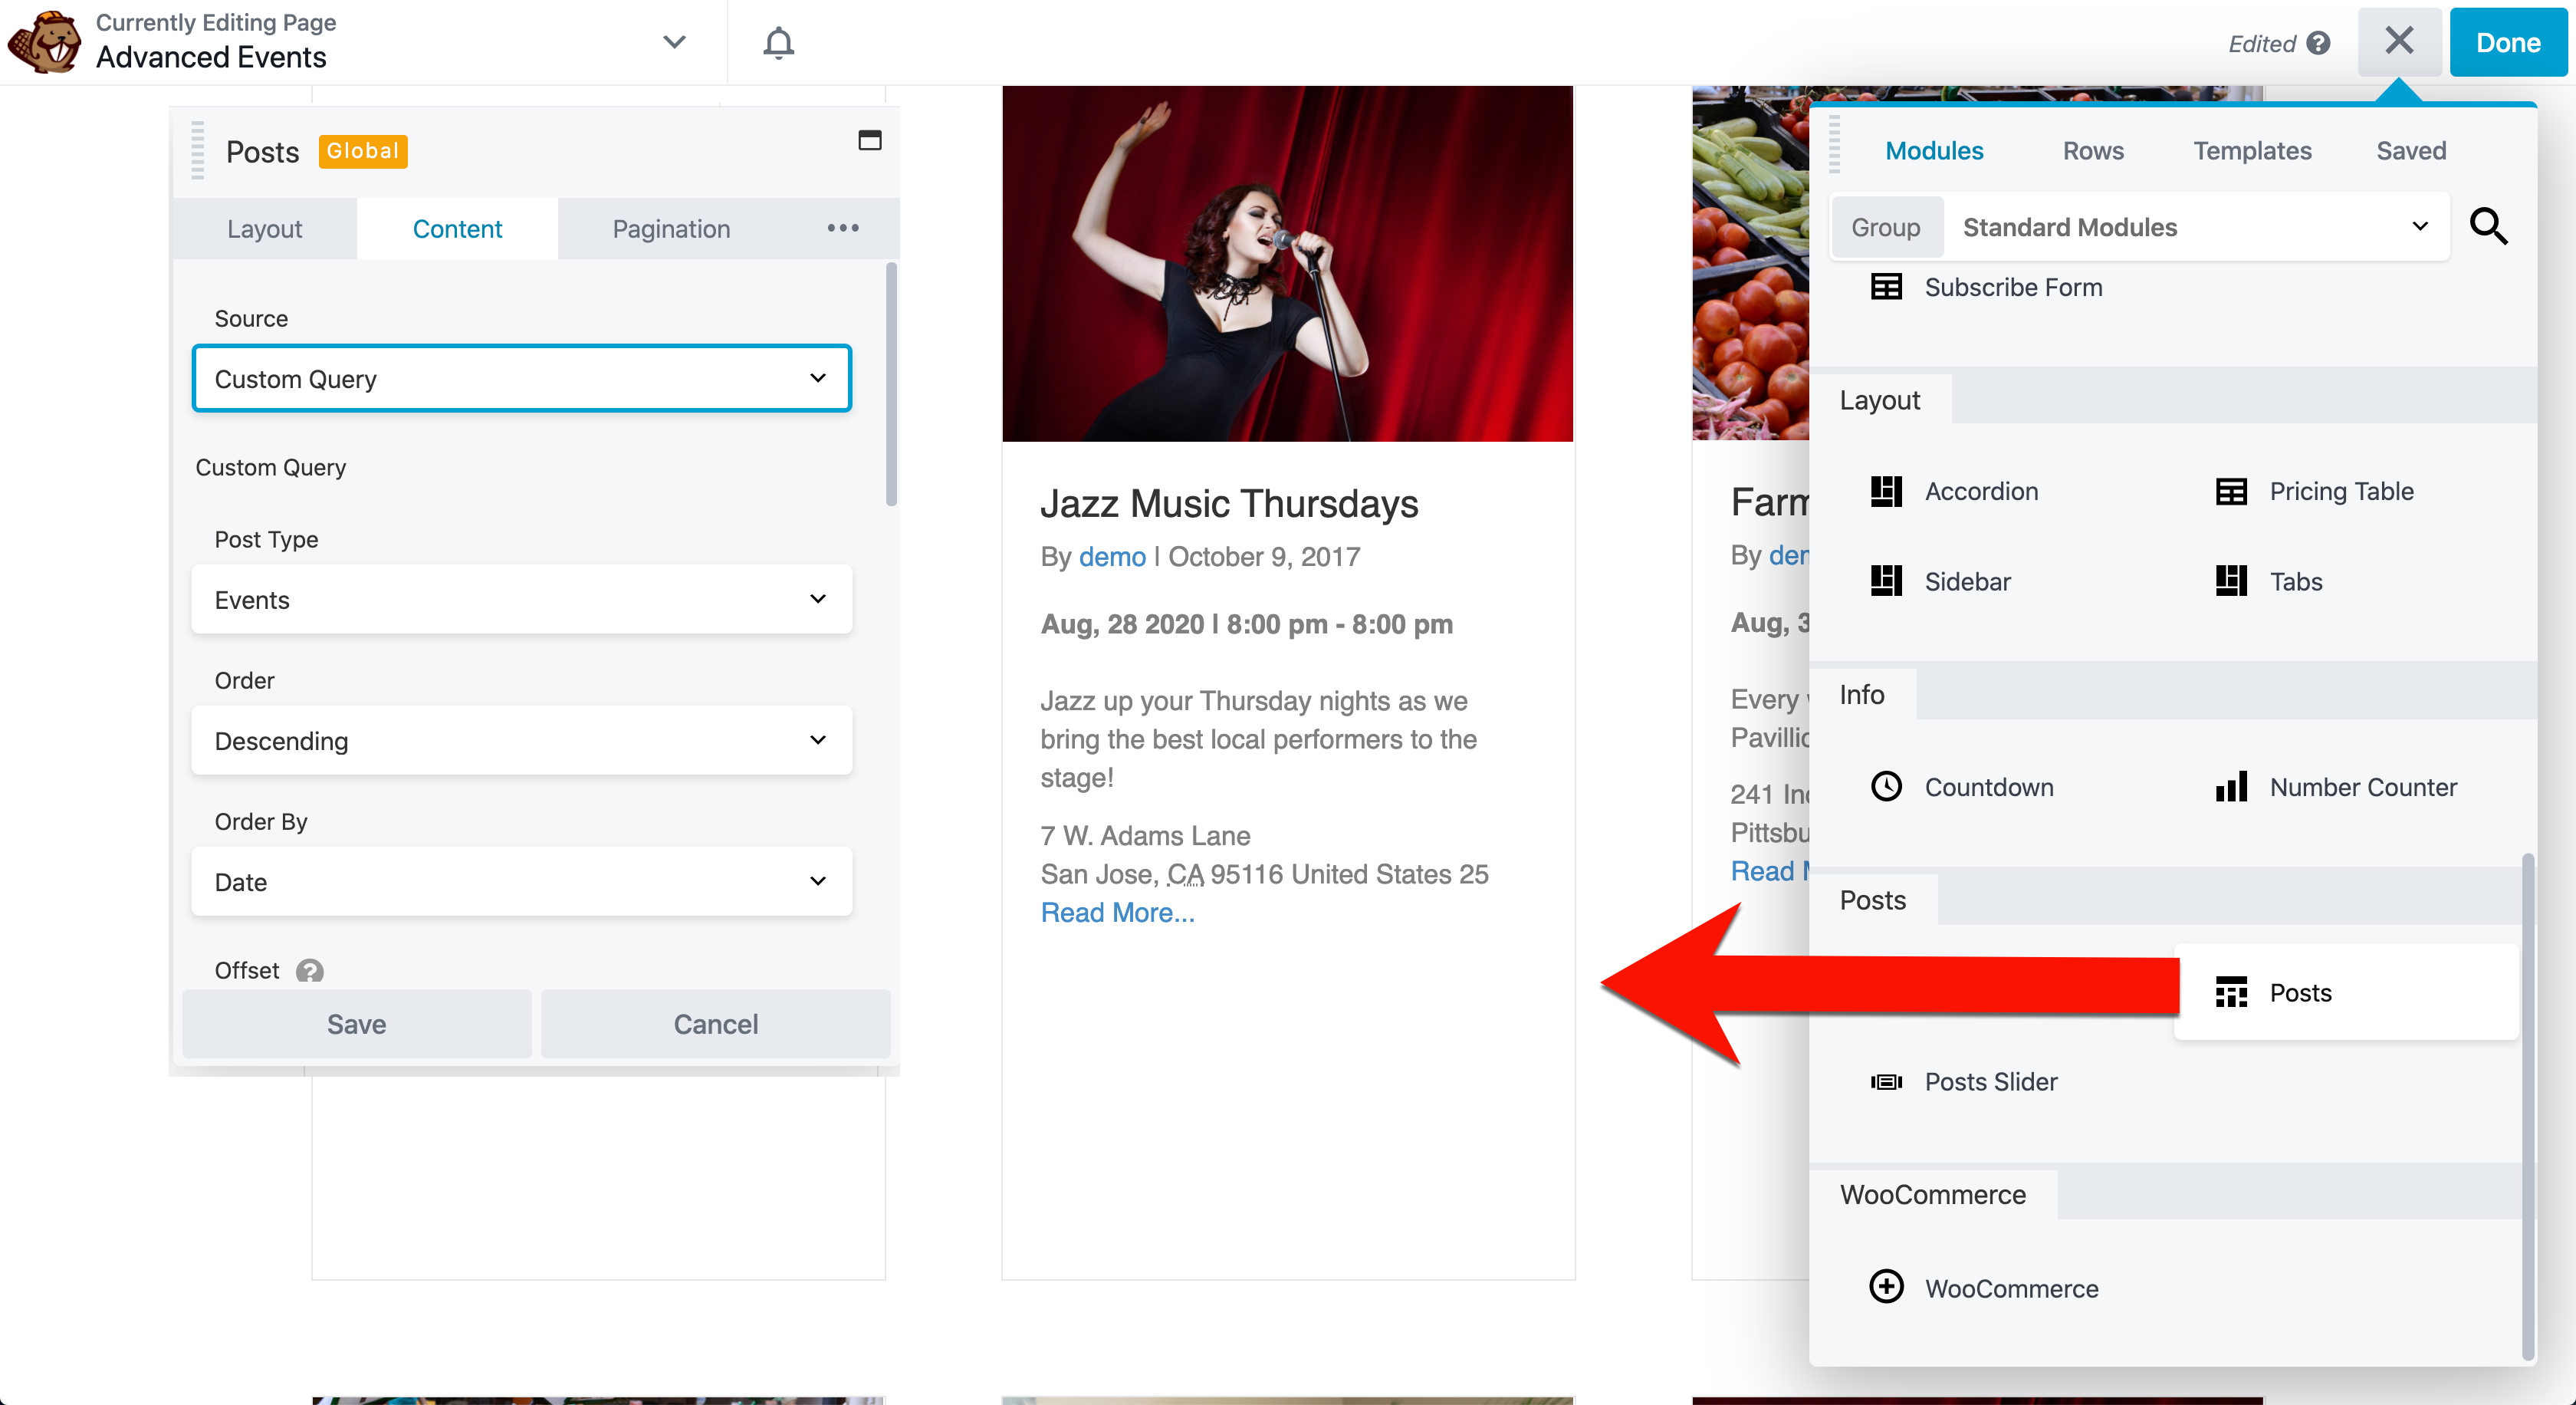
Want to get even more advanced? You can edit the custom layout much further. Add in additional parameters and toggle to the CSS view to style the event post preview as thoroughly as you’d like. See Beaver Builder’s knowledgebase for more resources about field connections and parameters.

Additional Fields
You can add additional fields to any custom area within the single event page using Beaver Builder and The Events Calendar. Note that you will need both the Beaver Builder and Themer in order for this setup to work properly. Here’s how to do this:
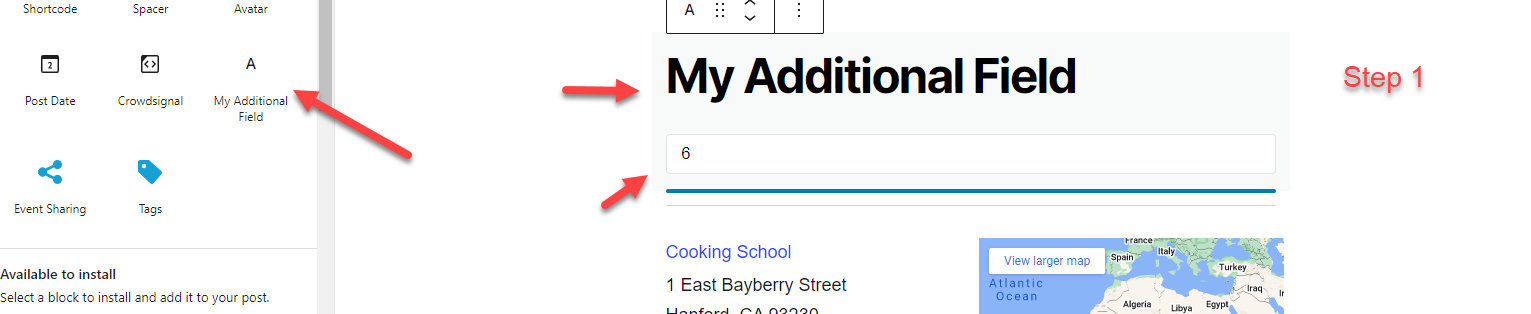
- Make sure you have a defined Additional Field in the backend.
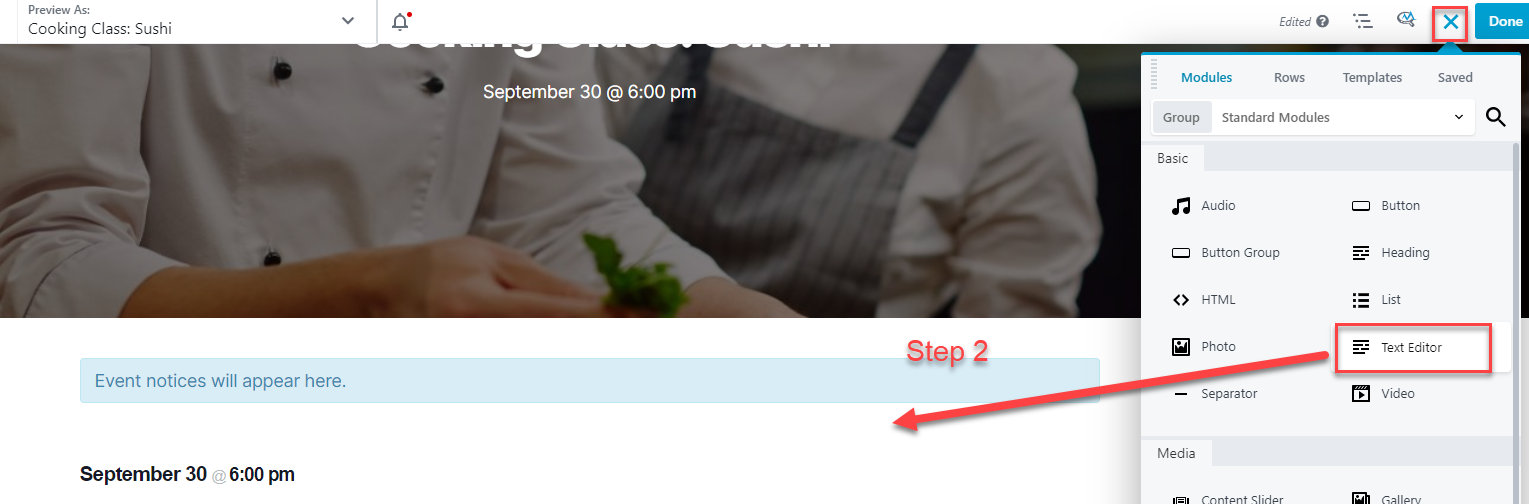
- Drag a Text Editor Beaver Block in the event.
- Click on the + sign, find the Event Field, and click on “Connect”.
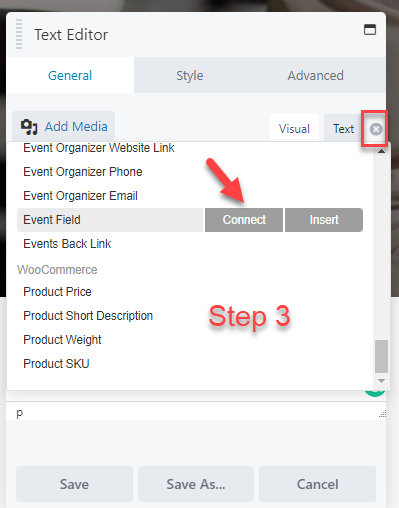
- Copy and paste the name of the custom field and hit Save.
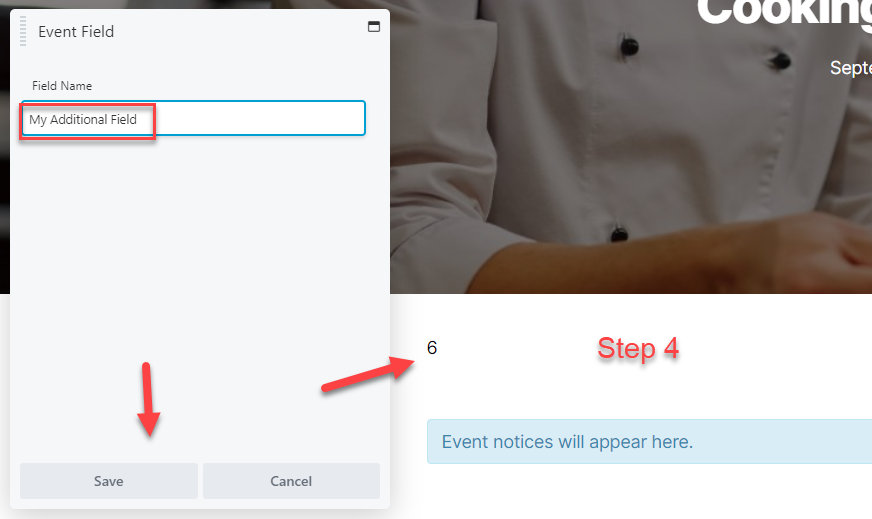
You should now see the Additional Field appearing on the single event page.
We hope you found this walkthrough useful for getting the most out of The Events Calendar when creating events and pages with Beaver Builder.