Our Attendee Registration page and modal options are designed to blend nicely with as many themes as possible. If you’re looking to make some tweaks to make it look even better on your site, we’ve got your back.
Attendee Registration Settings
Your first stop should be the Tickets → Settings → Attendee Registration admin screen. Under the Attendee Registration template setting, you’ll see a couple of default options:
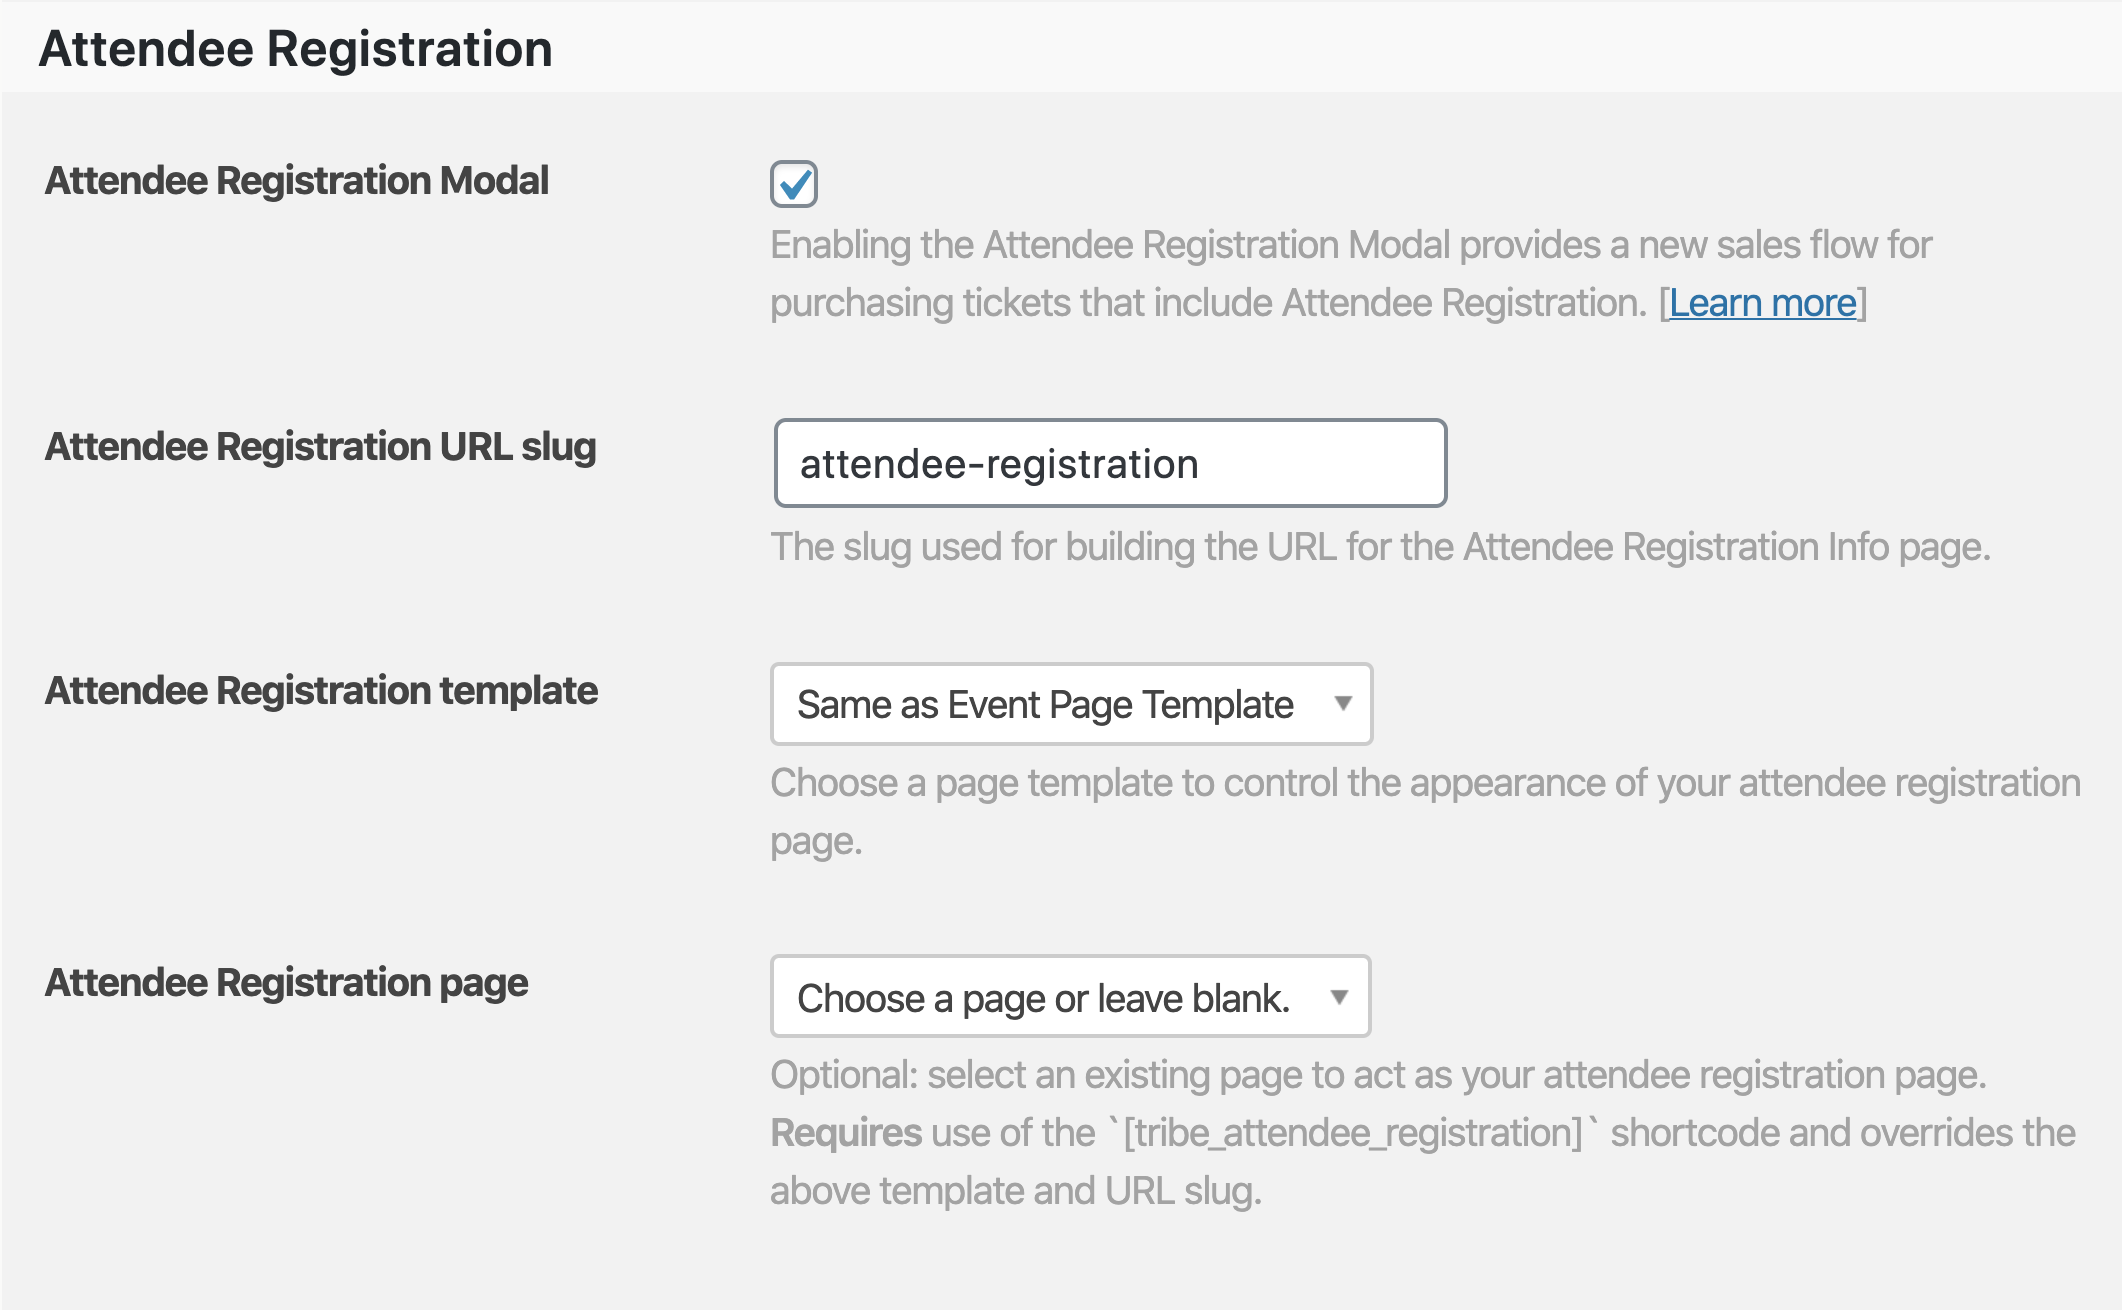
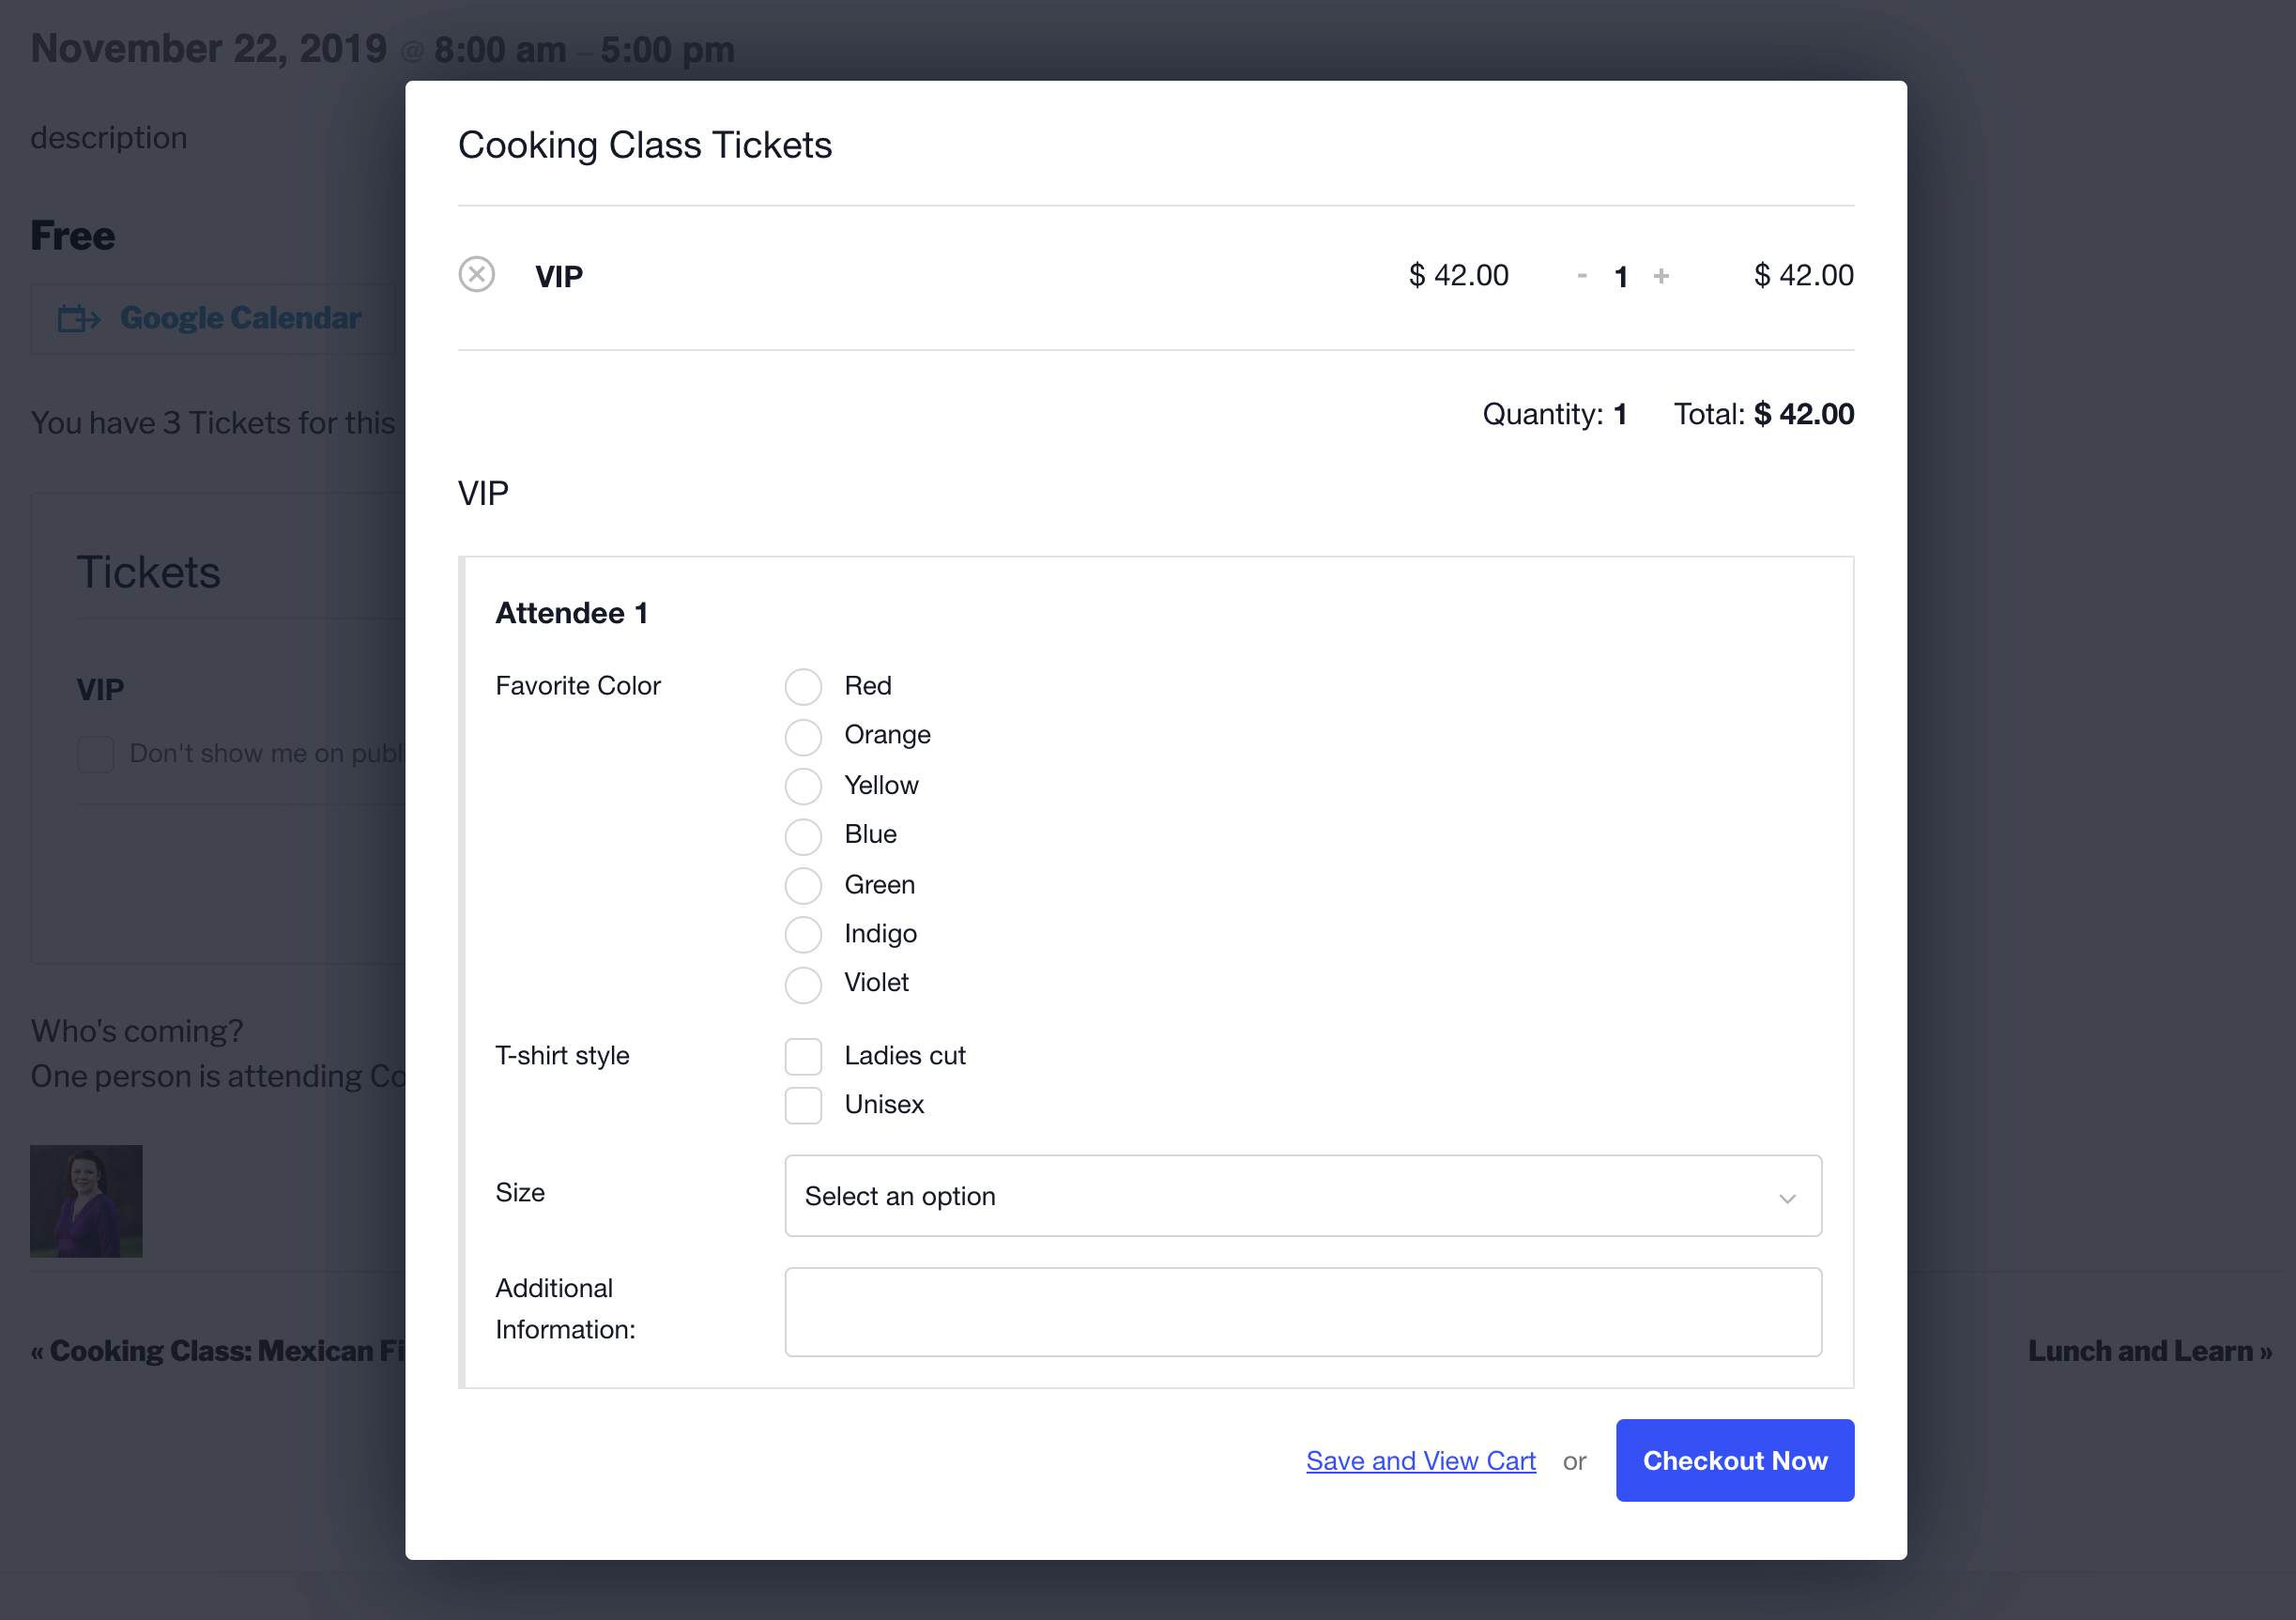
Enabling the registration modal will create a popup effect to complete the attendee registration before reaching the cart checkout page.
The Attendee Registration page can be so left as our default page. Alternatively, using the shortcode lets you display the Attendee Registration on any post or page you’d like, and makes it easier to add in widgets or other layout elements.
Depending on the theme you are using, you may see other page templates available. Take ‘em for a spin and see how they look. If one stands out as the winner, save your changes and you’re set!
Template Overrides and Custom CSS
If the template options mentioned above still need a few tweaks, you’ll want to move on to template overrides and/or custom CSS. The same customizations should work whether you use the modal or the attendee registration page. For those comfortable writing a little code, our Template Guide is your new best friend.
No coding chops? No worries. There are lots of reliable WordPress professionals out there who can help you with custom development.
Sometimes you’ll run into situations where you need to change or add CSS rules to your theme’s stylesheet—for example, there are thousands of WordPress configurations out there so you’ll want to make sure the CSS rules in your theme don’t conflict with the CSS rules in Event Tickets.
The Customizing Styles guide (or the earlier views version) walks you through the process. If you run into any trouble integrating your theme with Event Tickets Plus, drop by our premium help desk so we can try to help you out.
⚠️ But please note:
- Event Tickets and its add-ons will not integrate smoothly out of the box with every single theme out there. We will do our best to point you in the right direction, but we cannot provide extensive theme support.
- If you are wondering about theme compatibility, we recommend that you test your theme with our free core plugin before purchasing the Plus version.
- The Attendee Registration Page (using a shortcode on any page) overrides both the URL and template settings. This shortcode uses the page template set for the “shortcoded” page. Setting a page without the shortcode will result in falling back to the default functionality (the url and template selectors).
Template Overrides
In order to create a template override of the attendee registration page, create a copy of event-tickets/src/views/blocks/tickets/registration/content.php and place it in [your-theme]/tribe/tickets/blocks/tickets/registration/content.php.
For the modal, simply copy event-tickets/src/views/modal/registration.php into [your-theme]/tribe/tickets/modal/registration.php.
Show RSVP Fields Directly on Event Page
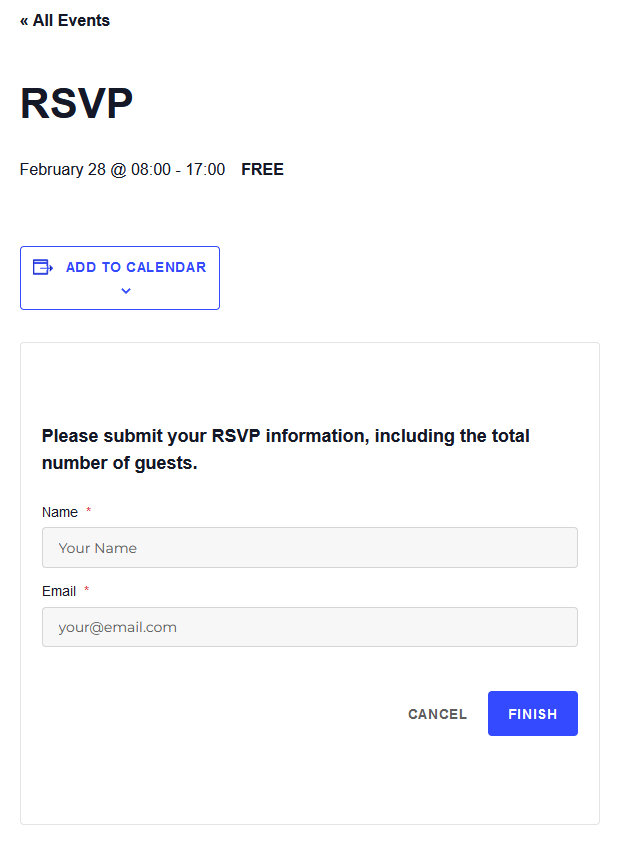
In this example, we’ll cover the specific example of showing users the registrations fields directly, rather than seeing the RSVP button first.
Showing the registration fields
To start, you’ll want to create a template override the following template file: wp-content/plugins/event-tickets/src/views/v2/rsvp/content.php
Next, find and delete the following two lines from your newly-created template override:
<?php $this->template( 'v2/rsvp/details', [ 'rsvp' => $rsvp ] ); ?>

<?php $this->template( 'v2/rsvp/actions', [ 'rsvp' => $rsvp ] ); ?>
Add this line instead:
<?php $this->template( 'v2/rsvp/form/form', [ 'rsvp' => $rsvp, 'going' => 'going' ] ); ?>
Hiding the number selector
For this you will need to create a template override for this file: wp-content/plugins/event-tickets/src/views/v2/rsvp/form/fields/quantity.php
From the override, remove the whole <label>…</label> part and change this line:
<input
    type="number"
to:
<input
    type="hidden"
Here’s the final result:
Please also note that this might expose your registration form to bots, which could result in some fake registration
Divide Name into Separate First and Last Name Fields
Note: This workaround is valid for Tickets only and not for RSVPs. Individual Attendee Collection (IAC) should also be set to Allowed or Required.
By default, the attendee registration module has a single field to collect the full name, which isn’t always the desired behavior, as separate fields for first and last names are often needed. Here’s how this can be achieved:
1. Create a new Text type attendee information field labeled Last Name,
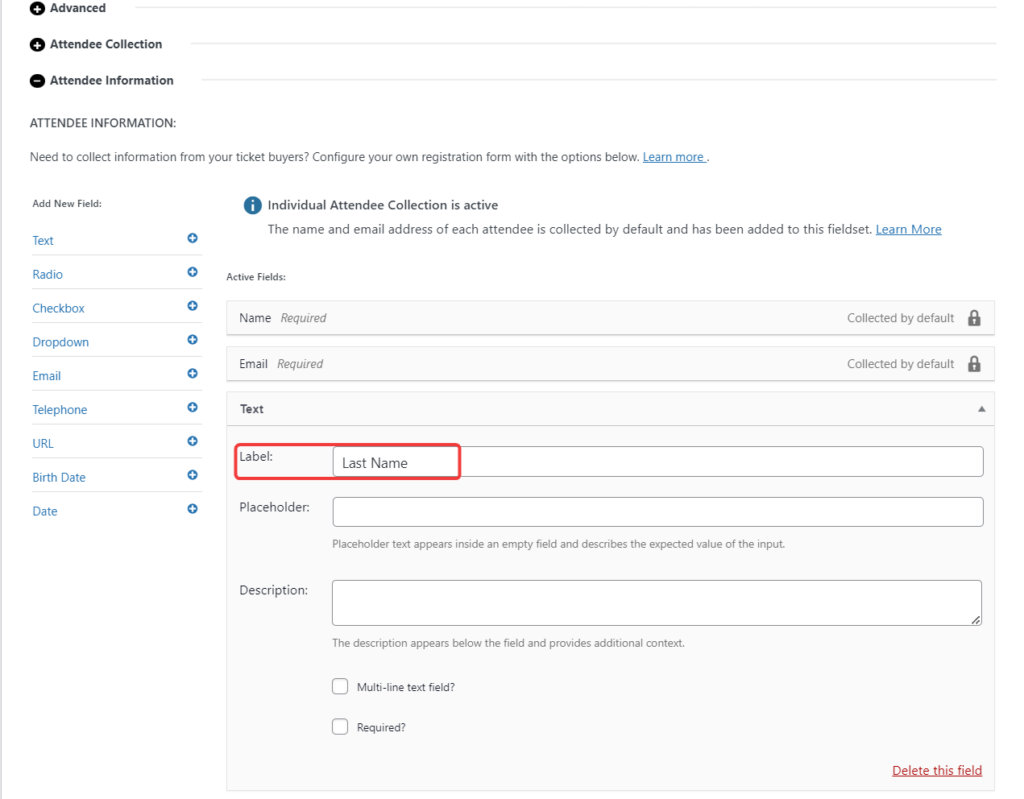
2. Add the following snippet to your site to rename the Name field to First Name,
add_filter( 'tribe_tickets_plus_attendee_registration_iac_fields', function ( $fields ) {

$fields['name']['label'] = 'First Name';

return $fields;
} );
This is what we have so far,

It’s not quite right as the newly added Last Name field needs to be placed right after First Name.
3. Add the following snippet to your site to reorder the fields,
add_filter( 'event_tickets_plus_meta_fields_by_ticket', function ( $fields ) {

	$emailIndex = array_search( 'tribe-tickets-plus-iac-email', array_column( $fields, 'slug' ) );
	$nameIndex  = array_search( 'tribe-tickets-plus-iac-name', array_column( $fields, 'slug' ) );

	if ( $emailIndex !== false && $nameIndex !== false ) {
		$lastNameIndex = array_search( 'last-name', array_column( $fields, 'slug' ) );
		if ( $lastNameIndex !== false ) {
			$lastNameField = $fields[ $lastNameIndex ];
			unset( $fields[ $lastNameIndex ] );
			array_splice( $fields, $emailIndex, 0, array( $lastNameField ) );
		}
	}

	return $fields;
}, 20 );
The fields should now be in the correct order,

4. At the backend, the Last Name isn’t automatically displayed conveniently; however, this can be solved with, you guessed it, a PHP snippet,
add_filter( 'manage_tribe_events_page_tickets-attendees_columns', 'add_last_name_column' );
add_filter( 'tribe_events_tickets_attendees_table_column', 'populate_last_name_column', 10, 3 );

function add_last_name_column( $columns ) {
	$new_columns = [];
	foreach ( $columns as $key => $title ) {
		$new_columns[ $key ] = $title;
		if ( $key === 'primary_info' ) {
			$new_columns['last_name'] = 'Last Name';
		}
	}

	return $new_columns;
}

function populate_last_name_column( $value, $item, $column ) {
	if ( $column === 'last_name' && ! empty( $item['attendee_meta']['last-name'] ) ) {
		if ( is_array( $item['attendee_meta']['last-name'] ) ) {
			return ! empty( $item['attendee_meta']['last-name']['value'] ) ? $item['attendee_meta']['last-name']['value'] : '';
		} else {
			return $item['attendee_meta']['last-name'];
		}
	}

	return $value;
}
Last Name should now be displayed in a dedicated column at the backend, next to the primary info column with First Name and other attendee details,

While it is possible to add PHP code snippets similar to those provided in this article directly to the functions.php file, using a third-party plugin like Code Snippets is recommended.
Allow Duplicate Email Addresses
In Event Tickets Plus, the Individual Attendee Collection (IAC) feature requires all attendees to provide their details, including their name and email. By default, both the name and email fields must be unique for each attendee. While this ensures separate records, it may not be suitable for scenarios where parents buy tickets for themselves and their children, as children may not have individual email addresses.
In this example, we will explore how to remove the requirement for the email field to be unique in order to accommodate specific use cases better. To allow multiple attendees to share the email, you can use the following code snippet. This will modify the attendee registration process and permit identical emails across different tickets,
Alternatively, here is a snippet that would allow you to change the default labels for the IAC fields.
Below is another snippet that allow you to remove the input requirement of the email address, as well as the unique requirement.
add_filter( 'tribe_tickets_plus_attendee_registration_iac_fields', function ( $fields ) {
		$fields['email']['classes']['tribe-tickets__form-field--unique'] = false;
		$fields['email']['required'] = '';
		return $fields;
} );
Add the code snippet to the functions.php file of your theme, or use your preferred method for integrating snippets into your WordPress site, such as the free Code Snippets plugin.
By making these customizations, you can adjust the Individual Attendee Collection feature to better fit different event setups where unique details for each attendee may not be practical.
Require Attendee Information for the Main RSVP Guest Only
💡 Note: This solution only works with RSVPs. It does not work with tickets!
Attendee Information Collection is a feature of Event Tickets Plus, that allows you to require information from users registering or purchasing tickets for your events. It is possible to set up a required field, so a registration cannot be done or a ticket cannot be purchased if that field is not filled with information for all of the ticket holders.
There might be scenarios, however, where the information would only be required from the main guest and would be optional for the other guests. While this cannot be done out of the box, it is possible with a template override.
There are different field types you can use to collect information, like a text field, a checkbox, or a date, among others. A template override will be needed for each field type where you want this functionality. In this example, we will walk you through the process for the text field. The approach is the same, or very similar for all other field types.
Create the Template Override
The templates for the attendee fields can be found in this folder:
wp-content\plugins\event-tickets-plus\src\views\v2\components\meta\
Since we are creating an override for the text field, we need to grab the text.php file, and place a copy of it in the following folder:
wp-content/themes/[your-theme]/tribe/tickets-plus/v2/components/meta/text.php
The folder structure likely doesn’t exist in your child theme folder, so you will need to create it.
This copied text.php file is the one we will be working on.
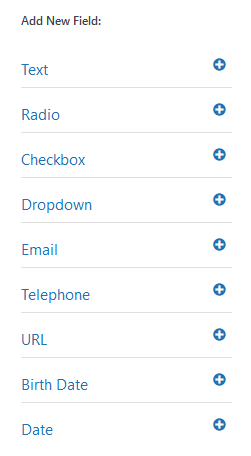
Other Fields
In this example, we are using the text field, but the process would be very similar or might be even the same for the other fields. Here’s a list of the other fields and the files, which would need to receive a template override.
| Text | text.php |
| Radio | radio.php |
| Checkbox | checkbox.php |
| Dropdown | select.php |
| email.php | |
| Telephone | telephone.php |
| URL | url.php |
| Birth Date | birth.php |
| Date | datetime.php |
Add the Code
The code goes at the top of the file between the opening and closing php tags.
The piece of code we are going to add does the following:
- Checks which field is being rendered. (Line 2)
- Checks if the field is being rendered for the main guest. (Line 4)
- Sets the field as required. (Line 6)
- Adds additional text to the description. (Line 8)
- Hides the field for all other guests. (Line 9-15)
// If the name of the text is "Phone number", then the slug is "phone-number".
if ( $field->slug == 'phone-number' ) {
    // Limit to main guest
    if ( $attendee_id === 0 ) {
        // Set it required.
        $required = true;
        // Add to the description
        $description .= " Required for main attendee.";
    } else {
        // Do this for other guests
        // Hide the field.
        // Remove 'return' or the whole 'else' branch,
        // if the field should be shown for other guests, but not required.
        return;
    }
}
On line 2, we are checking the slug of the field that is being rendered. The slug will be the label of the field with lowercase letters, special characters removed, and the space character changed to a minus (-) character. For example, if your field name would be “Date of Birth:”, then the slug would become “date-of-birth”.
On line 4 we are checking if the field is being rendered for the main guest. You can turn this around as well if you want to make a field required for all guests except the main one. Then you will need to use
if ( $attendee_id != 0 ) {
On line 8 we are adding some extra text to the description. This can be a nice touch and makes it clear what needs to be done. This is optional though.
If we want to hide the specific field for all other guests, then we can simply do a return; in the else branch; this way nothing will be rendered. If you still want to show the field to other guests but not make it required, then you can remove the full else branch.
The rest of the template is unchanged.
And that is it!
This example was done on the text field. It is possible to do this on other fields as well, you just need to override the right file.
The Full File
Here is the full code of the file for reference:
<?php
/**
 * This template renders the Text or Textarea field.
 *
 * Override this template in your own theme by creating a file at:
 * [your-theme]/tribe/tickets-plus/v2/components/meta/text.php
 *
 * @link    https://evnt.is/1amp See more documentation about our views templating system.
 *
 * @since 5.0.0
 * @since 5.1.0 Added support for div HTML attributes.
 * @since 5.1.1 Added support for placeholders.
 * @since 5.2.9 Added support for description.
 *
 * @version 5.2.9
 *
 * @var string $field_name The meta field name.
 * @var string $field_id The meta field id.
 * @var bool   $required A bool indicating if the meta field is required or not.
 * @var string|int $attendee_id The attendee ID, to build the ID/name.
 * @var array $classes Array containing the CSS classes for the field.
 * @var array $attributes Array containing the HTML attributes for the field.
 * @var string $placeholder The field placeholder text.
 * @var bool $disabled Field is disabled or not.
 * @var string $value Value for field.
 * @var Tribe__Tickets__Ticket_Object $ticket The ticket object.
 * @var Tribe__Tickets_Plus__Meta__Field__Text $field.
 * @var string $description A user-defined description for meta field.
 *
 * @see Tribe__Tickets_Plus__Meta__Field__Text
 */

$multiline = Tribe__Utils__Array::get( $field, [ 'extra', 'multiline' ], null );

// The name of the text field has to be "Phone number".
if ( $field->slug == 'phone-number' ) {
	// Limit to main guest
	if ( $attendee_id === 0 ) {
		// Set it required.
		$required = true;
		// Add to the description
		$description .= " Required for main attendee.";
	} else {
		// Hide the field.
		return;
		// Remove 'return' above if the field should be shown for other guests, but not required.
	}
}
?>

<div
	<?php tribe_classes( $classes ); ?>
	<?php tribe_attributes( $attributes ); ?>
>
	<label
		class="tribe-tickets__form-field-label"
		for="<?php echo esc_attr( $field_id ); ?>"
	><?php echo wp_kses_post( $field->label ); ?><?php tribe_required_label( $required ); ?></label>
	<div class="tribe-tickets__form-field-input-wrapper">
		<?php if ( $multiline ) : ?>
			<textarea
				id="<?php echo esc_attr( $field_id ); ?>"
				class="tribe-common-form-control-text__input tribe-tickets__form-field-input"
				name="<?php echo esc_attr( $field_name ); ?>"
				placeholder="<?php echo esc_attr( $placeholder ); ?>"
				<?php tribe_required( $required ); ?>
				<?php tribe_disabled( $disabled ); ?>
			><?php echo esc_textarea( $value ); ?></textarea>
		<?php else : ?>
			<input
				type="text"
				id="<?php echo esc_attr( $field_id ); ?>"
				class="tribe-common-form-control-text__input tribe-tickets__form-field-input"
				name="<?php echo esc_attr( $field_name ); ?>"
				value="<?php echo esc_attr( $value ); ?>"
				placeholder="<?php echo esc_attr( $placeholder ); ?>"
				<?php tribe_required( $required ); ?>
				<?php tribe_disabled( $disabled ); ?>
			/>
		<?php endif; ?>
		<?php if ( ! empty( $description ) ) : ?>
			<div class="tribe-common-b3 tribe-tickets__form-field-description">
				<?php echo wp_kses_post( $description ); ?>
			</div>
		<?php endif; ?>
	</div>
</div>