Hide Number of People Attending from Event Pages
If you’d like to remove the number of attendees for your events, you can easily do so by adding a simple CSS snippet to your WordPress site. Follow the instructions below to hide the number of people who are attending the event from being displayed on your event pages. This can help create a more streamlined and focused presentation for your audience.
Copy the below code into your (child) theme’s style.css file, or add it to Appearance > Customize > Additional CSS box (or wherever you usually put custom styling).
.single-tribe_events .tribe-tickets__rsvp-attendance {
display: none !important;
}
Another way to achieve this is a snippet that can be added to your theme’s functions.php file or with a plugin like Code Snippets.
add_filter( 'tribe_template_done', function ($show, $name) {
return 'v2/rsvp/details/attendance' === $name ? '' : $show;
}, 10, 2 );
Display Ticket Description on Mobile View
Is your ticket description not showing on mobile? If you’re facing an issue where the ticket description is not visible on mobile devices, this simple fix will ensure that the ticket details are displayed correctly.
Add Custom CSS
To resolve this, you need to add a few lines of CSS to your WordPress site. Follow these steps:
Navigate to Appearance > Customize > Additional CSS in your WordPress dashboard.
Insert the following CSS code:
@media (max-width: 768px){
.event-tickets .tribe-tickets__tickets-item-details-content {
   display: block !important;
}

.event-tickets .tribe-tickets__tickets-item-extra{
 grid-row: 4 !important;
}

.event-tickets .tribe-tickets__tickets-item-details-content{
     grid-row: 2 !important;
}
}
Click Publish to save your changes.
What This Does
- Forces the ticket description to be visible on mobile screens.
- Adjusts the grid structure to ensure proper alignment of ticket details.
- Enhances the user experience by making ticket descriptions more accessible.
Once you apply this CSS, the ticket description will now appear correctly in the mobile view, ensuring that users can easily see all relevant details when booking tickets.
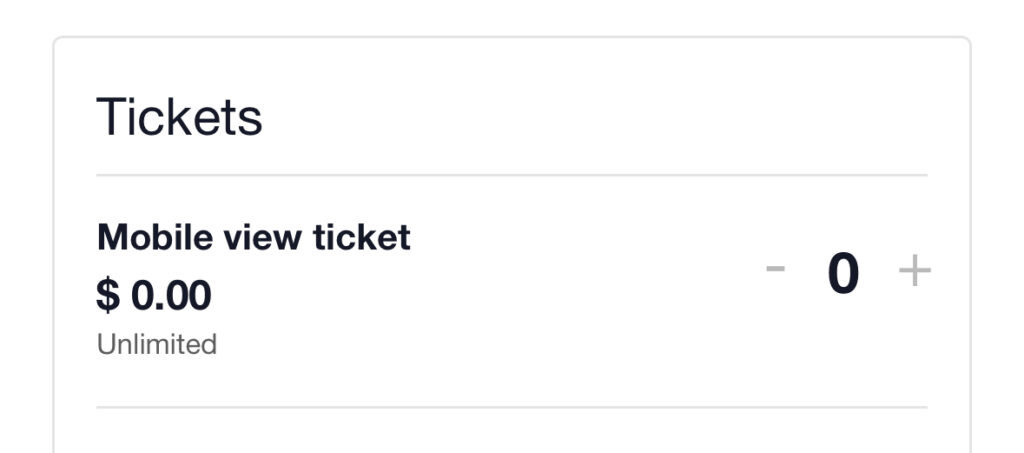
Before:
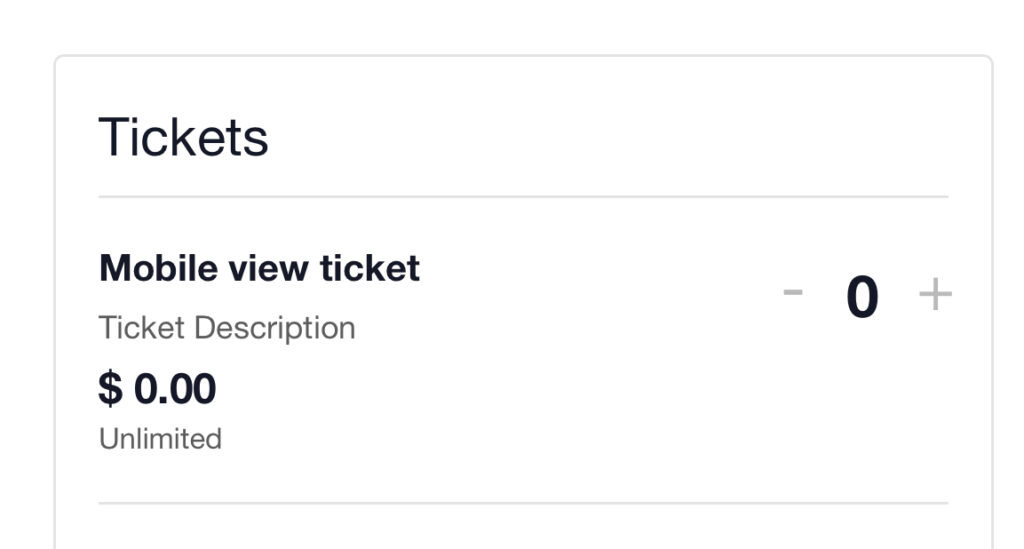
After:
Display Attendee Names in Public Attendee List
The Public Attendee List feature in Event Tickets makes it easy to showcase the attendees of your events right on the single event pages. By default, it only shows the attendee avatars, which is handy but might leave your users wanting a bit more. Imagine how wonderful it would be to enhance that list by adding names next to the avatars. This simple change can make your event feel more connected and inviting for everyone involved. In this article, we’ll walk you through the steps to customize template files and make that happen!
Follow these steps to override and customize the template file and show attendee names along with their avatars in the attendee list:
1- Make a Copy of the Template File
Navigate to the following file within the Event Tickets plugin:
/wp-content/plugins/event-tickets/src/views/blocks/attendees/gravatar.php
Copy the gravatar.php file from this location.
2- Paste the File in Your Theme Directory
Paste the copied file into your active theme’s directory. If the necessary folders don’t exist, create them. Match the following path:
/wp-content/themes/[your-theme]/tribe/tickets/blocks/attendees/gravatar.php
3- Add Attendee Names
Open the newly added file and append the following line of code at the end:
echo $attendee['purchaser_name'];
4- Save Your Changes and Test
Save the changes to the file. Navigate to an event page where the Public Attendee List is displayed. Ensure that attendee names are now displayed with avatars.
Following these simple steps, you can easily personalize the attendee list to display names alongside avatars. This makes your event pages more informative and engaging for everyone involved. Just a quick tip: When you add these attendee names, you may want to sprinkle some CSS to ensure the list is visually appealing and fits perfectly with your site’s design.
Emphasizing the Sale Price
Let’s say you want to customize the original price to draw attention to the sale. Maybe that’s making the price red instead of black.
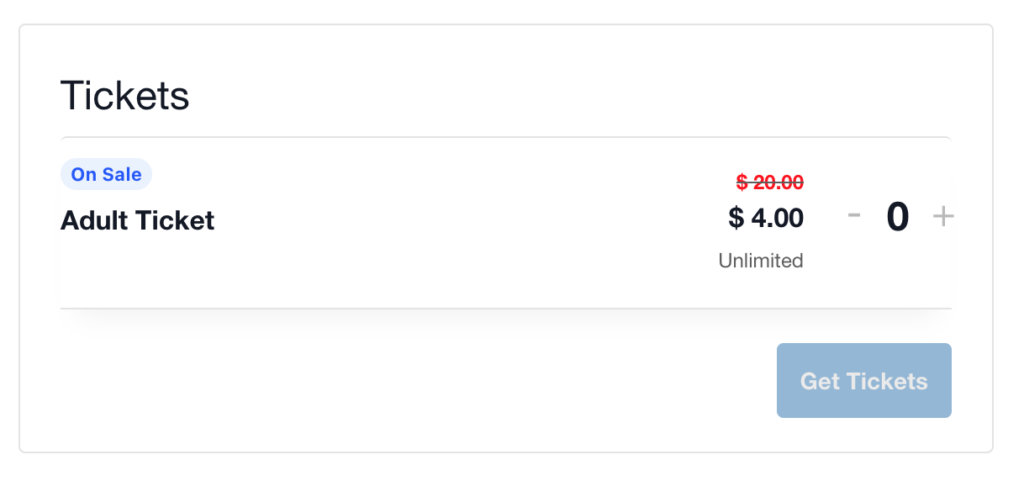
The .tribe-tickets__item__extra__price .tribe-tickets__original_price class is what you’ll want to use in your theme’s CSS, or on the Additional CSS section at wp-admin > Appearance > Customizer > Additional CSS.
Here’s an example:
.tribe-tickets__tickets-original-price span {
  color: red;
  font-size: 1.5rem;
  font-weight: bolder;
  padding-right: 1rem;
 }
Disable Free Tickets
This filter allows you to completely disable the Free Ticket feature. Once you apply this filter, all the tickets created need to have their price higher than 0 (zero).
/**
*
* This Filter allows user to completely disable the Free Tickets featur
*
* @filter: tec_tickets_commerce_is_free_ticket_allowed
* @path: /event-tickets/src/Tickets/Commerce/Hooks.php:138
* @article: https://theeventscalendar.com/knowledgebase/making-tickets/
*
*/

add_filter( 'tec_tickets_commerce_is_free_ticket_allowed', '__return_false' );
Modifying the Default Message for Tickets Not Yet Available
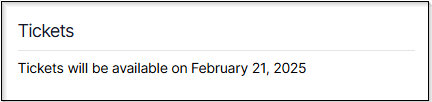
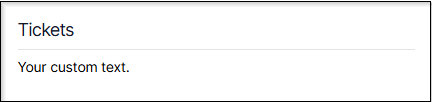
Occasionally, you may add an event to your calendar before tickets become available. In this case, the ticket block on the frontend will display the message, “Tickets will be available on [date].”
If you’d like to customize this default text, you can use the PHP snippet below. Paste this snippet within your themes function.php file or use this handy Code Snippets plugin. You can learn more about using custom code snippets here.
add_filter( 'event_tickets_unvailable_message', function( $message, $tickets ) {
	return "Your custom text";
}, 10, 2 );
Enable Public Attendees List for All Events
The public attendees list is a feature of the Event Tickets Plus plugin that shows a list of attendees for public events. This can enhance the user experience by allowing potential guests to see who else is attending, thus encouraging them to join in. However, as stated, it is deactivated by default and requires each event to be modified individually to enable this setting.
This can become tedious, especially for event managers with numerous upcoming events. Instead of manually activating the feature for each event, you can use a code snippet to apply the changes universally.
<?php //Do not copy this line

add_filter( 'tribe_tickets_hide_attendees_list', function ( $hidden, $post ) {
	if ( function_exists( 'tribe_is_event' ) && tribe_is_event( $post ) ) {
		return false;
	}

	return $hidden;
}, 10, 2 );
Add the code snippet to the functions.php file of your theme, or use your preferred method for integrating snippets into your WordPress site, such as the free Code Snippets plugin.
Utilizing this code snippet is an efficient way to streamline the process of activating the public attendees list for all your events. Rather than activating the feature one event at a time, you can easily ensure that all events display a list of attendees to enhance participation and engagement.
For Developers
Changing the Number of Events Shown in the Event Tickets Plus App
By default, the Event Tickets Plus app limits the number of events displayed per page to 50. However, you can easily override this limit by adding a small PHP snippet to your site.
📘 How to Increase the Event Limit
To customize the number of events displayed, add the following code snippet:
add_filter( 'tribe_rest_event_max_per_page', function( $per_page ) {
    return 100; // Or whatever limit you need
}, 10, 1 );
Replace 100 with your desired number of events.
⚠️ Important Note
Avoid setting this value too high. Increasing the number of events significantly can impact your server’s performance and resource usage, especially on sites with large datasets or limited hosting resources.
🧩 Where to Add the Code
You can add this PHP snippet to your theme’s functions.php file. However, we strongly recommend using a dedicated code snippets plugin instead. This approach ensures your changes remain intact even after theme updates.
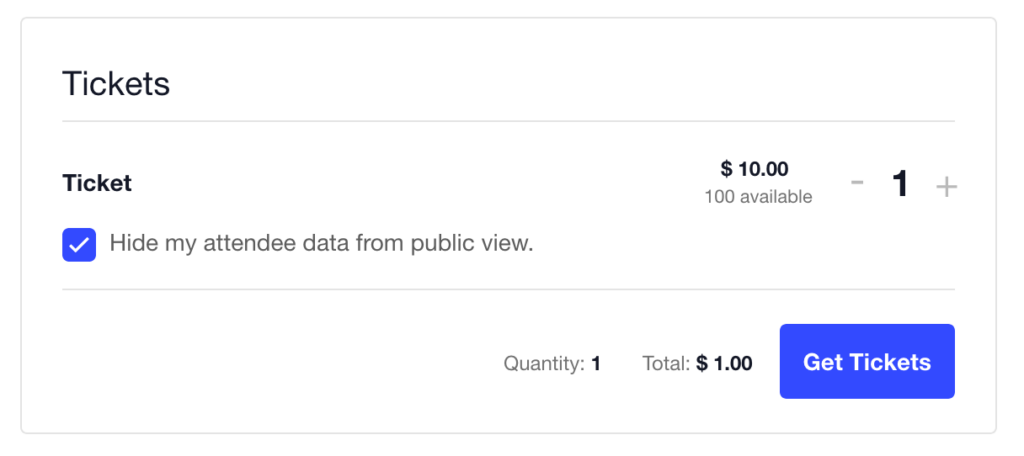
Hide Remaining Ticket Quantity
Use the CSS snippet below to hide the available ticket quantity shown in the ticket or RSVP.
/* list view */
.tribe-events .tribe-events-c-small-cta__stock {
    display: none !important;
}

/* single view */
.tribe-common-b3.tribe-tickets__tickets-item-extra-available {
    display: none;
}
Change the “Get Tickets” Link Text on Calendar Views
With Event Tickets and Event Tickets Plus, events with tickets have a “Get Tickets” link that appears by default in certain places on the calendar, like list view:
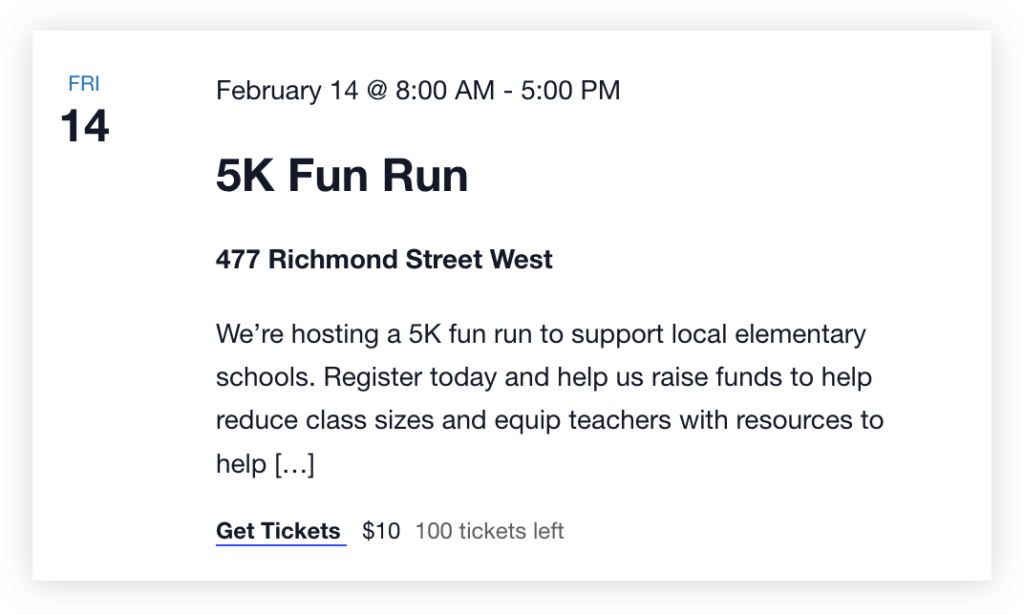
There’s one in the event view as well:
Let’s say we want that to say something else, like “Register Now!” or something. Here’s a snippet that you can use to change the link text to whatever works best for your site:
Change “Register Now!” in this example to anything that you would like, then add this snippet to the `functions.php` file of your child theme, or by using the Code Snippets plugin.
PHP 7.4 version
/**
 * Change the Get Tickets on List View and Single Events
 *
 * @param string $translation The translated text.
 * @param string $text        The text to translate.
 * @param string $context     The option context string.
 * @param string $domain      The domain slug of the translated text.
 *
 * @return string The translated text or the custom text.
 */

add_filter( 'gettext_with_context', 'tribe_change_get_tickets', 20, 4 );
function tribe_change_get_tickets( $translation, $text, $context = "" , $domain ) {

	if (
	     $domain != 'default'
	     && strpos( $domain, 'event-' ) !== 0
	) {
		return $translation;
	}

	$ticket_text = [
		// Get Tickets on List View
		'Get %s'      => 'Register Now!',
		// Get Tickets Form - Single View
		'Get Tickets' => 'Register Now!',
	];

	// If we don't have replacement text, bail.
	if ( empty( $ticket_text[ $text ] ) ) {
		return $translation;
	}

	return $ticket_text[ $text ];
}
PHP 8.x version
/**
 * Change the Get Tickets on List View and Single Events
 *
 * @param string $translation The translated text.
 * @param string $text        The text to translate.
 * @param string $context     The option context string.
 * @param string $domain      The domain slug of the translated text.
 *
 * @return string The translated text or the custom text.
 */

add_filter( 'gettext_with_context', 'tribe_change_get_tickets', 20, 4 );
function tribe_change_get_tickets( string $translation, string $text, string $context, string $domain ): string {

	if (
		$domain != 'default'
		&& ! str_starts_with( $domain, 'event-' )
	) {
		return $translation;
	}

	$ticket_text = [
		// Get Tickets on List View
		'Get %s'      => 'Register Now!',
		// Get Tickets Form - Single View
		'Get Tickets' => 'Register Now!',
	];

	// If we don't have replacement text, bail.
	if ( empty( $ticket_text[ $text ] ) ) {
		return $translation;
	}

	return $ticket_text[ $text ];
}
Note, $context and $domain parameters are not used in the above example, so they can be omitted. If so, remember to change the number of parameters from 4 to 2 when applying the filter.