The Events Calendar adds various touches to the WordPress admin — menus, editor defaults, notices, and list views. You may want to adjust those touches to better fit how you work. This article collects admin-side customizations for The Events Calendar.
Hiding Admin UI Elements
The two customizations in this section are defined as constants in your WordPress installation’s wp-config.php file, which is located at the root of your WordPress installation. Place each define() line above the line that reads /* That's all, stop editing! Happy publishing. */, alongside any other define statements already in the file.
Remove Events from the WordPress Admin Bar
The Events Calendar adds a dropdown to the WordPress admin bar, giving you a quick way to manage events, settings, and your calendar from any page once logged in.
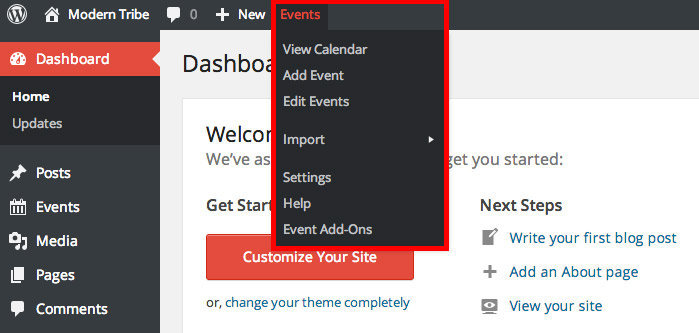
If you’d rather keep the admin bar uncluttered, this constant removes the dropdown:
/** Removes Events from WP Admin Bar */
define( 'TRIBE_DISABLE_TOOLBAR_ITEMS', true );
Remove Upsell Notices
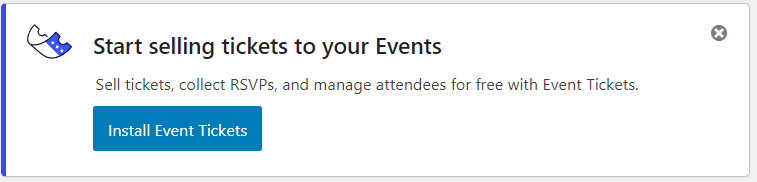
After installing The Events Calendar, you may notice messages in your WordPress admin encouraging you to purchase add-ons or install Event Tickets. These are intended to help you get more out of the plugin, but we understand they can feel like they’re getting in the way.
These notices appear in several places:
- Settings page — a banner visible when you visit Events → Settings.
- Admin Dashboard — a banner that appears at the top of the WordPress admin dashboard.
- Event editing screen (Classic Editor) — an “Additional Functionality” section near the bottom of the event editor, below the Event Cost section.
- Event editing screen (Block Editor) — a “Turbocharge your events” section in the event date picker dropdown.
- Event Tickets one-click install notice — visible to users who have The Events Calendar but not Event Tickets installed.
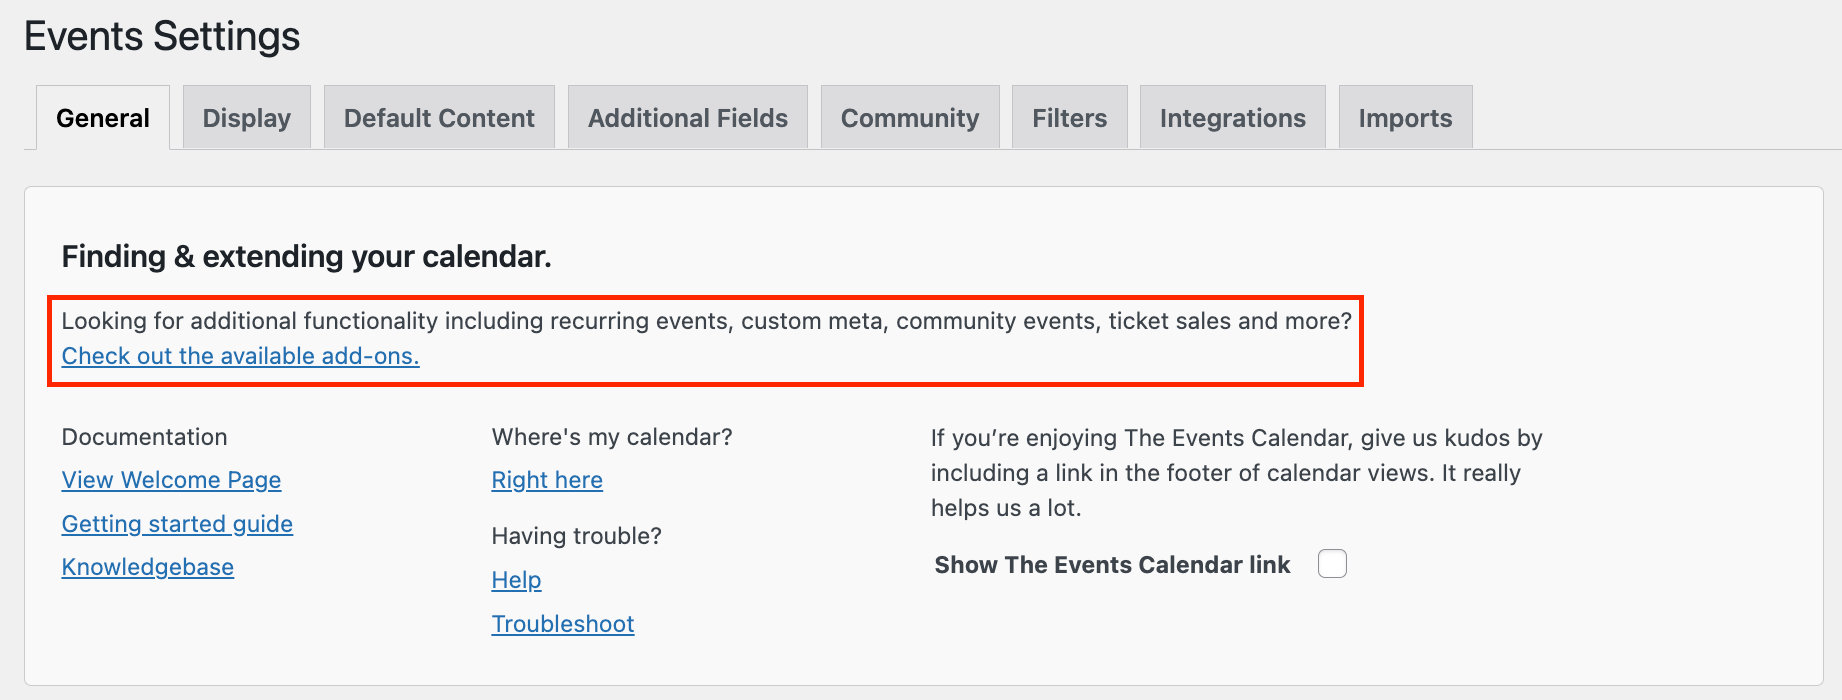
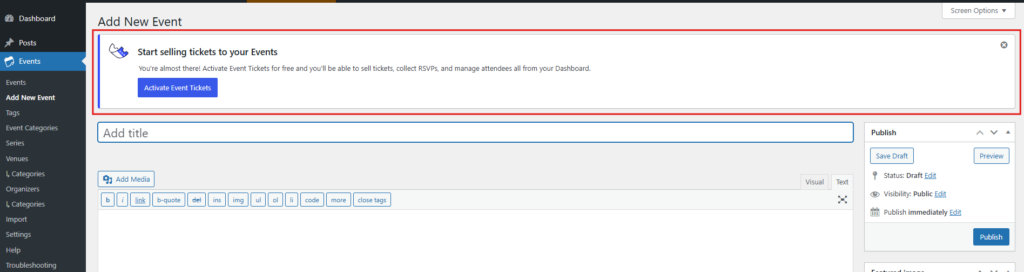
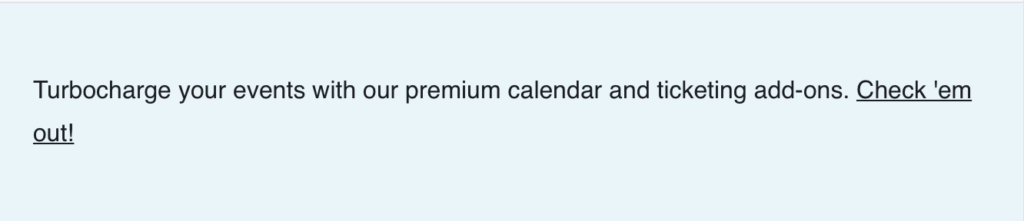
One line of code removes all of the above messages at once:
define( 'TRIBE_HIDE_UPSELL', true );Customizing Admin Behavior
The three customizations below are PHP snippets that hook into The Events Calendar’s filters and actions. Add them to your child theme’s functions.php file or use the Code Snippets plugin. If code snippets are new to you, start with Using Code Snippets to Customize The Events Calendar for a walkthrough.
Add an Event Status Column to the Events List
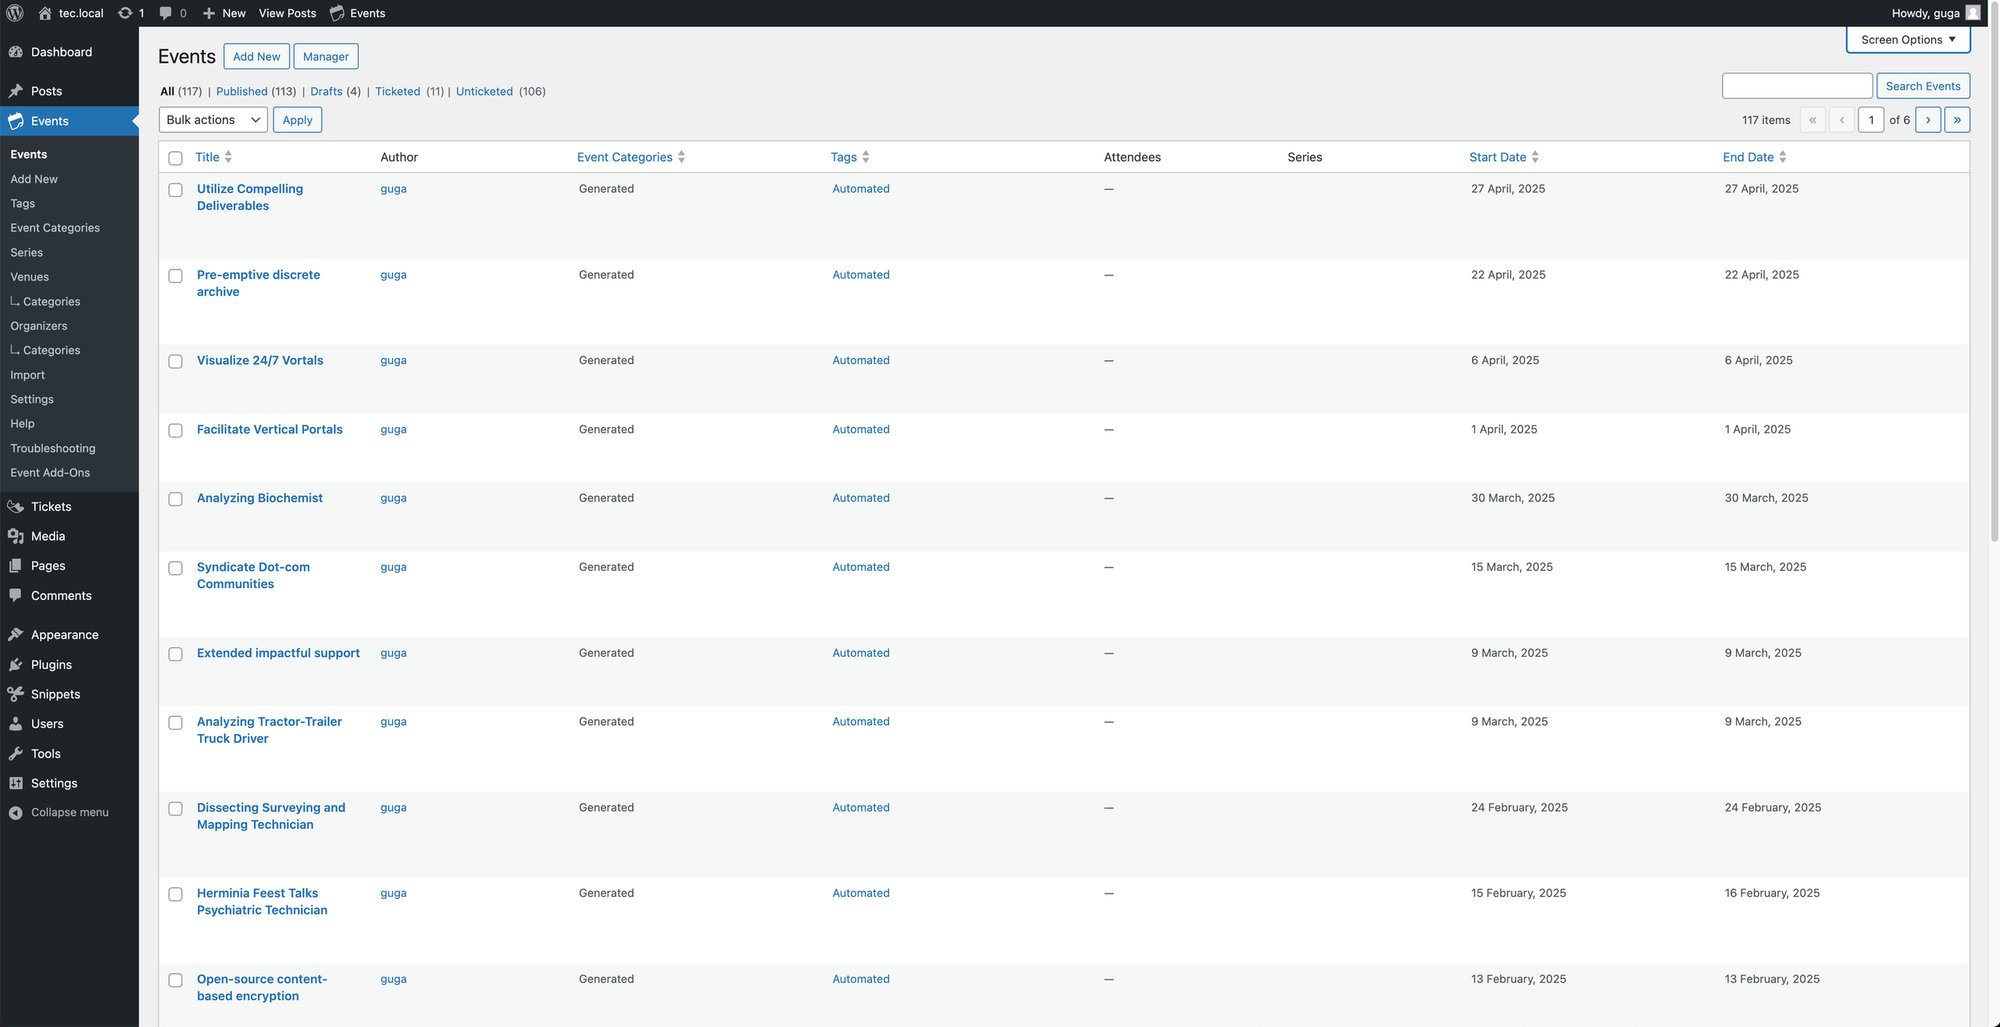
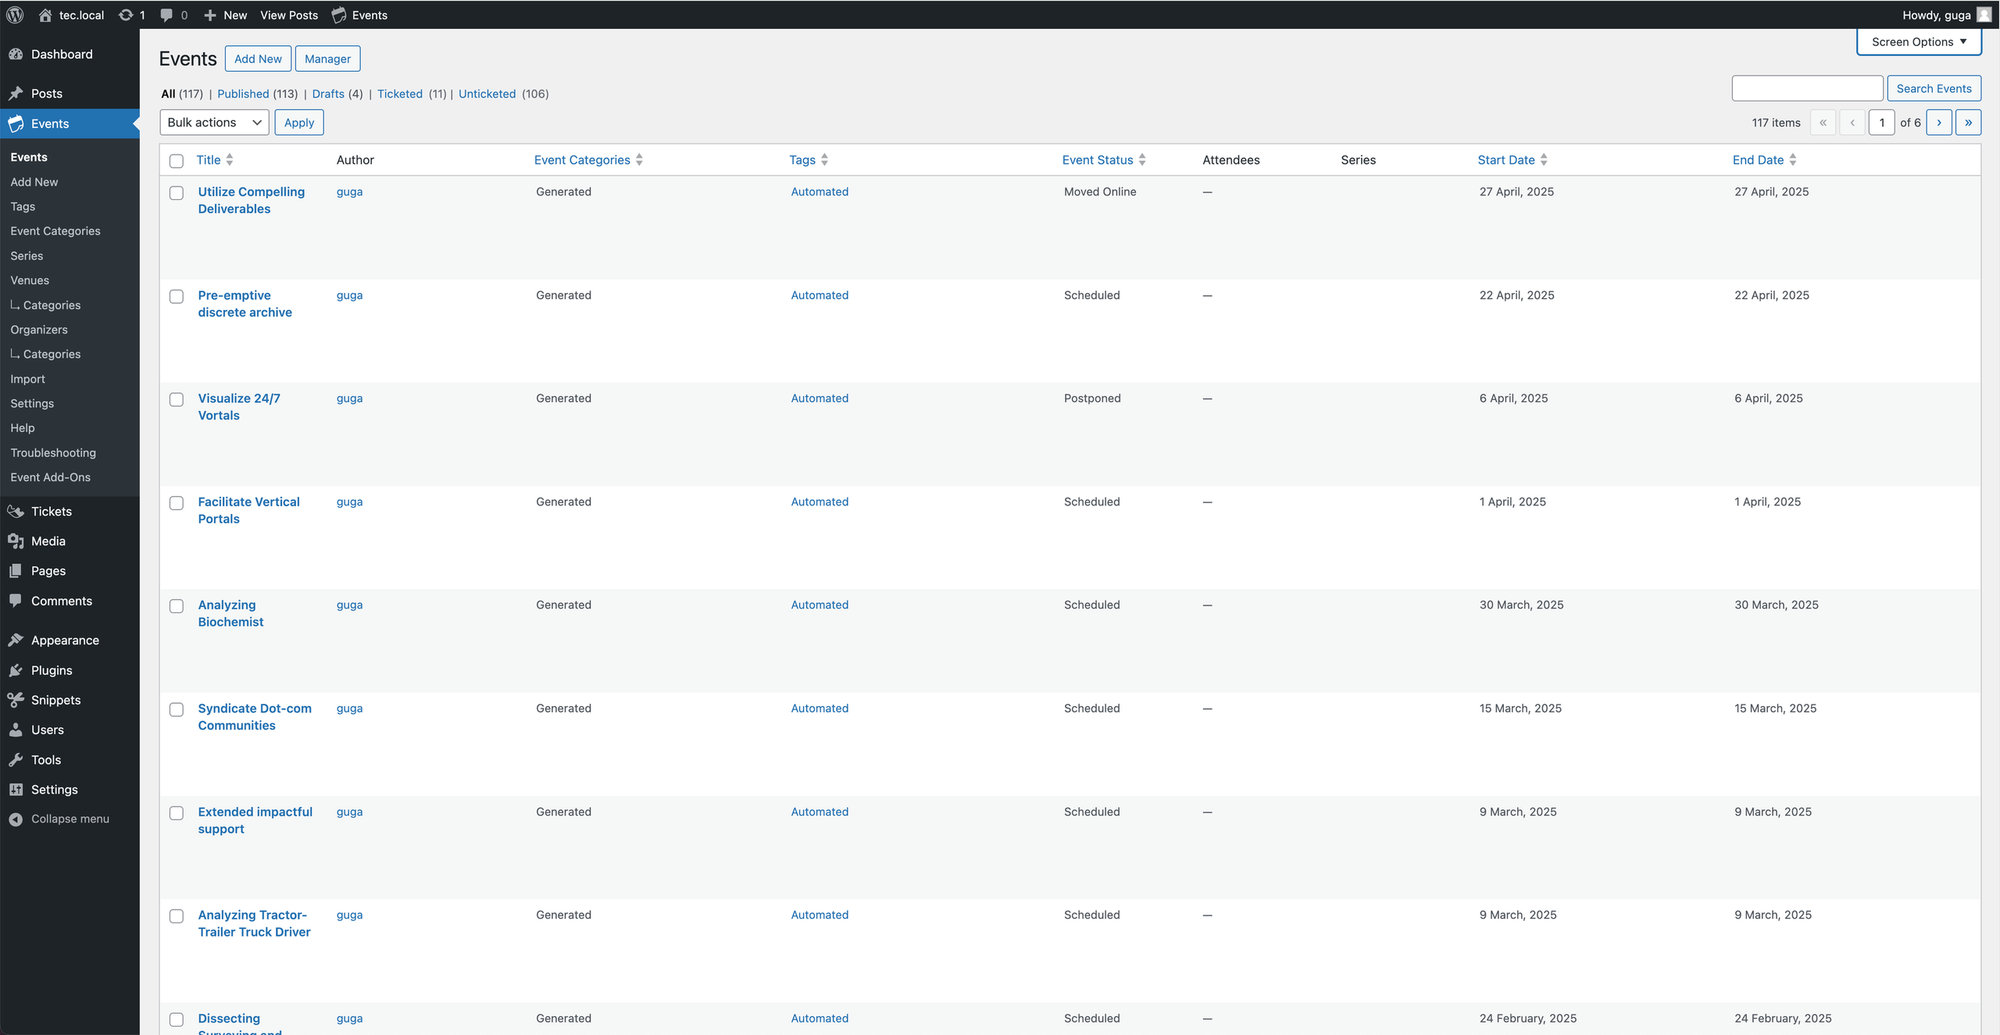
On the Events → All Events screen, the Event Status (Scheduled, Canceled, Postponed, etc.) is not displayed by default. This snippet adds an “Event Status” column to that list and makes it sortable.
if ( class_exists( 'Tribe__Events__Main' ) ) {
    add_filter( 'manage_tribe_events_posts_columns', 'custom_tec_statuses_columns' );
    function custom_tec_statuses_columns( $columns ) {
       $columns['tribe-events-status'] = __( 'Event Status' );

       return $columns;
    }

    add_action( 'manage_tribe_events_posts_custom_column', 'custom_tec_statuses_column', 10, 2 );
    function custom_tec_statuses_column( $column, $post_id ) {
       if ( 'tribe-events-status' === $column ) {
          $event_status         = get_post_meta( $post_id, '_tribe_events_status', true ) ?: 'Scheduled';
          $cleaned_event_status = ucwords( str_replace( '-', ' ', $event_status ) );
          echo $cleaned_event_status;
       }
    }

    add_filter( 'manage_edit-tribe_events_sortable_columns', 'custom_ce_events_sortable_columns' );
    function custom_ce_events_sortable_columns( $columns ) {
       $columns['tribe-events-status'] = 'tribe-events-status';

       return $columns;
    }

    // Add the join clause
    function tribe_events_custom_join( $join ) {
       global $wpdb;

       if ( is_admin() && is_main_query() ) {
          $join .= " LEFT JOIN {$wpdb->postmeta} AS tribe_events_status ON {$wpdb->posts}.ID = tribe_events_status.post_id AND tribe_events_status.meta_key = '_tribe_events_status'";
       }

       return $join;
    }

    add_filter( 'posts_join', 'tribe_events_custom_join' );

    // Adjust the orderby clause in SQL
    function tribe_events_custom_orderby( $orderby, $query ) {
       global $wpdb;
       // Bail, if not admin.
       if ( ! is_admin() ) {
          return $orderby;
       }
       // Bail, if not main query.
       if ( ! $query->is_main_query() ) {
          return $orderby;
       }
       // Bail, if it's not for events.
       if ( $query->get( 'post_type' ) !== 'tribe_events' ) {
          return $orderby;
       }

       $orderby_value = $query->get( 'orderby' );
       if ( 'tribe-events-status' == $orderby_value ) {
          $orderby = "tribe_events_status.meta_value " . $query->get( 'order' );
       }

       return $orderby;
    }

    add_filter( 'posts_orderby', 'tribe_events_custom_orderby', 20, 2 );
}
Before adding the snippet, the list view shows no status column:
After adding the snippet, an Event Status column appears:
Customize Default Event Times
When you create a new event, the default start time is 8:00 am and the default end time is 5:00 pm. You can override these in the editor each time, but if most of your events happen at different hours, it’s easier to change the defaults globally.
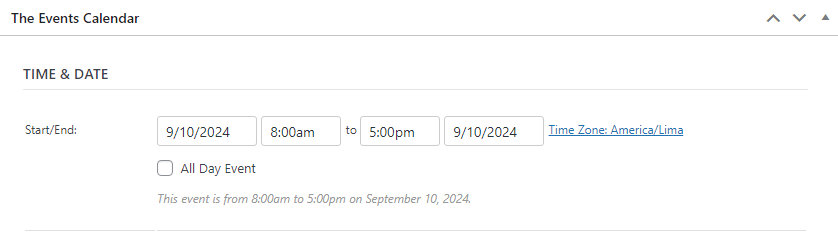
This snippet sets a new default of 9:00 am for the start time and 4:00 pm for the end time. Adjust the times on the return lines to fit your own needs.
add_filter( 'tribe_events_meta_box_timepicker_default', 'my_custom_timepicker_defaults', 10, 3 );

function my_custom_timepicker_defaults( $default, $type, $date ) {
    if ( $type == 'start' ) {
       return "09:00:00";
    }

    if ( $type == 'end' ) {
       return "16:00:00";
    }

    return $default;
}
Auto-Delete Featured Images When Events Are Deleted
When you delete a post in WordPress, the post itself disappears but its featured image stays in your media library. Over time this can clutter your site with unused images and make media management harder.
This snippet automatically deletes an event’s featured image when the event is permanently removed, keeping your media library tidy with no extra effort.
⚠️ Note: This snippet only deletes the featured image when an event is permanently deleted, not when it’s moved to the trash. It also fully removes the file from your server, so the image cannot be recovered afterward.
// Delete the featured image when an event is permanently deleted.
add_action( 'before_delete_post', function( $post_id ) {
// Get the post object.
$post = get_post( $post_id );
// Check if the post is an event.
if ( $post && $post->post_type === 'tribe_events' ) {
// Check if the event has a featured image.
if ( has_post_thumbnail( $post_id ) ) {
// Get the attachment ID of the featured image.
$attachment_id = get_post_thumbnail_id( $post_id );
// Delete the attachment (featured image).
wp_delete_attachment( $attachment_id, true );
}
}
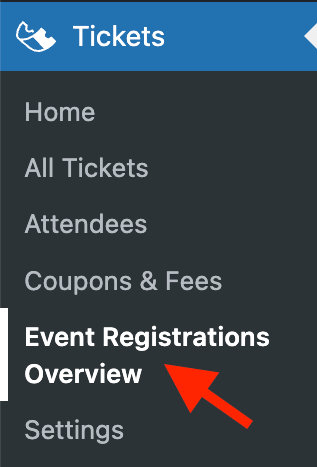
}, 10, 1 );Change the “Orders” Page Title in the Admin Dashboard
This filter gives you control over the title displayed for the Event Tickets “Orders” page within your WordPress admin dashboard.
What it does: Customizes the page title in the admin backend.
add_filter( 'tribe_tickets_admin_order_page_page_title', function( $title ) {
    return __( 'Event Registrations Overview', 'your-text-domain' );
});
Result:
Ref: tribe_tickets_admin_order_page_page_title
Granting Custom User Roles Access to Attendee Data
If you’re managing events and need to allow a user with limited permissions to view or export attendee data, you may notice that the Attendees menu or export button isn’t available—even when permissions seem correctly configured. This article explains why that happens and how to safely open up attendee access using a few small code snippets.
Understanding the Issue
By default, the Attendees admin menu and its sub-pages (like Ticket Fieldsets) require the manage_options capability, which is typically reserved for Administrators. Users with other roles—Editor, Contributor, or custom roles—won’t see the menu, and visiting it directly returns a “You do not have permissions to access this page” error.
The Export Attendees feature has its own requirement: it’s gated behind the publish_pages capability, which is typically available to Super Admins, Admins, and Editors. So even after a user can see the Attendees list, they may still not see the export button.
Granting manage_options or publish_pages outright isn’t ideal, since it gives broader access than needed. Thankfully, there’s a safer approach that involves up to three steps: making the menu visible, granting the role enough capability to manage the content, and enabling the export button.
Enable Access to the Attendees List
The snippet below lowers the required capability from manage_options to edit_posts, which Editors and Contributors typically already have.
<?php
/**
 * Lower the capability required for Tickets post type
 * can access the Attendees list and other subpages (e.g., Fieldsets list).
 */
add_filter( 'tec_admin_pages_capability', function( $capability ) {
	return 'edit_posts';
} );
With this in place, anyone who has the edit_posts capability will be able to view the Attendees list on the Tickets post type in the dashboard.
Add Permissions to Read, Edit, Delete or Publish Posts
The Attendees list is now visible, but users still won’t have the permissions they need to edit, publish, or delete content on those pages—like updating an attendee record. The following snippet grants a specific role the capabilities required to fully manage these posts.
<?php
/**
 * Ensure a custom role can read, edit, and publish Ticket Fieldsets.
 */
add_action( 'init', function () {
	// Replace 'sample' with your user role slug.
	$role = get_role( 'sample' );
	if ( ! $role ) {
		return;
	}

	$role->add_cap( 'read' );
	$role->add_cap( 'edit_posts' );
	$role->add_cap( 'edit_others_posts' );
	$role->add_cap( 'edit_published_posts' );
	$role->add_cap( 'publish_posts' );
	$role->add_cap( 'delete_posts' );
} );
Important: Be sure to replace 'sample' with the slug of your target role (for example, 'contributor' or your own custom role).
Enable Attendee Export for Limited or Custom Roles
The ability to export attendees in the Event Tickets plugin is controlled by the tec_tickets_attendees_user_can_export_csv filter. You can use it to extend export access to other roles—for example, allowing users with the edit_posts capability (such as Contributors) to export attendee lists. Add the following snippet to your site:
add_filter( 'tec_tickets_attendees_user_can_export_csv', function( $can_export ) {
    // If current user can edit posts (is a contributor), allow attendee export.
    return current_user_can( 'edit_posts' );
});
This lets users with limited permissions export attendees while keeping your overall site permissions tightly scoped. The same filter can also target a specific custom role—just replace the capability check with logic that confirms the current user has your role slug.
Adding Custom Code to Your Site
You can add these PHP snippets to your theme’s functions.php file, but we recommend using a dedicated code snippets plugin like Code Snippets so your changes survive theme updates. For more details, see our guide on the best practices for implementing custom code snippets.
Once the snippets are in place, make sure the target role has the base capabilities (like edit_posts) enabled in your user role management plugin. Then log in as that user and confirm that the Attendees menu is visible and the Export Attendees button appears on the Attendees page.