When you’re using Elementor with The Events Calendar, the default widgets cover the common cases — but sometimes you need finer control over which event data appears and how. This article collects snippets for a few common customizations that go beyond what the standard widget settings allow.
See also:
Customizations for The Events Calendar are usually implemented via code snippets or template overrides. Add snippets to your child theme’s functions.php file or use the Code Snippets plugin. Template overrides should go in a child theme. If either approach is new to you, start with Using Code Snippets to Customize The Events Calendar and Customizing The Events Calendar Templates for a walkthrough of each.
Show Only the Next Upcoming Instance of a Recurring Event
When Elementor’s Loop Grid or Loop Carousel widgets are used to display events, every instance of a recurring event appears separately. If you’d rather show only the next upcoming instance and hide subsequent recurrences, the snippet below handles it.
function hide_subsequent_recurrences( $query ) {
    $query->set( 'hide_subsequent_recurrences', true );
}

add_action( 'elementor/query/hide_subsequent_recurrences', 'hide_subsequent_recurrences' );
Here’s the full flow using Code Snippets:
- Install and activate the Code Snippets plugin from the WordPress plugin repository.
- Go to Snippets → Add New in your WordPress dashboard.
- Paste the snippet above into the code editor.
- Name the snippet (e.g., “Hide subsequent recurrences in Elementor loop”) and click Save and Activate.
- In Elementor, edit the Loop Grid or Loop Carousel widget and set its Query ID to
hide_subsequent_recurrences.
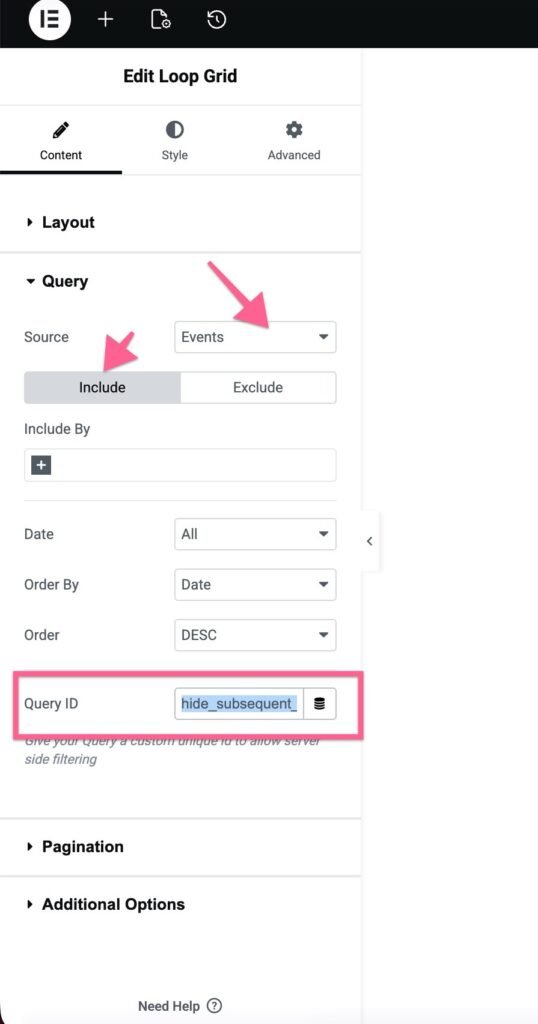
Once the Query ID matches the action hook in the snippet, only the next upcoming instance of each recurring event will display in the widget.
Display Individual Additional Fields with a Shortcode
The Elementor Additional Fields widget (from Events Calendar Pro) renders every Additional Field for an event in a single block. If you’d rather place specific fields in specific spots on the page — or scatter a few of them across different sections — the snippet below registers a shortcode that outputs one field at a time.
Although this guide is written for Elementor, the resulting shortcode works anywhere on a single event page, with or without Elementor.
Step 1: Add the Shortcode to Your Site
// Define the shortcode
function custom_event_custom_fields_shortcode( $atts ) {
    // Get the current event ID
    $post_id = get_the_ID();

    // Get the custom fields for the event
    $custom_fields = tribe_get_custom_fields( $post_id );

    // Get custom field name from the shortcode attribute
    $atts = shortcode_atts(
        array(
            'field' => '', // Default is empty
        ),
        $atts
    );

    // Initialize the output string
    $output = '';

    // Check if the custom field exists based on the attribute 'field'
    if ( ! empty( $atts['field'] ) && isset( $custom_fields[ $atts['field'] ] ) ) {
        $output .= '
';
        $output .= '
' . esc_html( $atts['field'] ) . '
';
        $output .= '

' . esc_html( $custom_fields[ $atts['field'] ] ) . '
';
        $output .= '
';
    }

    // Return the output
    return $output;
}

// Register the shortcode
add_shortcode( 'event_custom_fields', 'custom_event_custom_fields_shortcode' );
Step 2: Add the Shortcode in Elementor
With the shortcode registered, you can drop it in anywhere on a single event page:
- Edit the event in Elementor.
- Add the Shortcode widget. Drag Elementor’s Shortcode widget into the section where you want the field to appear.
- Insert the shortcode. In the widget’s settings, enter
[event_custom_fields field="Custom Field"]. - Replace Custom Field with the exact name of the Additional Field you want to display (for example, Event Website or Location). The field name must match what’s defined in Events → Settings → Additional Fields.
Step 3: Display Multiple Fields
Add as many Shortcode widgets as you need — one per field. Just change the field attribute each time. For example, [event_custom_fields field="Dress Code"] in one section and [event_custom_fields field="Parking"] in another.
Step 4: Customize the Output Markup (Optional)
If you’re comfortable with HTML, you can change the markup the shortcode emits by editing the output block inside the function:
// Check if the custom field exists based on the attribute 'field'
if ( ! empty( $atts['field'] ) && isset( $custom_fields[ $atts['field'] ] ) ) {
    $output .= '';
    $output .= '' . esc_html( $atts['field'] ) . '';
    $output .= '' . esc_html( $custom_fields[ $atts['field'] ] ) . '';
    $output .= '';
}
Swap the div, h3, and p tags for whatever structure and classes match your theme.