▶️Note: This video may refer to products and features that have since been merged or changed. For the most up-to-date information, please refer to the content of this article.
Now you can use Microsoft Power Automate (MSPA) to combine The Events Calendar Pro and Event Tickets Plus with many of your favorite third-party apps and tools. MSPA allows you to integrate our plugins by using what they call “flows”. A flow is a workflow that sets up an automation between two different apps.
Useful Links:
- Microsoft Learn
- List of connectors
- Go through the first 2 sections of Get started with Power Automate (18 minutes)
- Take the Assessment to get recommendations of helpful flows
To explain how this works, we’ll be creating an actual automation! In this example, every time you publish an event (trigger), an email will be sent to someone using Gmail.
Related Articles:
- Managing Your Power Automate Endpoints
- Triggers, Actions & Data Fields for Power Automate with The Events Calendar
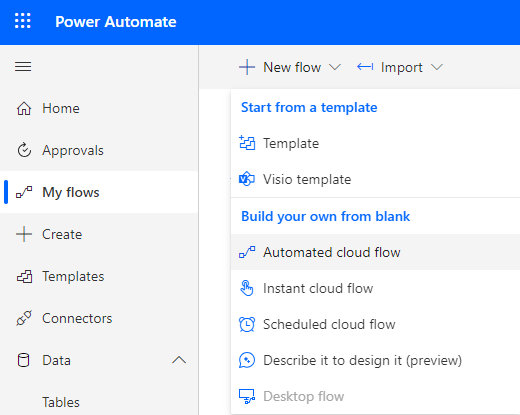
Creating Flows
- Click on My Flows

- Click on + New flow
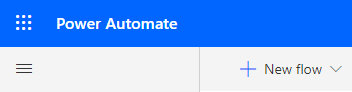
- Select Automated cloud flow
A pop-up will now appear to build your flow:

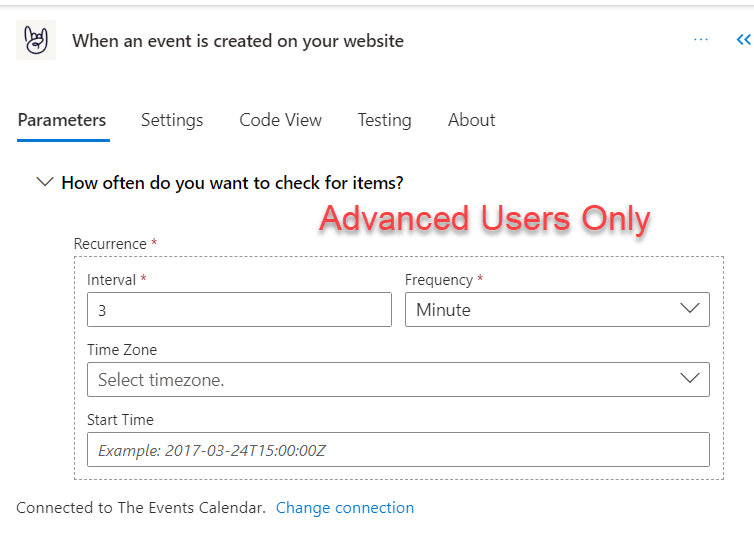
- If you are not an advanced user, click on Skip and jump to the next section
- For advanced users:
- Name your flow (recommended, but not required)
- Choose your flow’s trigger
- Use the search field to narrow down your selection
- i.e.: When an event is created on your website
- Click on Create
Choosing a Trigger
- Click on Add a trigger
- Search for the Connector of the app you want to use as a Trigger (e.g.: The Events Calendar)
- Click on the desired Trigger button
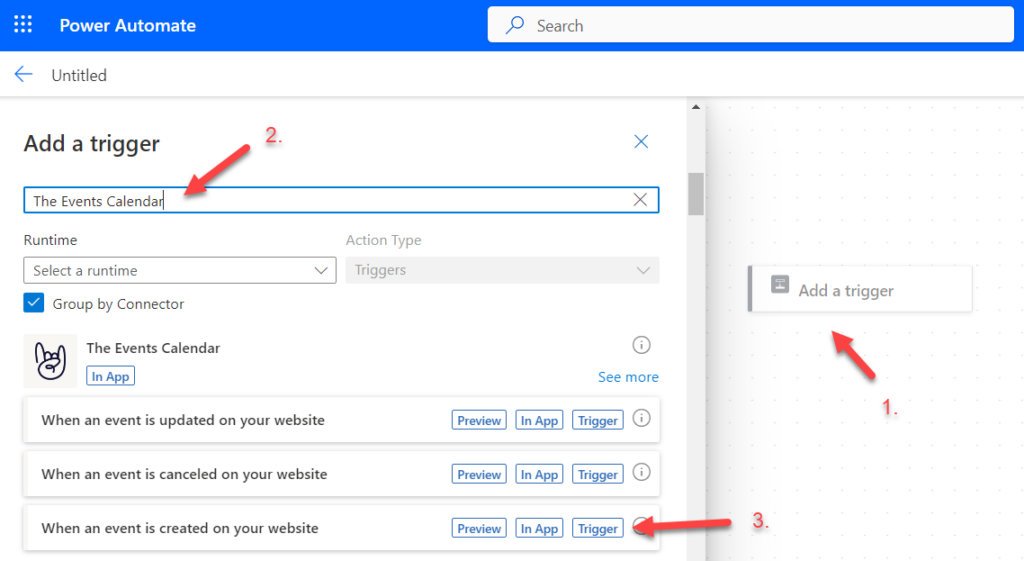
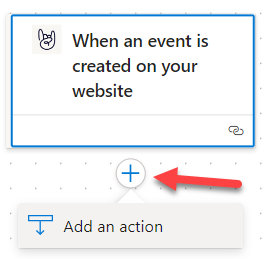
Your trigger is set.
Pro tip: Advanced users can customize the trigger configuration, but its default configuration should be fine.
The rest of us should move on and add an action (a.k.a. operation)
- Click on the + icon to Add a New Step
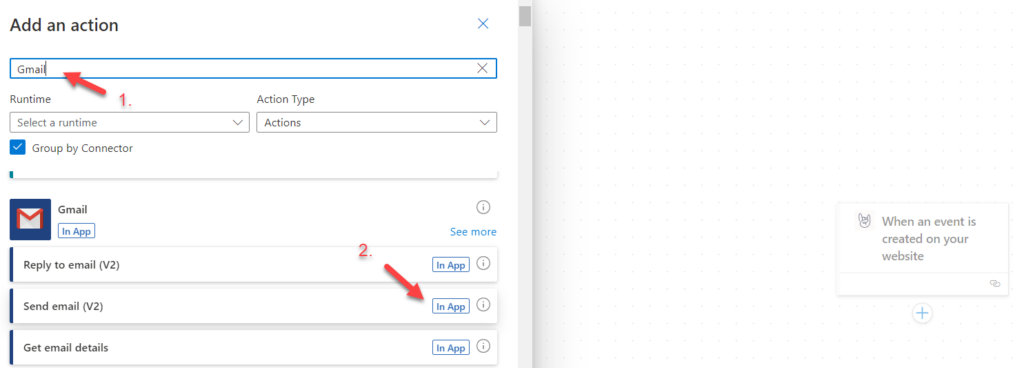
Choosing An Action
- Choose your flow’s action from your preferred connector
- Use the search field to narrow down your selection
- Example:
- Enter “Gmail” in the search bar
- Select Send Email under the Gmail connector
- Depending on the action and connector selected, it might be necessary to:
- Sign in the desired applications (if not previously done)
- Grant permissions to the desired applications
- Provide more information (e.g.: Location, File, and Table for Excel Online)
- Etc..
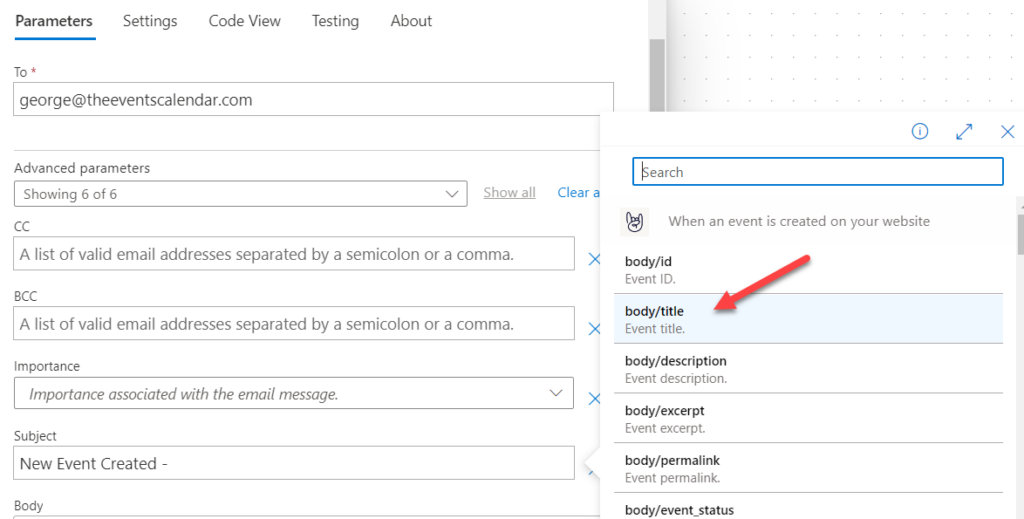
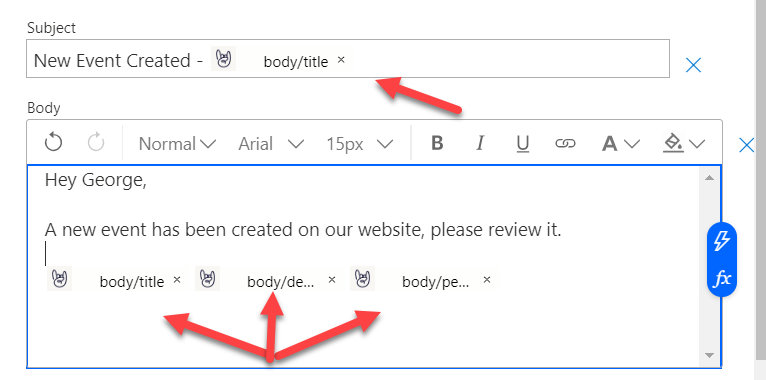
Mapping Dynamic Fields
The trigger and the operation connectors are now linked. But we are not done! We need to teach the action app how to use the trigger app’s data. This needs to be done one field at a time. For a full reference of every available trigger, action, and dynamic field, see this article.
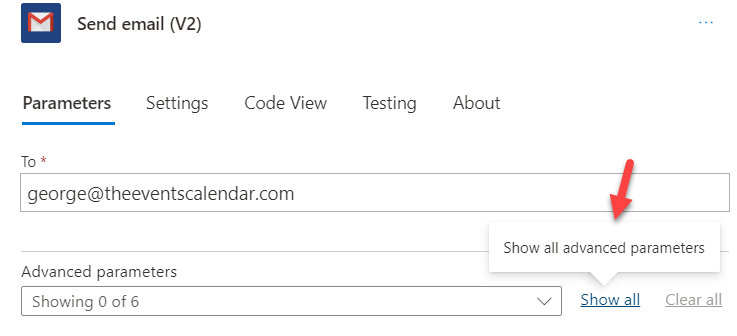
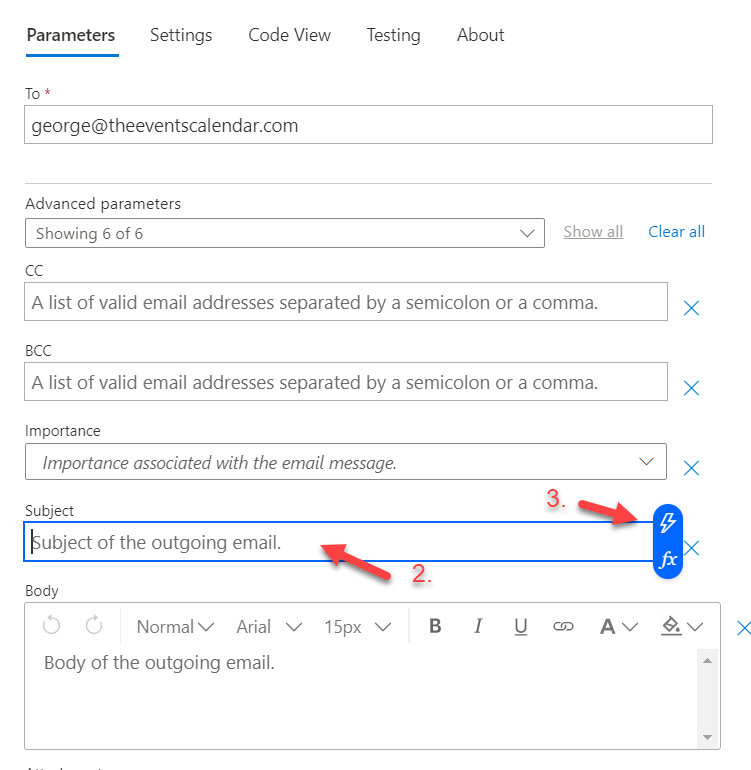
In the action app’s connector (Gmail in this example):
- Review every field available under the Parameters tab to see if they require mapping
- You might need to click on a Show All link to see them
- For each field you review:
- Ask yourself if that field needs to receive information from your trigger (The Events Calendar)
- When you find a field needing information from your trigger, click on it to select it.
- Click on the lightning bolt icon that appears to display the available dynamic fields from the trigger
- Repeat this process for every available field until you are satisfied
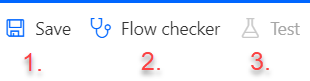
Okay! You are almost there.
- Save the Flow
- Run the Flow checker
- Take it for a test run
Your flow is ready to go and your process is now automated!
In our example, a chosen email address will receive an email every time you create a new event on your calendar.
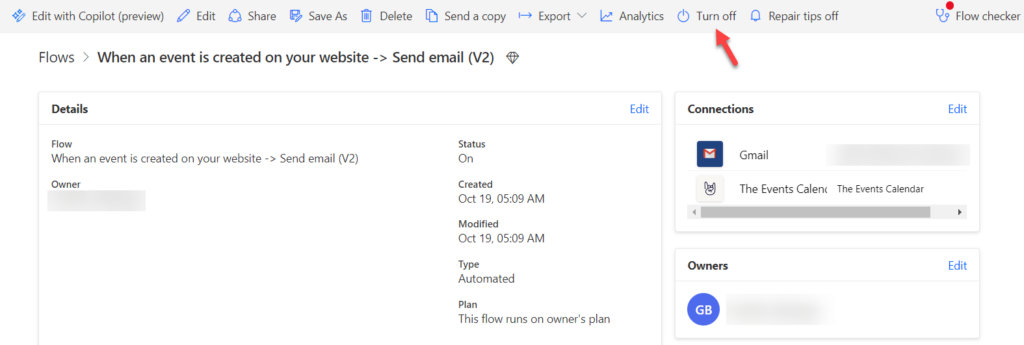
Important: always keep an eye on new flows #safetyfirst
Pro Tip: you can turn the flow on or off at any given point by using the My Flows menu on all platforms (online, mobile app, or desktop app)