With Events Calendar Pro, you can automatically generate Zoom links by connecting to Zoom.
Connect Your Site to Your Zoom Account
All it takes is a few simple steps:
- Navigate to Events → Settings → Integrations from the WordPress dashboard.
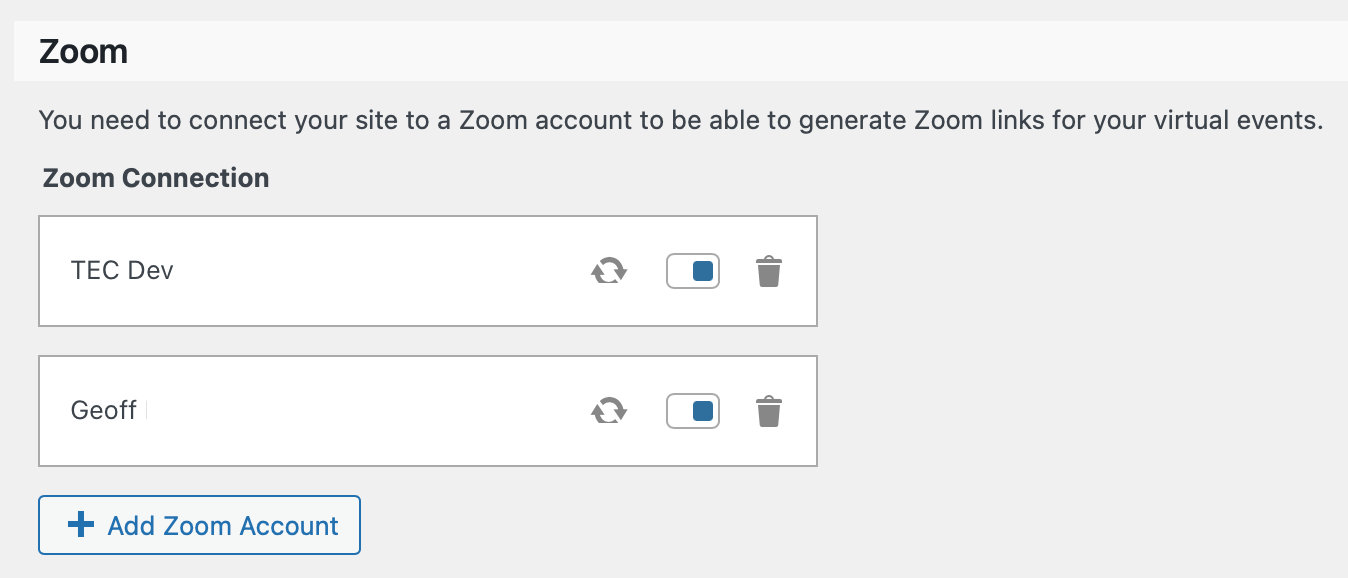
- Find the Zoom Connection and click Add Zoom Account.
- You will be redirected to Zoom, where you can log in or create an account.
- From there, you can go back to your site and see that it says Refresh Connection, which means that you are already connected.
- Start automatically generating your Zoom meetings and webinars!
Check out this article for details on creating and managing your virtual events.
Adding Multiple Accounts
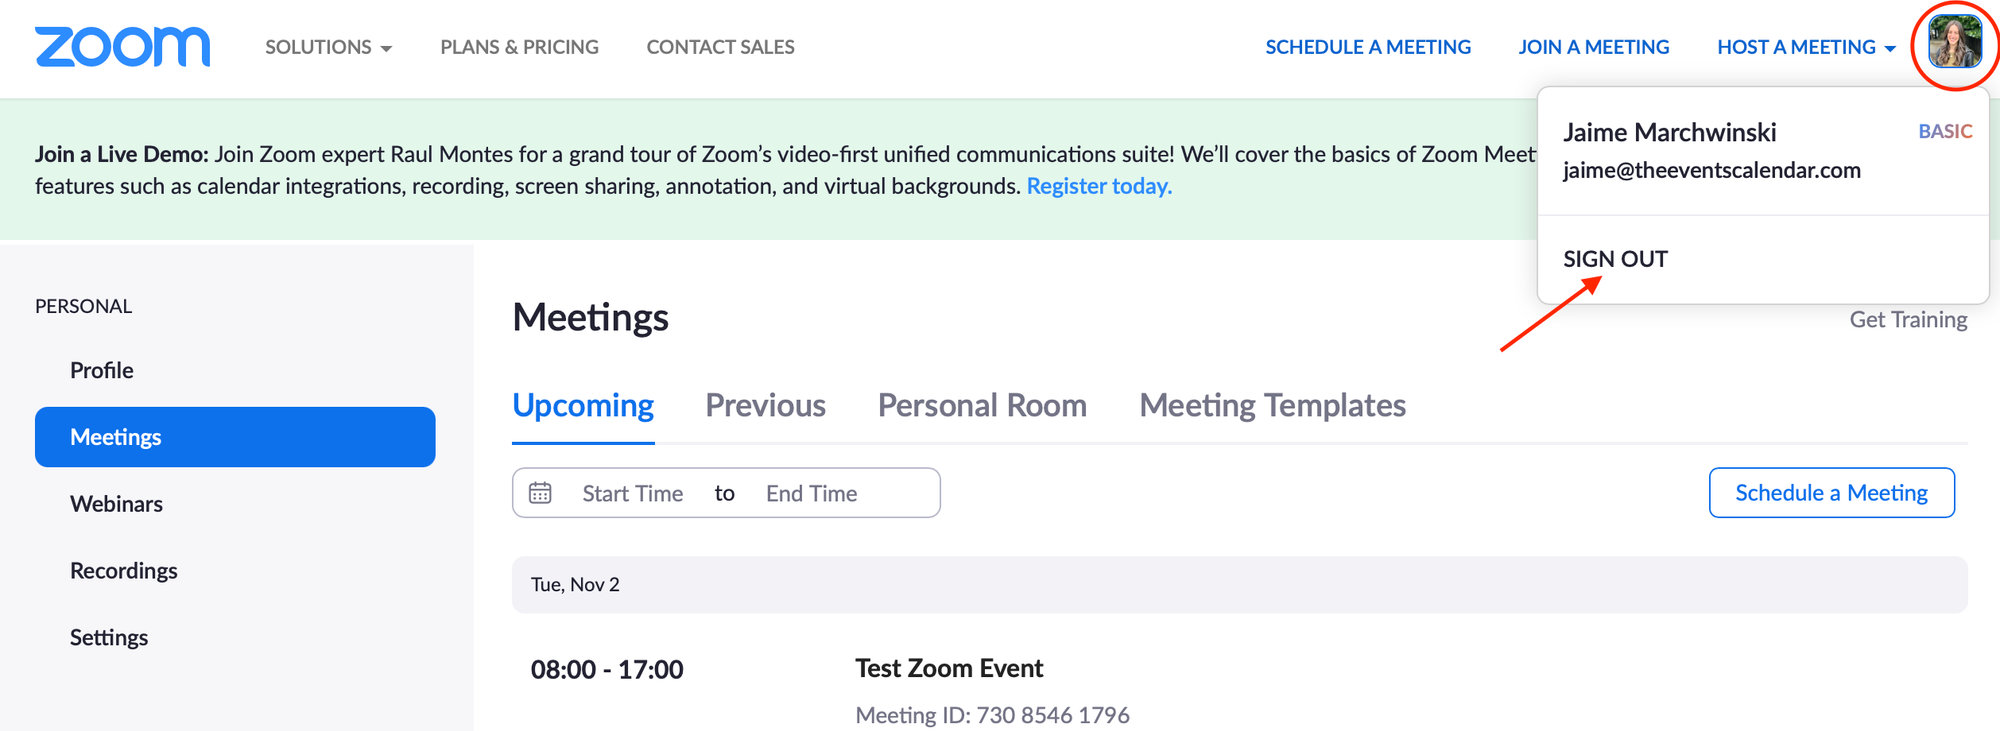
It is important to note that you can add multiple Zoom accounts to your site, allowing you to create meetings or webinars from different accounts simultaneously. To do this, you must first log out of one Zoom account before logging into another.
You can only connect to a Zoom account on one WordPress install at a time. If you’d like to use the same Zoom account on two separate sites, you will have to sign out of that account on one site before using it on another. This includes using the same Zoom account on both a staging and a live site at the same time.
Note: For our customers who previously connected to Zoom, there will be some changes in place to make things easier. You will notice that with the most recent update, your Client Secret input field will disappear, although the Client ID field will stay, but will be disabled. Your site will remain connected to Zoom this way. If you disconnect and reconnect, it will change your connection to the new and improved connection.
Switching Zoom Accounts
In addition to choosing a different user and host for your Zoom meetings, you can also toggle between Zoom accounts. To do this, head over to Events > Settings > Integrations. Once there, you can add an account, toggle an account on, or delete an account.
If you’d like to switch accounts, you must first log out of one account in Zoom before logging in to another Zoom account on your site.
Note: You can only log in to a Zoom account on one WordPress install at a time. If you’d like to use the same account on two separate sites, you will have to sign out of that account on one site before using it on another. This includes logging in to both a staging and a live site on the same account.
Zoom Webinars
If your Zoom account has webinar capabilities, you have the option to either create a Zoom Meeting or a Webinar.
This option will appear in a dropdown next to Add Video Source after you have clicked Configure Virtual Event.
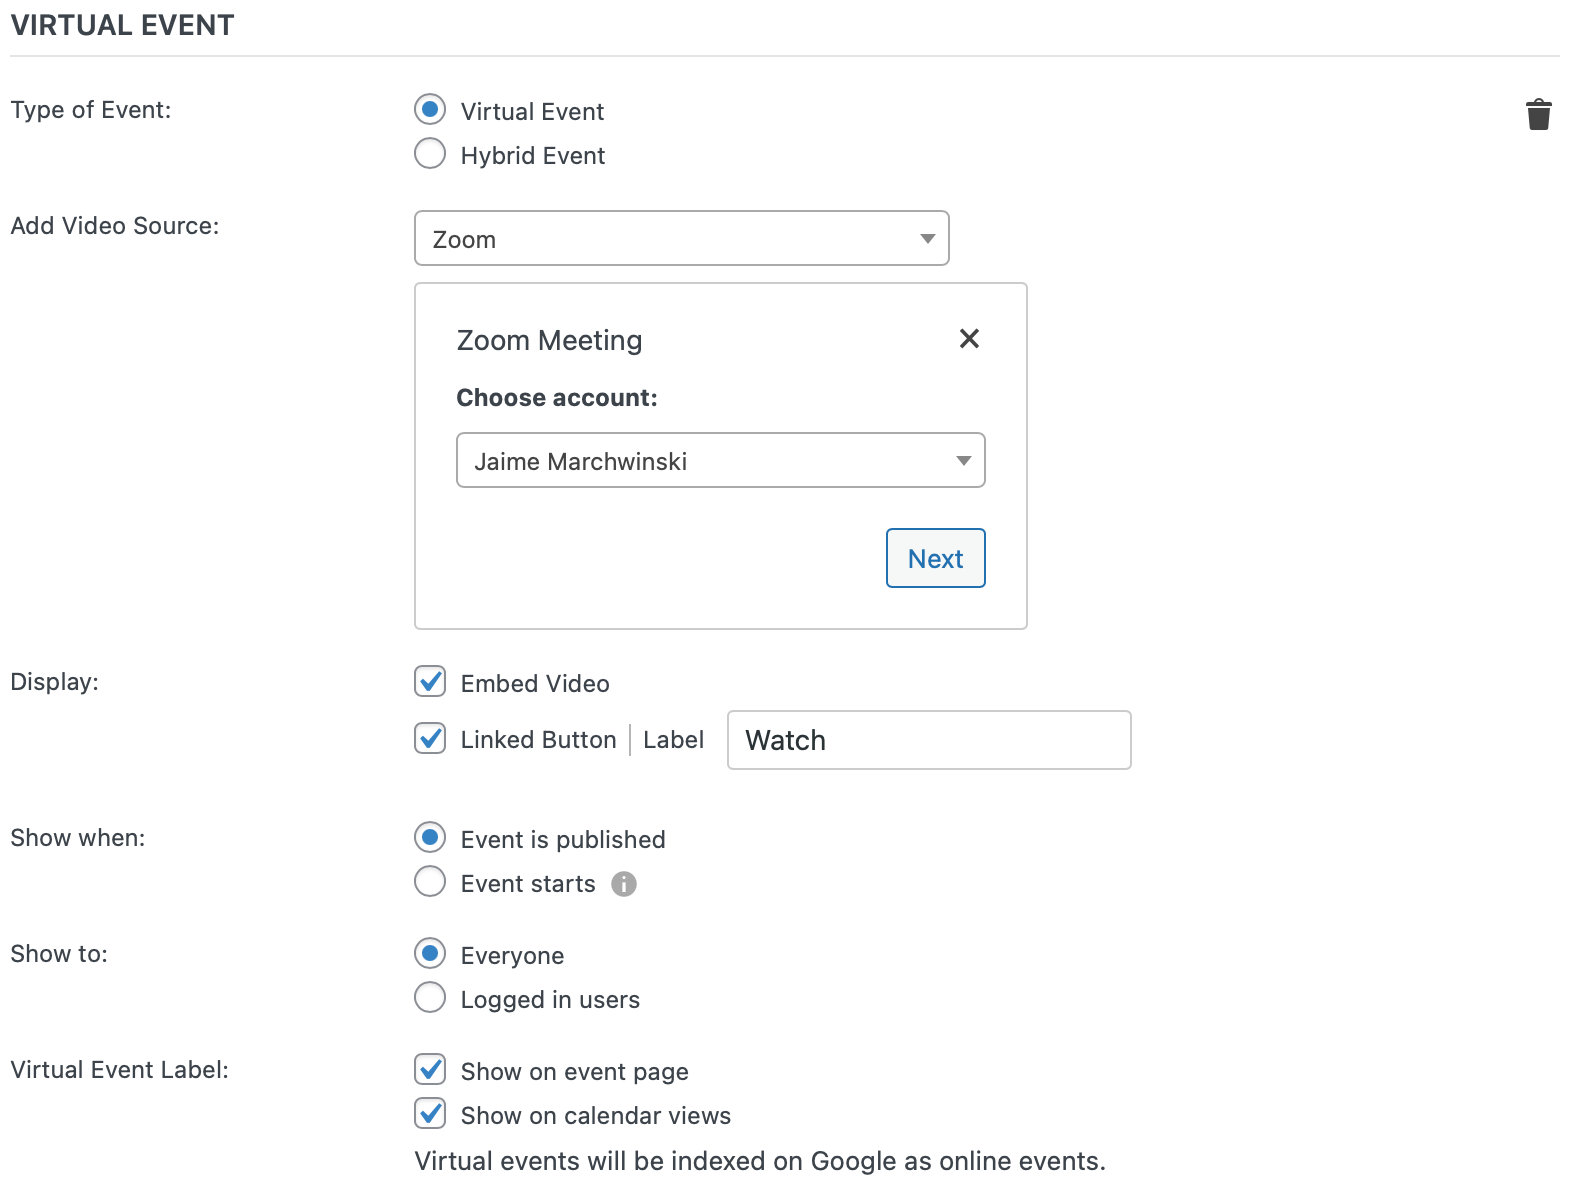
After choosing the account click on the Next button, where you will be able to choose between Meeting or Webinar.
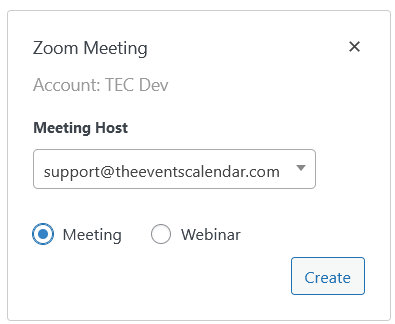
All that’s left is to click on the Create button and you should be set.
Using Meeting Passwords
The virtual events functionality is useful for hosting online events directly on your website. One of its key features is the integration with Zoom, which allows you to create Zoom meetings for your events directly from your WordPress dashboard.
You may have noticed that the meeting passwords are not provided for non-logged-in users by default. This can be problematic if you want to invite people who aren’t members of your website or don’t have an account. But don’t worry, there’s a simple solution to this problem.
To add Zoom meeting passwords to the meeting link sent in RSVP or Ticket confirmation emails or a single event export triggered by a user who is not logged in, you just need to add the following PHP snippet to your site.
add_filter( 'tribe_events_virtual_meetings_zoom_meeting_include_password', '__return_true' );
Add the code snippet to the functions.php file of your theme, or use your preferred method for integrating snippets into your WordPress site, such as the free Code Snippets plugin.
When you use the Virtual Events functionality to create a Zoom meeting, the meeting password will now be included in the meeting URL for logged-in and non-logged-in users. This means that anyone with the meeting URL can join the meeting without the need to enter a separate password.
The code snippet provided in this article uses the following filter hook:
Change the Phone Numbers for a Zoom Meeting
With Events Calendar Pro, you will have the ability to generate Zoom meetings and webinars right from your WordPress site. With that comes phone numbers that are automatically generated to allow users to dial in to Zoom meetings. But what if the phone numbers don’t match up with your location? No problem!
In this article, we’ll show you how to change the phone number settings on your Zoom account so that your specific country code is used. Let’s get started!
The first thing you’ll want to do is sign in to your Zoom account via the web portal. To specify the Global Dial-in Countries/Regions for all users in the account:
- In the navigation panel, click on Account Management > Account Settings.
- Click the Audio Conferencing tab.
- Scroll down to the Global Dial-in Countries/Regions section, then click the Edit icon.
- Choose the countries that you expect to have meeting or webinar participants dial in from.
- Click Save.
To specify the Global Dial-in Countries/Regions for groups or individual users, check out this article from Zoom. You can also change other phone number settings using this tutorial.
Troubleshooting
Zoom Meeting Fails to Generate
One place you might bump into an error is when you generate a Zoom meeting link for an event. In this case, a “No hosts found” error will display in the “Virtual Event” section of the event editor. You can follow the prompt to refresh your connection under Events Settings > Integrations.
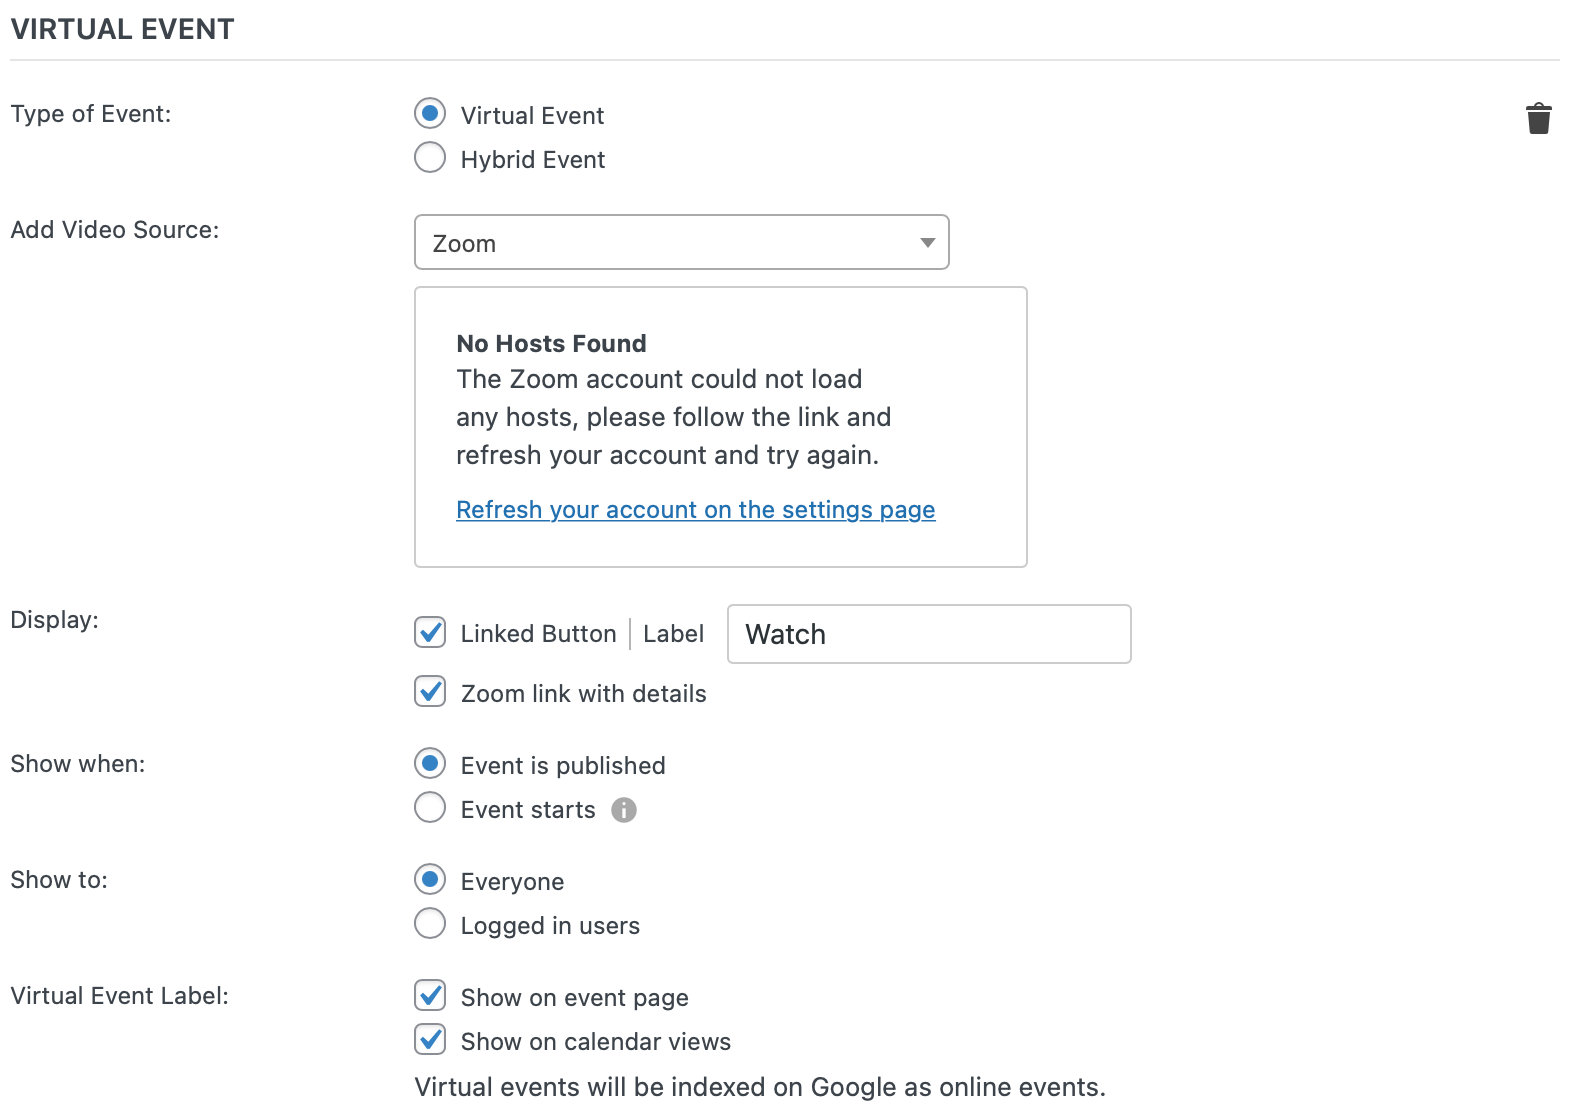
You may also see a “Try Again” button in the video source field. We recommend that you simply click that button, which will re-attempt to generate a Zoom link for the event. And if the error happens again? Yep, click the button again until it works.
If clicking the button does not fix the issue, you can try going to Events → Settings → Integrations, disconnecting the Zoom API, then re-connecting to the API before trying to generate the link again.
The Zoom Account Access Token Could Not Be Revoked
If you come across this message while trying to troubleshoot your Zoom connection, you’ll want to completely disconnect Zoom from your The Events Calendar plugin, and start over from scratch. This means logging into your Zoom account and disconnecting from there, as well as disconnecting from your WordPress website admin.
To do this, follow these four simple steps:
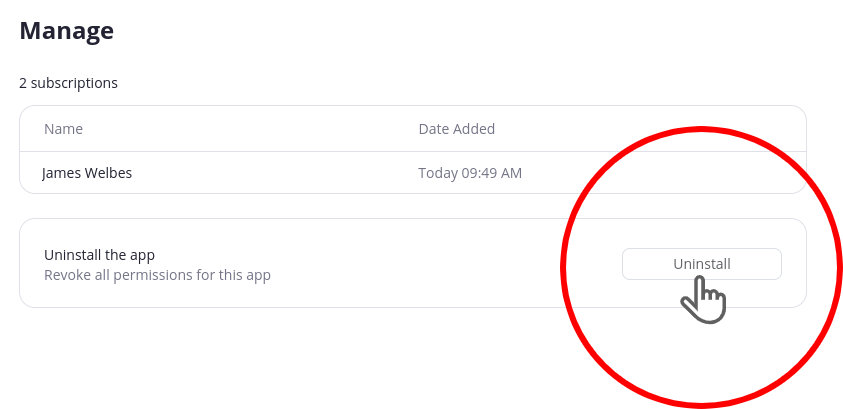
- First, click on this link to access the Events Calendar app inside your Zoom account (if you’re not logged in, you’ll need to log in after clicking this link): https://marketplace.zoom.us/apps/Y72-b02VQjKiZT0O6gt0jQ
- Scroll down to the bottom of the page and click the Uninstall button
- Next, go back to your WordPress website on the Events > Settings > Integrations page. Click the trash can icon to remove your Zoom connection
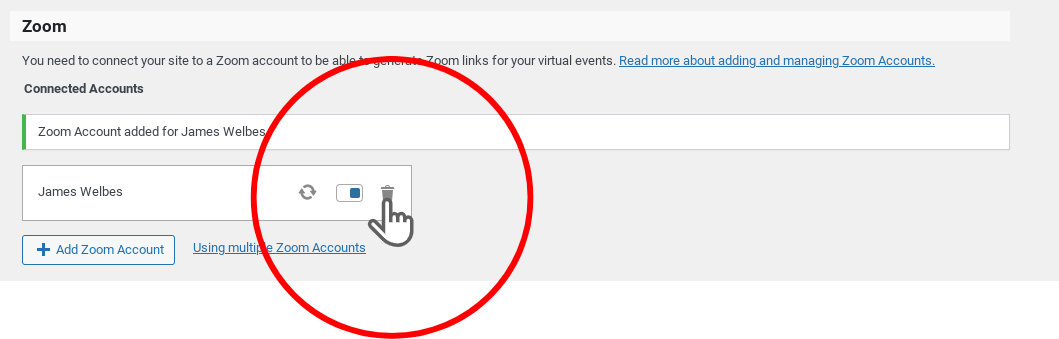
- Now go ahead and click Add Zoom Account to connect your Zoom account
Zoom API Response is Not the Expected One
If you come across this message:
Zoom API response is not the expected one, expected 201, received 400. Please, try again in a minute.
First, try refreshing your Zoom account under Events Settings > Integrations.
If that doesn’t work, try removing your Zoom account completely and adding it back again.
Lastly, ensure that the setting in Zoom that only allows numeric passcodes is turned off.