Allowing users to submit and manage their own events directly on your site is a powerful way to build community engagement and reduce the admin work of curating a calendar. With The Events Calendar and the Community Events add-on, you can enable frontend event submissions, review what comes in, and give users a dedicated page for managing their own events.
This article walks through the full lifecycle: configuring submissions, handling them as they arrive, and setting up a My Events page for your users. For a complete reference of every setting on the Community tab, see Configuring Community Events.
Setting Up Community Event Submissions
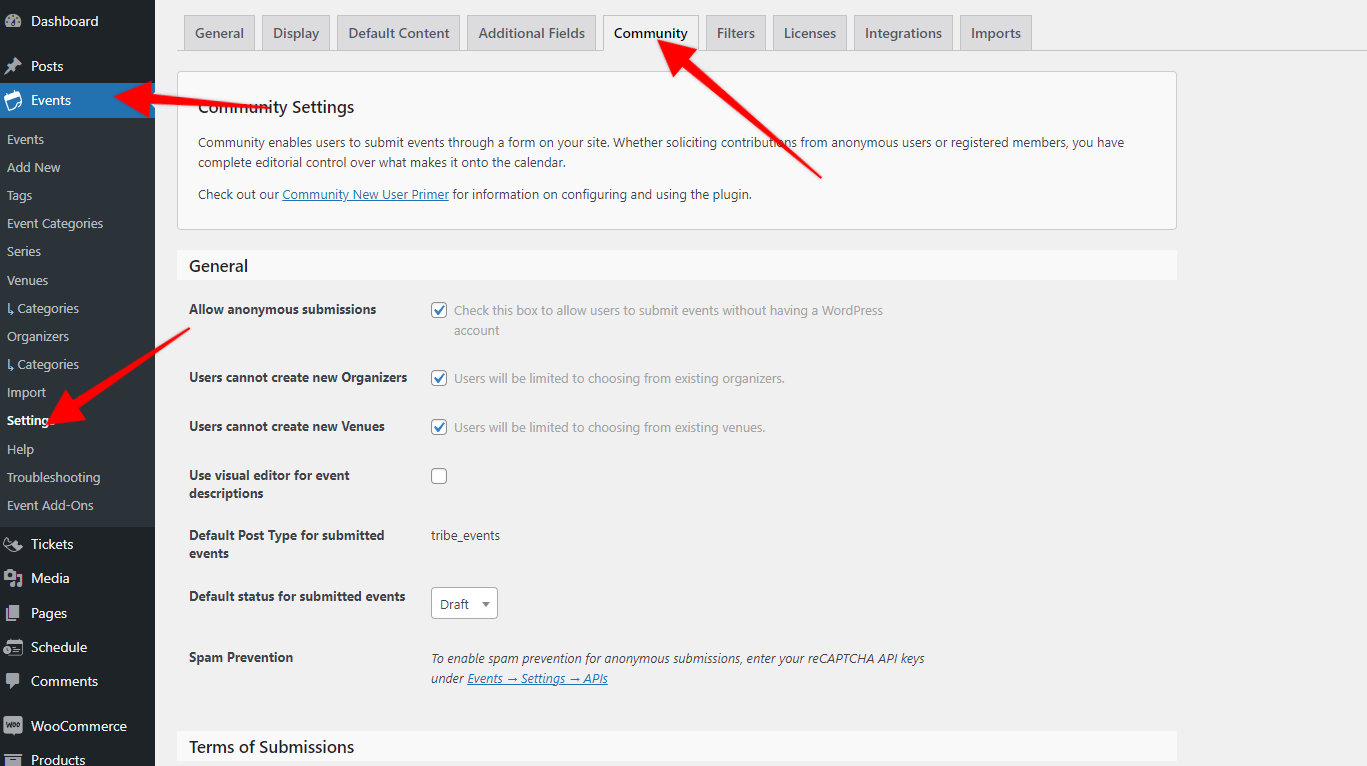
First, make sure the Community Events add-on is installed and activated alongside The Events Calendar. Then head to Events → Settings → Community in your WordPress dashboard to configure the submission form.
Decide Who Can Submit
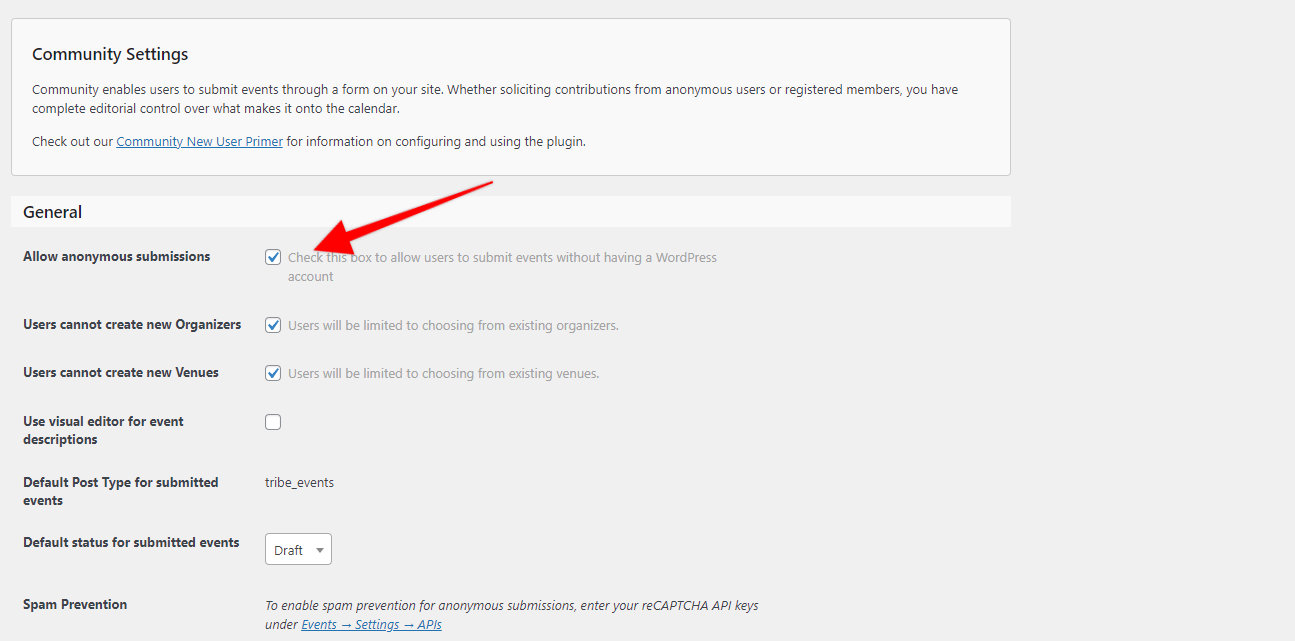
The first decision is whether to allow anonymous submissions. Enable this to let any visitor submit events without logging in. Disable it to require user accounts — anonymous visitors will be prompted to log in before they can access the submission form.
If you’re requiring registered users, make sure visitors can actually create accounts: go to Settings → General in your WordPress dashboard and check Anyone can register.
💡 Note: The default role for new registrations is Subscriber. If you want users to have additional dashboard access — to manage tickets, for example — see Roles and Permissions with The Events Calendar.
Choose a Review Workflow
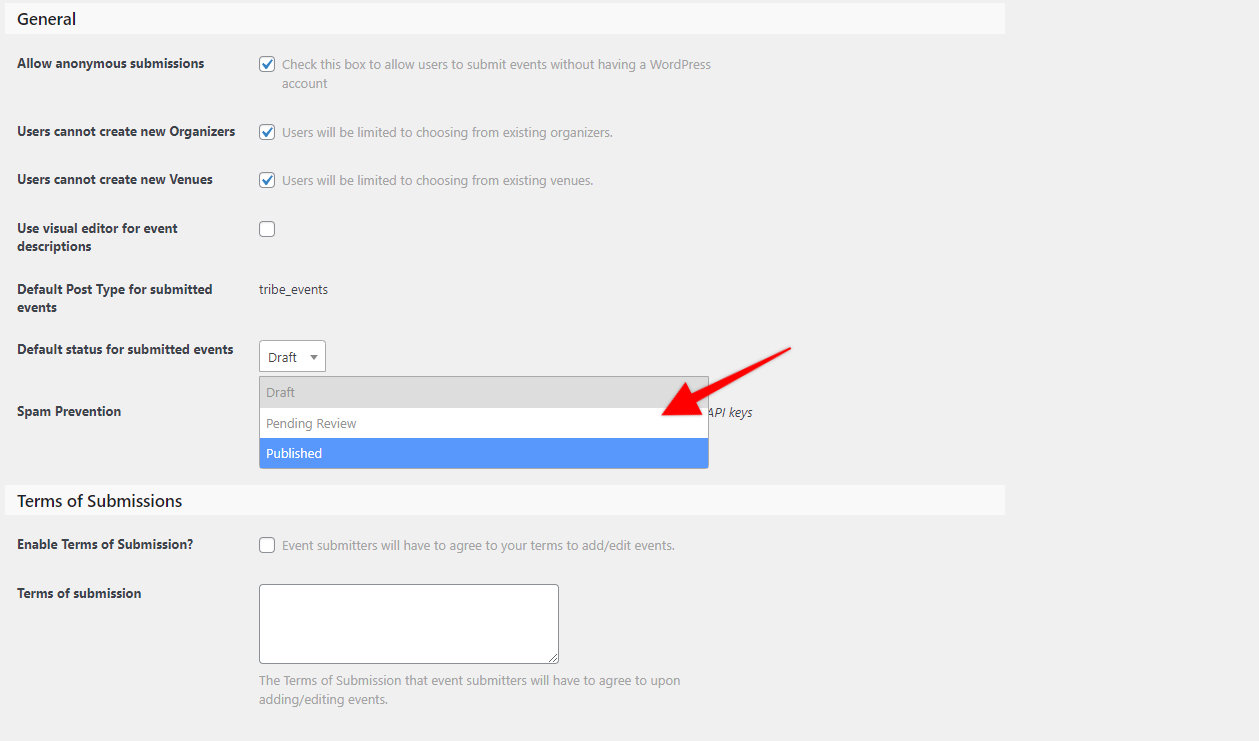
Next, set the default status for submitted events. This controls how much review happens before a submission goes live:
- Draft — submitted events won’t be displayed until an admin publishes them.
- Pending Review — same as Draft for visibility, but makes submissions easier for admins to find and review.
- Published — events are publicly accessible immediately after submission, with no review step.
Configure Submitter Permissions
Scroll down to configure what submitters can do beyond just creating events:
- Allow users to create new venues and organizers — enable these to let logged-in users add venues or organizers on the fly. Leave disabled to restrict submitters to your existing options.
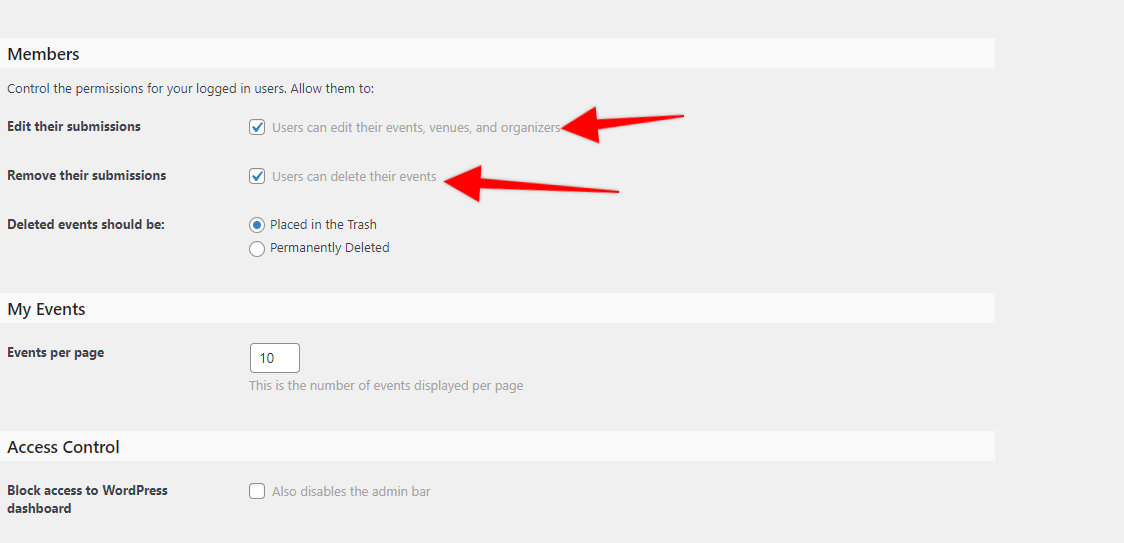
- Allow users to edit their submissions — lets logged-in users modify their events from the frontend. This is a prerequisite for the My Events page covered below.
- Allow users to remove their submissions — lets users delete their events from the frontend. Admins aren’t notified when this happens.
- Deleted events handling — choose whether removed events go to Trash (restorable) or are permanently deleted.
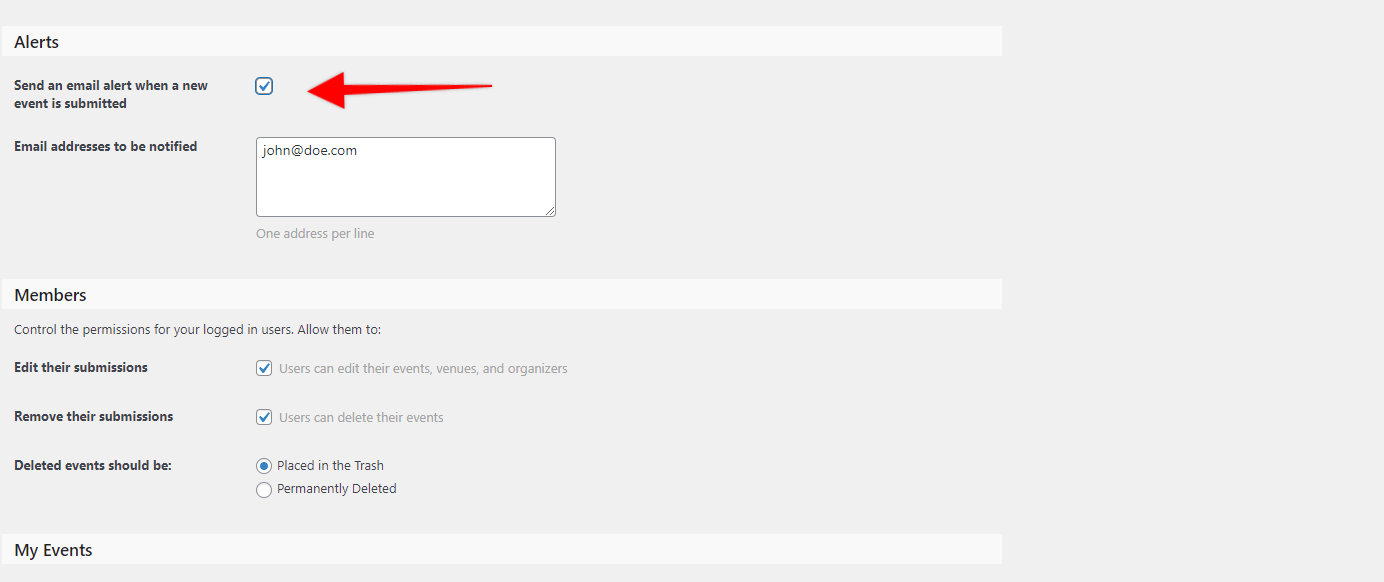
Turn On Email Notifications
If you’re using Draft or Pending Review as the default status, you’ll want to know when a new submission needs review. Scroll to the Alerts section, enable the checkbox, and enter one or more email addresses — each listed address will receive a notification whenever a new event is submitted.
Reviewing Submitted Events
Once your settings are configured, submitted events appear in your event list just like any other event. As an administrator, you can review submissions by clicking Events in the WordPress dashboard sidebar.
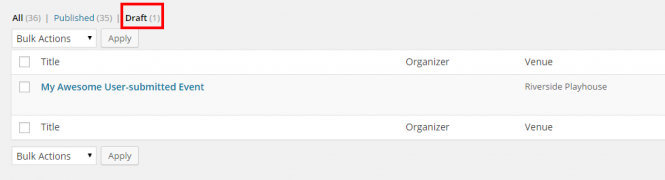
If your default status is Draft, new submissions appear as drafts in the event list:
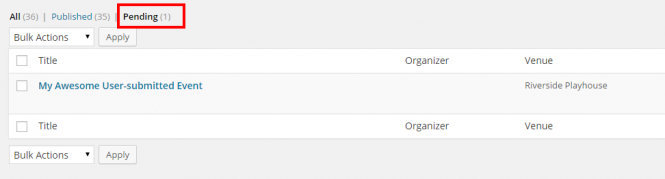
If your default status is Pending Review, submissions appear as pending:
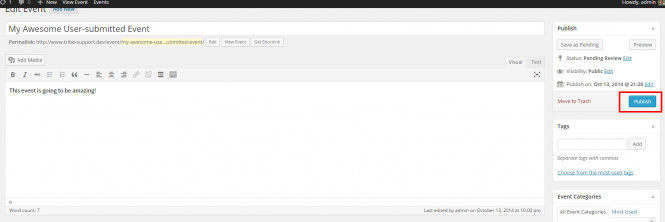
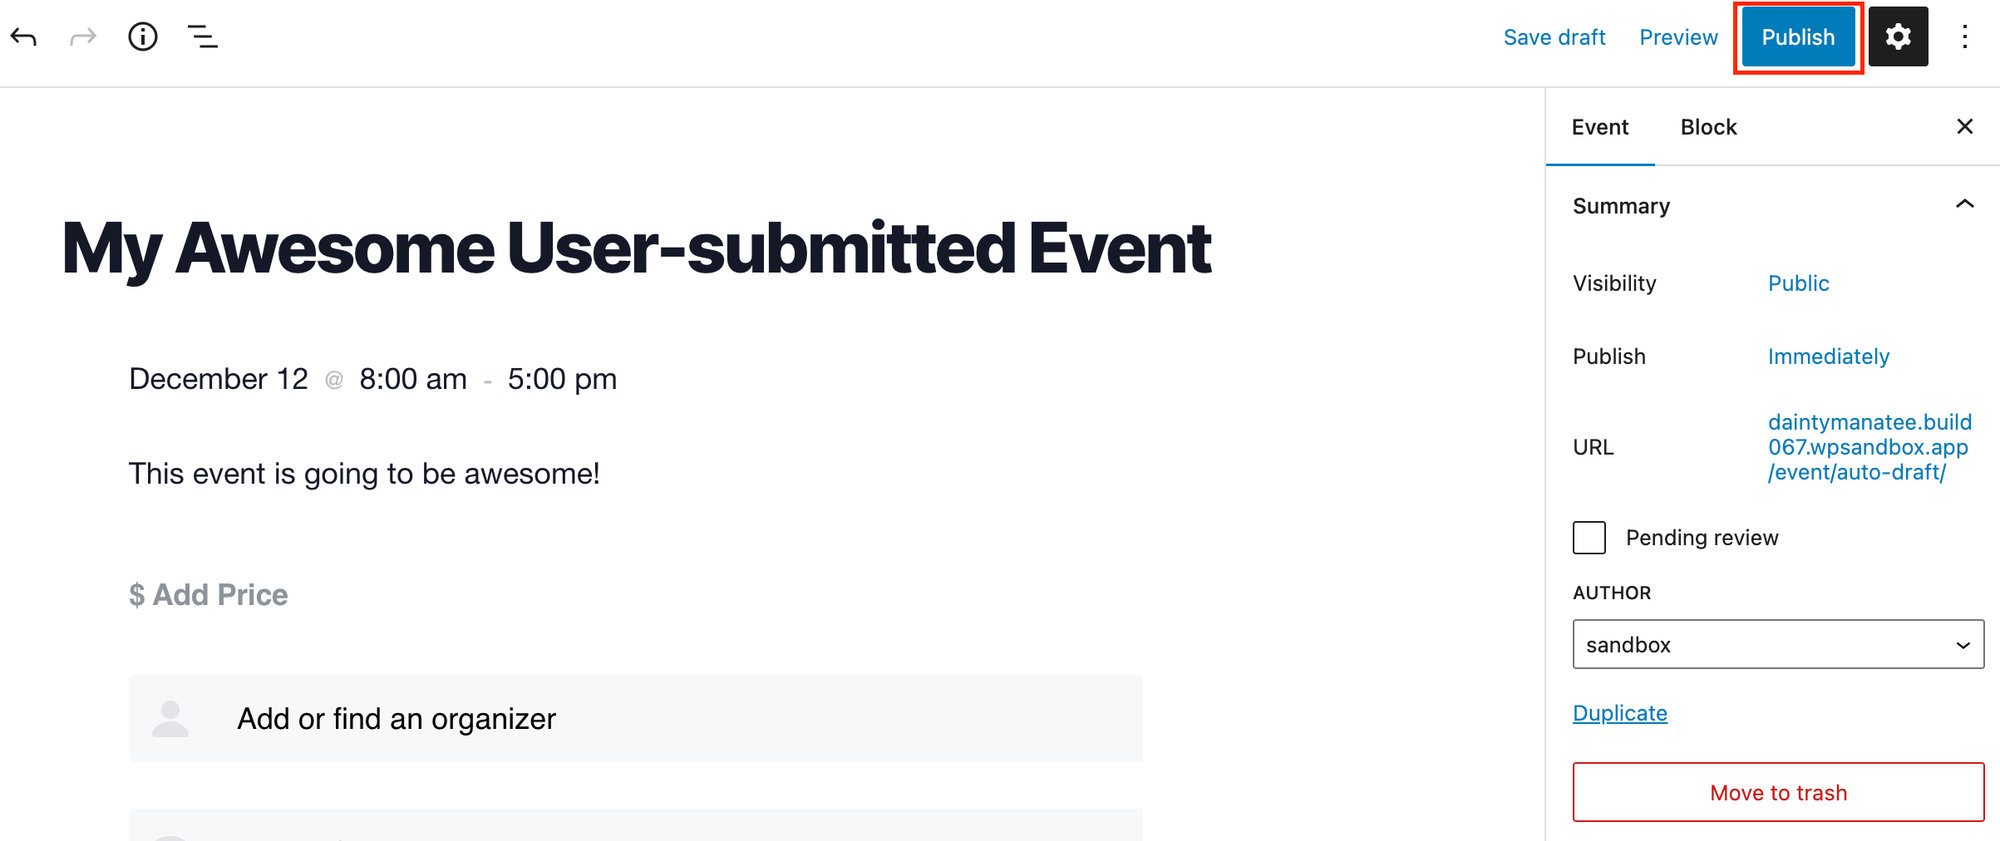
To review a submission, click the event, make any necessary edits, and click Publish. The editor works the same whether you’re using the Classic Editor or the Block Editor:
To reduce spam submissions from anonymous users, you can enable reCAPTCHA on the Community submission form. See the reCAPTCHA setup guide in Configuring Community Events.
Creating a My Events Page
Once submissions are configured and you’ve enabled Allow users to edit their submissions, you can give logged-in users a dedicated page where they can view, edit, and delete everything they’ve submitted — without needing access to the WordPress dashboard.
By default, logged-in users can access their submitted events at https://yoursite.com/events/community/list/. A dedicated “My Events” page gives you more control over branding and navigation, and makes this URL discoverable.
- Create a new page. In your WordPress dashboard, go to Pages → Add New and title it “My Events” (or whatever you prefer).
- Insert the shortcode. Add the following Community Events shortcode to the page content:
[tribe_community_events view="my_events"]- Publish the page. That’s it — the shortcode displays a list of events submitted by the currently logged-in user, each with options to edit or delete.
Linking Users to the My Events Page
A page users can’t find won’t get used. A few places to surface it:
- Navigation menu. Go to Appearance → Menus and add the My Events page to your site’s main navigation.
- User dashboard or profile area. If your site has an account dashboard, add a link to the My Events page there so users see it when managing their profile.
- Post-submission redirect. Consider redirecting users to the My Events page after they submit an event, so they can immediately see their submission alongside any others. See Customizing the Community Events Submission Workflow for the redirect snippet.
Additional Customizations
Custom styling. Use custom CSS to style the My Events page to match your site’s design.
Restrict access to logged-in users. Under Events → Settings → Community → Access Control, you can block access to the dashboard for certain roles and redirect them elsewhere. This helps keep non-admin users on the frontend.