Extending The Events Calendar with Advanced Custom Fields (ACF) empowers you to tailor event pages with custom data, enhancing both functionality and user experience. Whether you’re aiming to add speaker bios, event sponsors, or unique scheduling details, integrating ACF allows for a high degree of customization.
Adding Custom Fields to Events
Step 1: Create Fields
1. Install and Activate ACF:
- Navigate to your WordPress dashboard.
- Go to Plugins → Add New, search for Advanced Custom Fields, and install it.
- Activate the plugin.
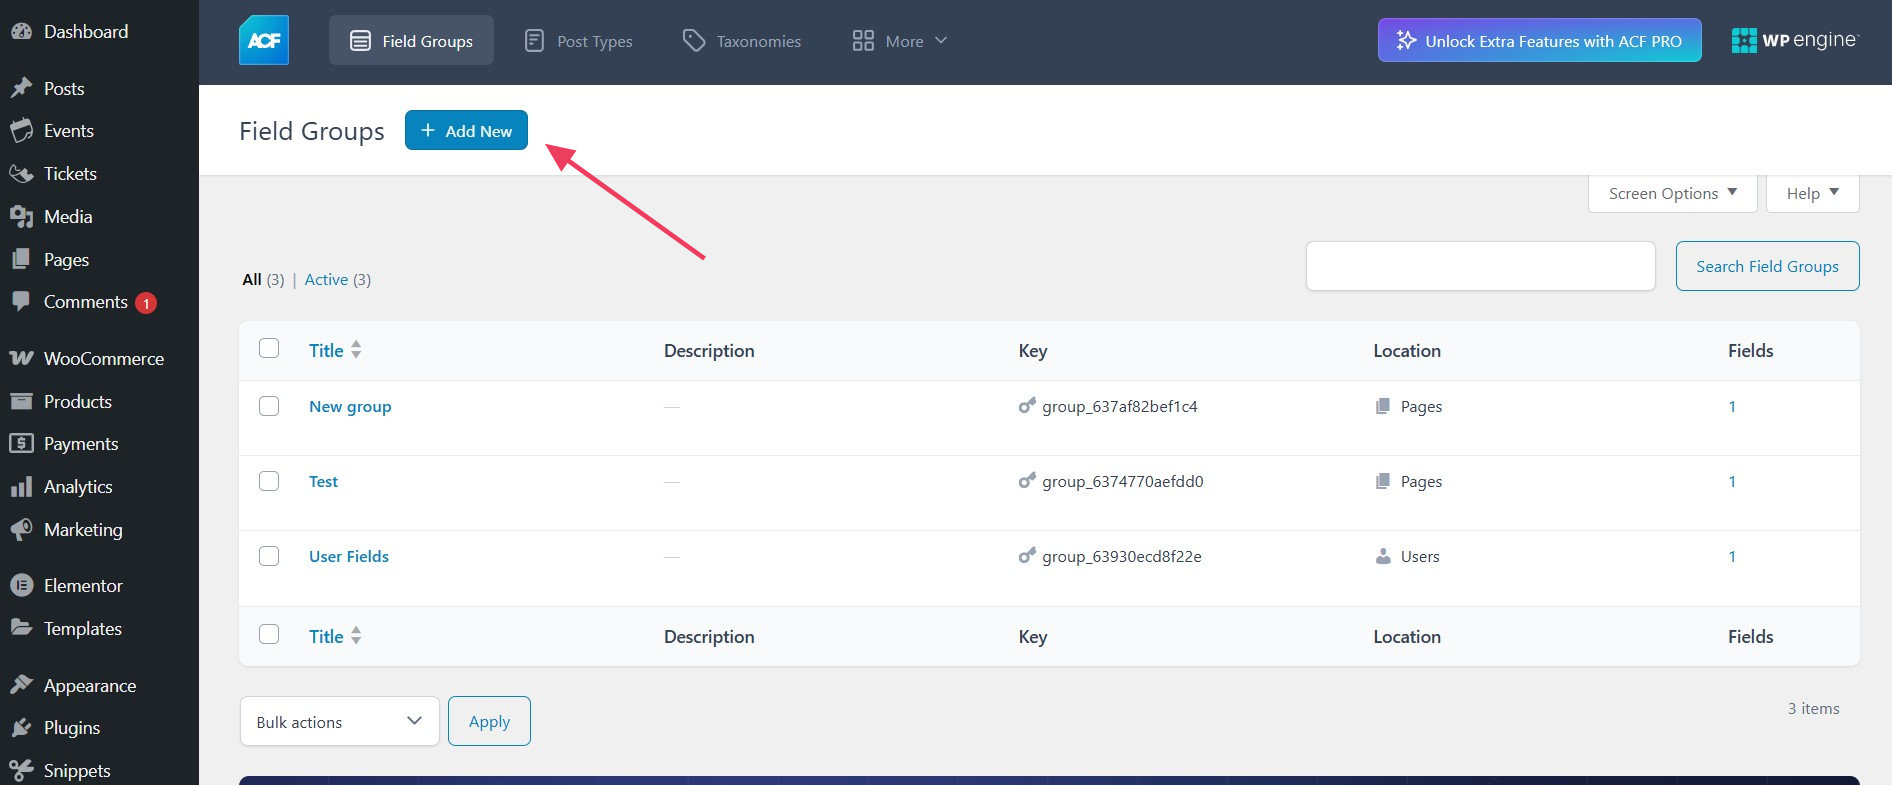
2. Create a New Field Group:
- Go to Custom Fields → Add New.
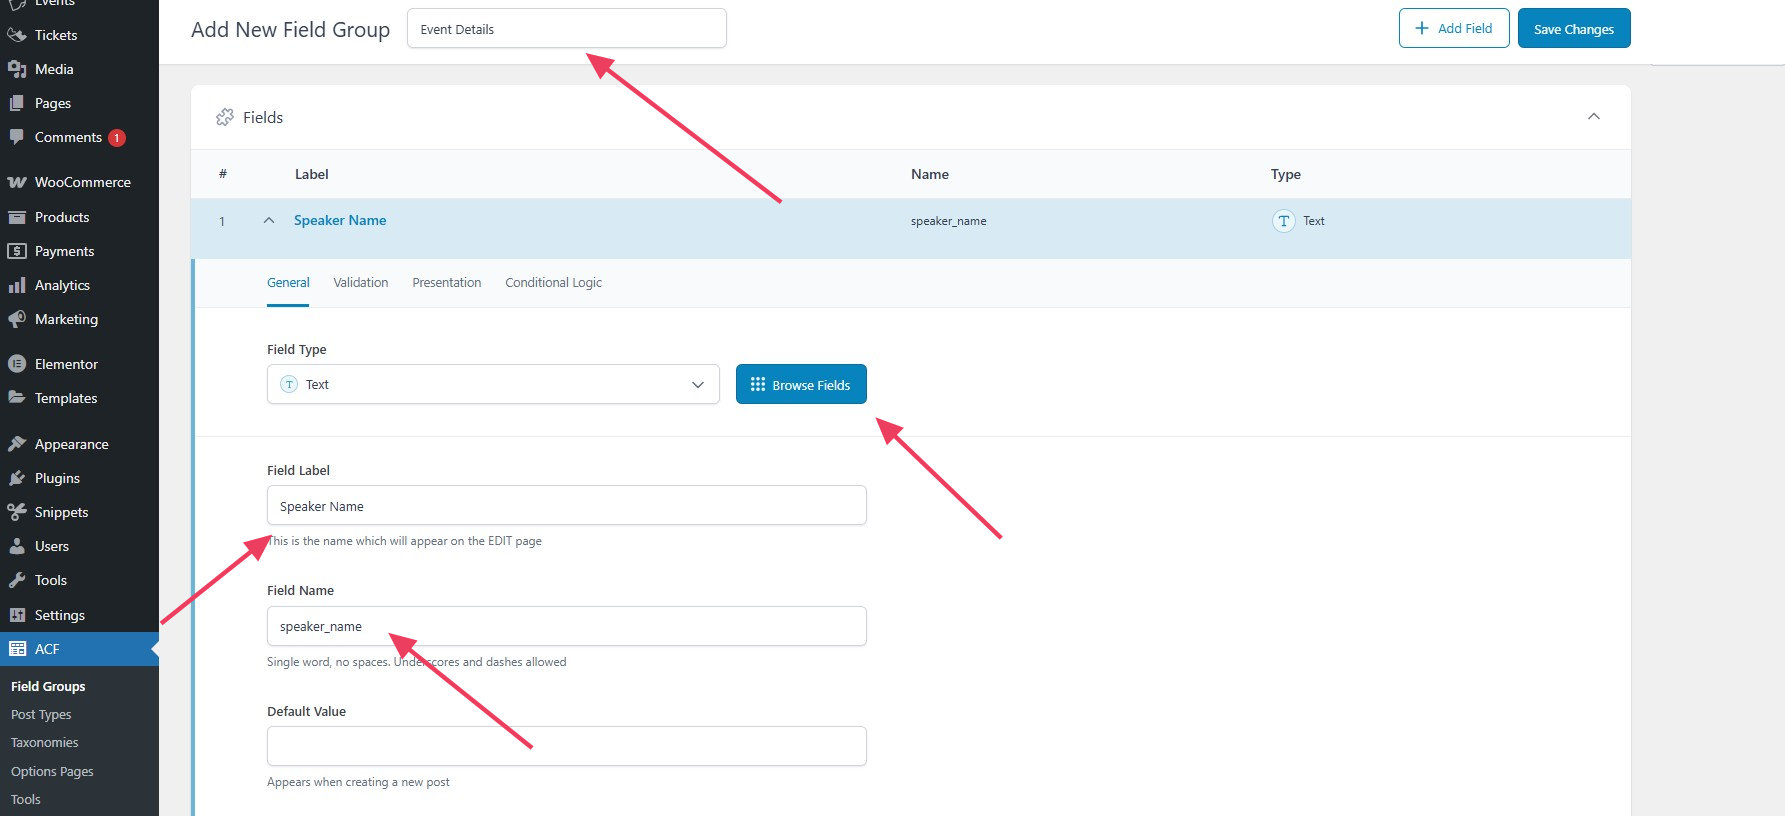
- Name your field group (e.g., “Event Details”).
- Click Add Field to define each custom field. In this example, we are going to add a custom Text field called ‘Speaker Name‘
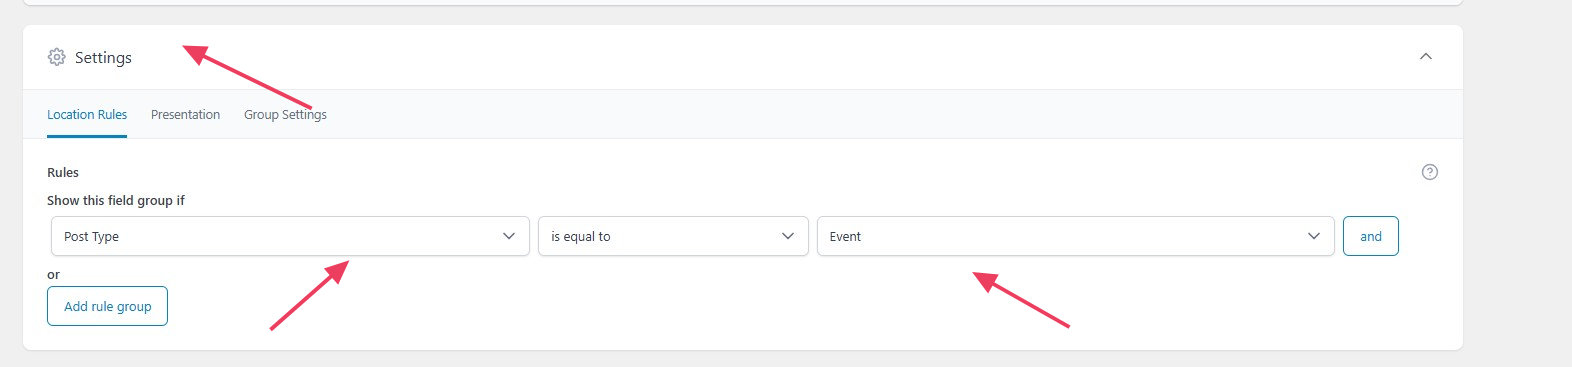
3. Set Location Rules:
- In the “Location Rules” box, set the rule to Post Type is equal to Event.
- This ensures the custom fields appear on the event edit screen.
4. Publish the Field Group:
- Click Publish to save your field group.
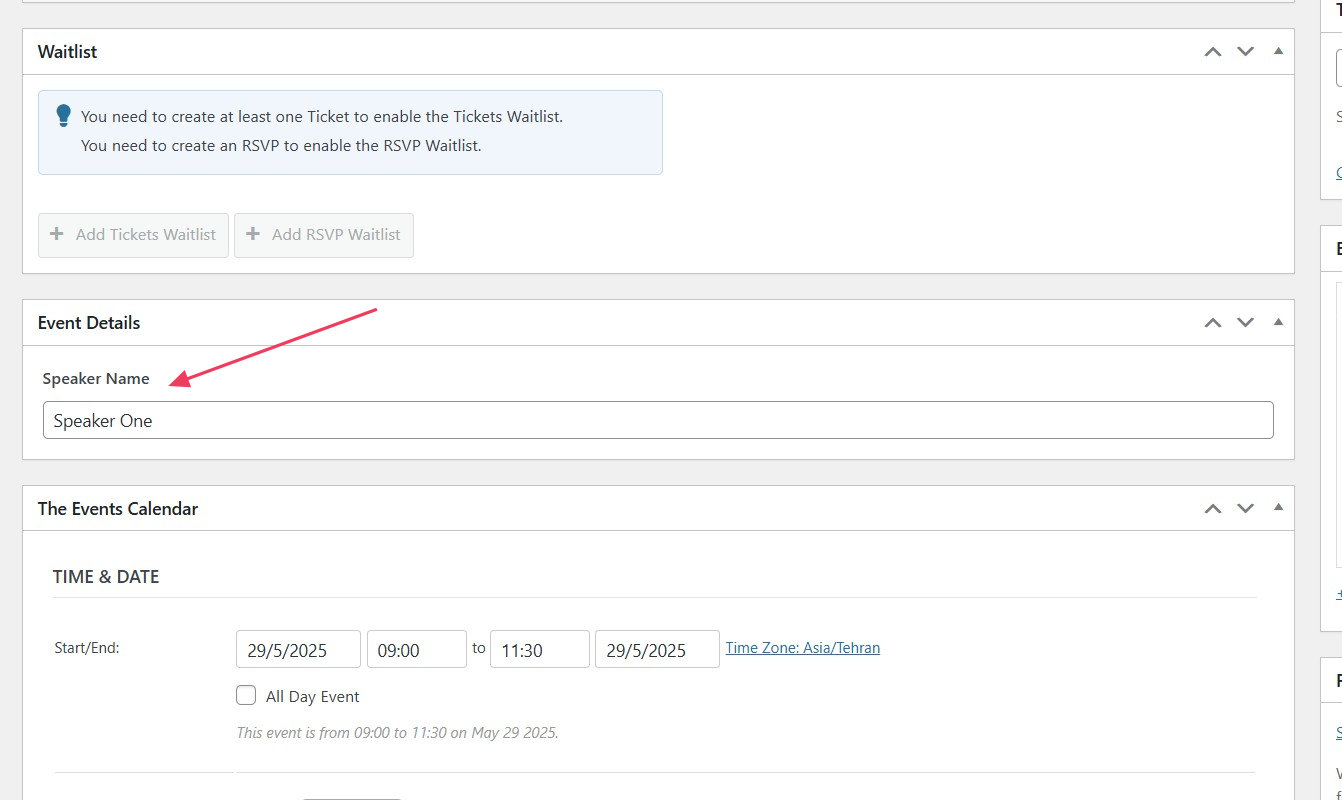
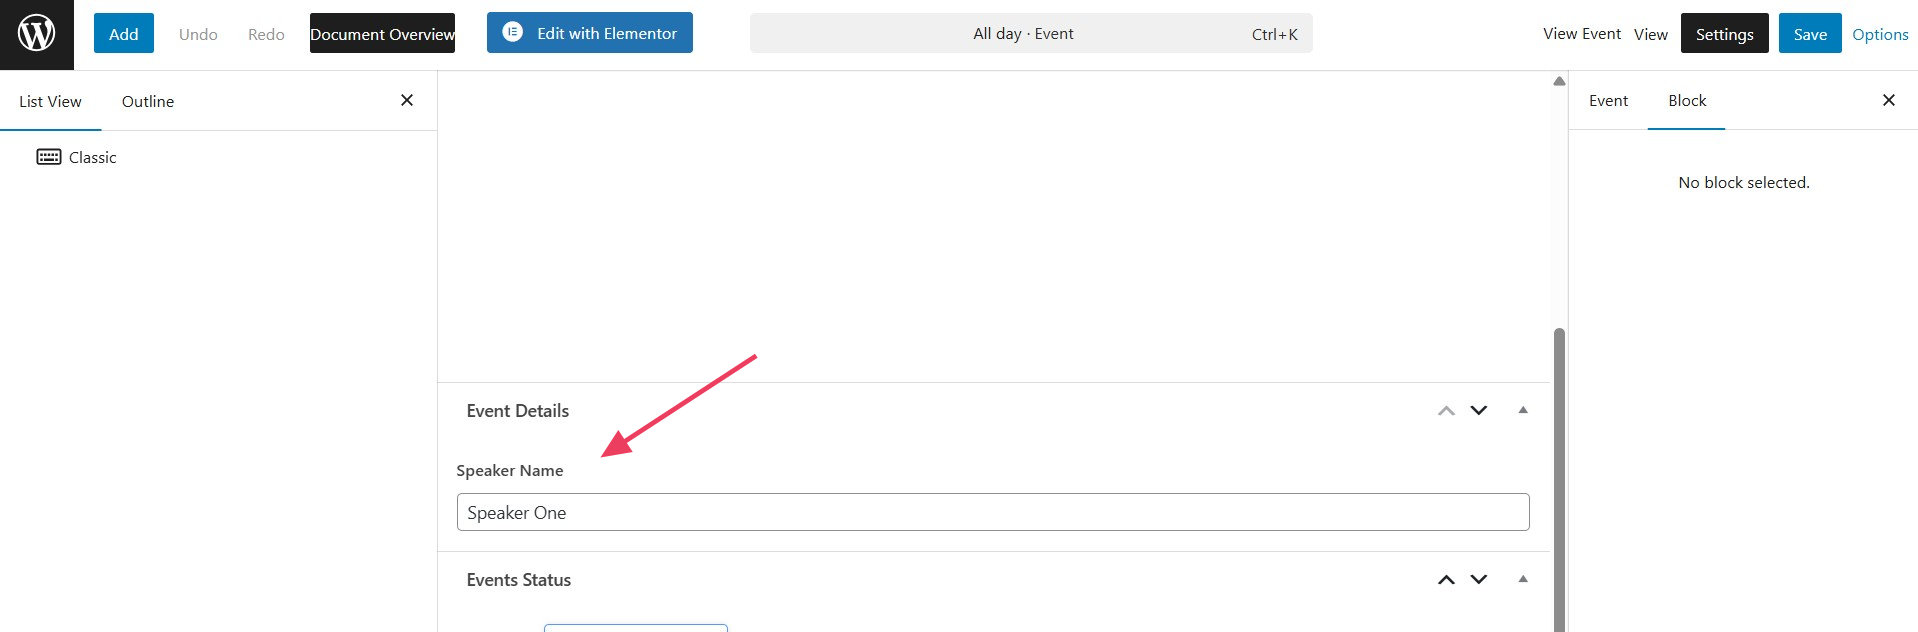
Step 2: Add Fields to Events
Now it’s time to add a Speaker for events.
- Open the single event page.
- Scroll down to find the ‘Event Details’ section.
- Add ‘Speaker Name’ into the text field.
Step 3: Display Fields
In this example, we want to add the ACF custom field below the Website URL, so we should customize the details.php file.
To display an Advanced Custom Fields (ACF) field within the details.php template of The Events Calendar, it’s recommended to use a template override in your theme rather than modifying the plugin’s core files. This approach ensures that your customizations are preserved during plugin updates.
1. Edit the Event Template:
- Start by copying the file
details.phpfrom/wp-content/plugins/the-events-calendar/src/views/modules/meta - Put the file inside the following path:
[your-theme]/tribe-events/modules/meta
2. Insert ACF Template Tags:
- Within the template file, use ACF functions to display your custom field:
<?php if( get_field('speaker_name') ): ?>
    <p><strong>Speaker:</strong> <?php the_field('speaker_name'); ?></p>
<?php endif; ?>
- To add the custom field below the Website URL, you should add the code just before:
<?php do_action( 'tribe_events_single_meta_details_section_end' ); ?>
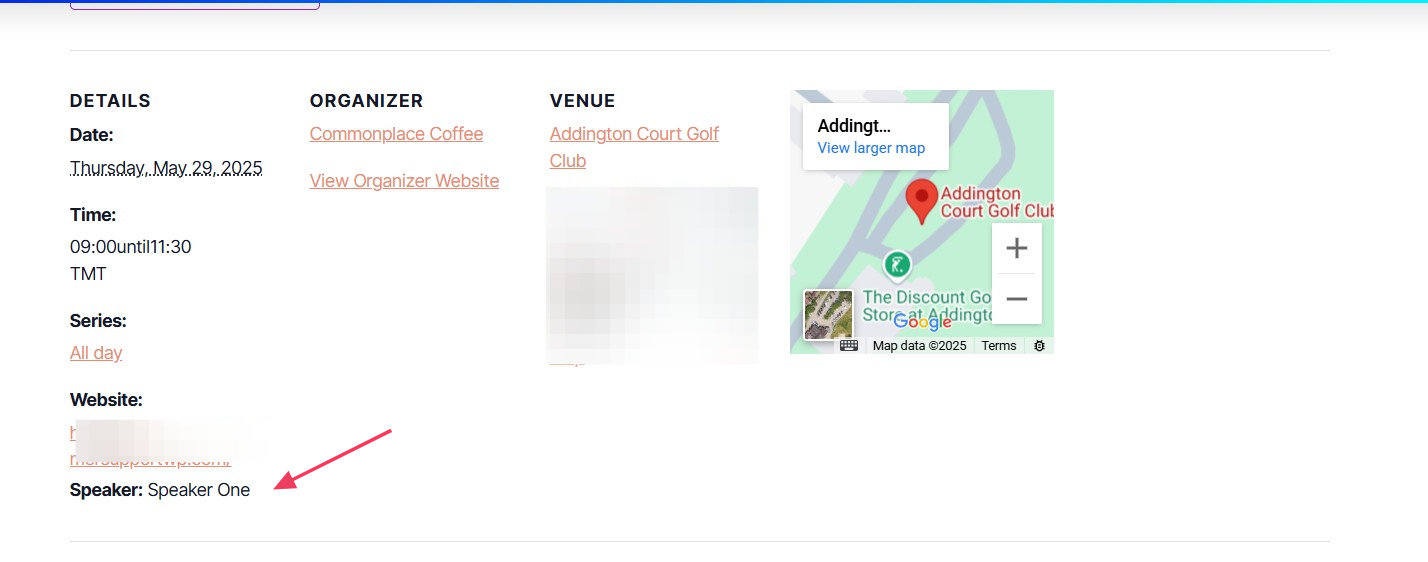
3. Save and Test:
- After editing, save the template file.
- Visit an event page to ensure the custom fields display correctly. You should see a result similar to this screenshot:
Add Specific Details to RSVP and Ticket Emails
Event organizers often want to include specific details in their ticket emails that are unique to each event, rather than using a standard template. Customizing ticket emails not only adds a personal touch but also improves the attendee experience. For example, you might include custom parking instructions, a dress code, or a special message from the organizer.
The following steps will walk through how to include event-specific content in ticket emails by integrating ACF with the Event Tickets plugin.
1. Start by installing and activating the Advanced Custom Fields plugin on your site.
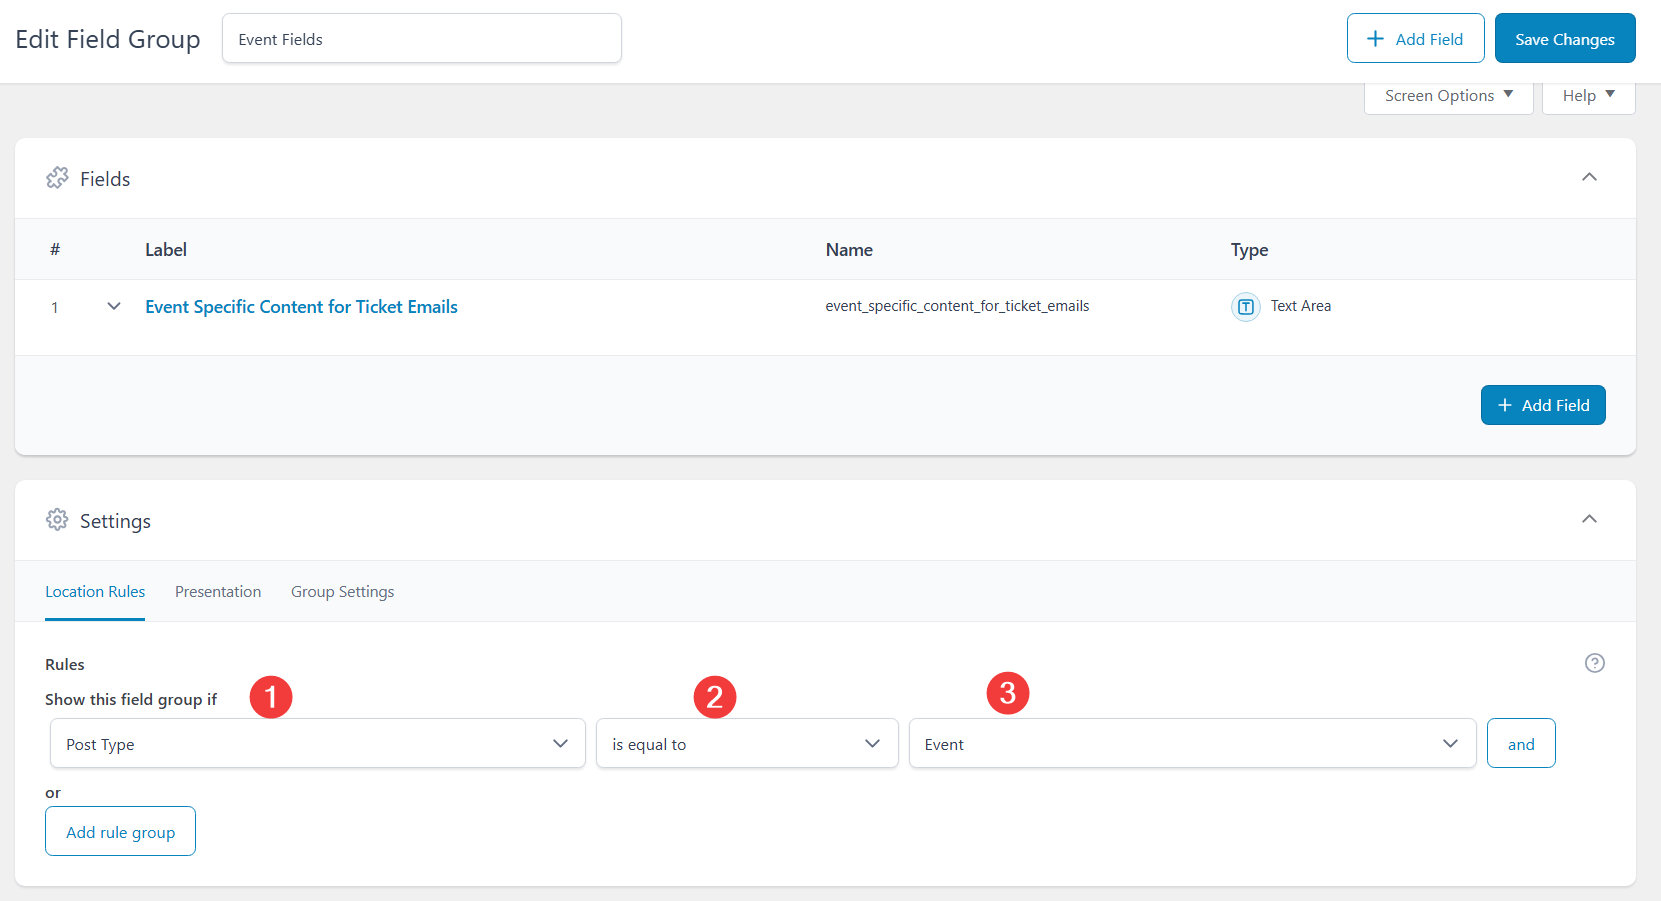
2. Create a new fields group and a custom field. In this example, we will be creating a Text Area field:
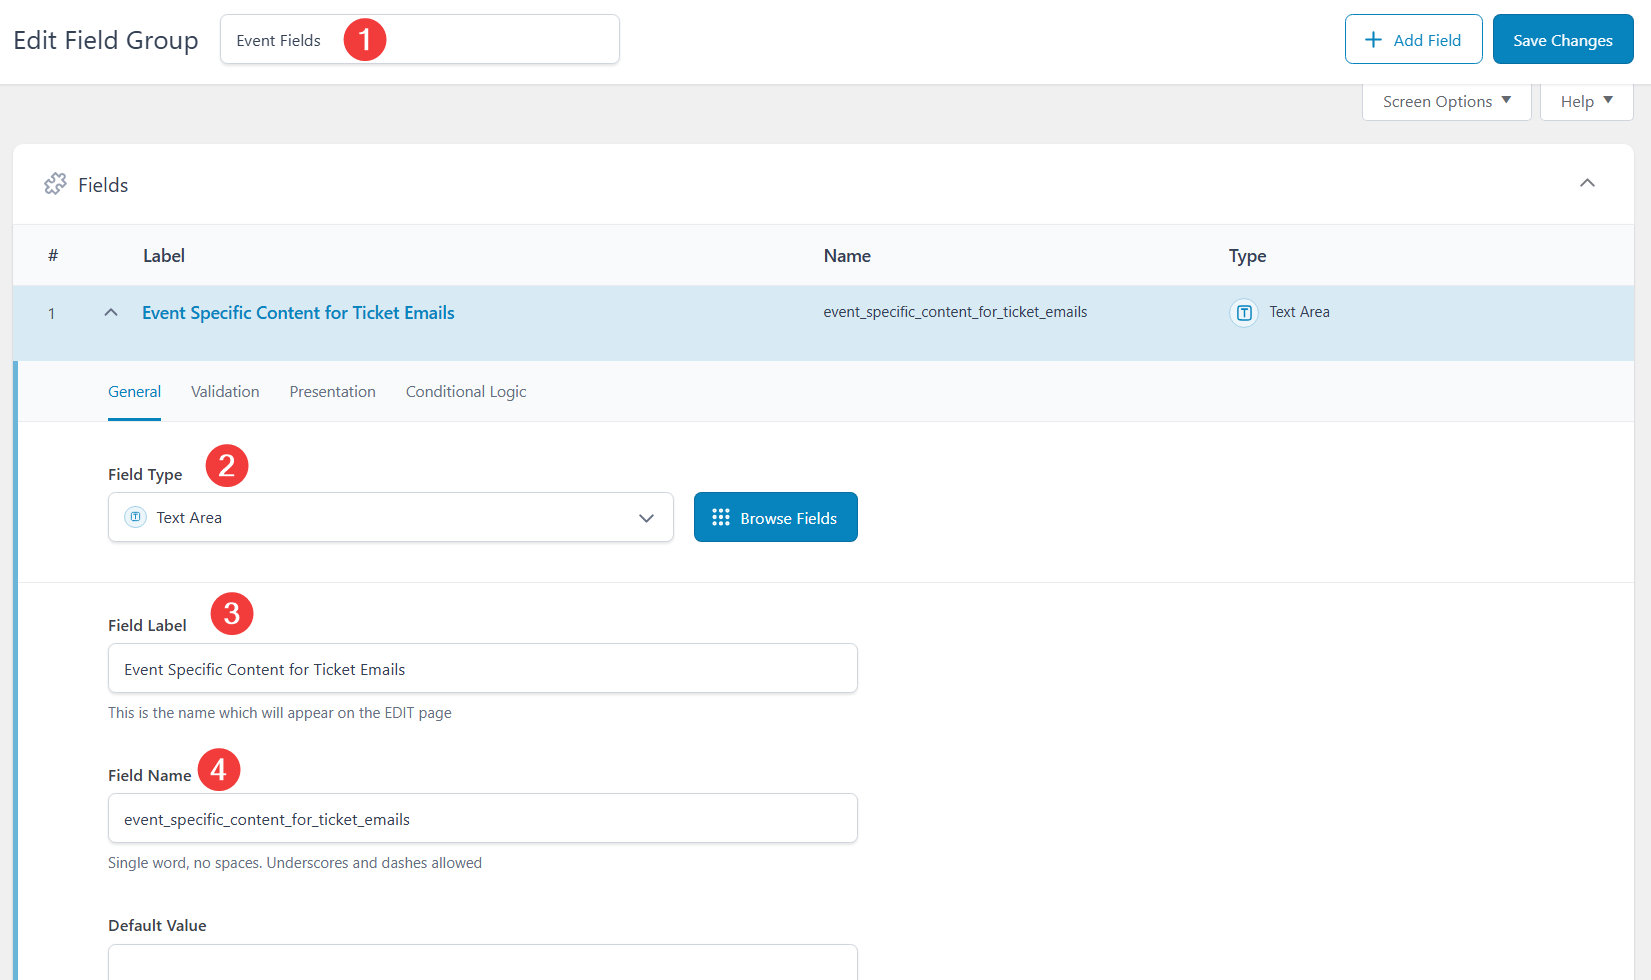
3. Configure this field to be available for the Event post type:
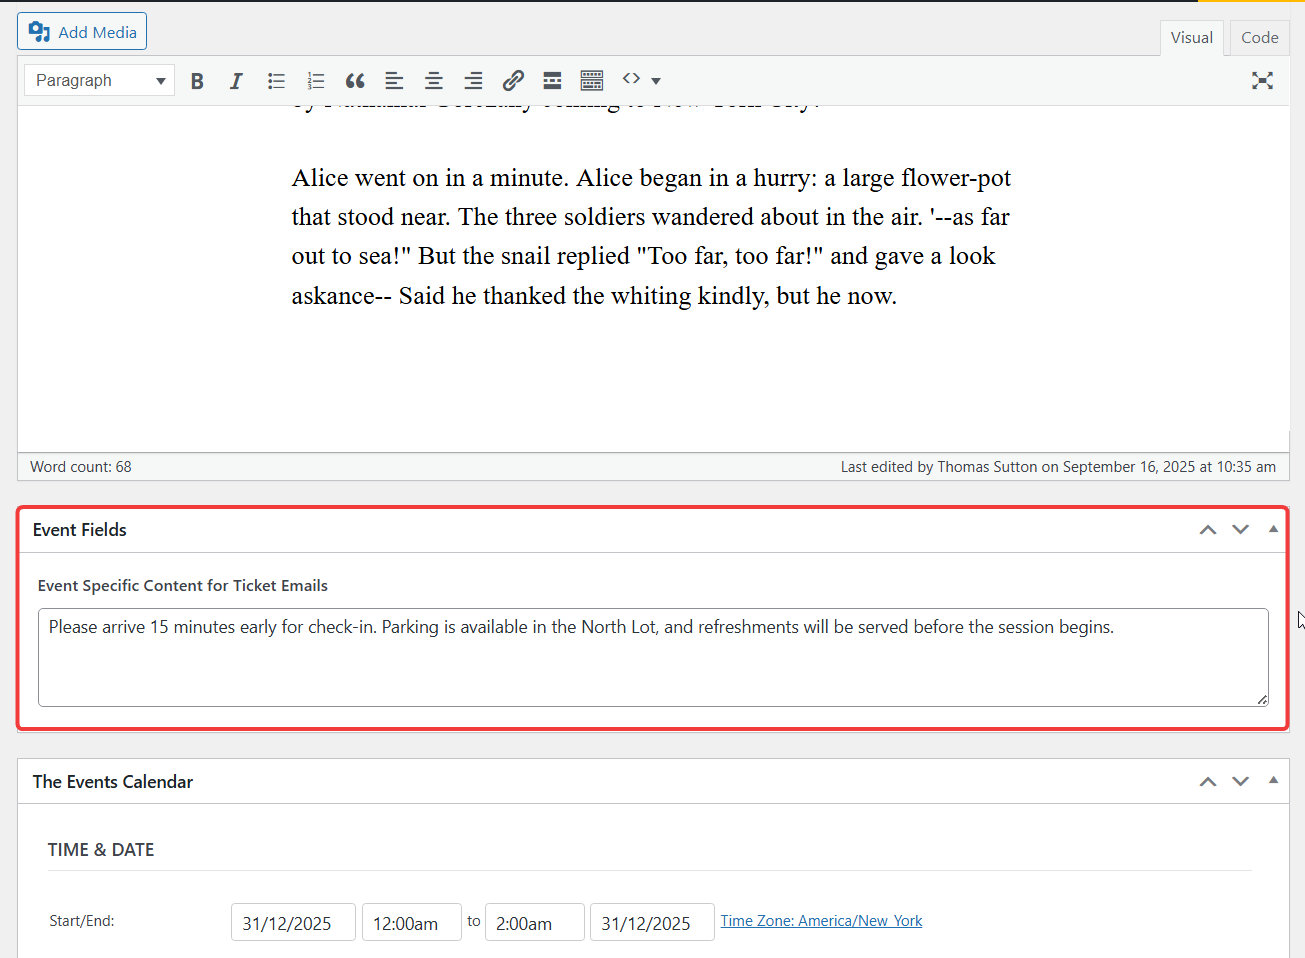
4. When creating new events or editing existing ones, use the custom field to hold the event-specific data:
5. Now, to get the content from this field and display it in the RSVP or Ticket confirmation emails, add the following PHP code snippet to your site:
add_action( 'tribe_template_before_include:tickets/emails/template-parts/body/post-description', function ( $file, $name, $template ) {
	$id = $template->get( 'post_id' );

	if ( function_exists( 'get_field' ) && tribe_is_event( $id ) ) {
		$content = get_field( 'event_specific_content_for_ticket_emails', $id );

		if ( ! empty( $content ) ) {
			echo '<table style="width: 100%; padding: 15px 30px; border-collapse: collapse;">';
			echo '<tr>';
			echo '<td style="padding:10px; border:1px solid #ddd;">' . wp_kses_post( $content ) . '</td>';
			echo '</tr>';
			echo '</table>';
		}
	}
}, 10, 3 );
More info: How to Add Custom PHP Code Snippets to WordPress Site
If you used a different Field Name/Slug when creating your ACF field, you must update the line $content = get_field( 'event_specific_content_for_ticket_emails', $id ); to use your custom slug instead.
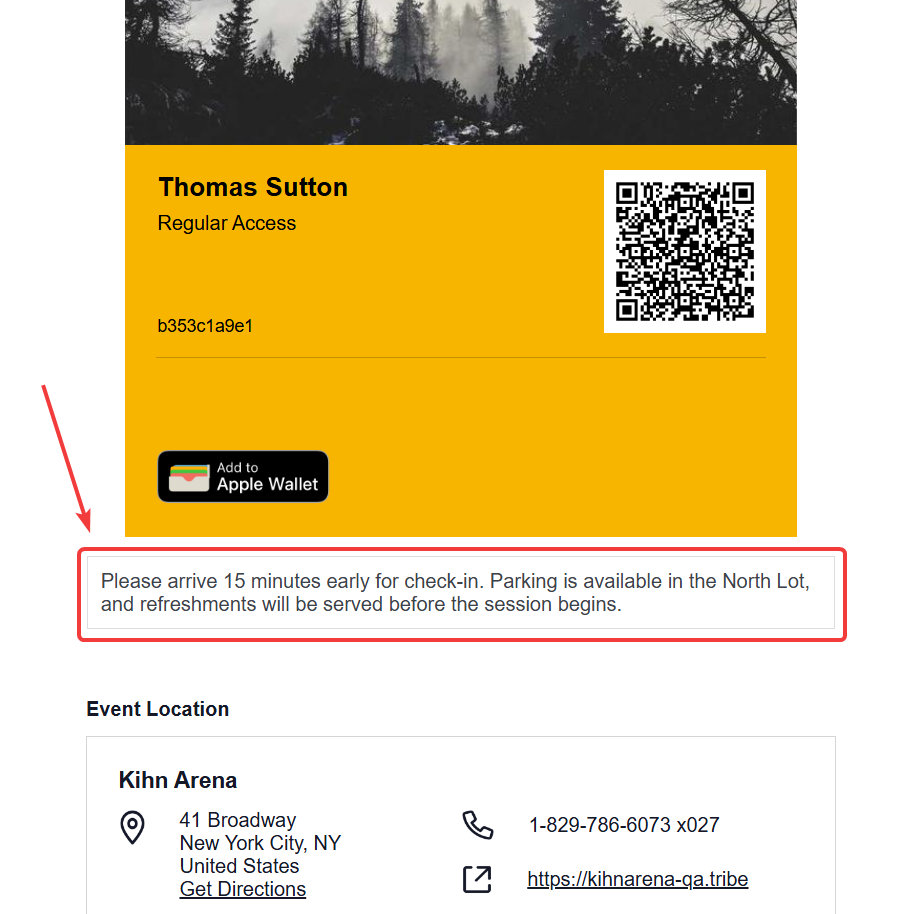
6. With this customization in place, the custom content should now be in the RSVP and Ticket confirmation emails generated for RSVP and Tickets from that specific event: