With Event Tickets Plus version 6.6.0, you can now create ticket presets – reusable ticket templates that make event setup faster and more consistent.
Once you assign a preset to an event, we’ll create a copy that’s linked to that specific event, so the original stays unchanged and ready to use again.
👋 Note: This feature is available in our premium plugin Event Tickets Plus.
Ticket presets are designed to save you time when managing multiple events with similar ticket setups.
Instead of recreating the same tickets from scratch each time, you can build a preset once and reuse it across events, even if only small details like capacity need adjusting. This helps you streamline your workflow and avoid repetitive tasks.
How to Create Ticket Presets
In your WordPress dashboard, head to Tickets → All Tickets → Tickets Presets, where you will find all your Ticket Presets. If you don’t have any, you can add them by clicking on “Add New”.

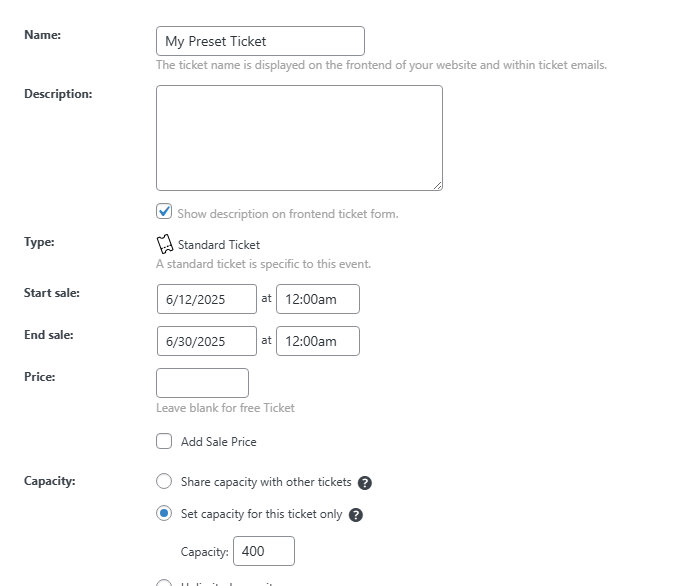
Once you click on “Add New”, you will see the preset creation screen.
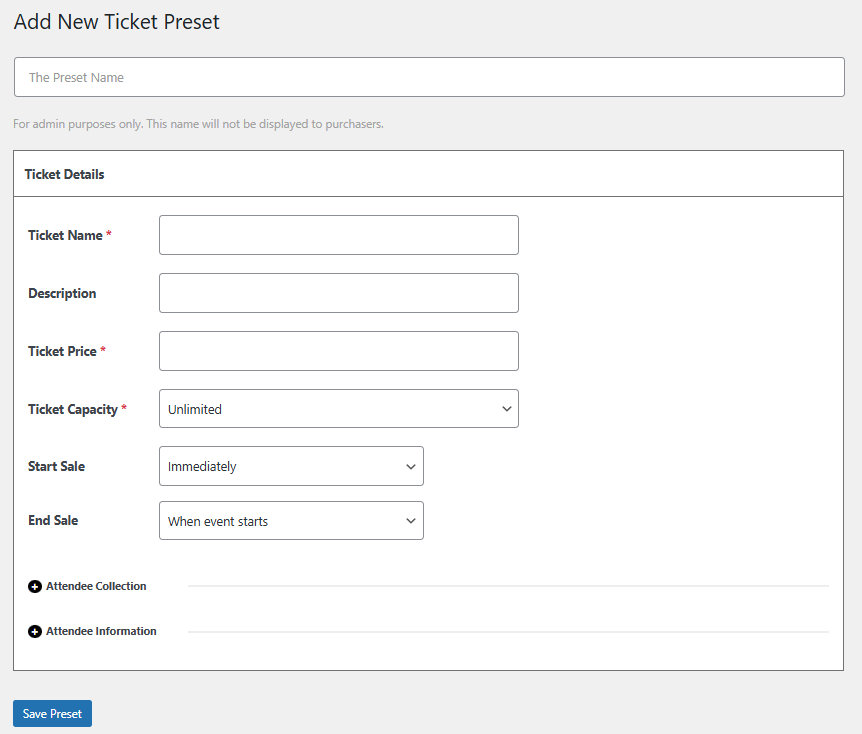
A slight difference from regular ticket creation is the Start Sale and End Sale options.
For the Start Sale Date, you can choose to begin ticket sales immediately or on a relative date.
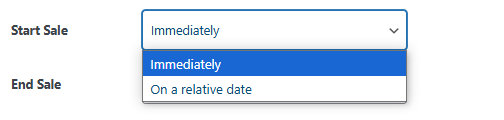
If you set the sale start to Immediately, it will use the current time as the start time.
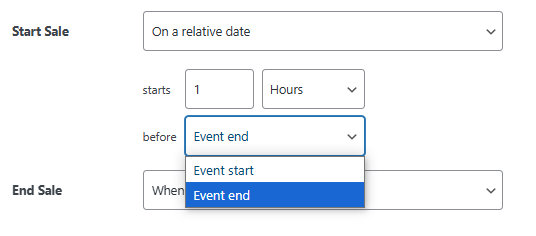
If you choose On a relative date option, you’ll be able to set the sale to start a certain number of hours, days, or weeks before the event starts or ends.
For the End Sale Date, you can choose to end the sale when the event starts or on a relative date.
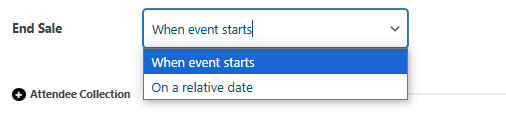
If you select the When event starts option, the sale will end at the event’s start time.
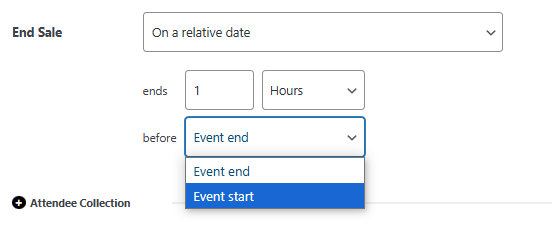
Alternatively, choosing On a relative date lets you set the sale to start a specific number of hours, days, or weeks before the event begins or ends.
Just like with regular tickets, you can select a default method for handling attendee information. After making your selection, click “Save Preset” to apply it.

A second way to create a Ticket Preset
A Ticket Preset can be created from a new Ticket when it is created.
Once a new Ticket is created and saved, a “Save as preset” option will be displayed when you edit the Ticket.
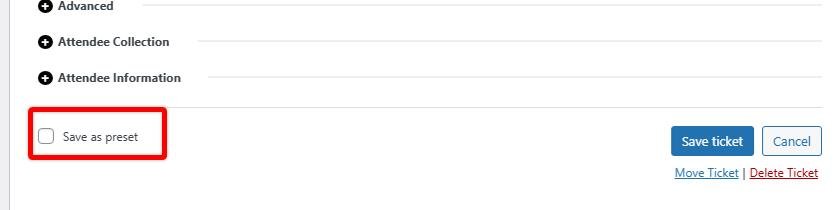
If we check this option and save the ticket, a dialog box will be shown to us to specify the Ticket Preset Name, and the Start and End Date method, the same as when we created it from the Tickets → All Tickets → Tickets Presets section.

Please note that this method to create a Ticket Preset from a new Ticket only works when we use the Classic Editor and we set the Capacity for this Ticket only. (If the Ticket is created with a shared capacity, cannot be saved as a Ticket Preset)
Assigning presets
Classic Editor
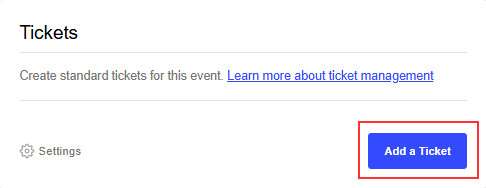
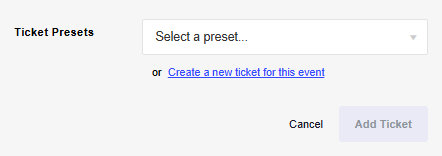
To get started, click on ‘New Ticket’ as you normally would. You’ll then see a screen where you can either select one of your previously created presets or create a brand-new ticket for this event.


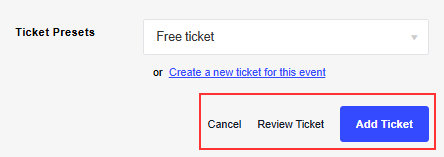
After selecting one of your presets, you’ll have the option to immediately add the ticket, review and edit it before adding, or cancel the process altogether.

Block Editor
Same with the Block Editor, you’ll be presented with the usual ticket block. Once you click on “Add a Ticket” you can choose whether you’d like to use one of your presets or create a new ticket for this event.