If you’re using our Event Tickets or Event Tickets Plus plugin and your customer purchases a ticket from your website, several emails should go out:
- You should receive an email from your eCommerce handler (Ticket Commerce or WooCommerce) letting you know a purchase was made from your website.
- The purchaser should receive an email receipt from your eCommerce handler
- All attendees should each receive an email from Event Tickets/Event Tickets Plus with their ticket information.
Occasionally folks will notice that some or all of these emails aren’t being received. Follow the steps below to find a solution.
Verify Ticket Email Settings
- Go to Tickets > Settings > Emails in your WordPress dashboard.
- Make sure the following emails are enabled:
- Ticket Email
- RSVP Email
- Purchase Receipt (only for Ticket Commerce users)
- Completed Order (only for Ticket Commerce users)
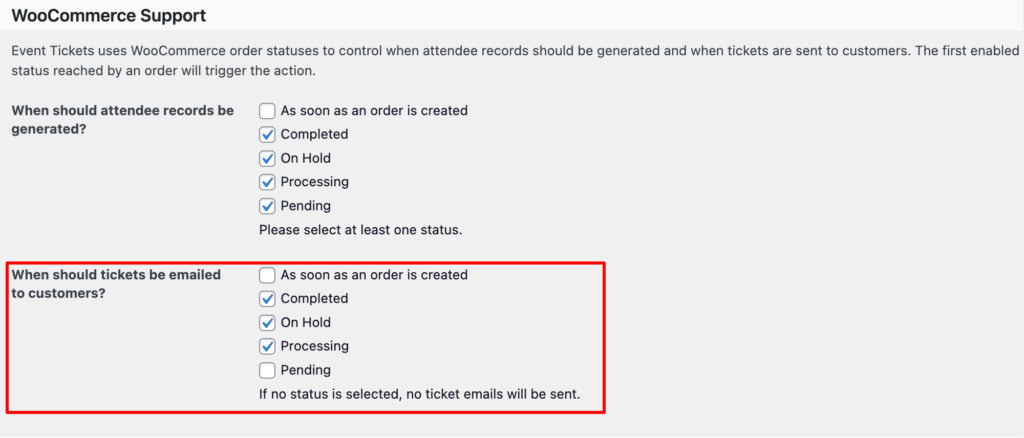
- If you’re using Event Tickets Plus with WooCommerce, go to: Tickets > Settings > Integrations > WooCommerce Support and ensure at least one order status is selected for “When should tickets be emailed to customers?” (We recommend selecting Completed orders.)
Confirm WordPress is Sending Emails
If emails are enabled but not received, consider installing the WP Mail Logging plugin to track outgoing emails. Activate the plugin and register for a test event on your site, and review the email logs:
- If you notice no emails being sent, make sure you set up an email server plugin on the site.
- If the log shows the email was sent, check the Inbox and Spam/Junk folders of your email.
- If the email log shows errors, there may be a theme or plugin conflict. In this case, deactivate all plugins except Event Tickets and Event Tickets Plus and WooCommerce (if used). Switch to a default WordPress theme (e.g., Twenty Twenty-Four) and test the ticket purchase again. Reactivate plugins and your theme one by one until you identify the conflict. If no conflict is discovered but the problem still exists, share the error message from the email log with support.
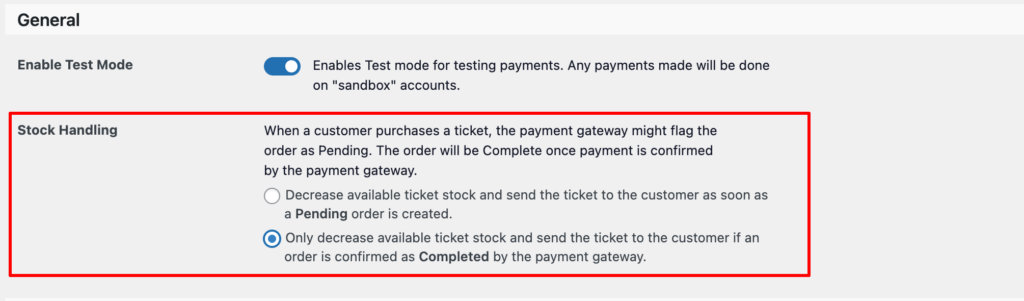
Verify Stock Handling Options
Sometimes, the reason the emails are not being sent is related to the stock handling settings from either Tickets Commerce or WooCommerce. For example: If your stock handling settings are set to decrease when an order is completed and the order status is set as pending after a purchase, then, it means the ticket email will never reach the purchaser email inbox.
With Tickets Commerce
From WordPress Dashboard > Tickets > Settings > Payments > General it is possible to adjust the Stock Handling settings.
With WooCommerce
From WordPress Dashboard > Tickets > Settings > Integrations > WooCommerce Support, you should find the option When should tickets be emailed to customers? It contains several options in which you can determine when tickets emails should be sent to the purchaser email inbox.
Solve Advanced Issues with SMTP
Sending emails requires not just your WordPress site, but additional functionality that all has to work together. This is the full process:
- WordPress creates an email.
- WordPress passes the email to your website host and that email gets logged by WP Mail Logging plugin.
- The host server takes the email and sends it (SMTP or Mail Transfer Agent)
- Recipient server receives or blocks the email
- If the email is accepted, the spam filter decides if it goes to the inbox or the spam folder
- Recipients see the email and might open it.
So, from the step 3 and beyond, WordPress has no control over the process, and the issue could happen on a server configuration or email agent level.
There are a couple different ways that an email can be sent out from a website. The default method is to let the web server that’s hosting the website do it, but a better way is to use an SMTP service which we’ll get to in a minute. When you let the web server send emails they can sometimes end up in spam folders, or fail to be delivered altogether. The frustrating part is there’s often no indication or reason given. You won’t receive a bounce-back email like you would if you sent the email via your email provider so the emails are just lost, out there somewhere in the ether…never to be found.
Luckily there’s a solution. Using an SMTP service can drastically improve the deliverability of emails sent from your website. SMTP stands for Simple Mail Transfer Protocol, and these services exist specifically to allow you to send lots of emails, and pretty much all of them have a free plan and you can upgrade as-needed.
Set Up SMTP
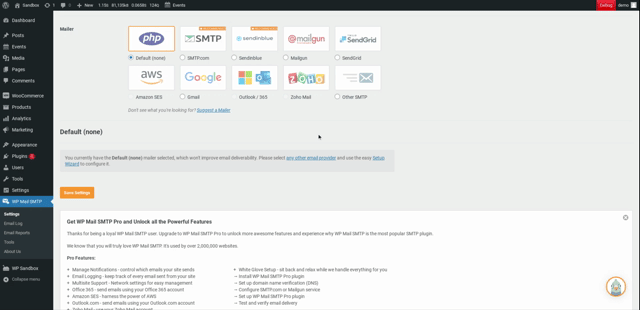
Start off by installing and activating this plugin: https://wordpress.org/plugins/wp-mail-smtp/. They have a free option and a paid option, you should be fine using the free version. This plugin is not an SMTP service, it simply allows you to easily integrate one with your WordPress website.
Next, you’ll want to choose which SMTP service to use. The plugin recommends a few. As of this article they’re currently recommending SMTP.com and SendInBlue, but there are several options that will work just fine.
You can actually use your business email to send emails from your website, such as Google Workspace or Office365. This is OK if you don’t plan on sending a lot of emails.
If you plan on hosting LOTS of events and you expect to have LOTS of customers making purchases and getting tickets, you’ll probably want to use some kind of SMTP service, such as SendGrid, MailGun, or SendInBlue. Standard email providers such as Gmail and Office365 tend to have limits to the number of emails you can send.
Setting up an SMTP service will be slightly different for each one, but they all do a pretty good job of walking you through the process. Once you select an SMTP service in the plugin, you’ll see a paragraph of information and a button to click on and get started.
Click the button to get started, and if you need help setting it up remember to reach out to their customer service and they’ll be happy to assist you. I’ve personally had great luck with SendGrid and SendInBlue.
Once you have your SMTP service set up, you should be able to easily integrate it with the SMTP plugin you installed either via logging in or using an API key, which the SMTP service will provide you.
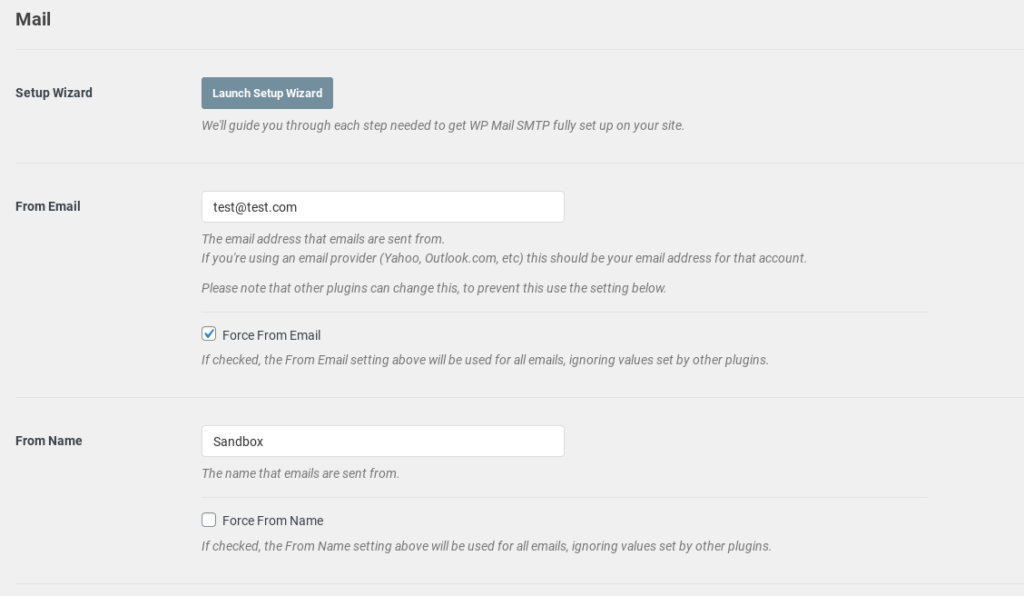
Before testing your setup, be sure to update the From Email and From Name fields.
After you’ve integrated your chosen SMTP service with the plugin, you’ll see an option to send a test email to make sure everything is set up and integrated properly. To send the test email, click on the “Email Test” tab at the top of the SMTP plugin settings.
Specific Email Issues
Emails Sent From Default WordPress Email
You may encounter a case whereby your confirmation emails for an event are being sent using your WordPress default email address vs the one that you’ve set up in your Tickets > Settings > Emails section.
This issue occurs when the Sender Name field is left blank in the email settings. Without a sender name, the system may revert to using the default WordPress email instead of the intended email address. Navigate to WordPress Dashboard > Tickets > Settings > Emails.
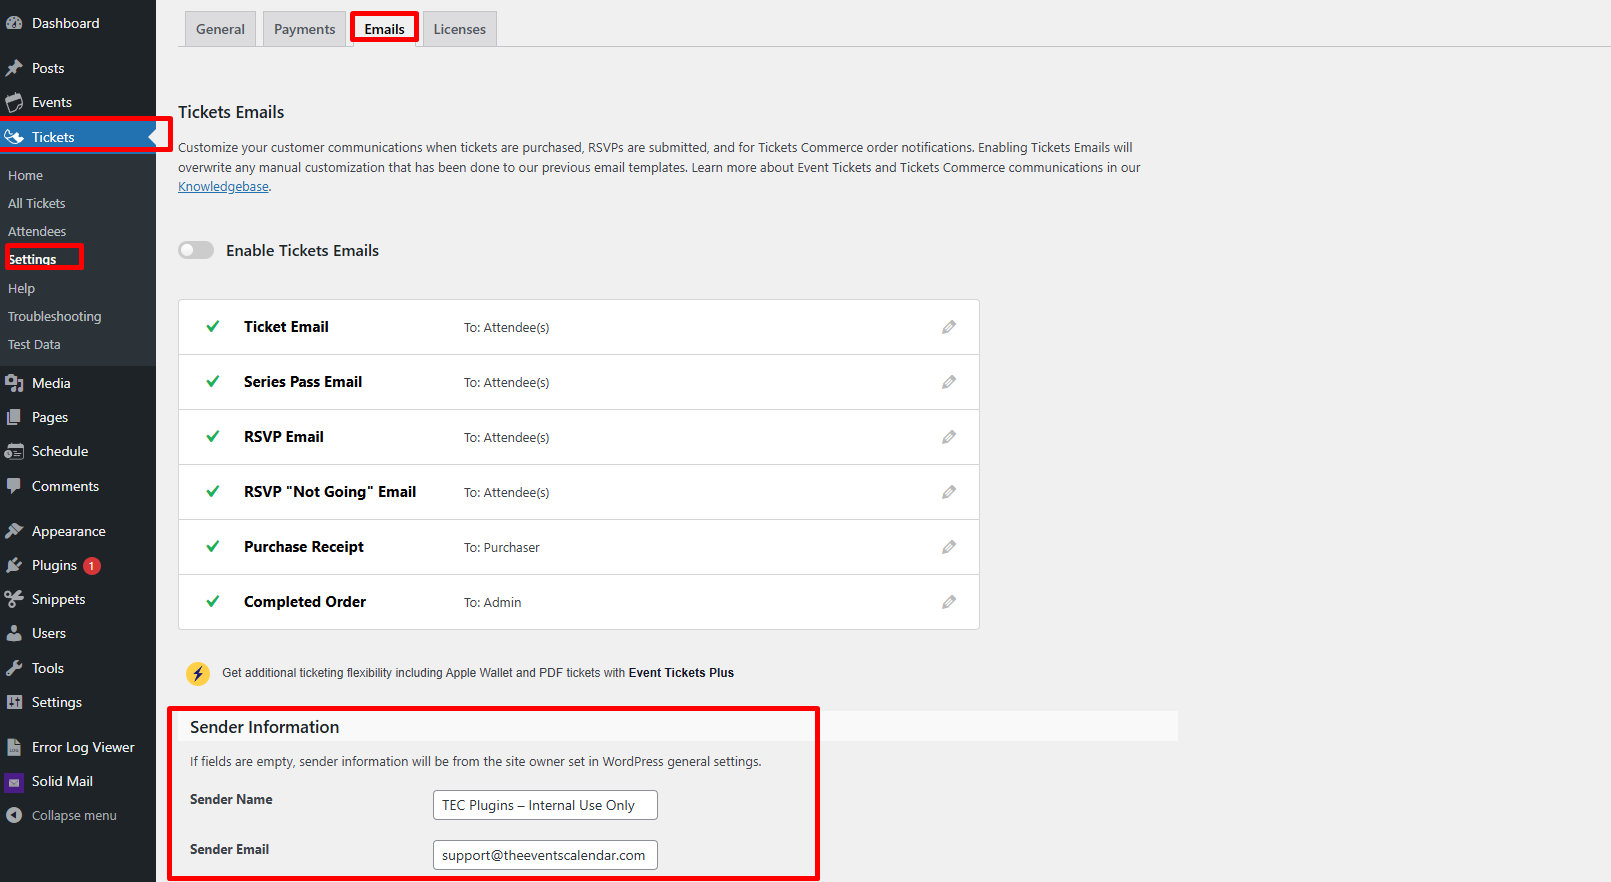
- Verify the email address entered in the Send From Email field.
- Check if the Sender Name field is empty.
- If the field is blank, enter a relevant name (e.g., your organization’s name or an appropriate sender name).
- Click Save Changes.
- Send a test email to confirm that the correct sender email is being used.
If the issue persists after completing the above steps, users should verify their email settings, SMTP configurations, and any email filtering rules that may affect outgoing messages. For further assistance, contact our support tea
Slow Submission of the Community Form
A few users reported that when they have the setting “Send an email alert when a new email is submitted” enabled under Events > Settings > Community > Alerts the community form submission takes 8-10 or seconds to get submitted. If you are experiencing the same, you can fix it by installing the Mail Queue Plugin and setting it something like this:

Missing QR Codes
When you send a ticket email to attendees with Event Tickets and Event Tickets Plus, a QR code should be generated and presented in the email. This code can then be scanned at your event to check in attendees using a QR scanner or the Event Tickets Plus app on your mobile device.
✨ Please ensure you have checked the setting to enable QR Codes for your emails in Tickets > Settings > Emails. And that your site has QR Codes enabled in Tickets > Settings > Integrations.
However, you may encounter issues with the QR code not appearing in the email as expected. Let’s look at some scenarios and troubleshoot them so you can get the QR codes to appear in your ticket emails.
Email client issues
Most email clients block images in emails that come from “unknown” sources. Since the QR code is also delivered as an image it might be blocked as well.

The solution here is to allow the email client to show images or add the sender’s email address as a trusted source.
Missing dependencies
The next thing to check will be if QR code images are being created at all. The QR code images are stored within the wp_uploads folder with a random file name like qr_1c94fa13e0baf7582673d5b725e213b8.png. If you see files like that, that’s a good sign.
You can also use the Email Log plugin to look at the emails that are sent out from your site and check if the QR codes appear there.
If you don’t see them there, they may have missing dependencies blocking the QR codes from being generated. In this case, you’ll need to make sure that you have both the php_gd2 and gzuncompress PHP extensions. Your hosting provider should be able to help you set these up and add them if necessary.
Broken image source
One reason that the QR may not be appearing is that there is a broken image source. To determine if this is the cause, you’ll want to copy the URL of the QR code by right-clicking on the QR code image in the email. Then paste that URL into your browser to see if the image works.
If not, the source link is broken. This generally indicates that something is blocking the QR code from appearing. As a next step, you can check for conflicts with security plugins (if you have one).
Often, security plugins can block direct access from external sources to items like images, that they deem unsafe. Try disabling the security plugin, and if the QR codes appear, you’ll know that the security plugin was blocking it. You can look through the settings of the security plugin to check if there’s anything related.
Alternatively, you can check your .htaccess file and look for a line similar to the following:
RewriteRule .*\.(jpg|jpeg|gif|png|bmp)$ - [F,NC]
This rule blocks direct access to files with the listed extensions. After creating a backup of your .htaccess file for security, you can adjust it or comment out the entire line by placing a hash (#) at the beginning.