One of the most useful added features of Event Tickets Plus, is the ability to check in attendees to your events via QR code.
These scannable codes are generated automatically for all ticket purchases or reservations, and each code references a unique URL that can be used to quickly check in guests without needing to manually access your attendees list.
Our Event Tickets Plus App is the easiest and fastest way to check in your attendees directly from your Android or iOS device without the need to log in to your site. Simply install and connect to your site using an API key and start scanning your tickets.
Download the app from:
- Google Play Store – for Android devices
- App Store – for iOS devices
Understanding QR Codes
First things first, it might be helpful to understand what a QR code is before beginning to use them with your tickets. You can think of QR codes as being similar to UPC barcodes in functionality, though their usage is typically a bit more complex. While barcodes are used primarily to encode simple numerical values, QR codes can contain a variety of data types, including web URLs, contact cards, and even payment information for mobile transactions.
Event Tickets Plus uses QR codes to embed unique check-in URLs for each ticket in your order database; when the QR code is scanned by a site administrator or another user with sufficient permissions, the URL is accessed, and the ticket is checked in automatically.

Example of a QR code.
To scan QR codes at your events, you’ll need a mobile device with a camera (such as a smartphone or tablet) and our Event Tickets Plus App.
💡 If attendees report that the QR code is showing as a “broken image link icon”, it may be related to their email client. Several email clients have a setting for whether to automatically download images in emails. If this is disabled, the QR code won’t show in the email.
Setting up the Event Tickets Plus App
But, before going into the check-in process, you need to connect the App from your phone to your website.
This is an easy process since the Event Tickets Plus settings provide everything you need.
Downloading the App
The first thing you need to do is visit your App Store from iOS or Google and search for Event Tickets Plus App.
Look for this icon and download the app.
Connecting to Your Website
Once you download and install the app on your phone/tablet, the next step is to connect them to your live website.
Before we proceed, go to your WordPress Dashboard and open the “Tickets > Settings > Integration” tab. We need the information presented on this page to make the connection.
Using QR Code
Open the app on your mobile device. Since it’s the first time you’re using the app, you’ll see a “Connect Your Site” screen.
At the end of the page, look for the blue button with the text Scan QR Code.
Once you press this button, the camera from your device will open and all you need to do is point the camera to the QR code presented on the page in your computer.
Event Tickets Plus App will read the QR code and will automatically fill your Website URL and API Key fields inside the App.
Once you see this information on the screen, press the Connect Your Site blue button.
You’ll be redirected to the initial screen of the App. It may take some time while the App connects to your website and load all your Events + Attendees to the app.
After getting back to the initial screen, use the menu icon at the top-left of your screen to see a list of all your Events.
Insert Details Manually
Alternatively, if you’re unable to read the QR code is still possible to connect your website and Event Tickets App manually by entering your website URL and API Key.
This information can be found in the same page we used before: “Tickets > Settings > Integrations”.
Open the app on your mobile device and use the button “Insert Details Manually”.
The app will present a screen with two fields: Website URL and API Key.
Check the WordPress page to get the information and insert in their fields. Once you finish, press the Connect Your Site blue button.
You’ll be redirected to the initial screen of the App while the connection with your website is established. As soon as the connection is done, you’ll be directed to the Event list section.
Your Connected Site
Once successfully connected, the app will automatically sync your events and attendee data from your website. This initial sync is important because it enables the app’s offline check-in capability. The sync process happens automatically whenever you open the app with an internet connection, ensuring you always have the latest event and attendee information available for offline use.
The Check In Process
With your QR code scanning application installed on your device of choice and your Administrator or Contributor account(s) set up and ready to go, all that’s left is to begin the actual task of checking in attendees! Your process may look slightly different depending on your actual setup, but the basic steps should be mostly the same across all platforms.
- On the device that you’ll be using to check in attendees, launch your default web browser.
- From the web browser you just launched, log in to your site’s WordPress dashboard using an account with sufficient permissions. (If you don’t wish to use your administrator account for this task, you can create a new account with limited permissions using the steps outlined above.)
- Open the Event Tickets Plus app and ready your device’s camera to begin scanning.
- Ensure that the QR code that you wish to scan is clean, undamaged, and held at a sufficient distance for your device’s camera to focus. Scan the code.
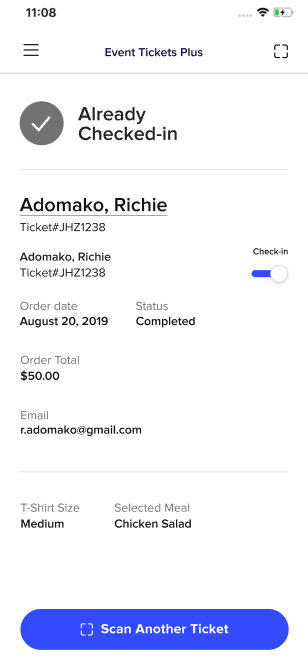
- The app will update, and you’ll receive confirmation in the browser if your attendee was checked in successfully (or an error if the code is invalid or has already been scanned).
Troubleshooting: if you are unable to check in attendees, you might want to take a look at the following post.
Offline Check-In Capability
One of the newest features of the Event Tickets Plus App is the ability to check in attendees even when you don’t have an internet connection. This is perfect for outdoor venues, remote locations, or areas with spotty cell service.
- Before you go offline: Open the app while connected to the internet. The app will automatically sync your events and attendee information to your device.
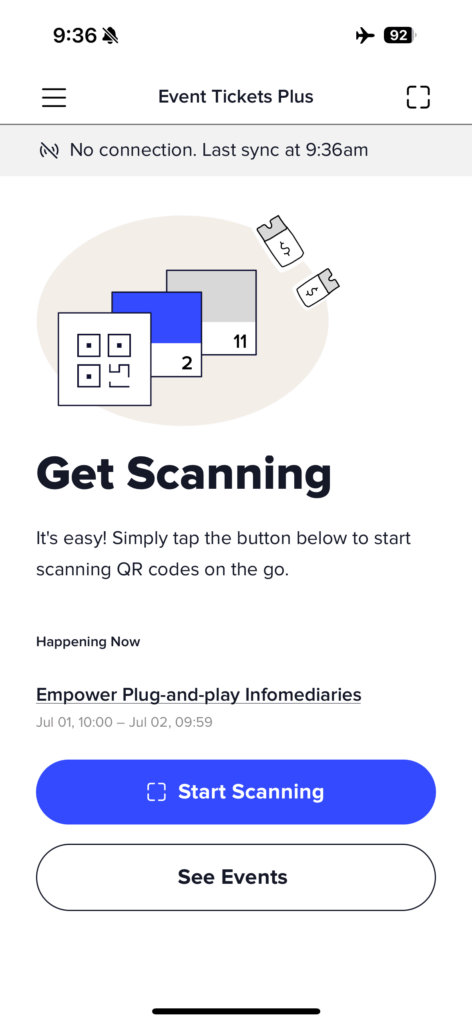
- While offline: You can check in any attendees whose tickets were included in your last sync. The app will show a small banner at the top letting you know you’re offline and when your last sync occurred.
3. When you’re back online: The app automatically syncs all your offline check-ins with your website. You’ll see your attendee lists update accordingly in your WordPress admin.
Important Notes:
- You need both The Events Calendar and Event Tickets Plus for offline functionality to work.
- You can only check in attendees whose tickets were synced before you went offline.
- If someone purchases a ticket after your last sync, you won’t be able to check them in until you sync again.
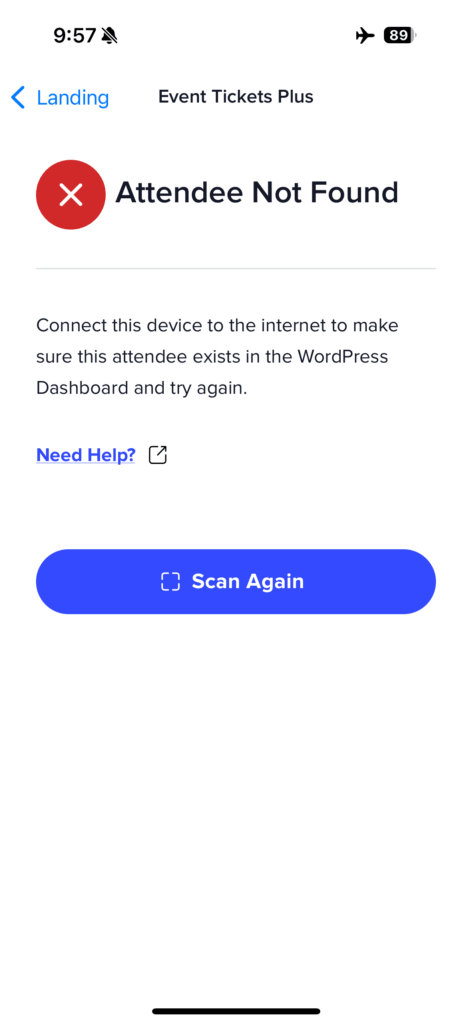
- While offline, the app can only show basic errors (like “Attendee Not Found” for tickets not in your synced data).
💡 Tip: If you’re in an area with weak or intermittent internet service, consider turning on airplane mode and working entirely offline. This prevents failed connection attempts that could cause check-in errors.
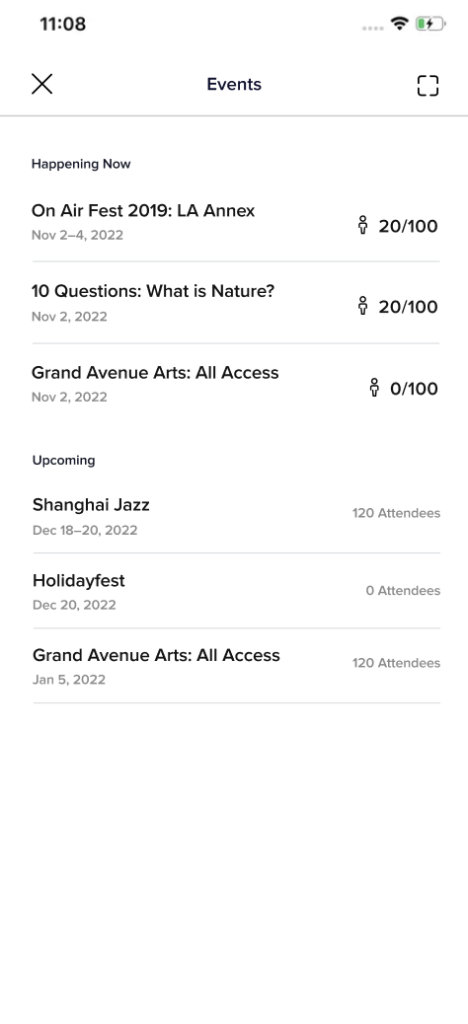
Event Listings in the App
If you are using The Events Calendar, in combination with Event Tickets and Event Tickets Plus, you’ll see all of your events listed in the app. Additionally, you’ll have access to attendee numbers, event details, and all of your attendee lists.
It’s important to note that you won’t be able to check in attendees until the time of your event by default. You can toggle this setting on under Tickets > Settings > Integrations on your WordPress site, which will allow you to set a time buffer in minutes so that they can start reading QR codes before the actual start time of the event.
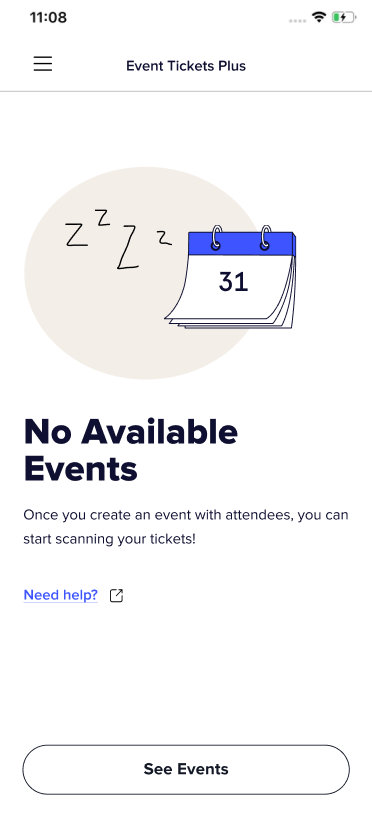
If you have a site with Event Tickets and Event Tickets Plus but do not have The Events Calendar, you will not see any events on your app. You will still have access to all of your attendees and their additional information once you scan their QR code.
Creating a New User for Scanning QR Codes
Since full attendee information is made available to site administrators for editing, reviewing, and export purposes, the administrator role is typically also used for checking in users manually or via QR code. But what if you’d like to have another member of staff check in attendees without giving them full access to your WordPress site’s backend? In that case, you can create a new user account with Contributor permissions, which will prevent edit access to your events, posts, or pages while still allowing attendees to be checked in. Here’s how to set that up on your site.
As always, you’ll want to begin by logging into your WordPress dashboard using your administrator credentials. Once you’ve successfully logged in, highlight the Users menu item in the WordPress sidebar and click Add New to open the new user creation form.
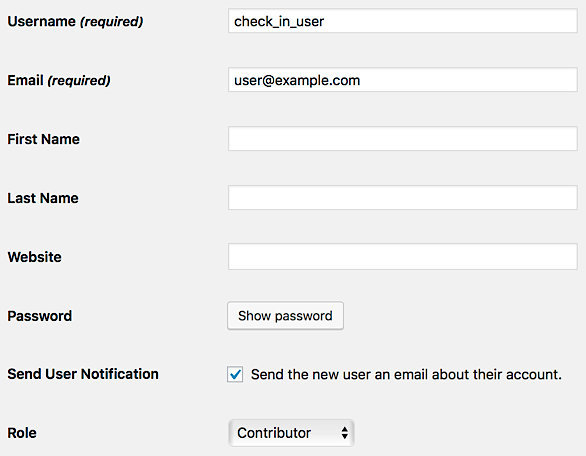
Enter a username and email address for your new user (you can leave the remaining text fields blank). You’ll also want to click the Show password button and note the password for the new account. Lastly, in the Role drop-down menu, select the Contributor role. Click Add New User once you’re finished, and the new user will be added immediately to your site. If you selected the check box for Send User Notification, an email will be sent to the address you provided to confirm the creation of this new account.
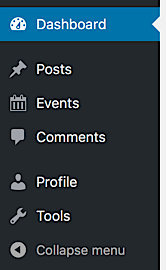
When your Contributor user account logs into the site, they’ll see a limited selection of menu items available to them, and they won’t be able to edit or delete any existing events in your database.
GDPR Compatibility
The Event Tickets Plus app is not storing any user-related information, and it is GDPR compatible. The information that’s displayed in the app is coming from the connected site, which has the appropriate GDPR tools.
Troubleshooting
If you’ve run into issues with check in, consult Troubleshooting the Event Tickets Plus App or Troubleshooting PDF Tickets and Ticket QR Codes.
Disconnect Your Website from the App
One important thing to notice is that the Event Tickets Plus App can only handle a connection to one website at a time.
This means that in the case you have multiple WordPress installations using Events Tickets Plus, you can only connect the app to one of them and check in attendees from that specific website.
But the app also offers a way to easily remove a website, so you can disconnect and connect as many times as necessary.
Keep in mind that the App is just a different way to check in users, once you disconnect from the app nothing will be lost since everything is being saved on your WordPress database.
To remove a website ,you need to perform the following steps
- Open the app
- Use the top-left menu button
- Go to Settings
- Click on the Website URL address and remove everything
- Click on API Key and remove everything
- Press the Update Settings blue button.
The app will redirect you back to the initial screen where you can connect to any other website again.
Customizations
See Customizing the Event Tickets Plus App
We hope that this guide gives you all the information that you need to begin using QR codes with your event tickets and start reaping the benefits of faster check-ins! Don’t hesitate to pay us a visit over at our help desk if you should have any lingering questions–we’re more than happy to assist!