As you may know, Event Tickets is a plugin for creating and selling tickets on your WordPress site. It works hand-in-hand with The Events Calendar but can be used on its own to create tickets on pages and posts as well.
Another thing that Event Tickets does is collect information about the attendees who purchase tickets for an event. The person’s name and email address are collected by default, but there are ways to collect more advanced information using the custom registration fields feature of Event Tickets Plus.
That’s a lot of valuable information at your fingertips. Wouldn’t it be nice to create marketing around the information? Or perhaps track your communication history with specific attendees?
That’s what the Event Tickets HubSpot extension is designed to do: connect the information collected by Event Tickets into HubSpot, a customer relationship management (CRM) app that lets you manage marketing and communications with your attendees.
In this article, we’re going to walk through the steps to install the Event Tickets HubSpot extension.
⚠️ Important Update for new and existing users of the extension: HubSpot apps are required to set a redirect URL where you are going to be redirected after granting access to your app. Please ensure you are using the latest version of the extension (1.0.3 or higher if available) and follow the steps in this article to set the Redirect URL in your HubSpot app.
Signup for HubSpot
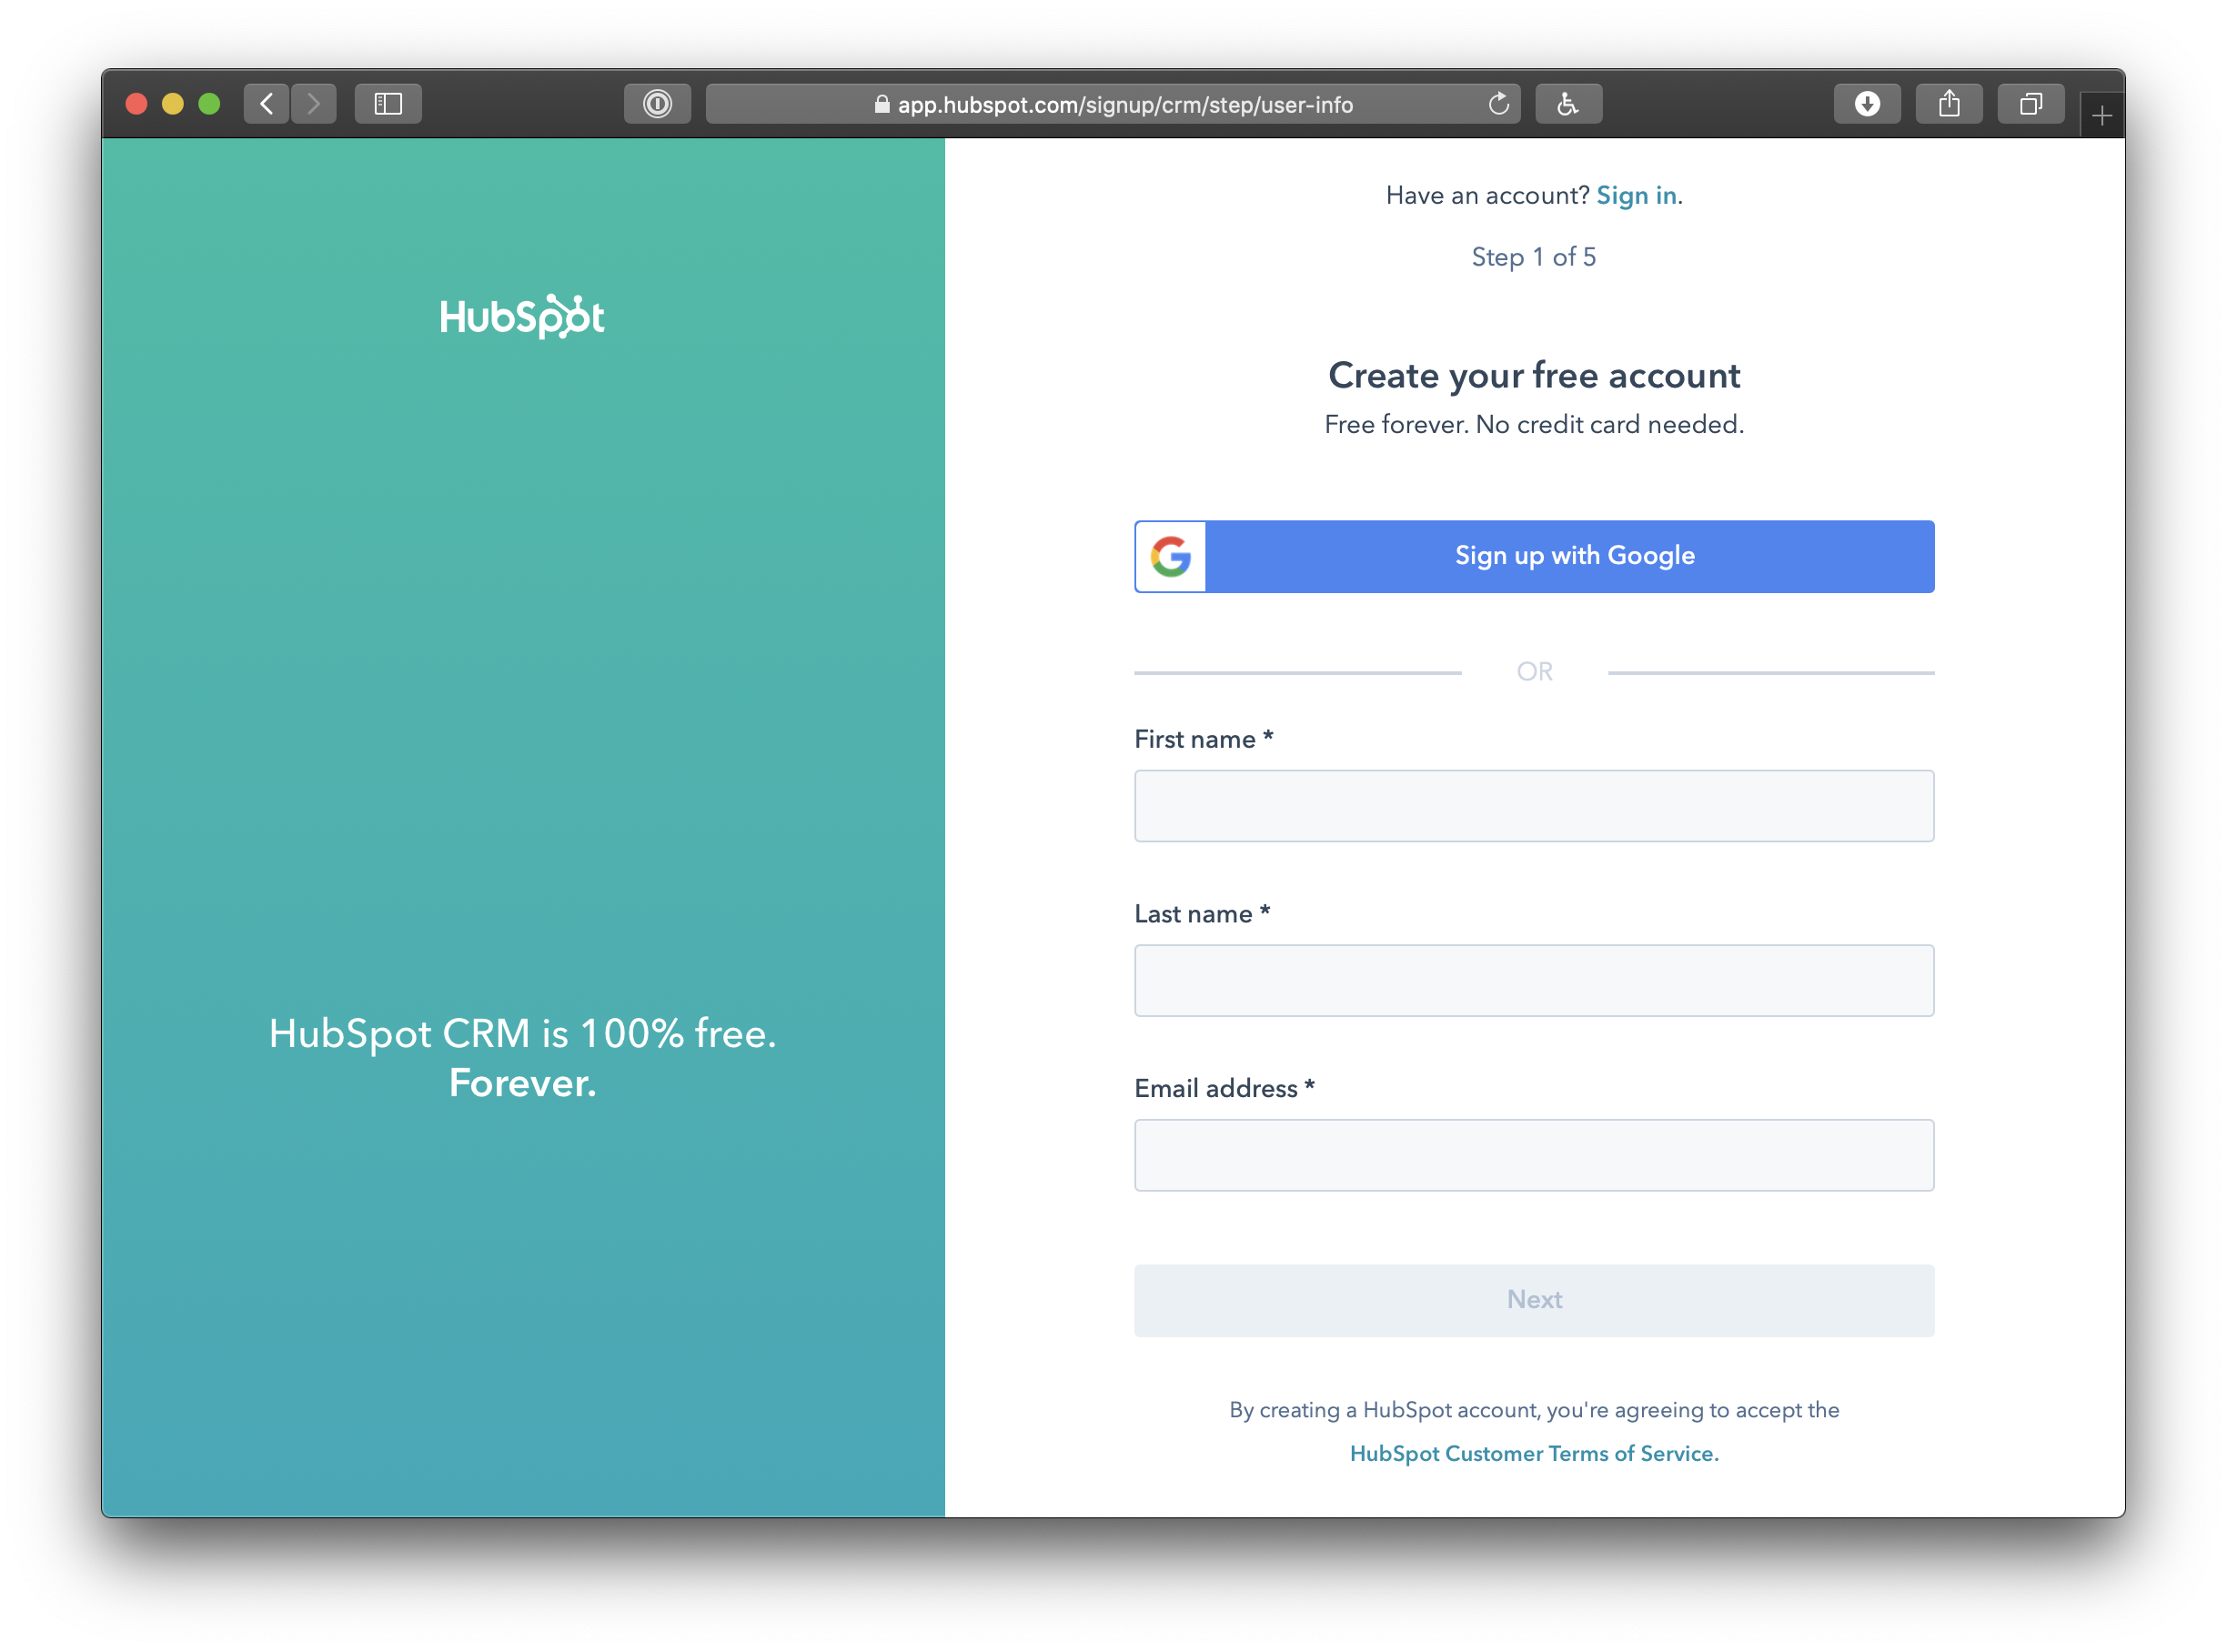
First things first. You will need to create a HubSpot account if you don’t already have one.
Create a developer account
That might sound a little scary if you’re not a developer, but all this really does is give you access to more options for your account, like registering an app, which is what we’re doing now.
Signing up for a developer account is nearly the exact same process as creating a normal HubSpot account.
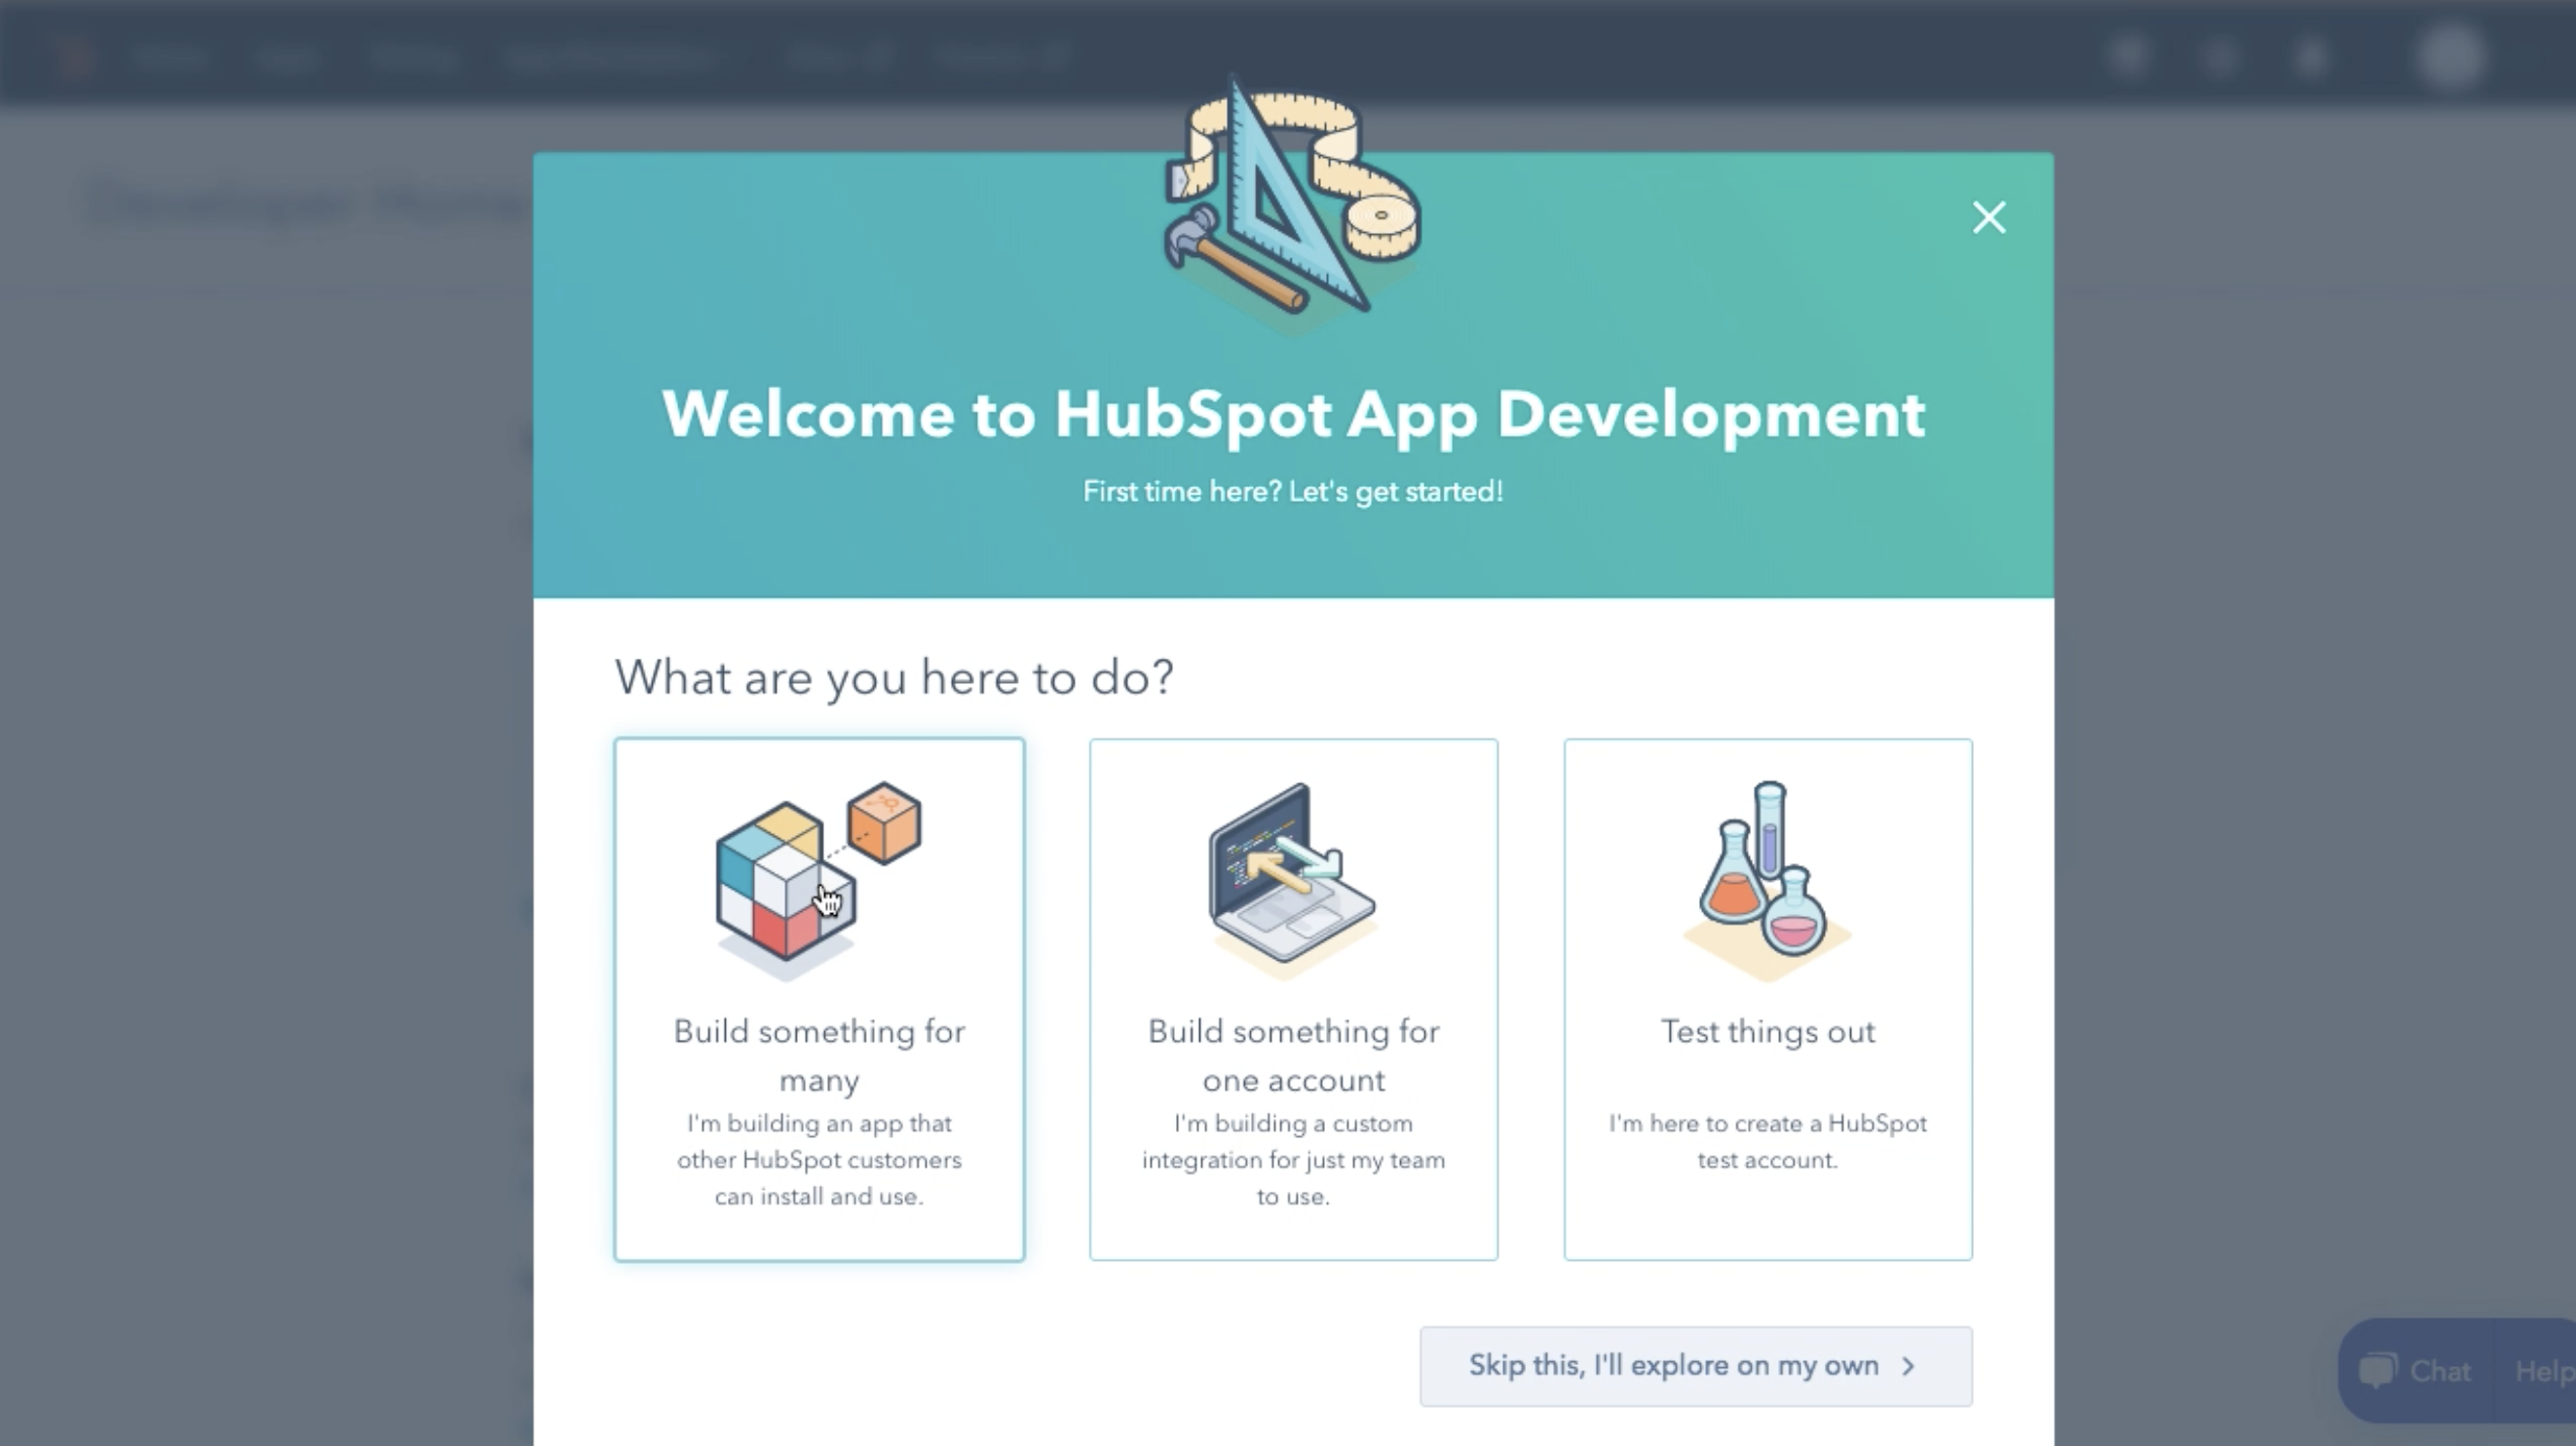
The first step is to tell HubSpot what you want your developer account for. Select the App option.

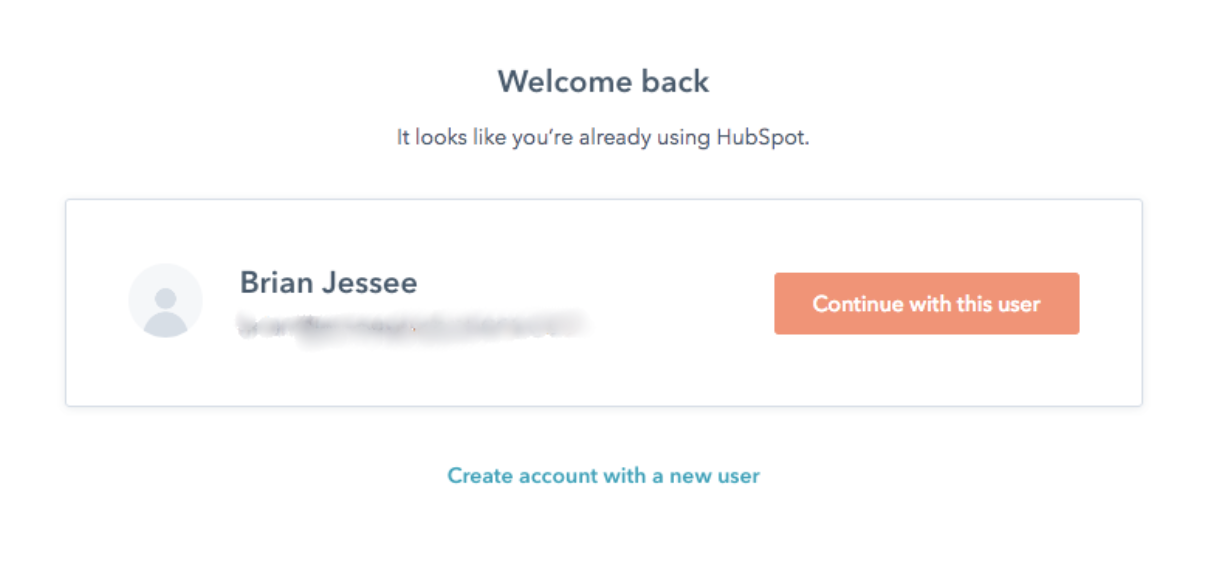
Once you’ve chosen the App option, you will be directed to another signup for exactly like the first one to set up a HubSpot account. You will be asked which user account you want to associate with the developer account; select yourself.
Create an app
Don’t worry, you’re not really “creating an app” but merely registering the one we’ve already created for you.
Right after creating your developer account, HubSpot will ask what you want to do. You can simply dismiss this by selecting the “Skip this” option.
This takes you to the next step, which is to “Create an app.”
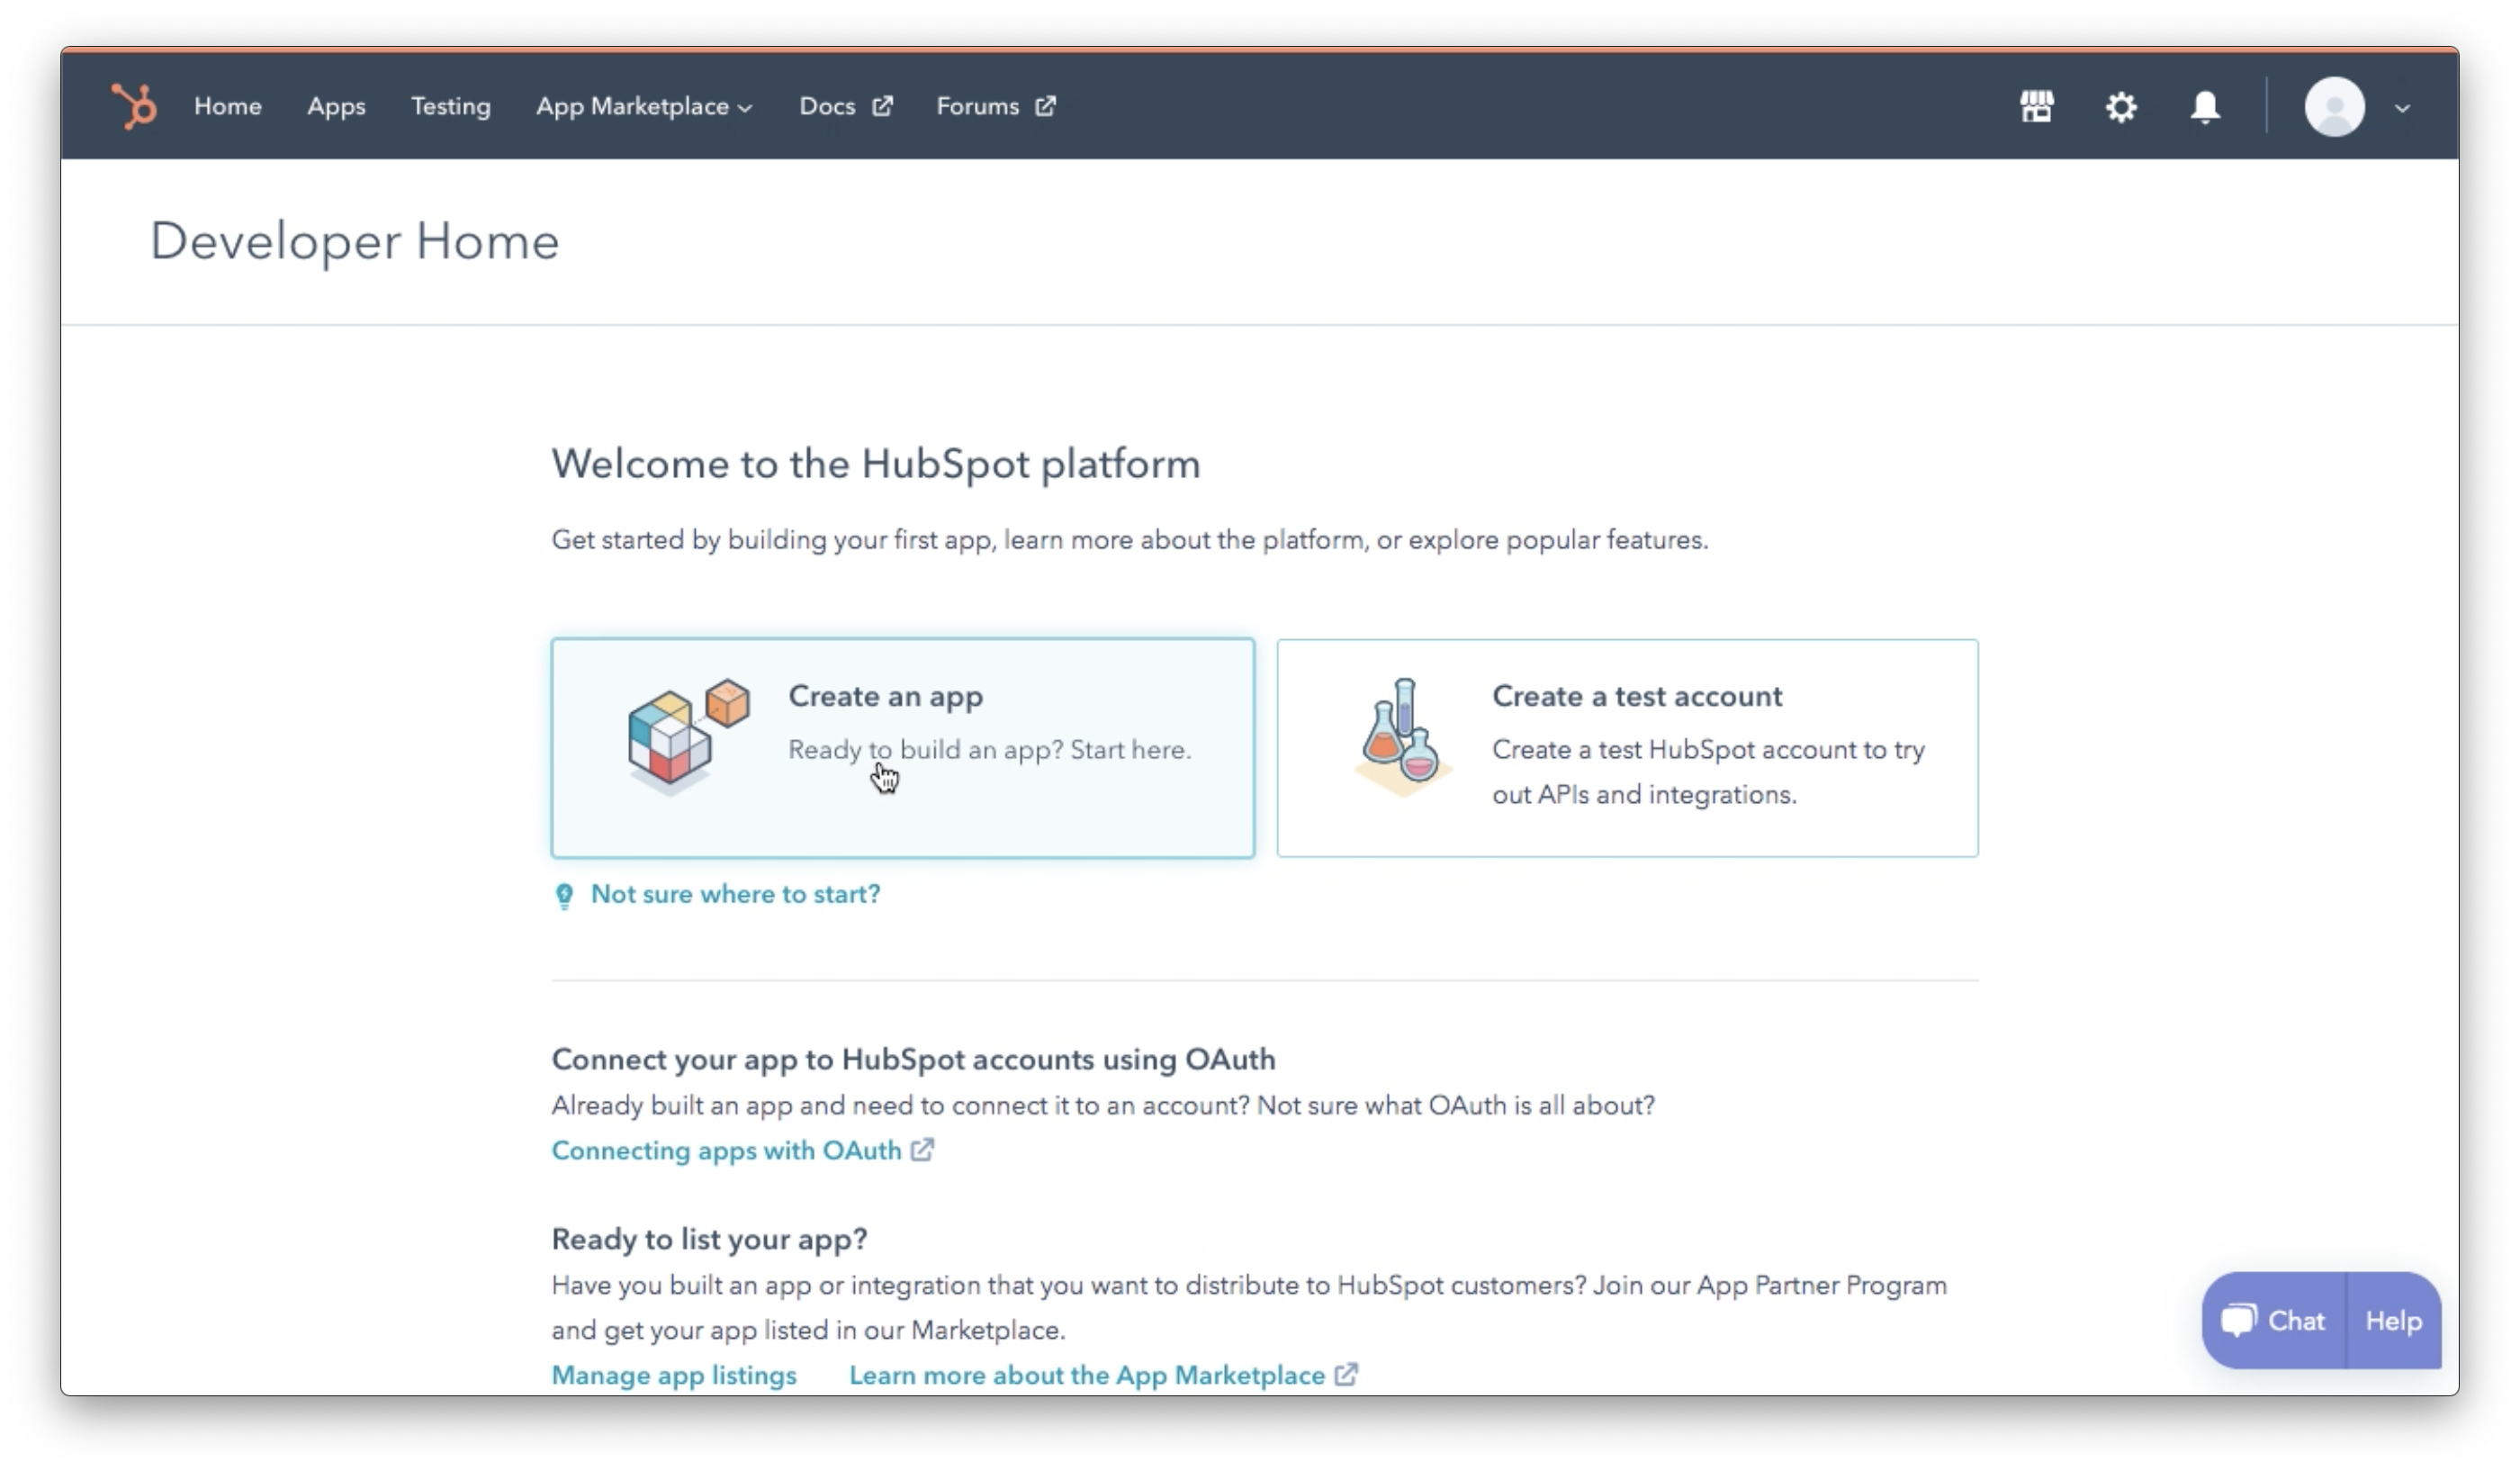
This will walk you through the process of setting up the Event Tickets HubSpot extension as an app for your HubSpot account. Provide the app’s name and a description of it. It doesn’t have to be creative. Something like this:
- Name: Event Tickets
- Description: Connecting my website to HubSpot
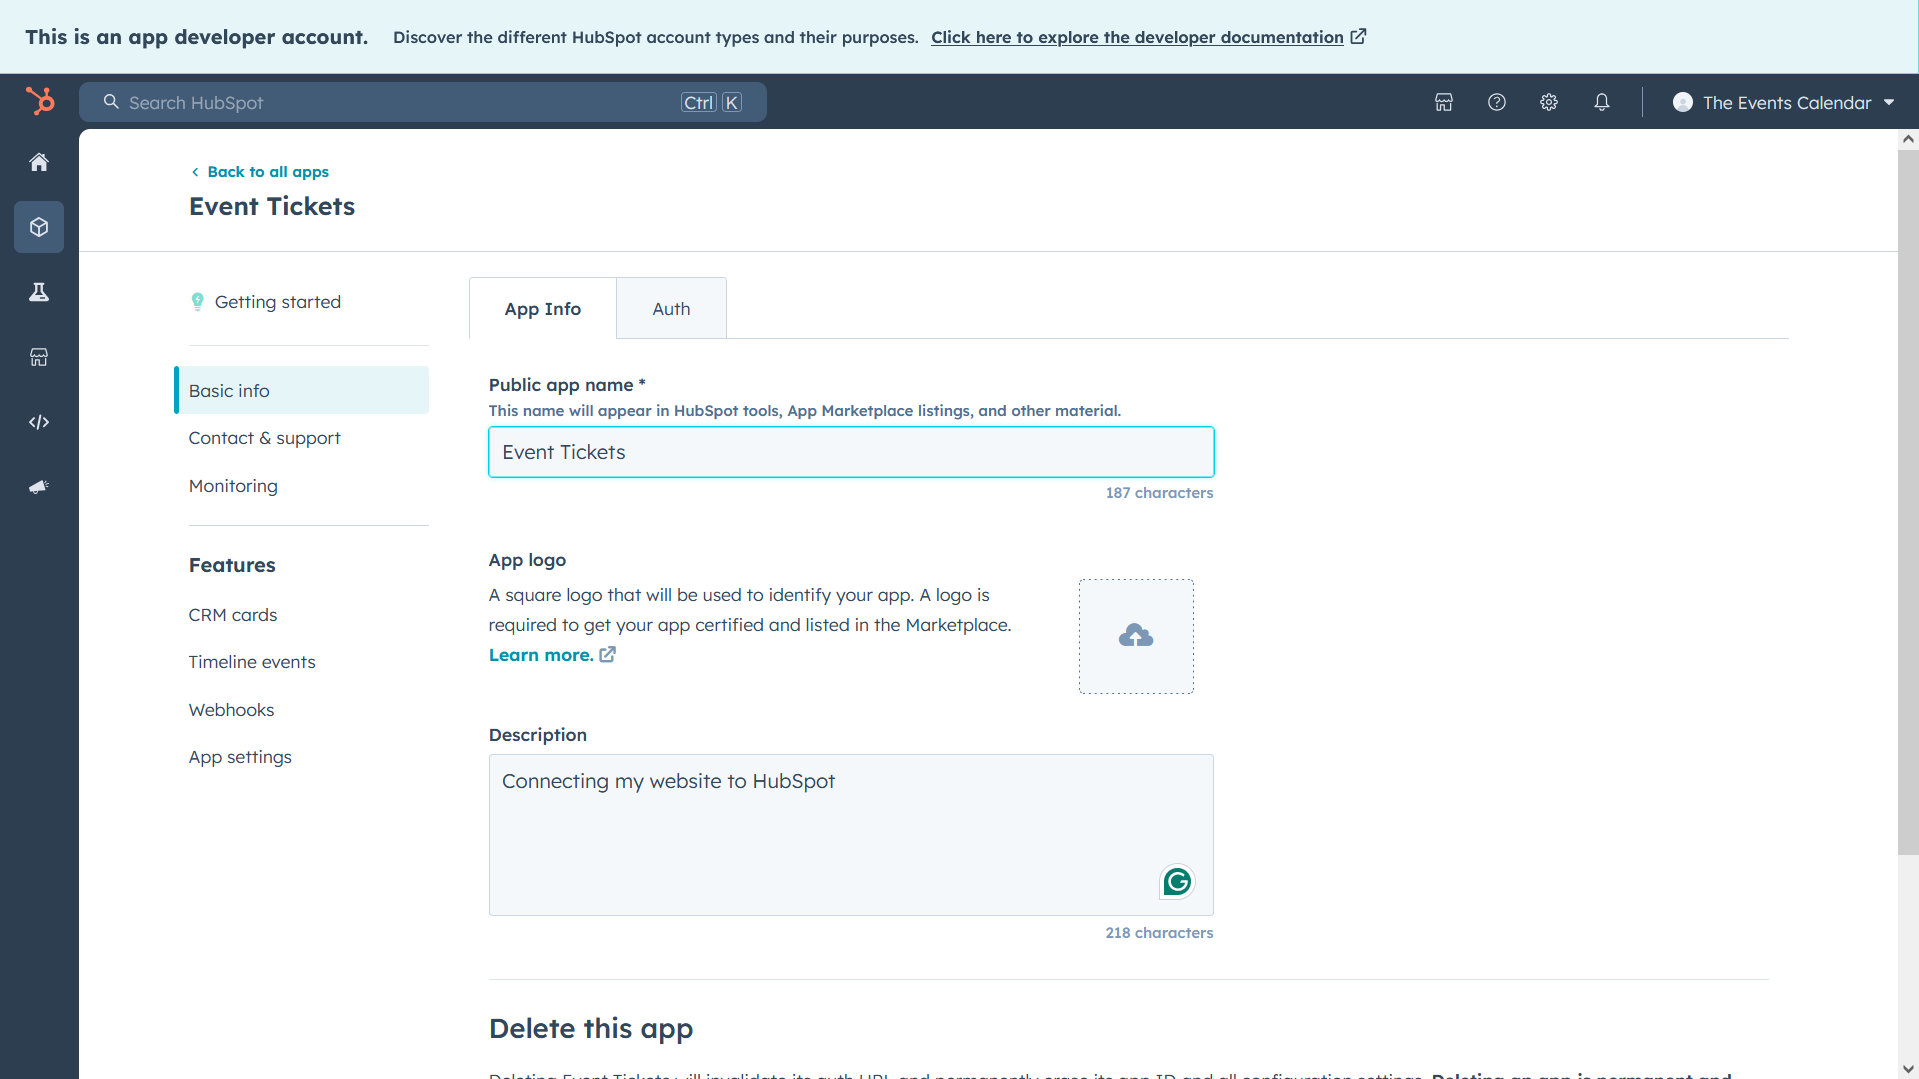
Next, click on the “Auth” tab. This will provide you with the information you need to connect your HubSpot account in your WordPress settings.
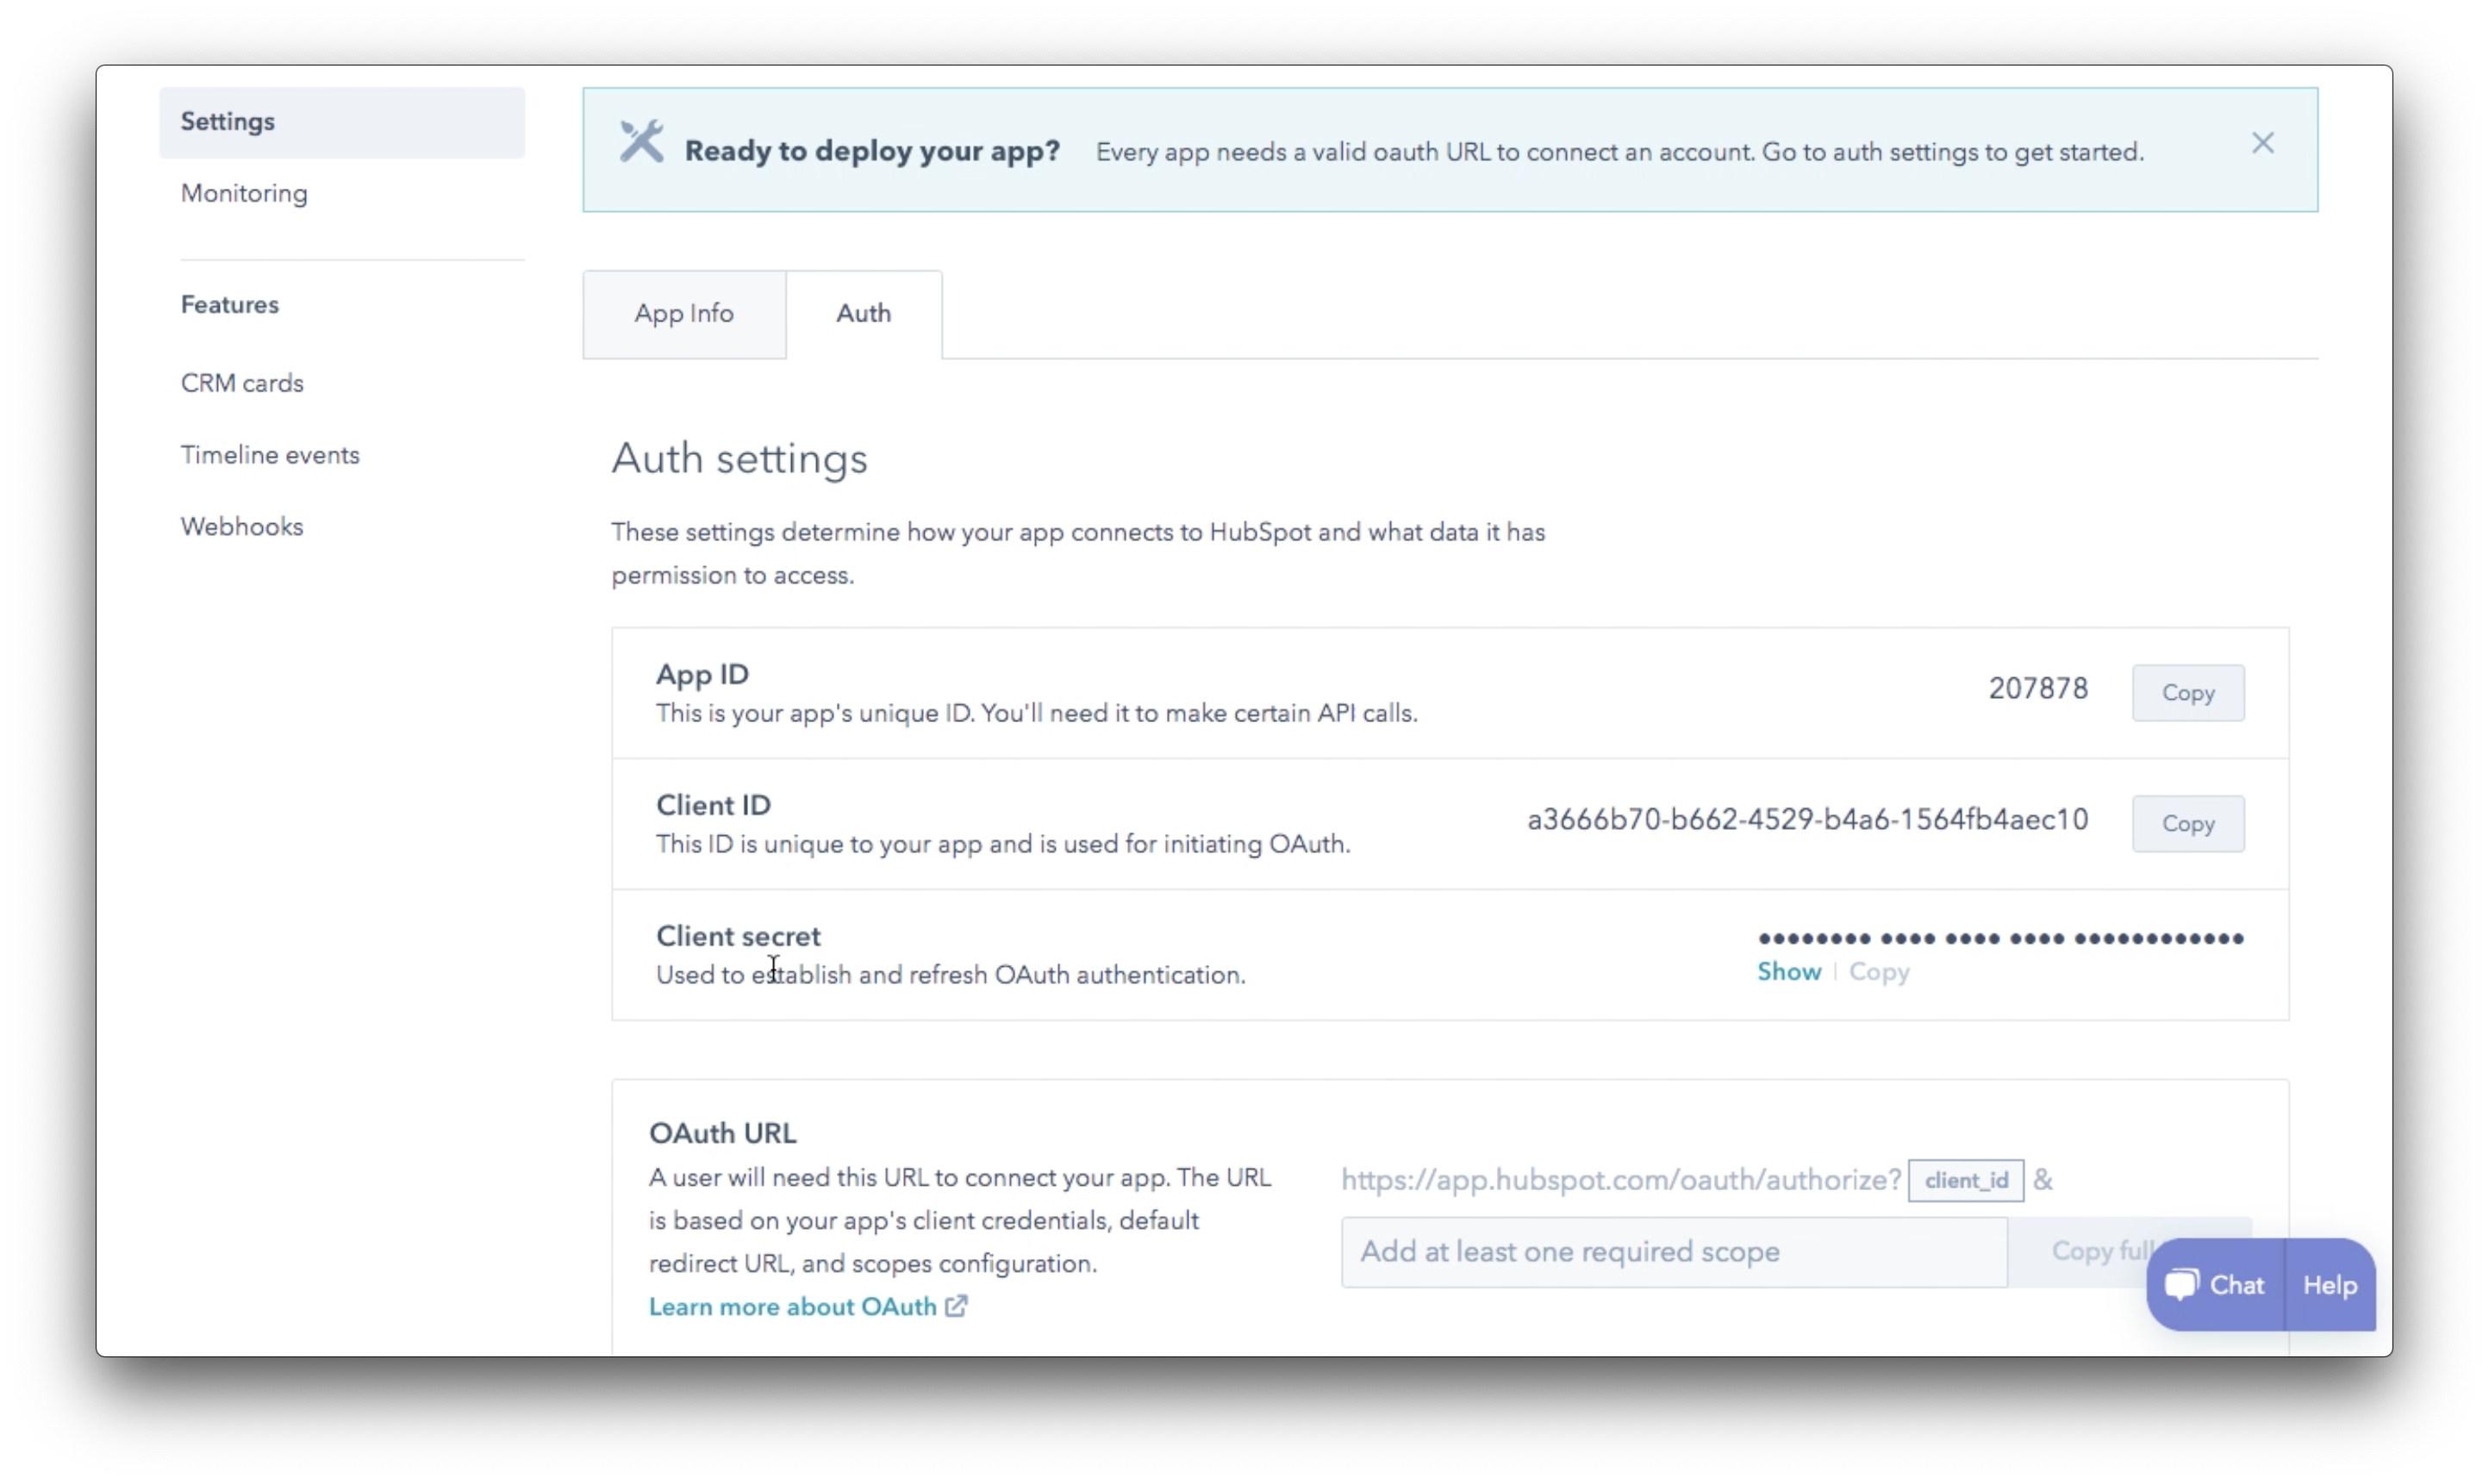
The next step is pretty important. Scroll past the app auth information and there is a dropdown setting to add “Scopes” to the app. This tells HubSpot what sort of information to expect when the Event Tickets HubSpot extension sends data over.
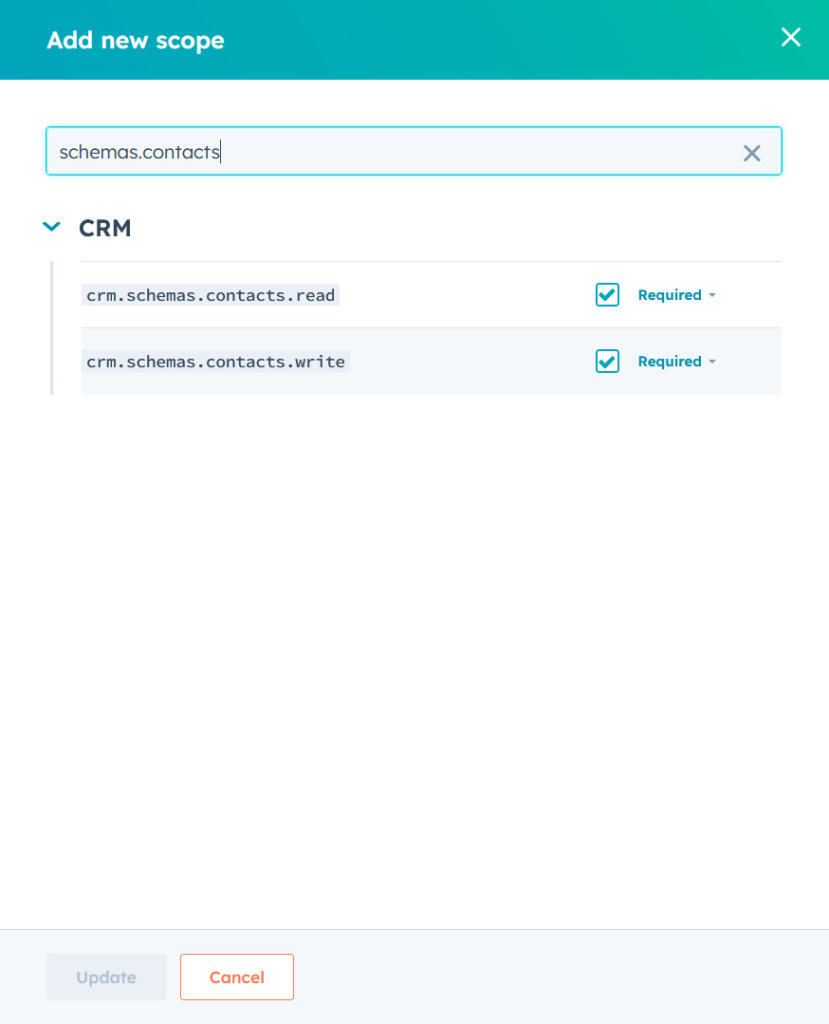
You will choose three specific scopes:
- crm.schemas.contacts read and write. This tells HubSpot that the extension will provide data about the attendee that will be used to create customer lists in HubSpot. This is found under the CRM list.
- timeline. This tells HubSpot that the extension will send information about when the attendee was created and updated. This is found under the “Other” list.
You can use the search box at the top of the panel to find the scopes. Avoid selecting any other options because the app will otherwise fail.
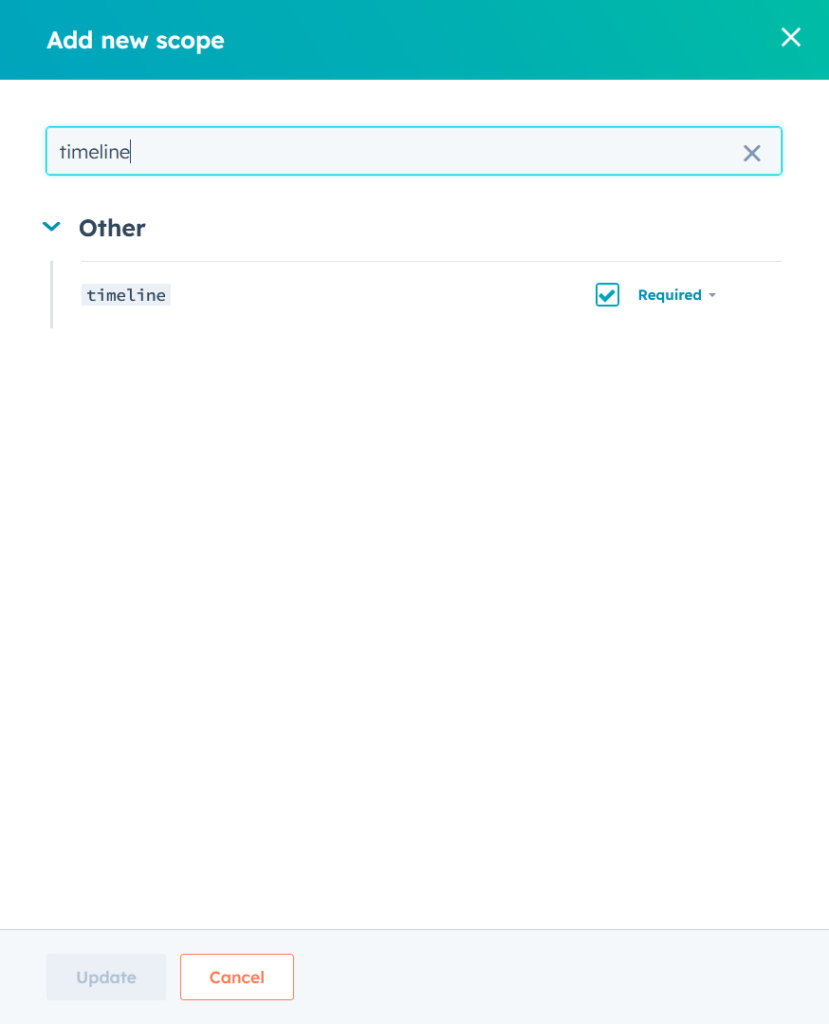
Now that the app’s information has been configured, hit “Save” or “Update” at the bottom of the panel.
Now you can go back to your app’s dashboard by clicking on “< Back to all apps” at the top left of the page and see your app listed.
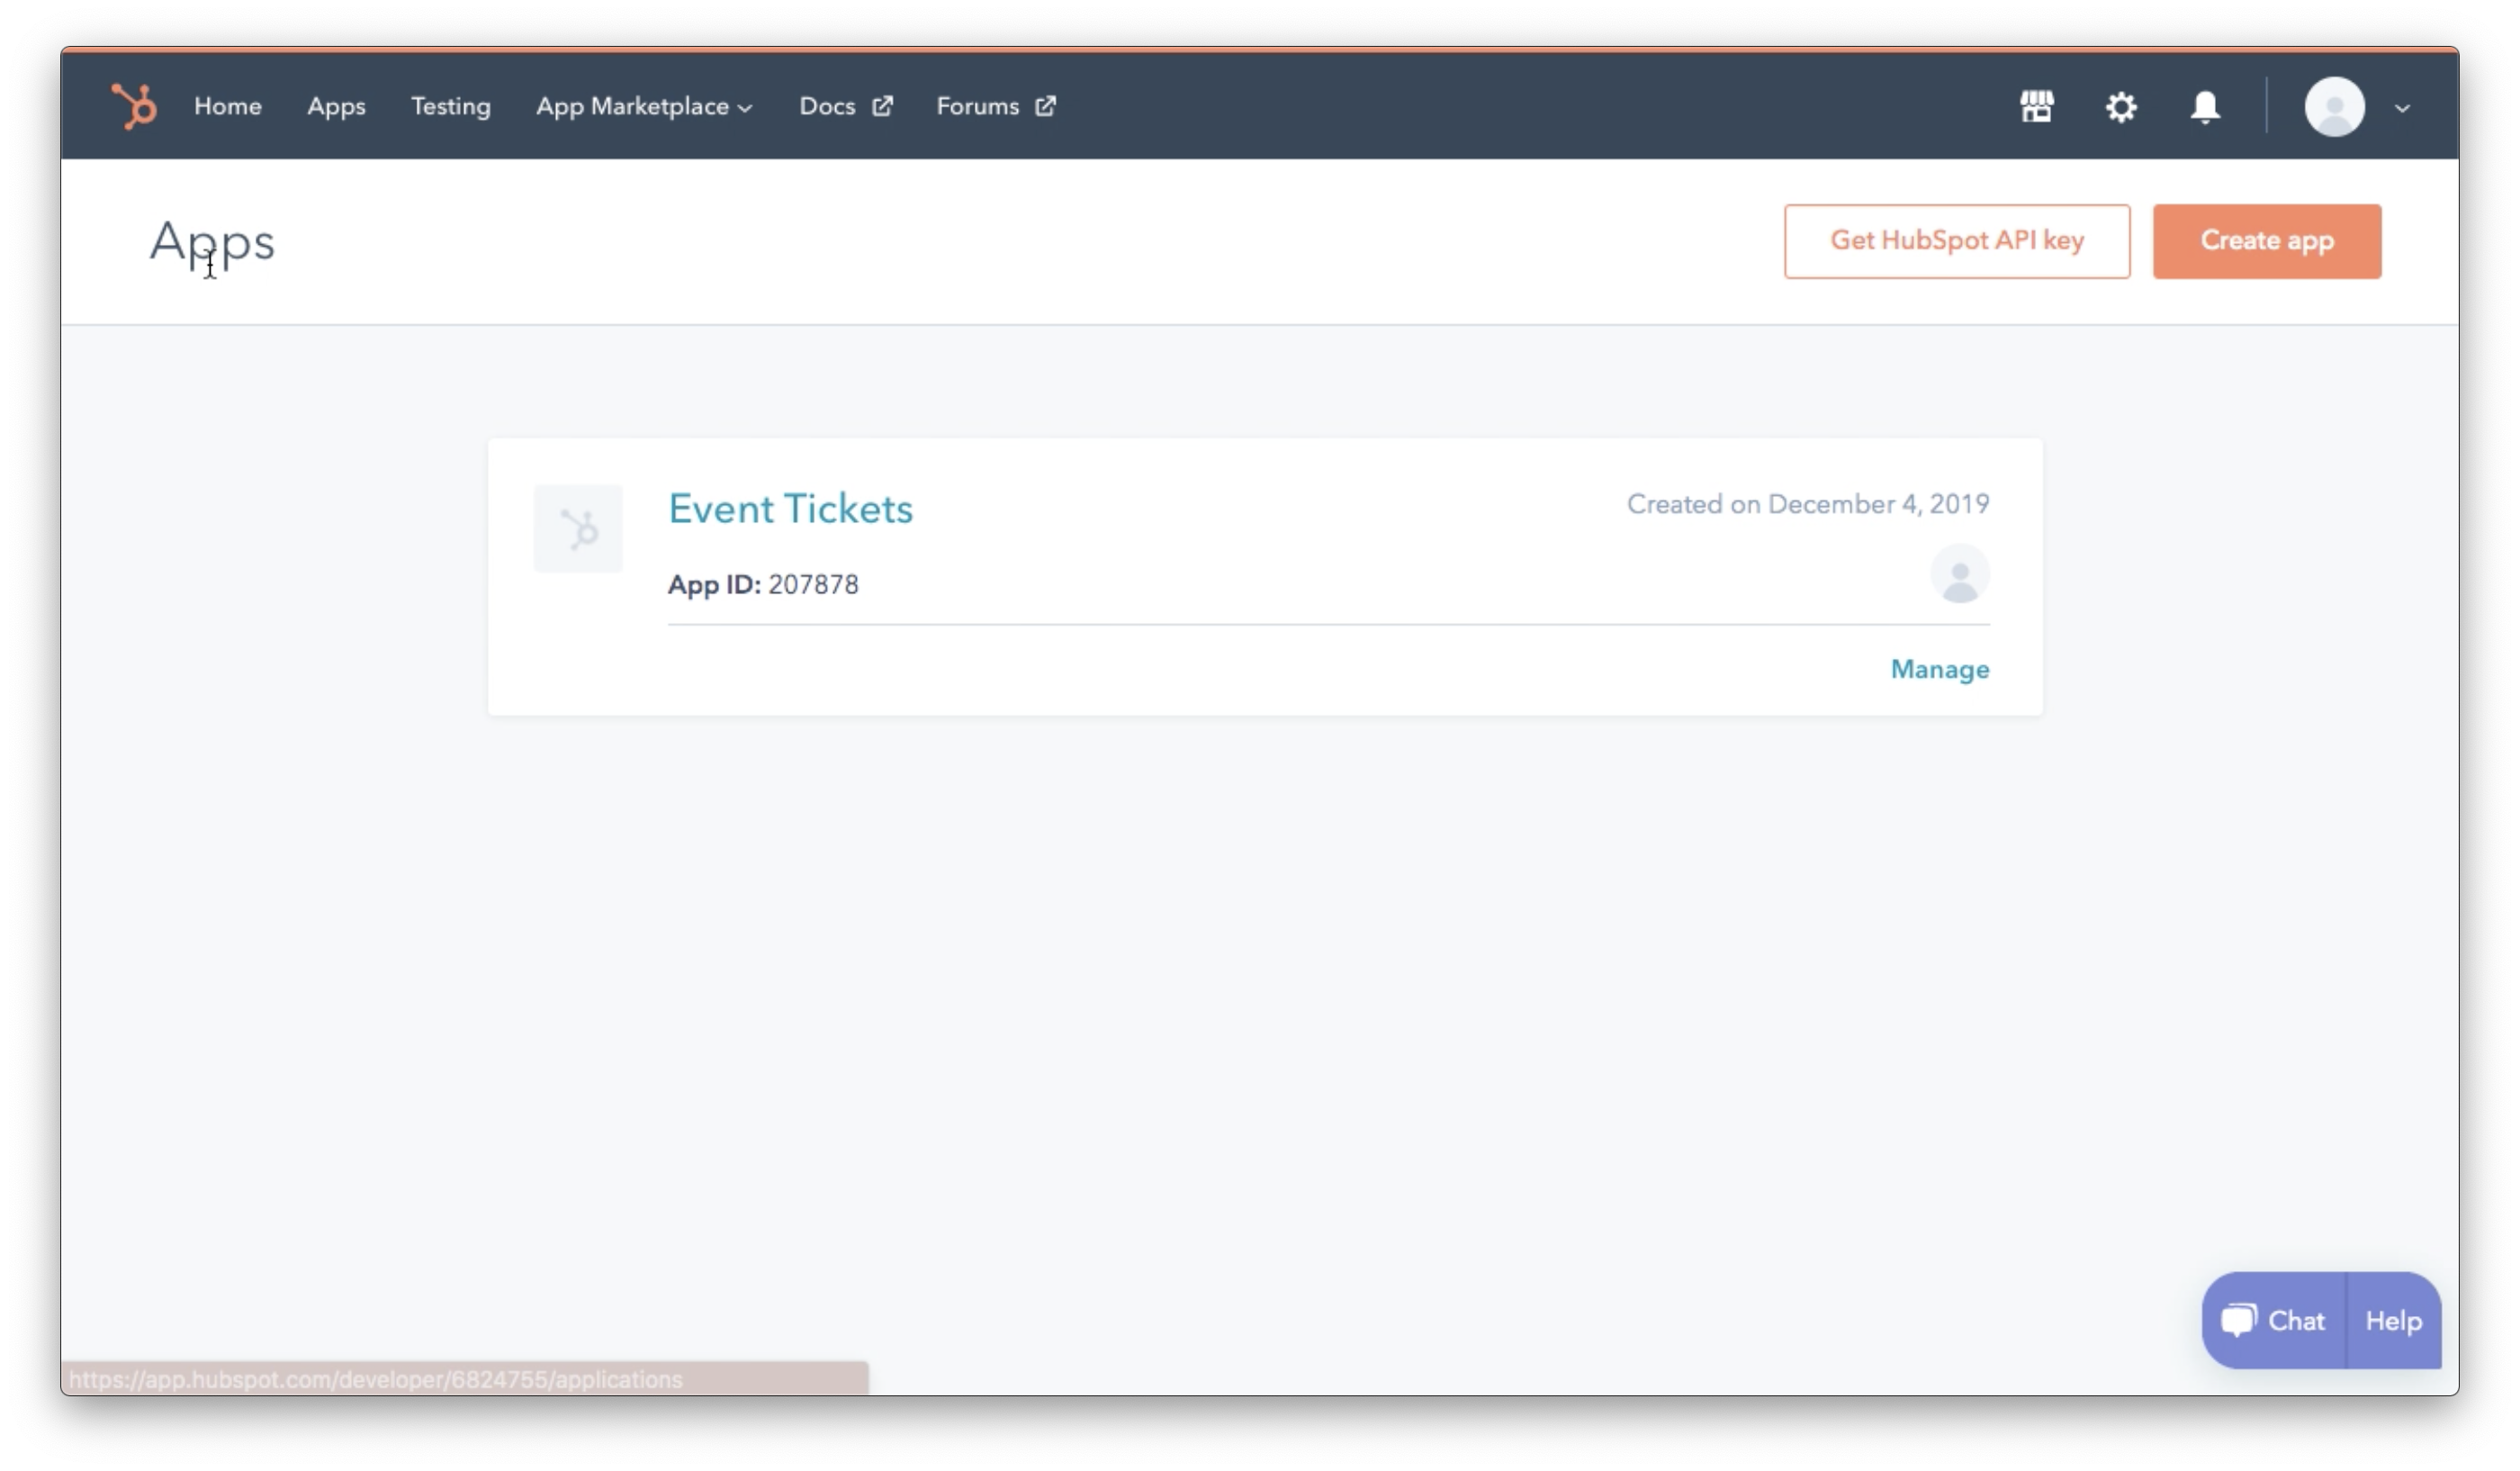
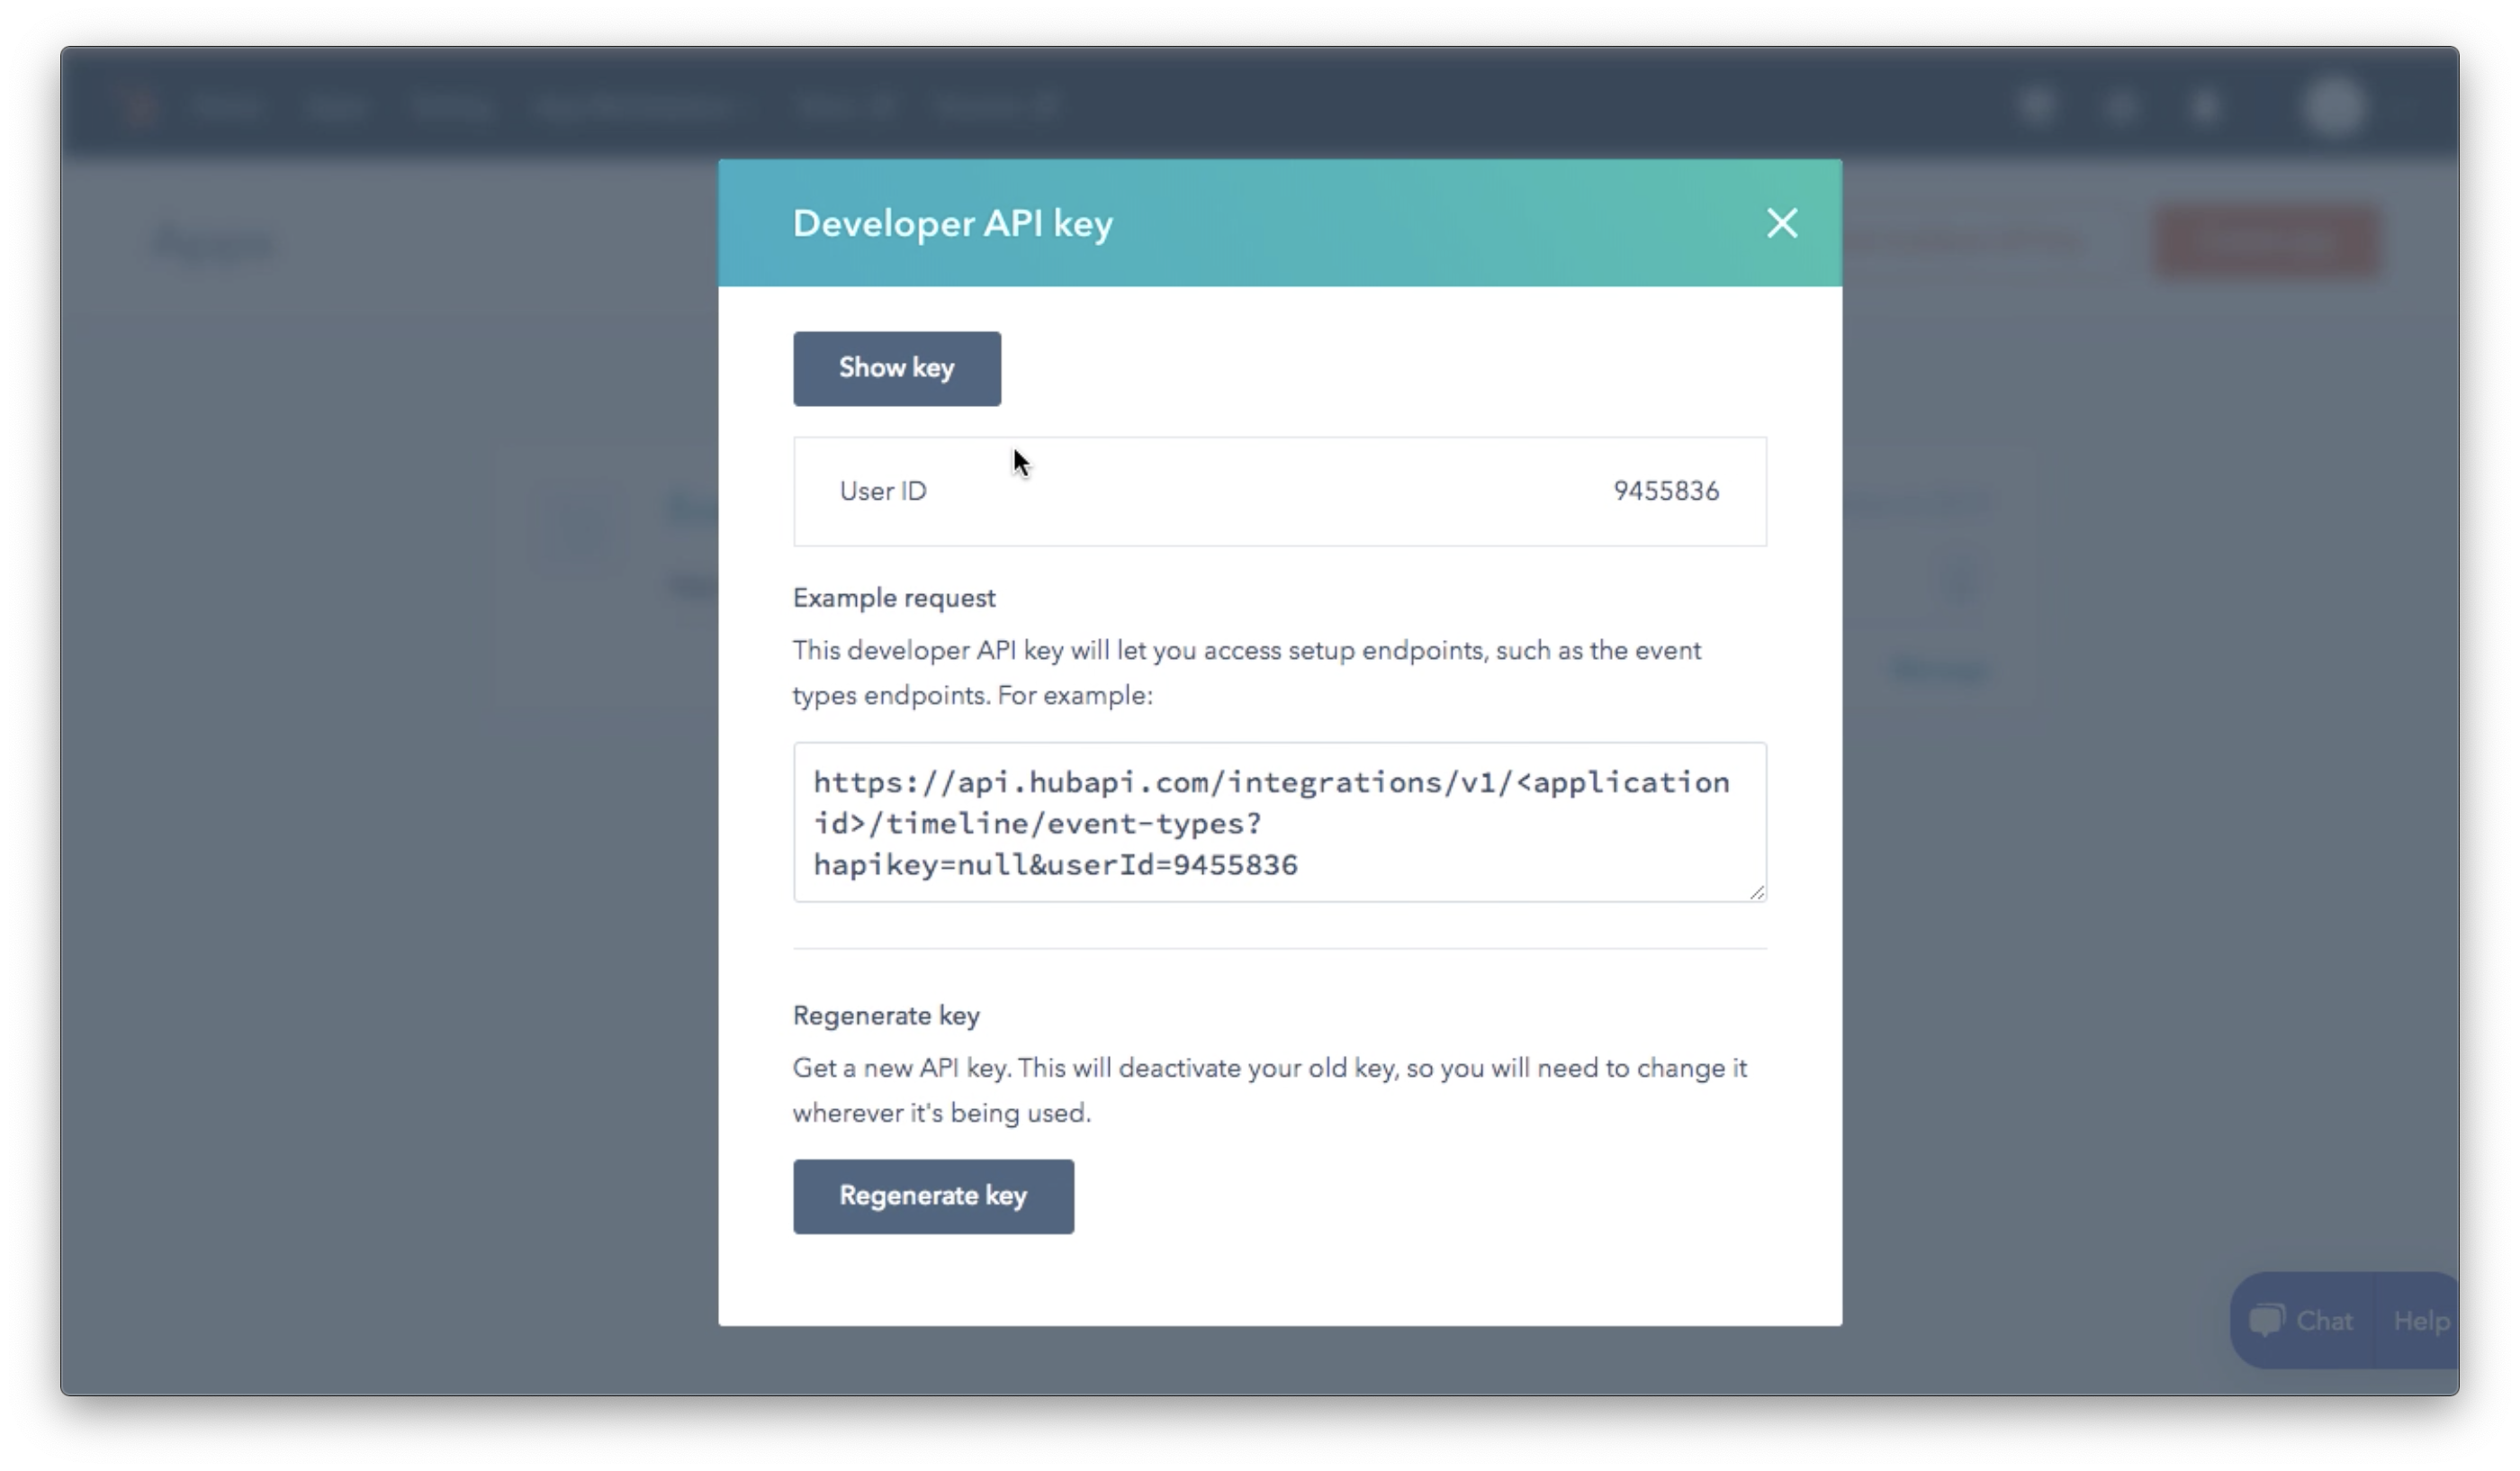
Click the “Get HubSpot API key” and a pop-up will display the information needed for the WordPress side of things.
Install the extension
Alright, the heavy lifting is done! Everything’s downhill from here. 🙂
Before installing the Event Tickets HubSpot extension, ensure that you have the latest versions of the following required plugins: The Events Calendar, Event Tickets and Event Tickets PLUS.
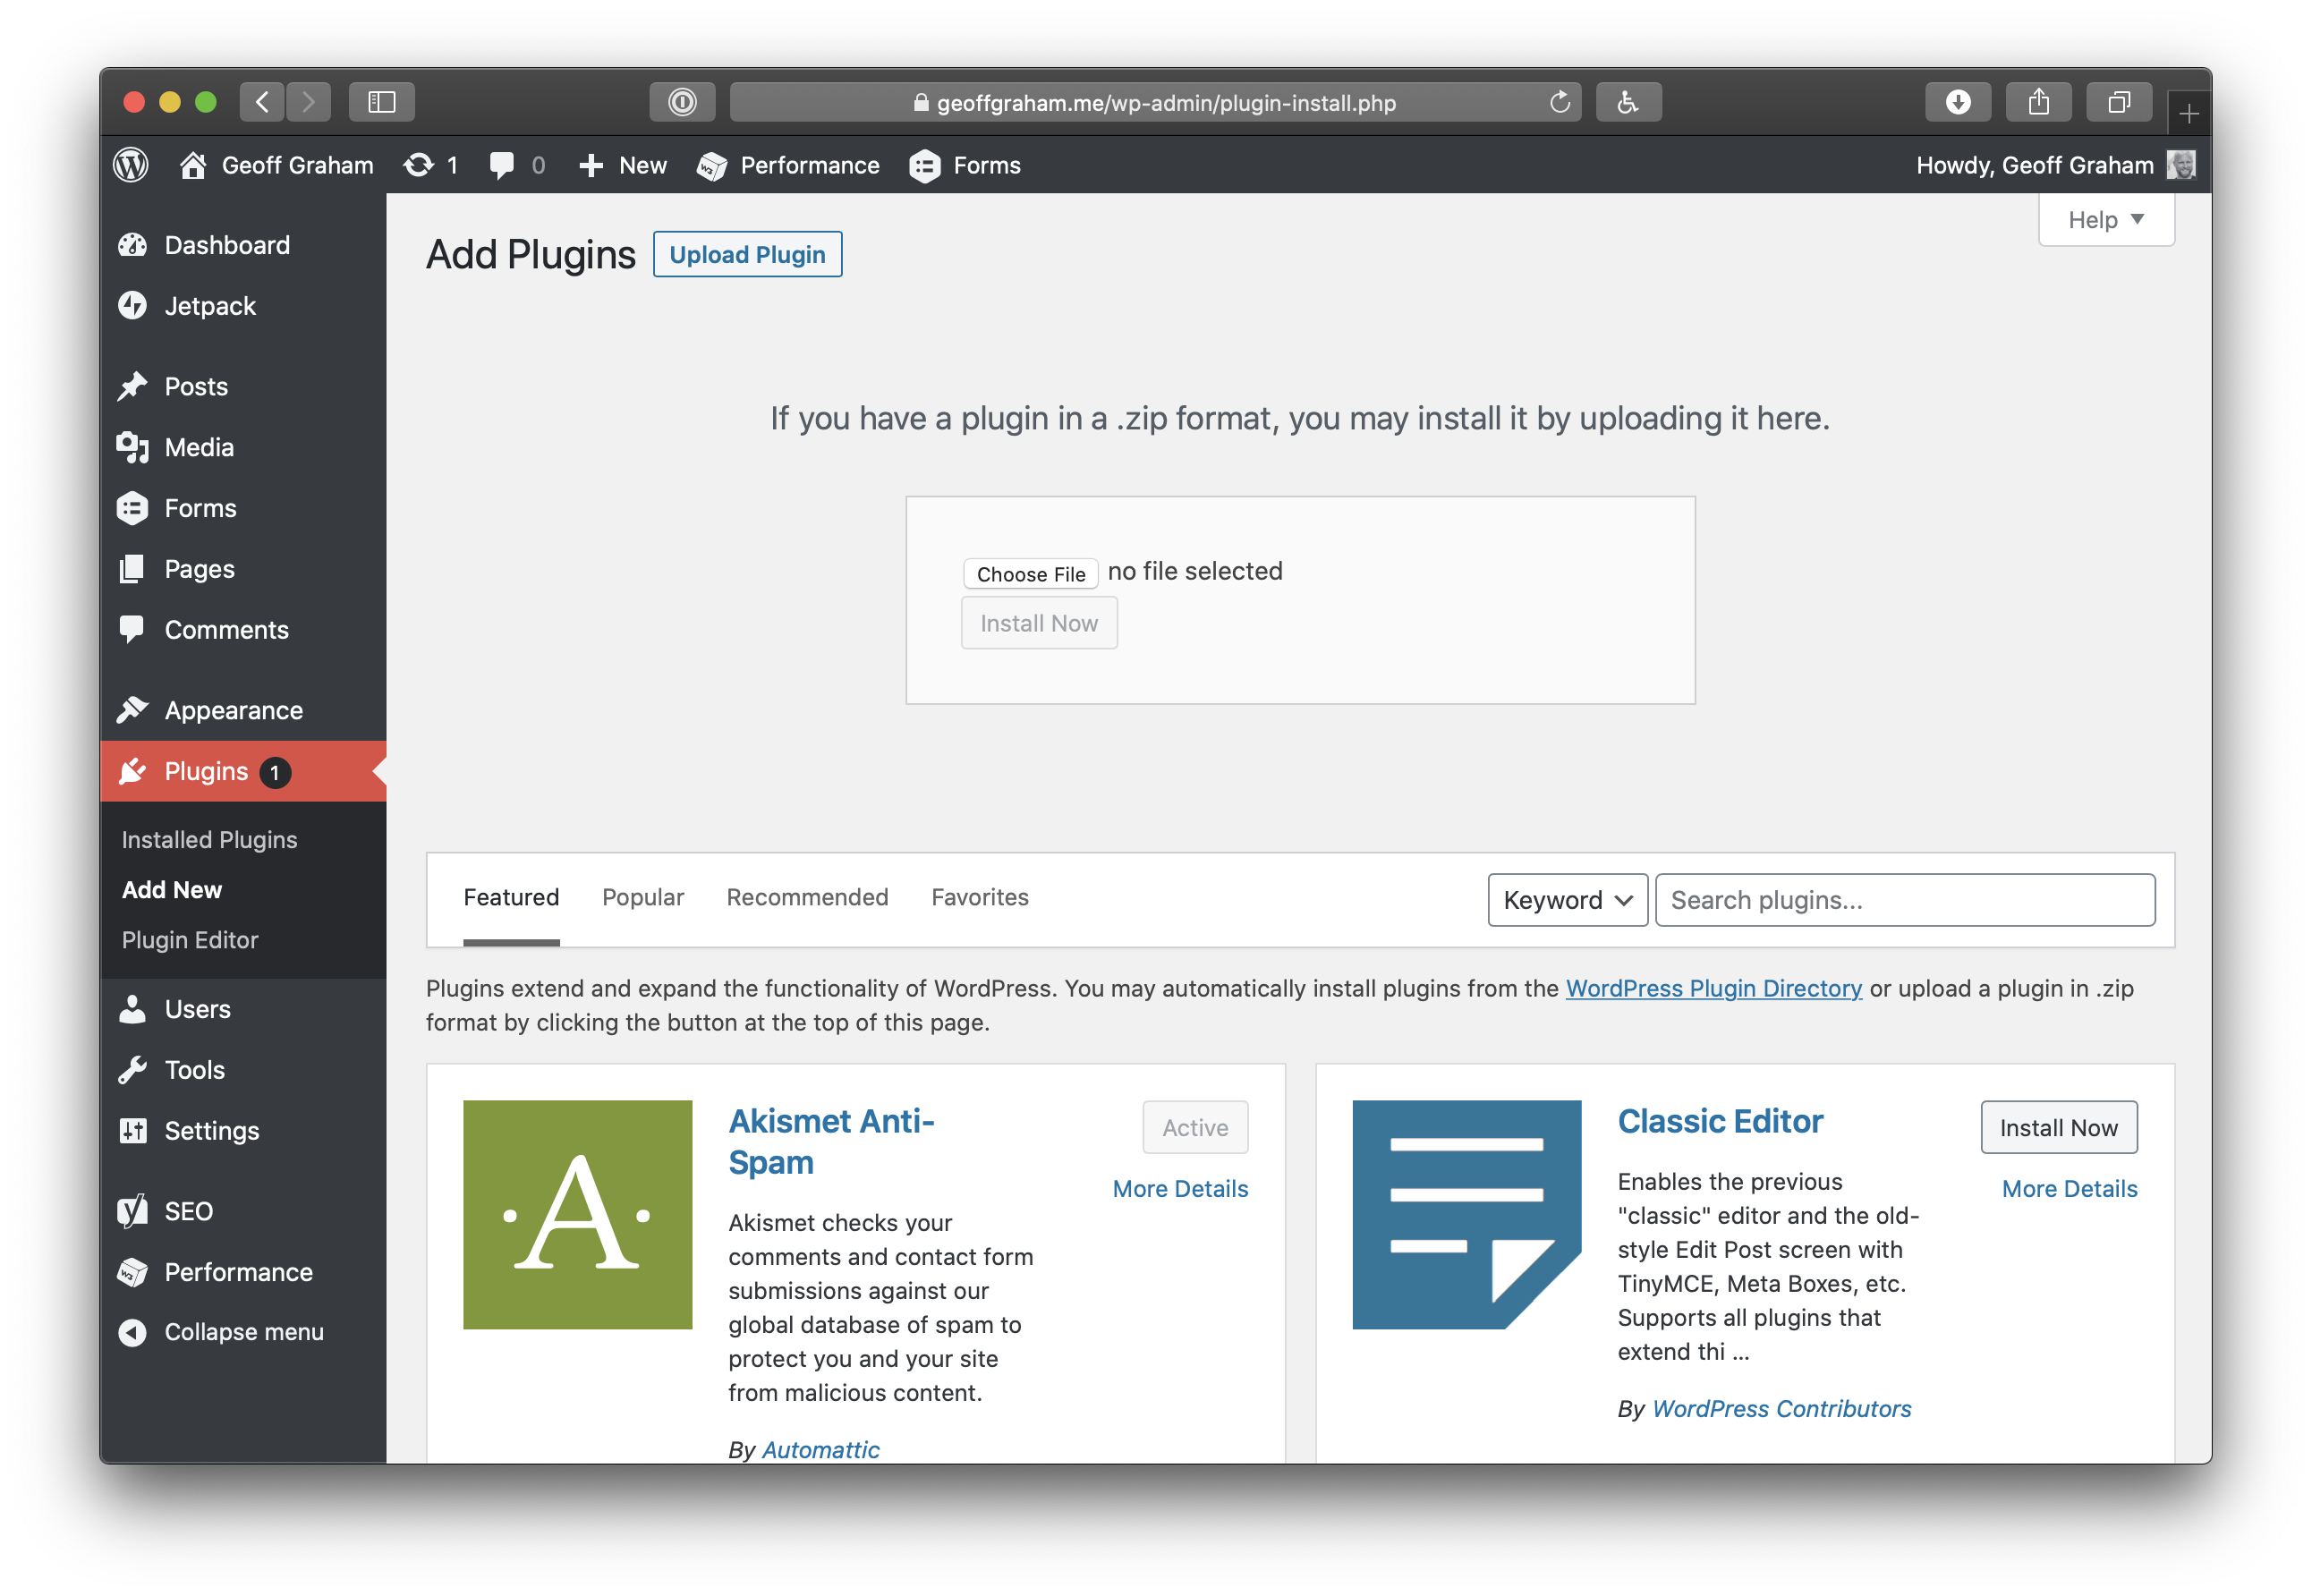
Head back over to WordPress and install the Event Tickets HubSpot extension. You can install it from the Plugins screen in your WordPress admin by clicking the “Add New” button at the top of the screen, followed by “Upload Plugin.”
Enter the API information
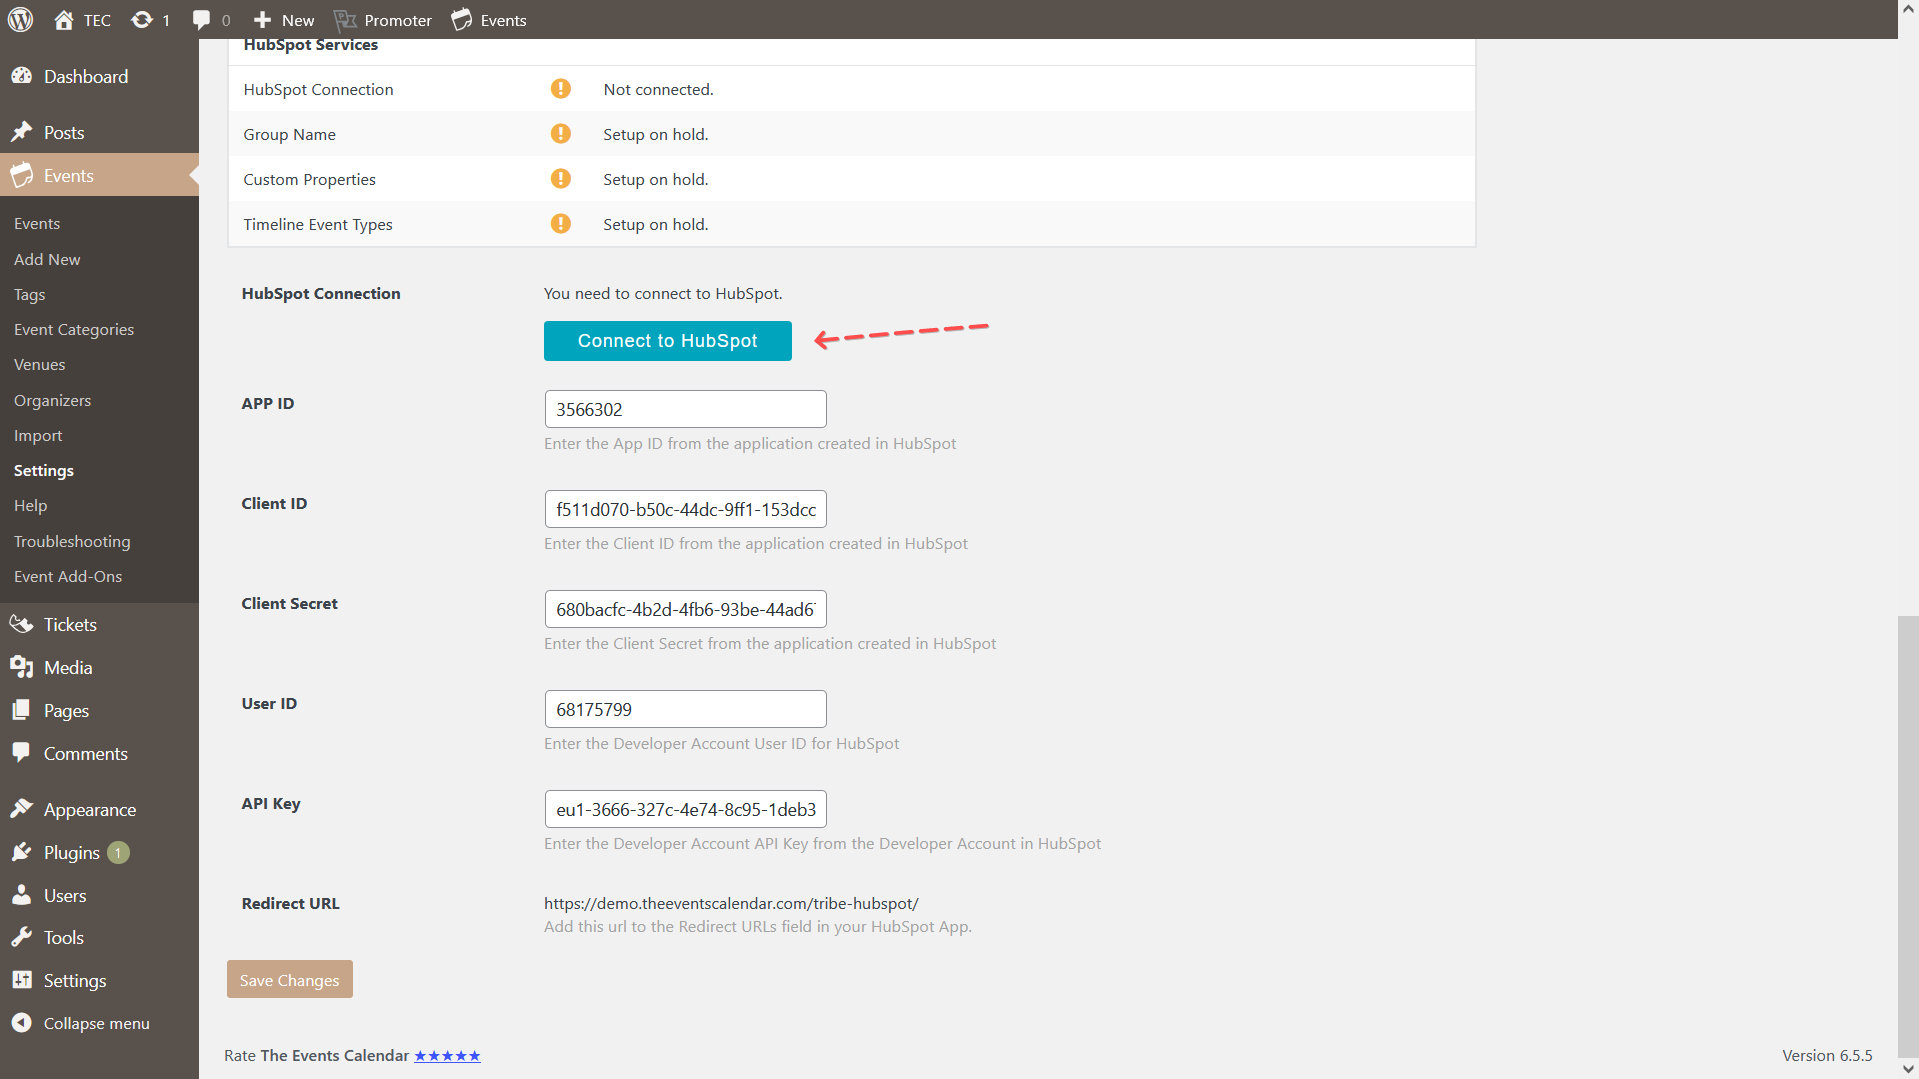
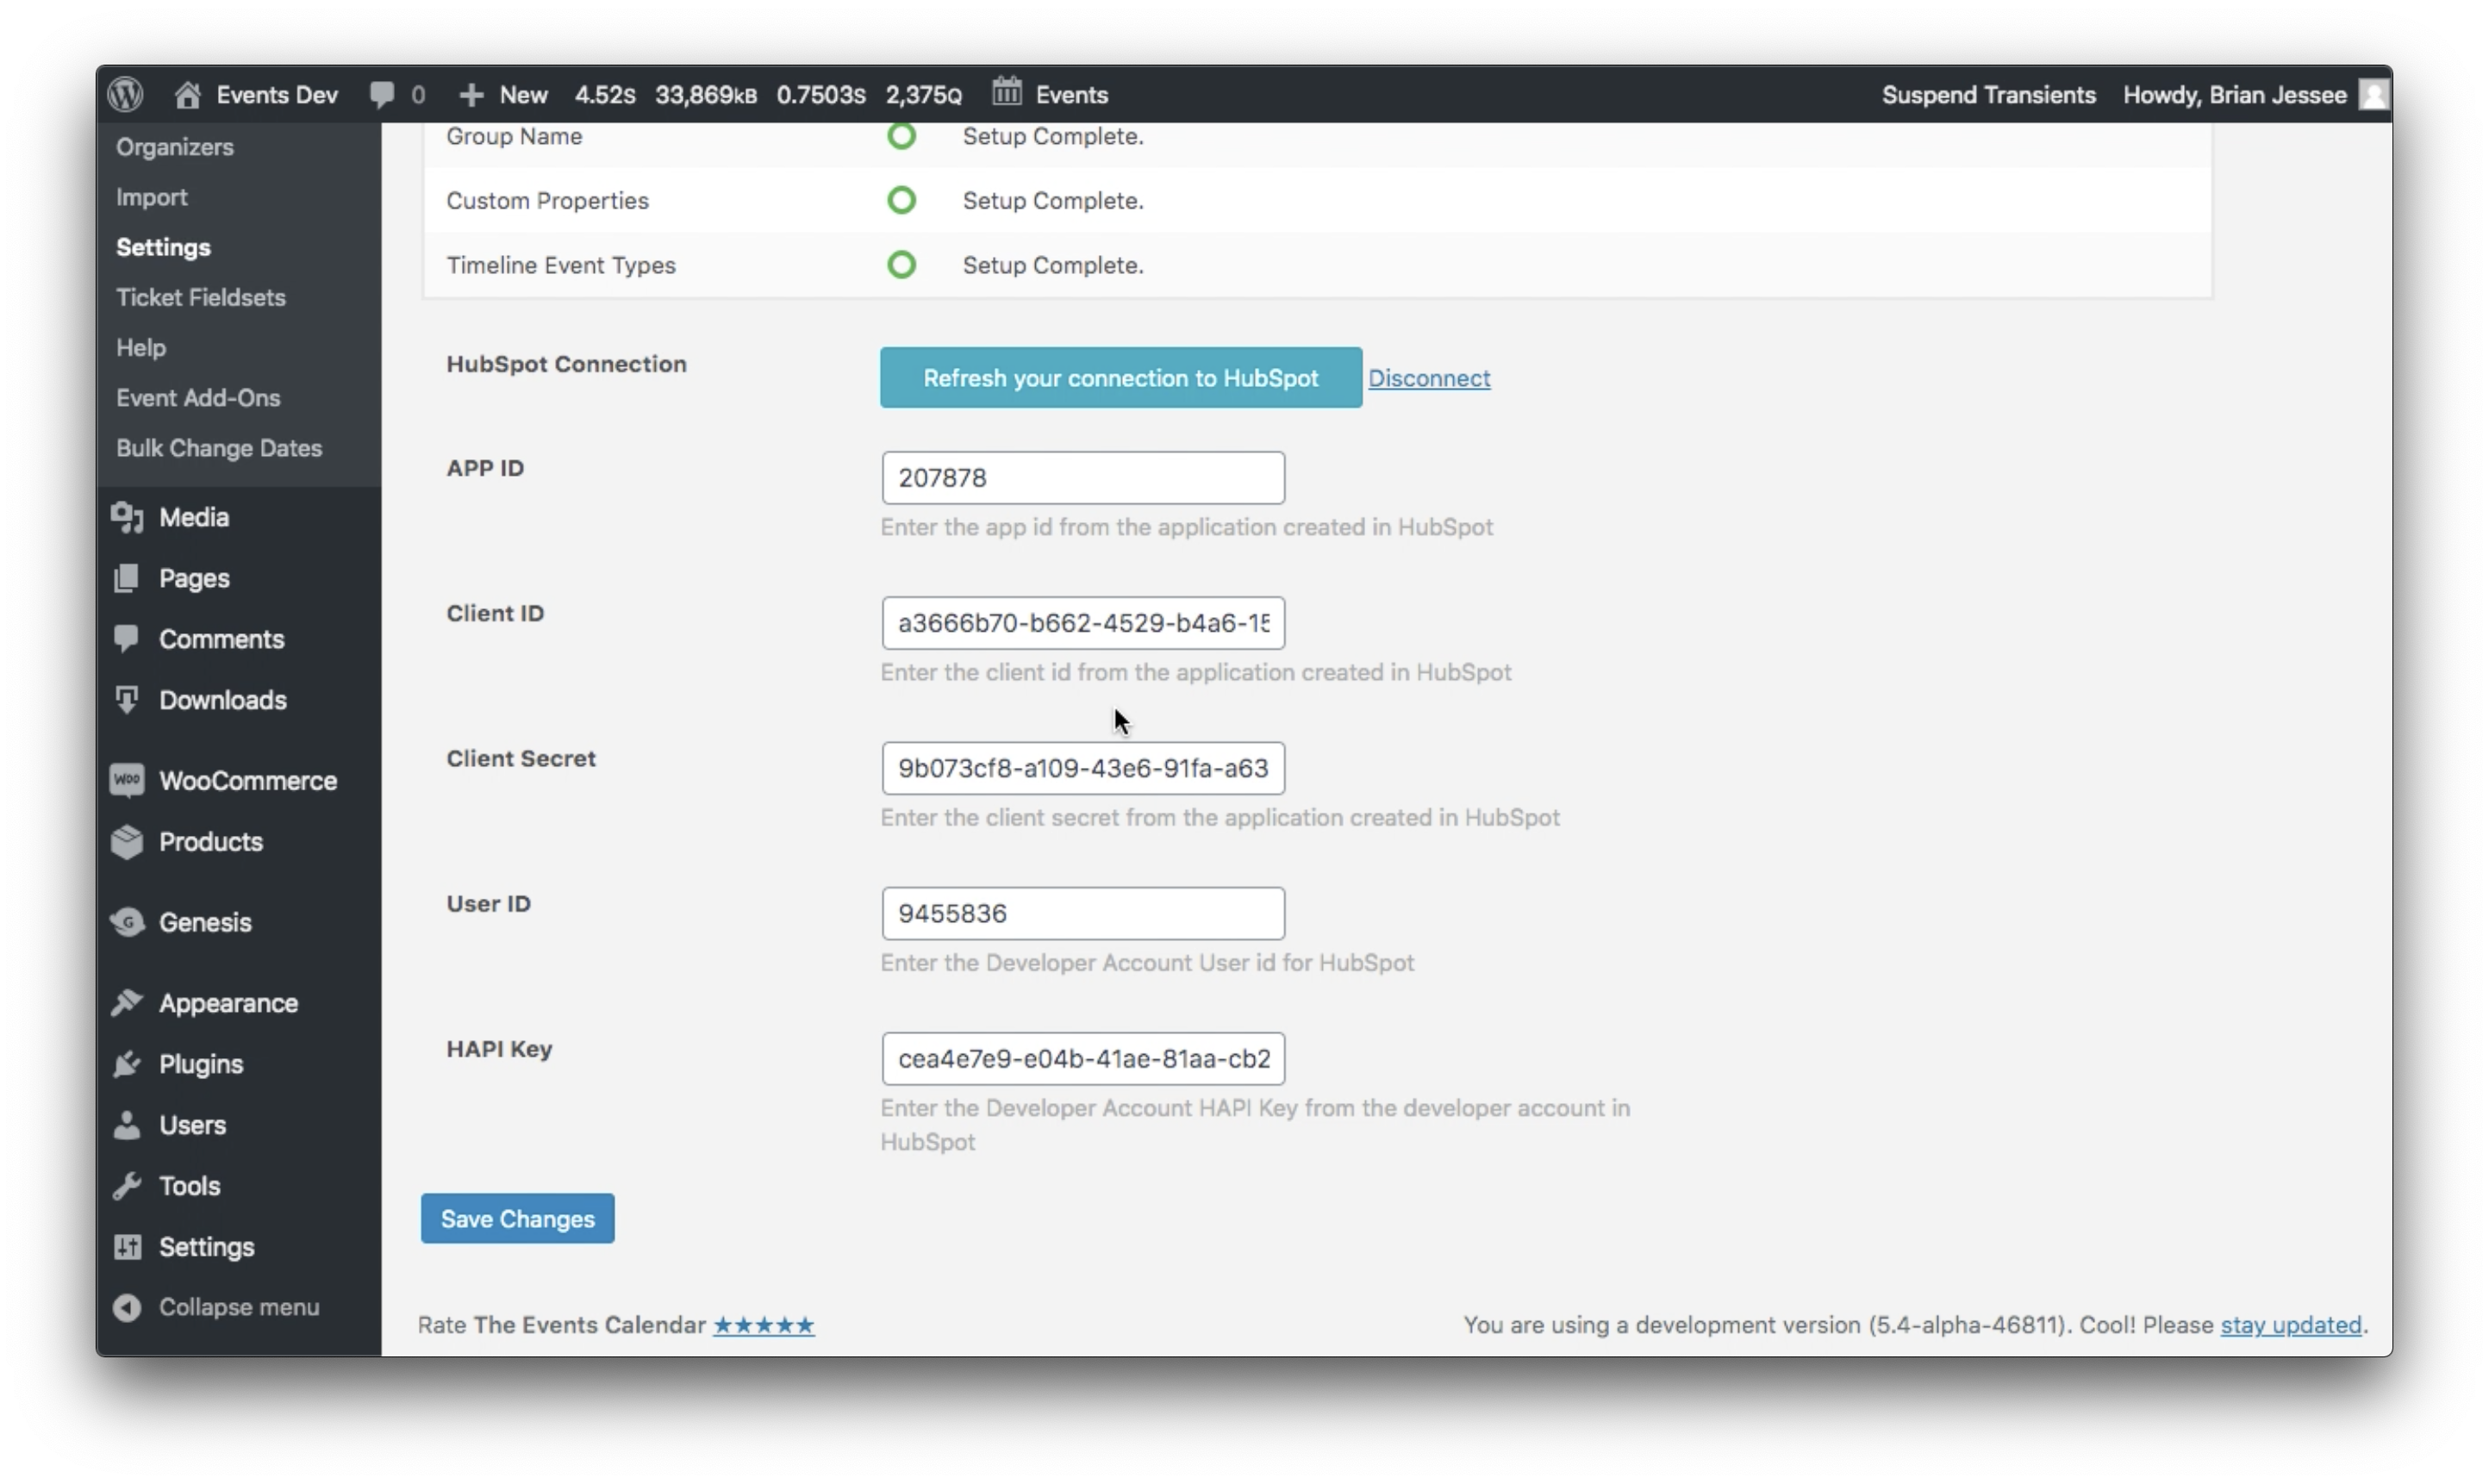
Once you’ve installed and activated the plugin, head over to Events → Settings → Integrations. This is where the API information from HubSpot will be entered.
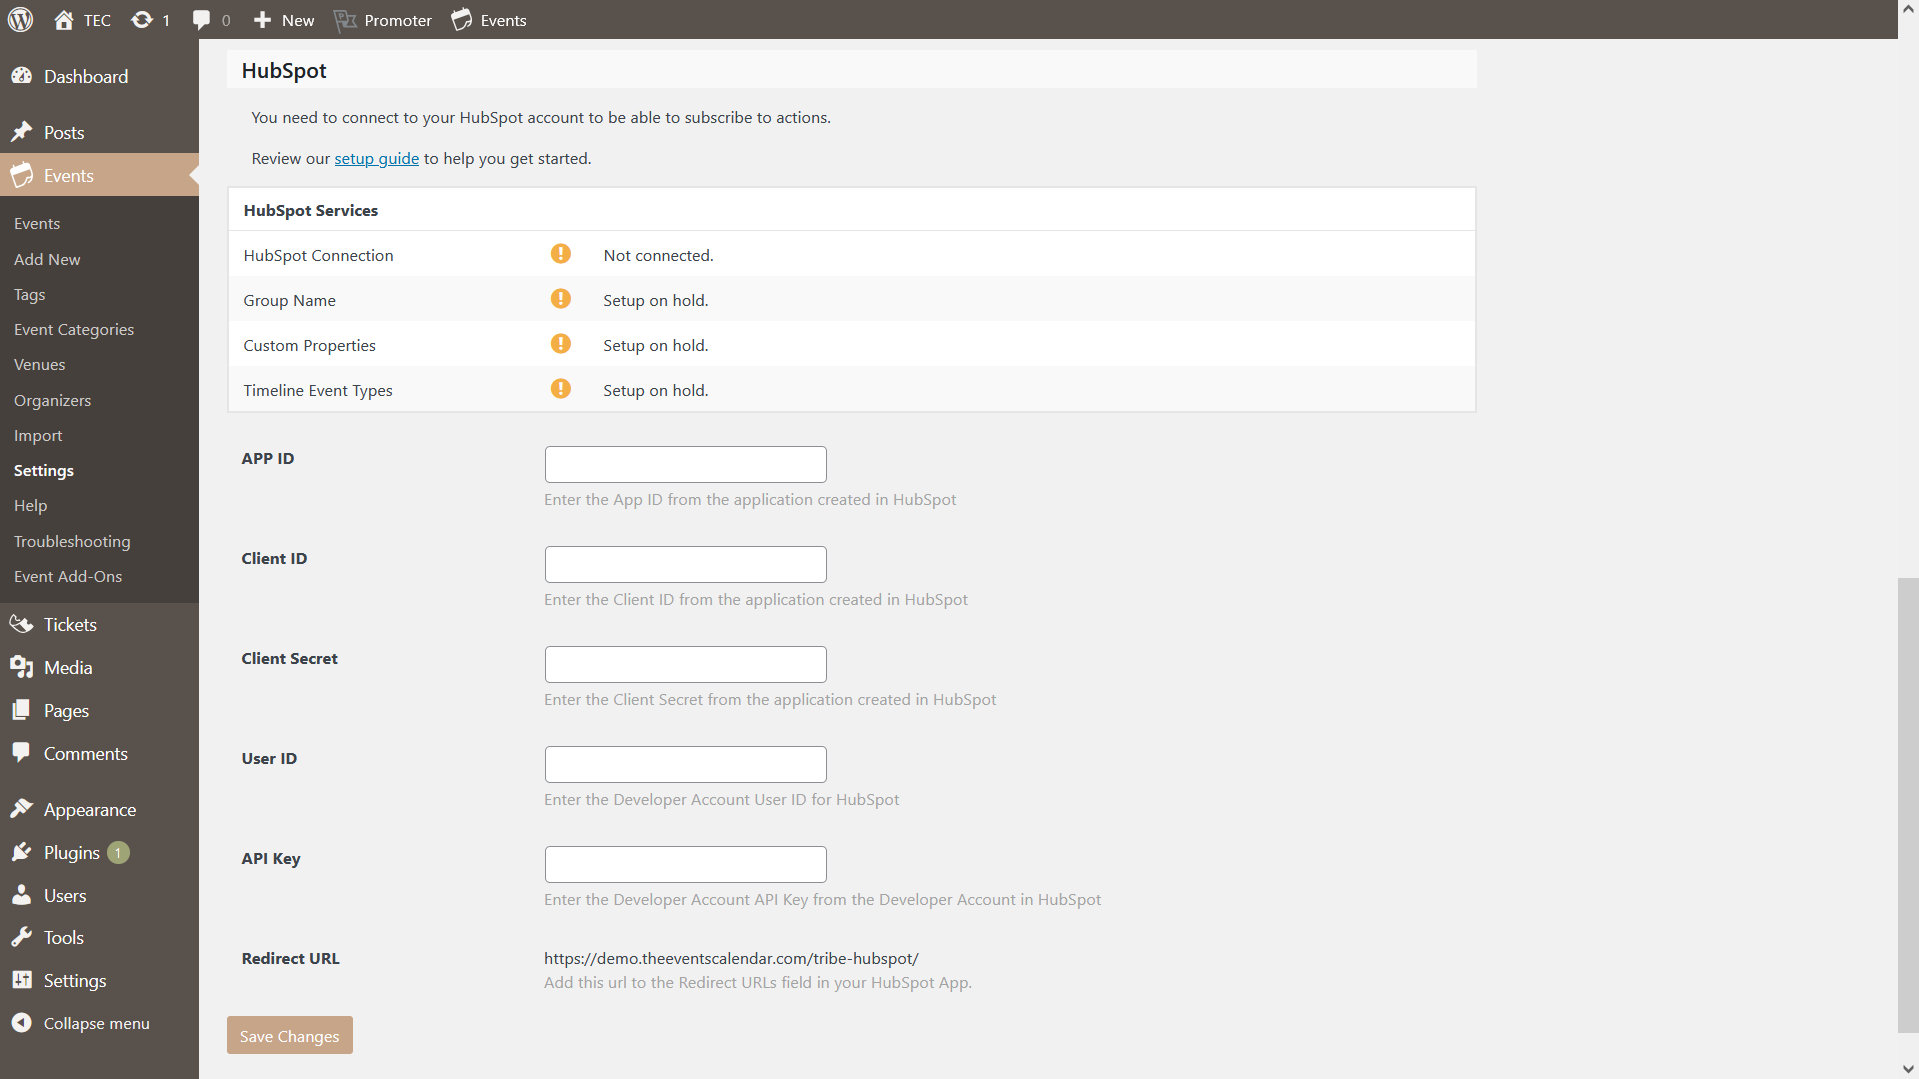
- App ID: This is located in the Auth section of the app’s settings in HubSpot.
- Client ID: This is located in the Auth section of the app’s settings in HubSpot.
- Client Secret: This is located in the Auth section of the app’s settings in HubSpot.
- User ID: This is your account number, and it is located with the app’s API key. You can find it by clicking on “Get HubSpot API Key” on the Apps page.
- API Key: This is the “API key” in the HubSpot account. You can find it by clicking on “Get HubSpot API Key” on the Apps page.
- Redirect URL: This is the URL you will need to copy to the HubSpot app. See below.
⚠️ The information you enter in these fields should be considered sensitive. Avoid sharing with others.
New since version 1.0.3
Due to a change in HubSpot requirements, apps are required to set a Redirect URL in order to create or update an app. Copy the Redirect URL from the extension settings and paste it on the “Auth” tab of your HubSpot app and save the changes.

Once you hit the “Save Changes” button at the bottom of the extensions API settings in WordPress, a button will display at the top of those settings that will connect WordPress with your HubSpot account.
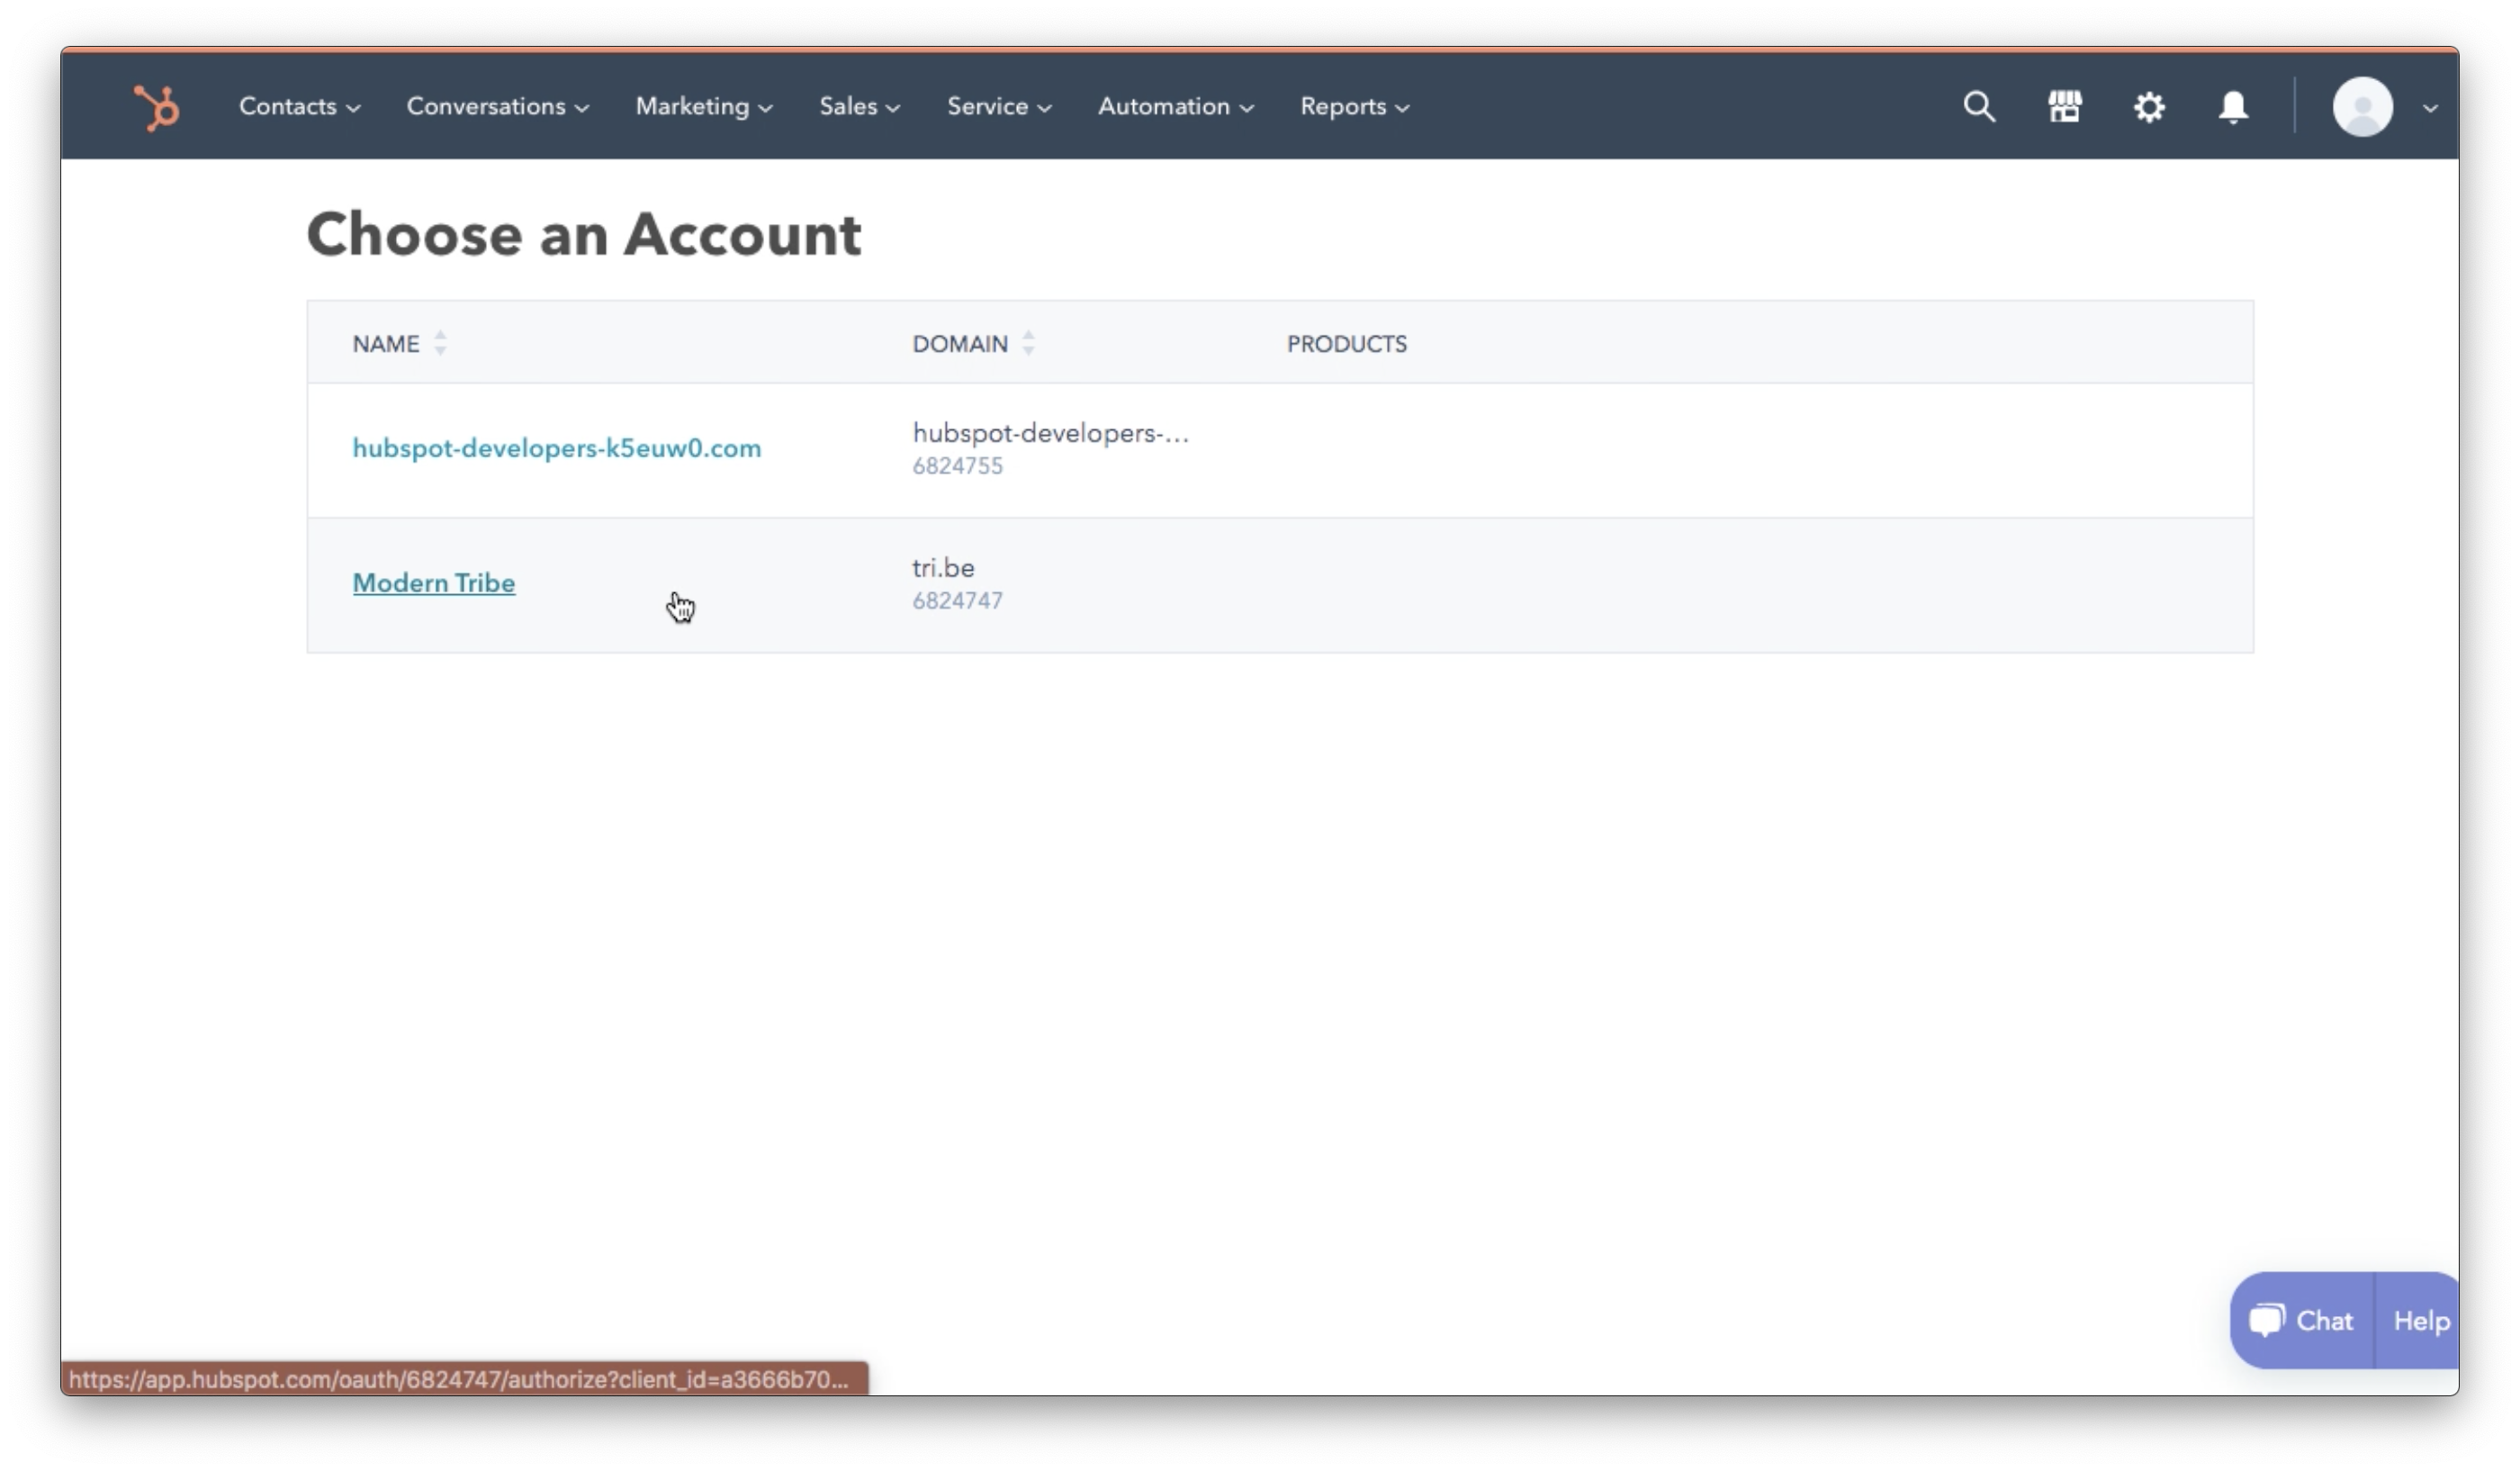
Clicking the button will redirect you to HubSpot, where you will be asked what account you want to connect. You have a regular account and a developer account. Select the regular account.
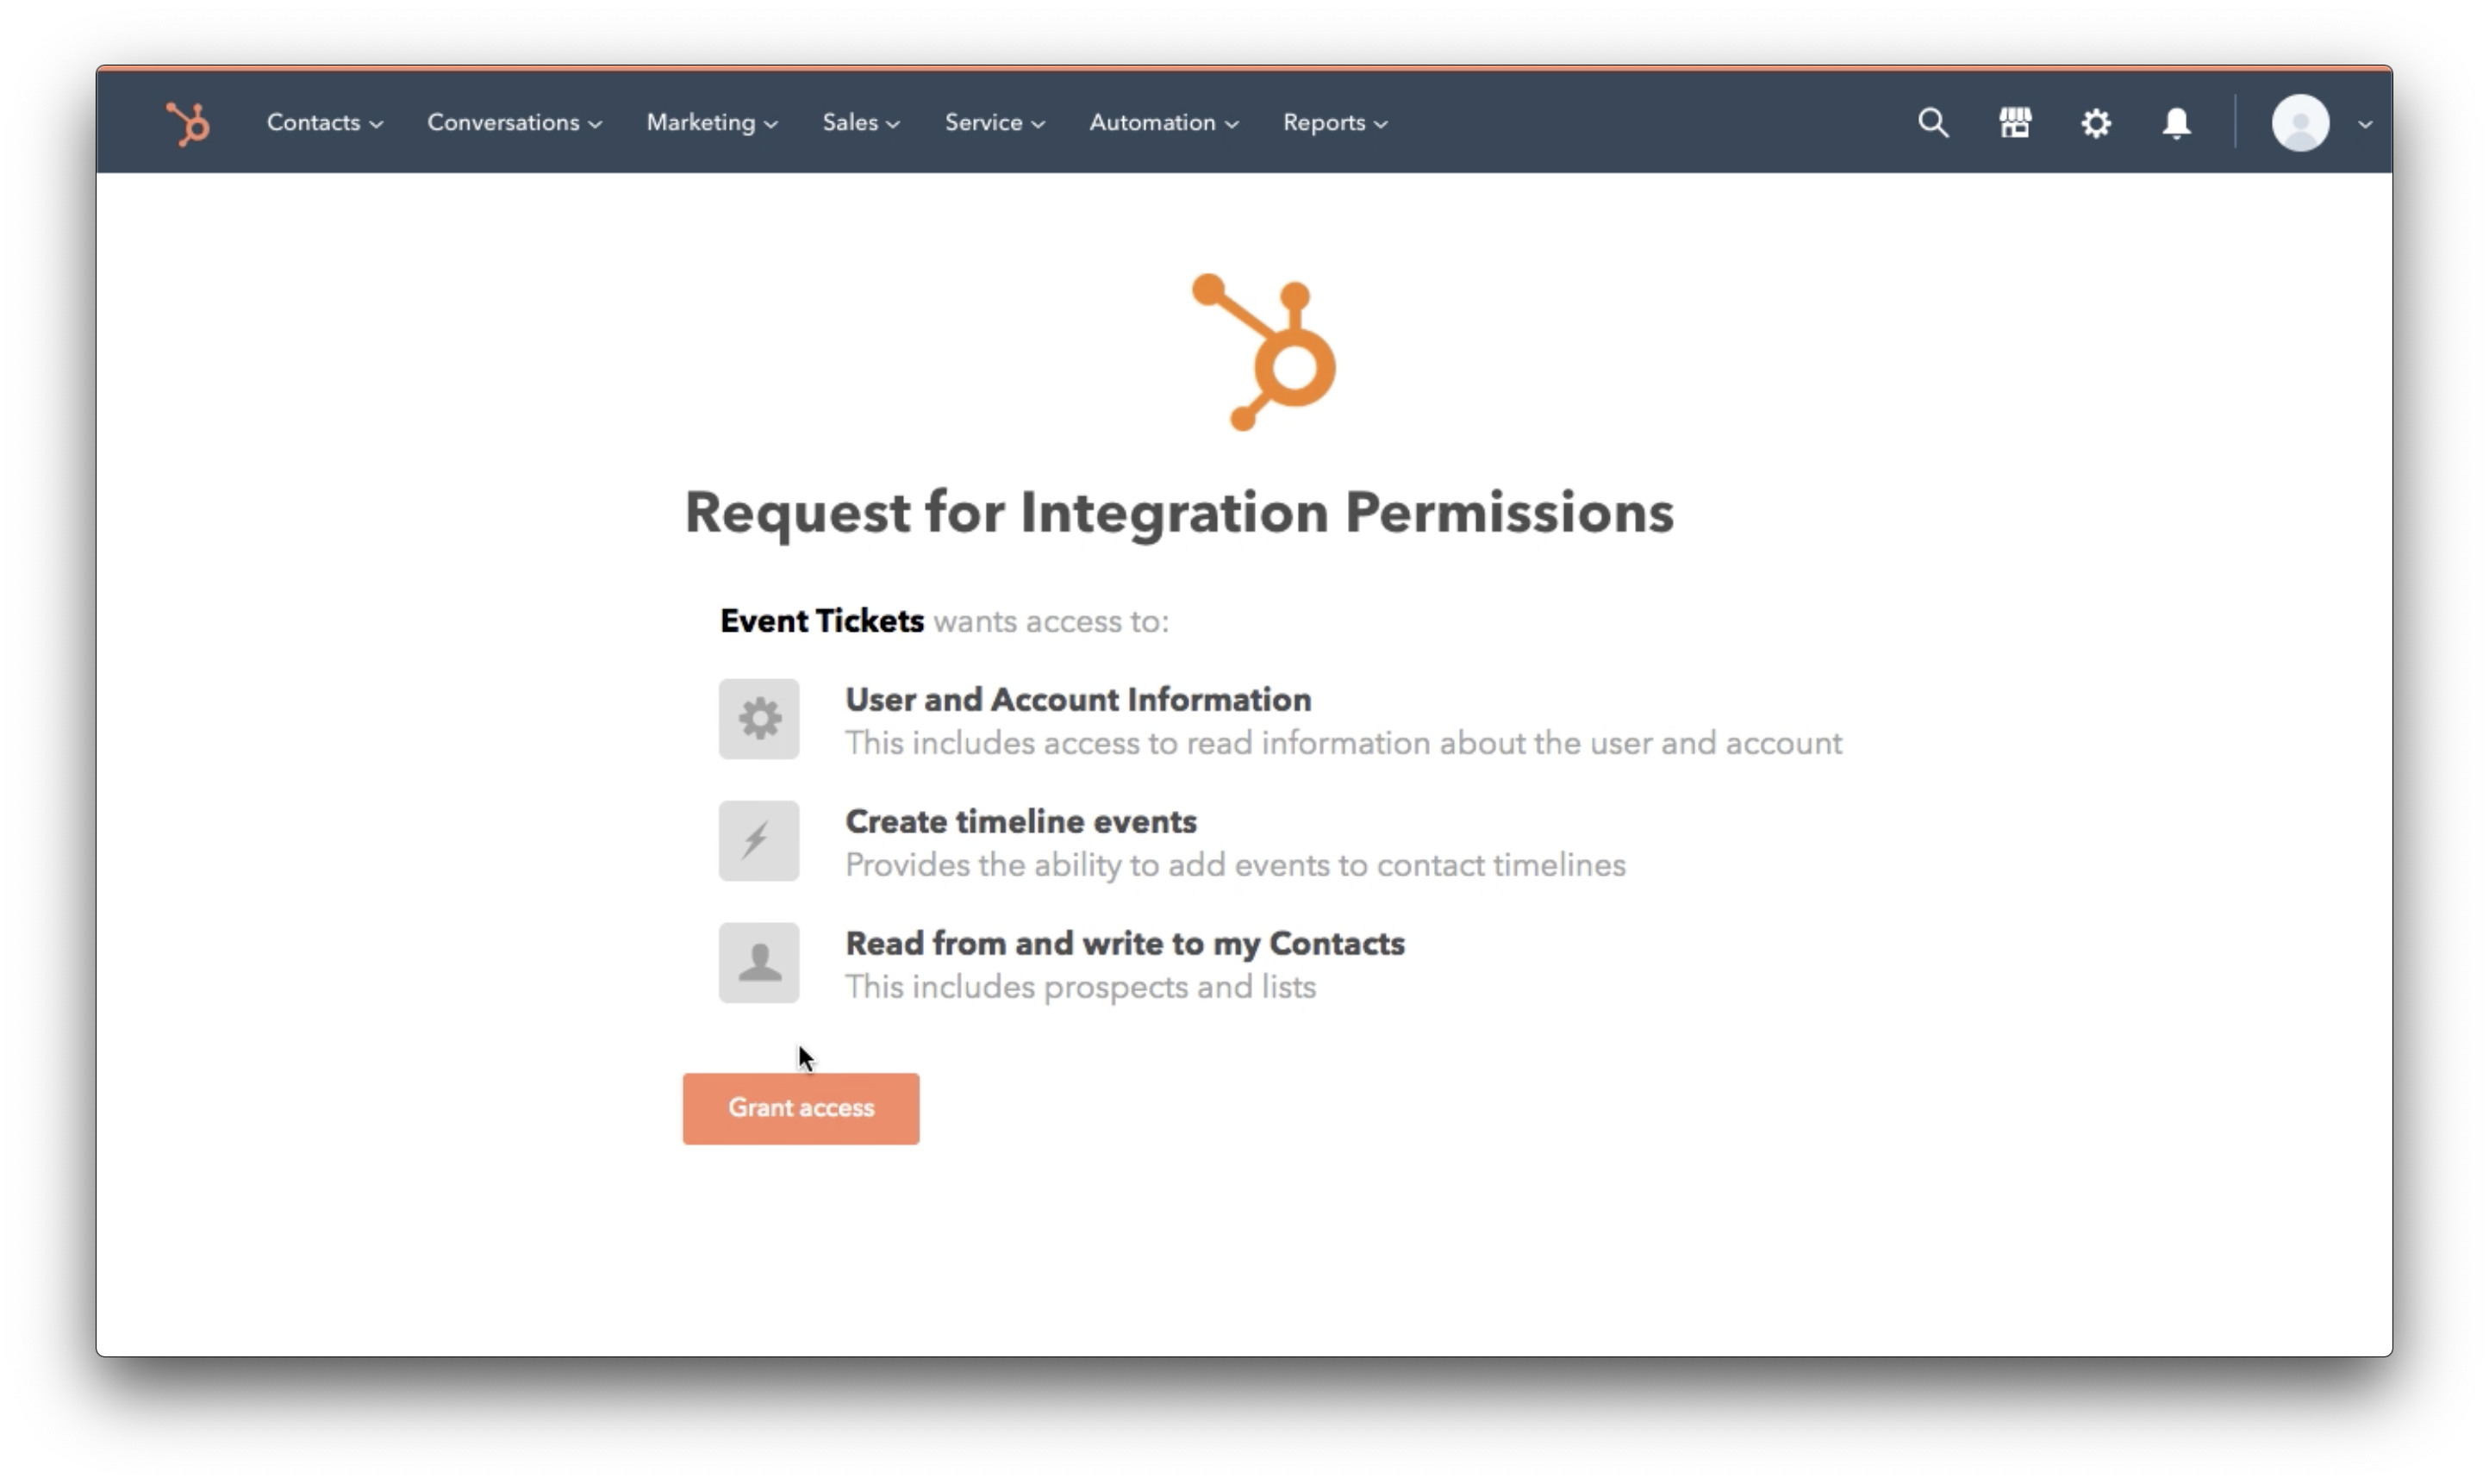
Next, grant access to your HubSpot account.
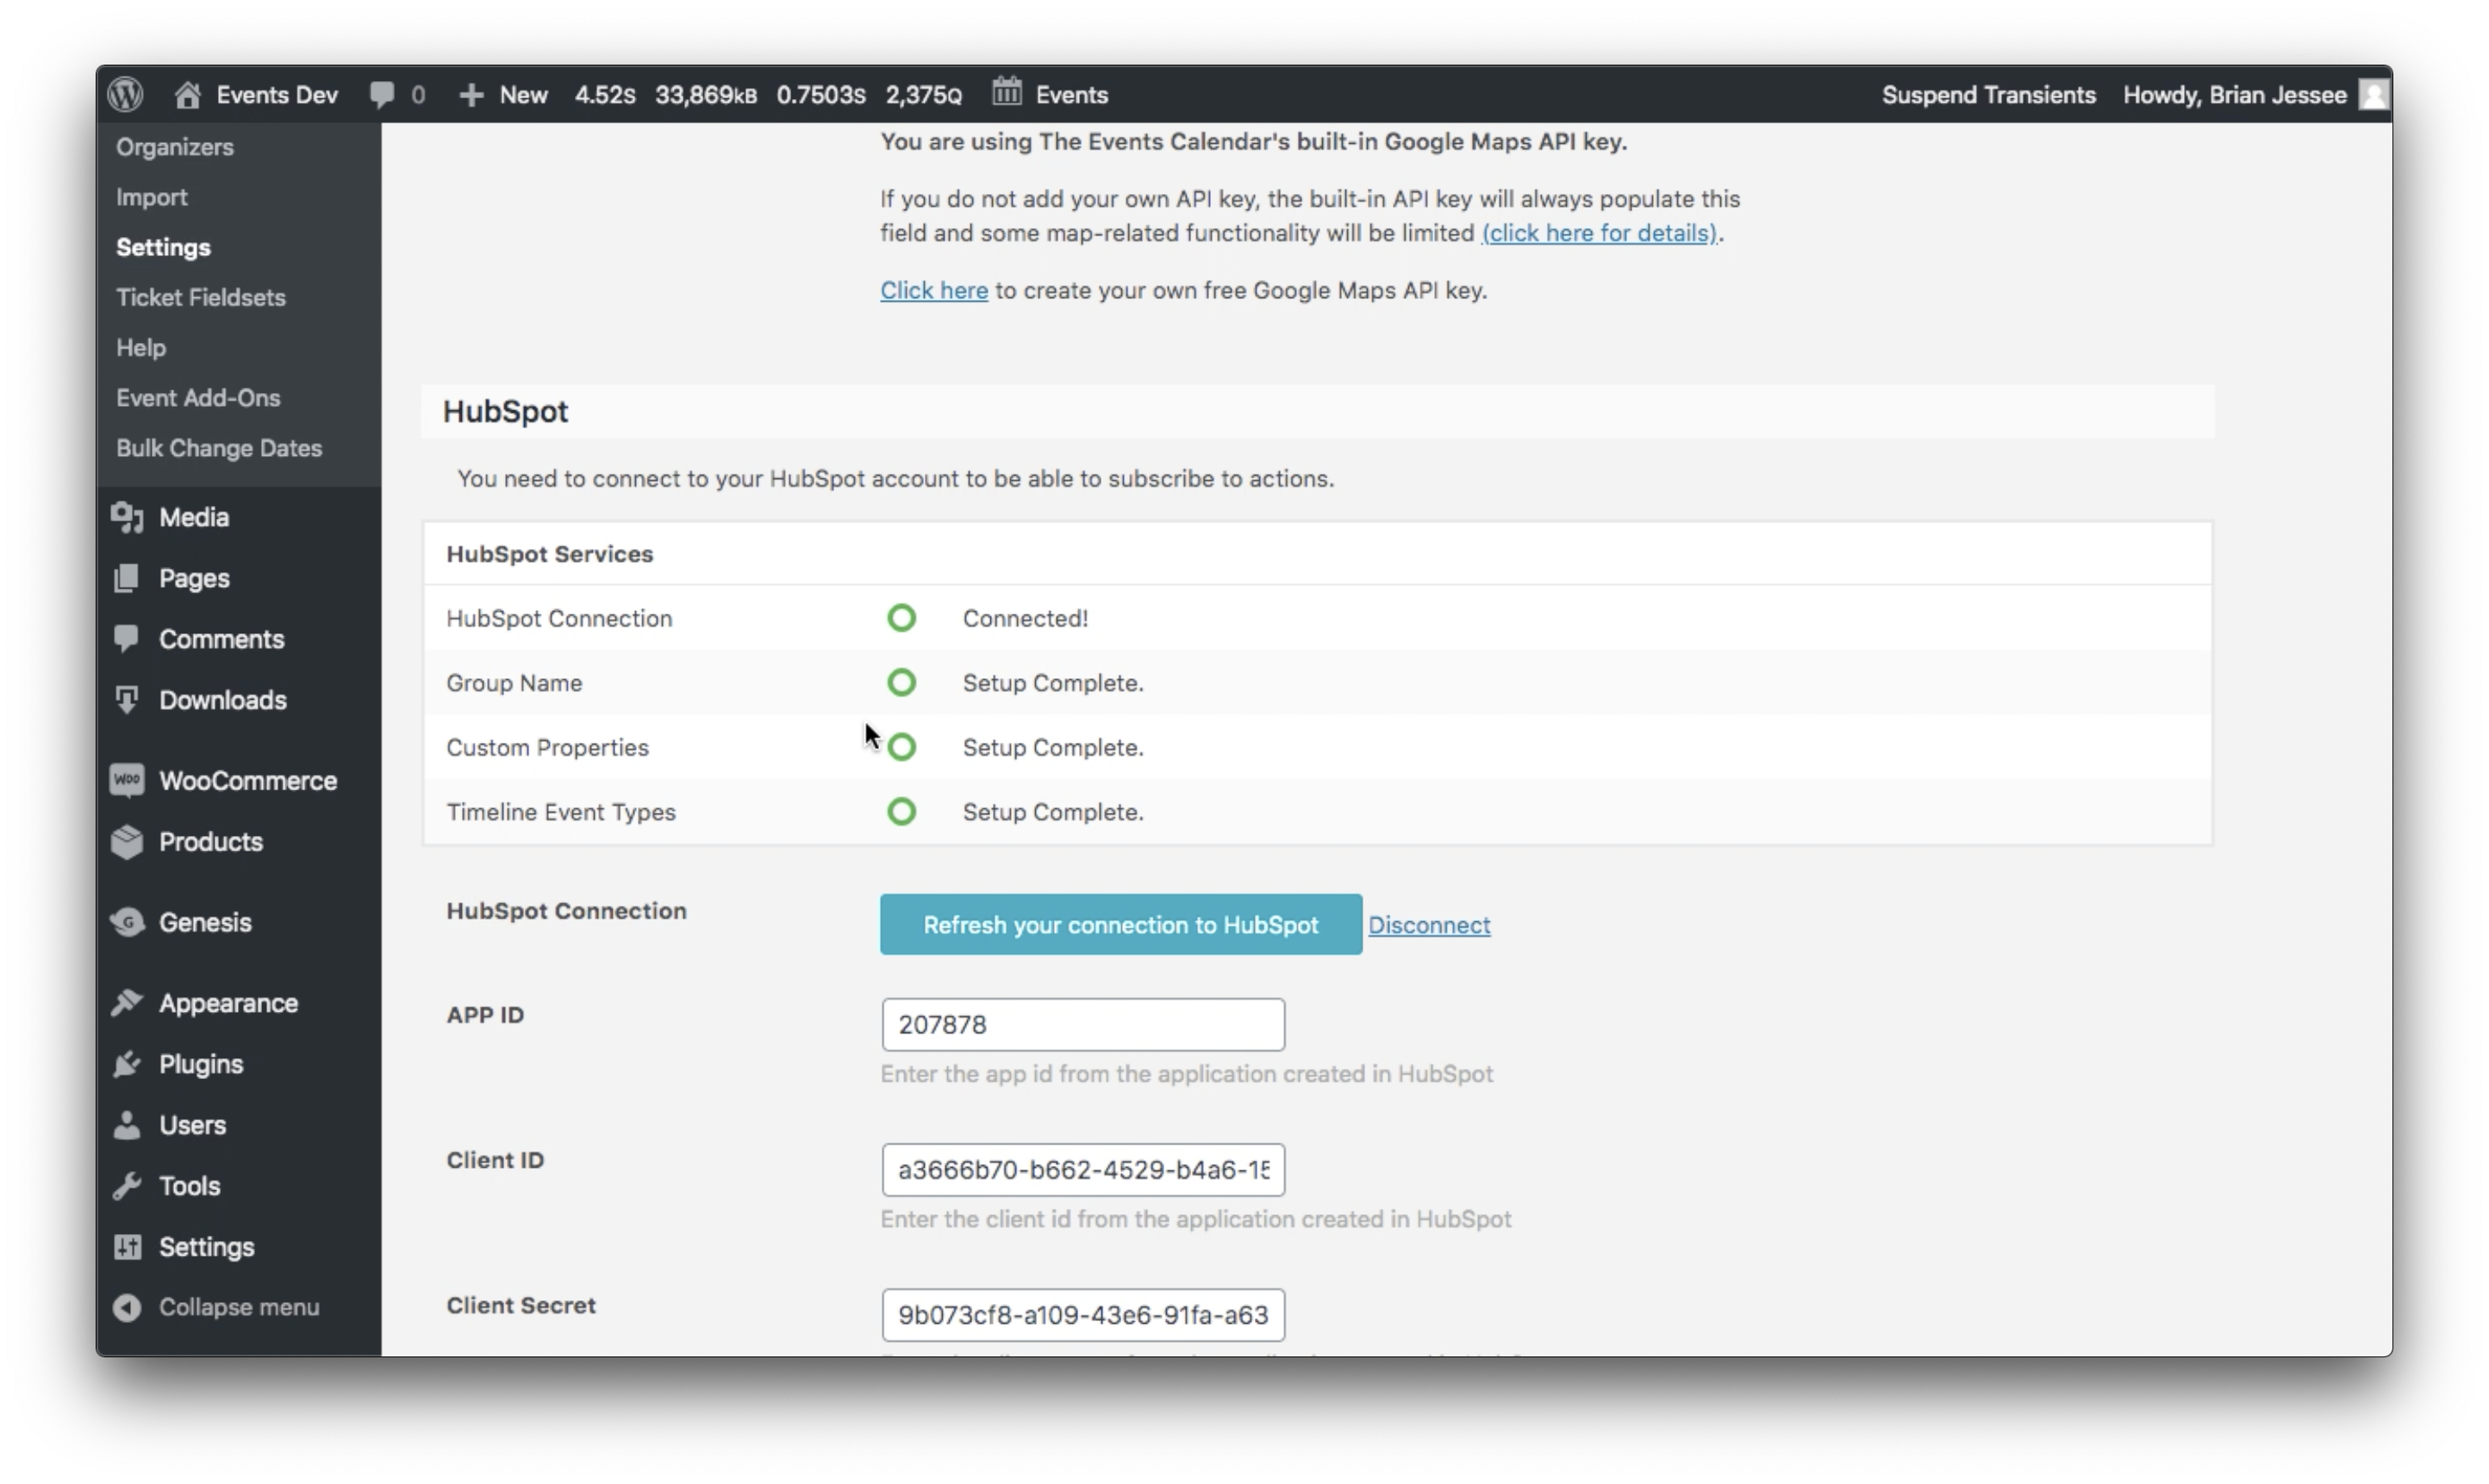
Once you grant access, you will be redirected back to the WordPress API settings screen. You will see that your app has successfully been connected to HubSpot.
Accesing Attendees data in HubSpot
You will notice that the contacts data isn’t available in the main contacts list, aside from the default properties like Name and Email. Here’s how you can access and display this information:
Explore the available properties
- Navigate to CRM Contacts: Go to your HubSpot account and select the “Contacts” section from the main menu.
- View Contact Properties
- Select a specific contact whose event or ticket data you want to view.
- In the contact’s profile, click on the Actions button located on the upper right side of the contact name.
- From the dropdown menu, select View all properties.
- Scroll down to the end of the list to find the Event Tickets properties. Here, you can explore all the data associated with event tickets for that contact, such as ticket name, start time, and more.
Displaying Event Ticket Data in the Main Contacts List
- Go Back to Contacts List: Return to the main contacts list view in HubSpot.
- Edit Columns:
- On the right side of the contacts list, click on the Edit columns button.
- In the dialog that appears, search for the properties you want to display, such as Ticket Name or Start Time.
- Select the desired properties and add them to the list of columns.
Disconnecting from HubSpot
Let’s say you no longer want to use the Event Tickets HubSpot extension. You can disconnect the app from your HubSpot account anytime by heading to the Integrations screen at Events → Settings → Integrations. There is a “Disconnect” link next to the button that refreshes your API connection.
Clicking that link will wipe out the app information on the screen and effectively unlink the extension with your HubSpot account. You are always welcome to set the extension back up by re-entering that information.