When managing tickets with Tickets Commerce, the situation may come up where you’d like to issue a refund to a customer. This requires logging in to the Stripe Dashboard, locating the order, and refunding the customer there. Then, you’ll want to return to your WordPress site to manually return the ticket. We’ll walk you through the steps here!
Refund an Order with Stripe
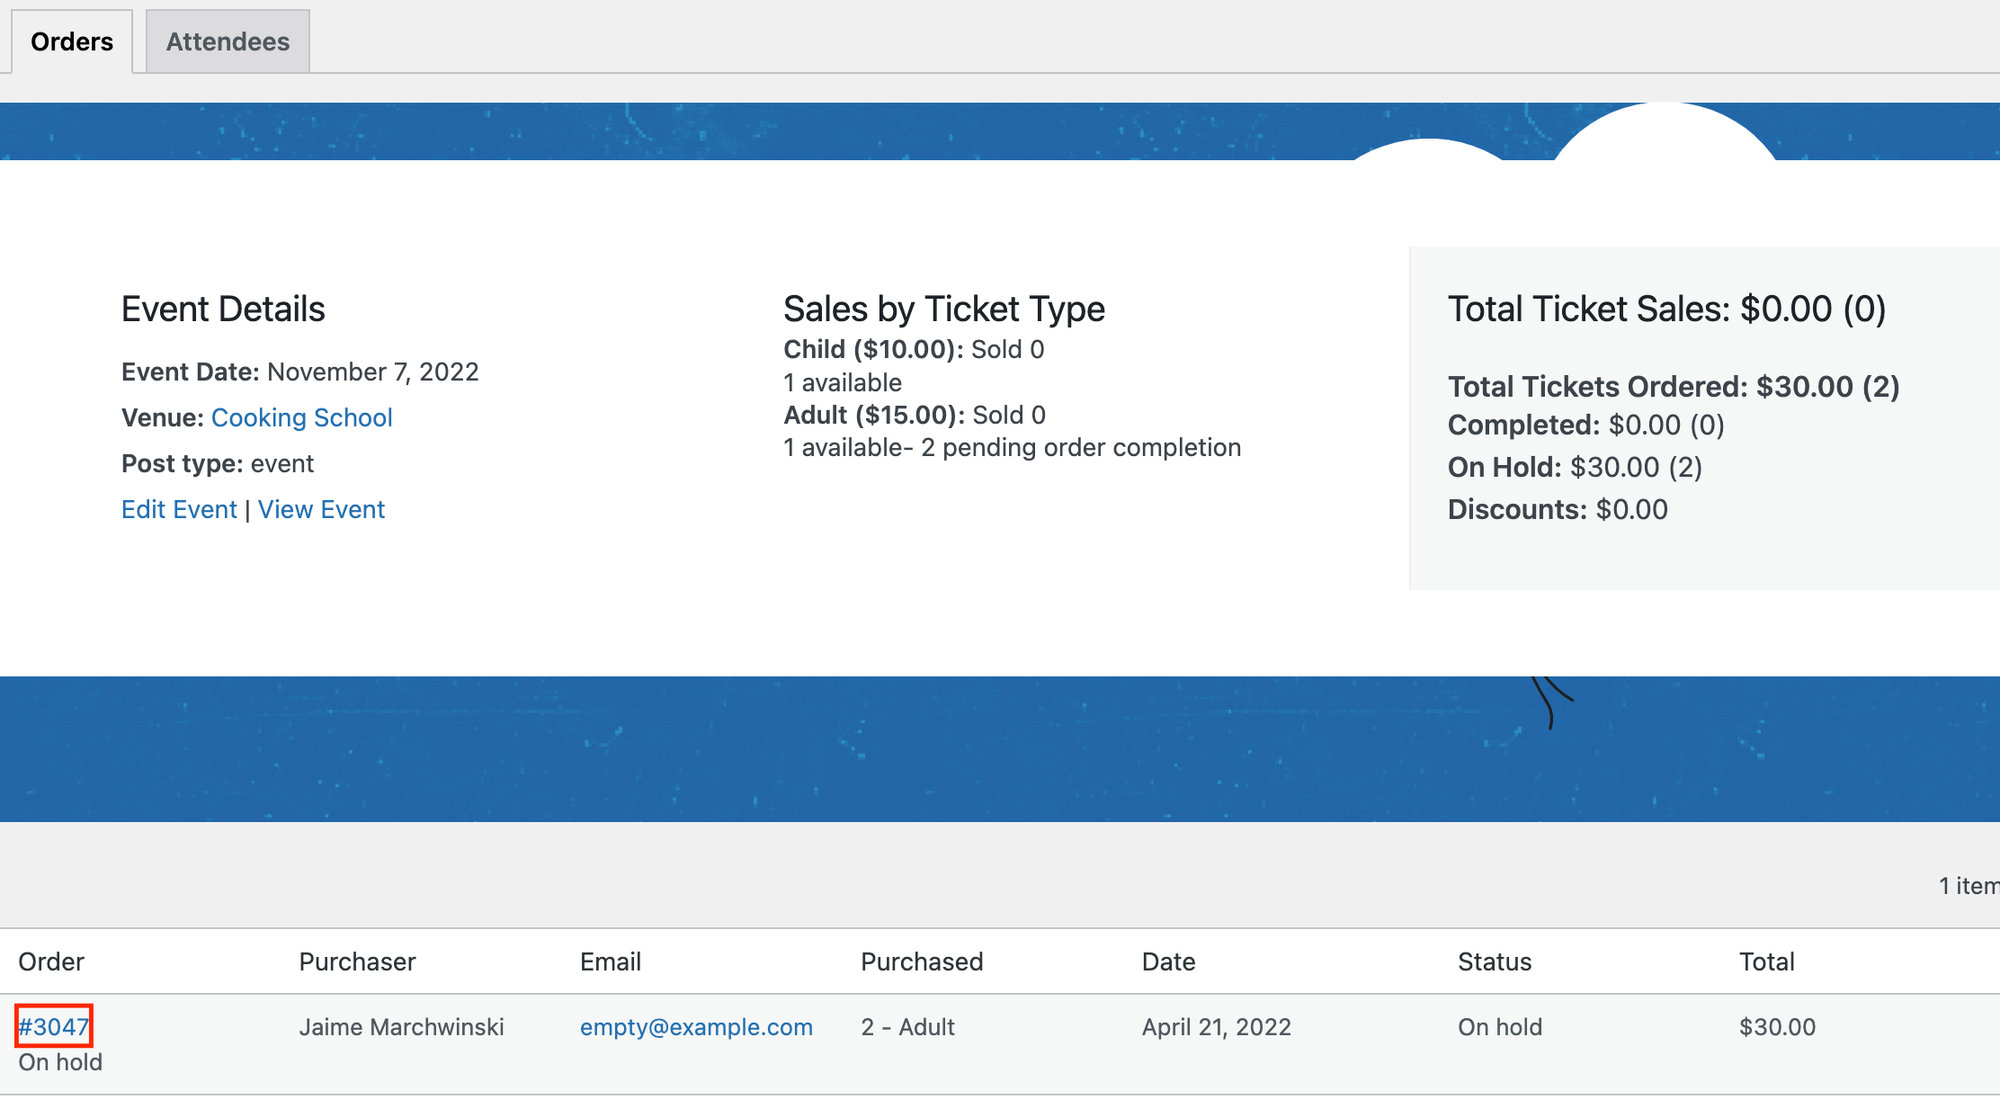
First off, you’ll want to locate the order number that you’d like to refund. You can find your Orders screen by going to your events, hovering over your event, and clicking on Orders. Then find the order number associated with the customer that you’d like to refund.
Next, head over to the Stripe Dashboard at https://dashboard.stripe.com/test/payments/{payment_intent_id}
Go to All Payments and locate the ticket you’d like to refund. The description field will correspond with order ID of the ticket (not the ticket number). Click on the order that you’d like to refund.
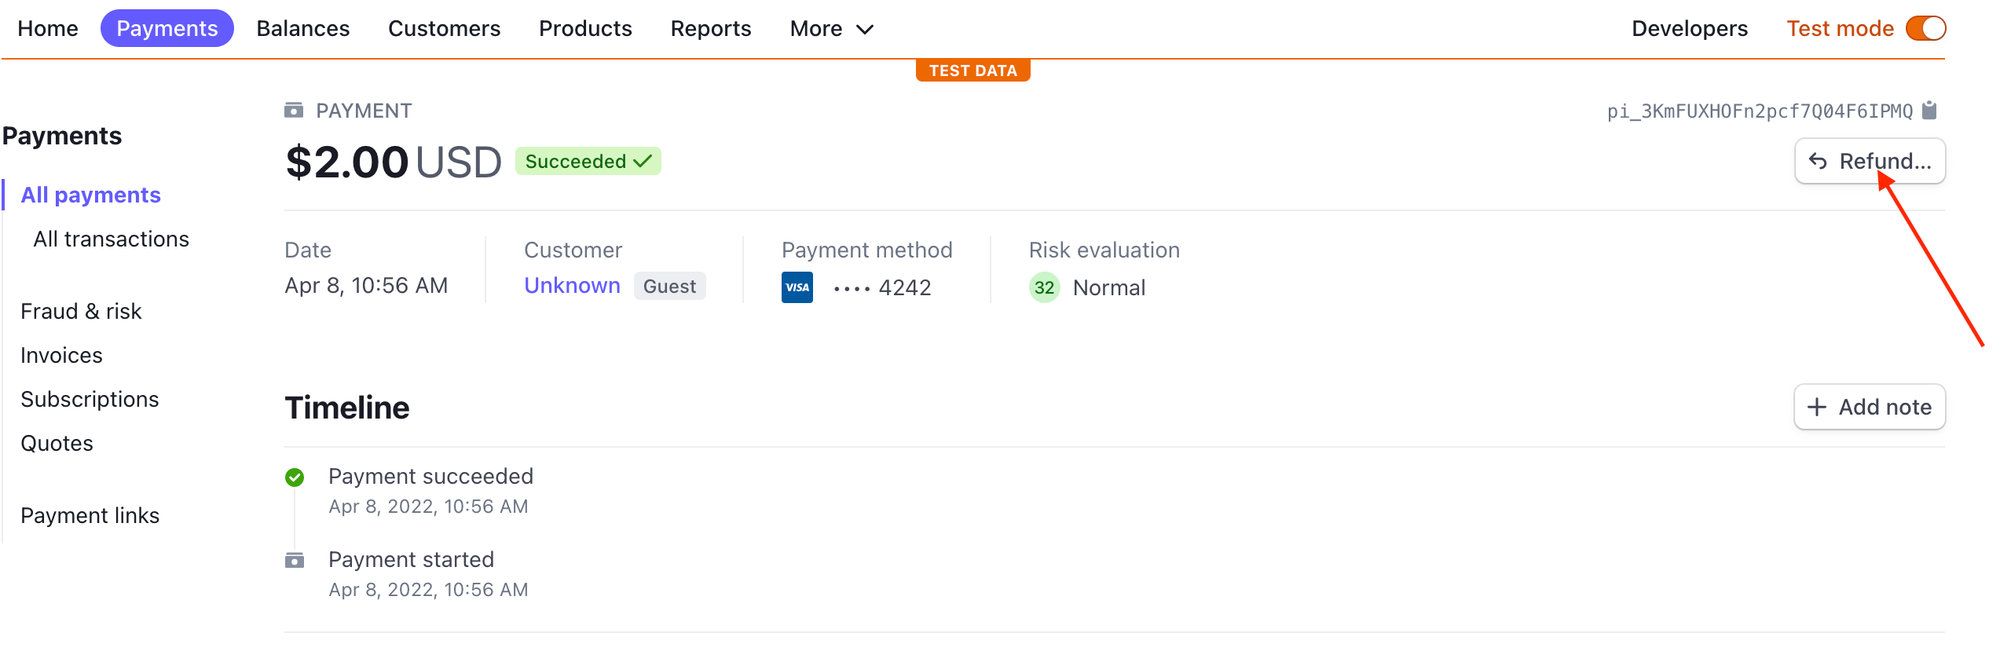
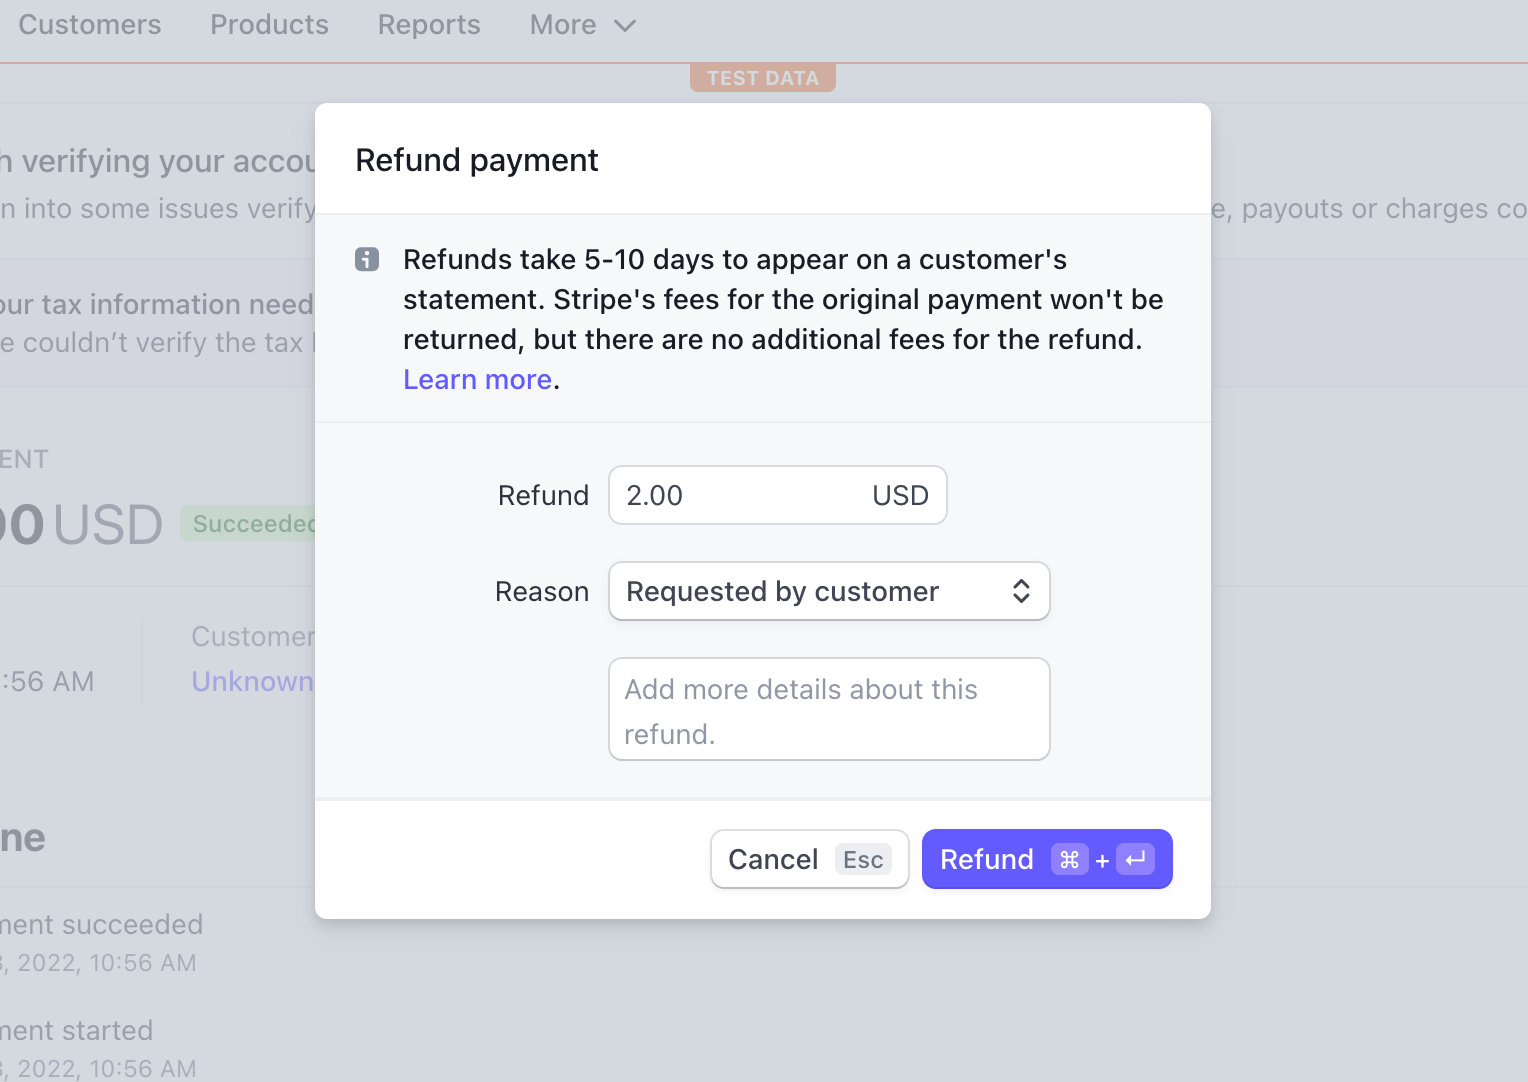
You’ll see a refund button in the top right-hand corner. Click on that button, confirm that you’d like to refund the order, and select a reason.
Handling Capacity
As long a Stripe Webhooks are set up correctly, Stripe will send a notification to the site and then update that Order based on the status. This will then update the capacity of the ticket. However, if webhooks are not set up, this change will not be sent over, and you’ll have to manually delete the attendee that you refunded (see below).
Refund an Order with PayPal
Start off by logging in to the PayPal Dashboard.
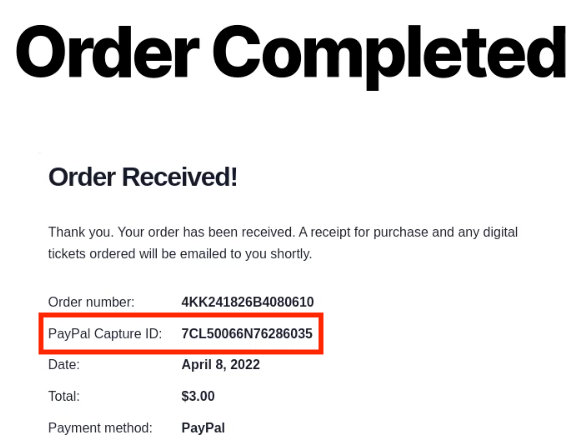
Once there, you’ll want to locate the ticket you’d like to refund. It’s important to note here that you’ll need to locate the PayPal transaction ID, and not the Order ID that is associated with the order in WordPress.
You can find this ID number by visiting https://your-site.com/tickets-order/?tc-order-id={GATEWAY_ID_FROM_LIST}.
Once you find this number, you can easily issue a refund directly from the PayPal Dashboard.
Handling Capacity
PayPal doesn’t notify your site about that refund when you proceed right from its dashboard (and don’t provide a way to other services, like Tickets Commerce, to receive that information), so the ticket stock will not automatically increase. If you’d like to keep the original capacity, you’ll have to manually delete the attendee that you refunded (see below).
Capacity and Attendees After the Refund
Once an order has been refunded or canceled, you will need to make some decisions: first about the capacity for the event with which the tickets were associated, then about the attendee who originally purchased the refunded/ canceled ticket.
Attendee Considerations
When viewing the Manage Attendees page for any ticketed event, any refunded or canceled tickets will still be listed with all the rest. If you have marked a ticket order with a status such as Refunded or Cancelled, then the ticket will reflect this in the Order Status column on this page. These tickets can still be checked in manually by your personnel.
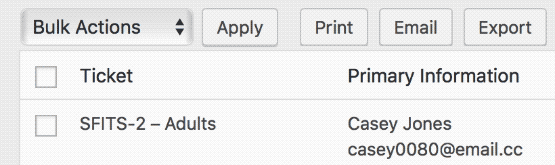
If you wish to remove a refunded or canceled ticket from your list of attendees and eliminate the possibility of the original buyer checking in with that ticket, navigate to the attendee list for the associated event. (You’ll find instructions for how to do so here on our Knowledgebase.) Click the checkbox next to the attendee or attendees that you wish to remove, select Delete from the Bulk Actions menu at the top (or bottom) of the list, and click Apply.
Note that deleting an attendee record will automatically increase the ticket capacity. If you delete the attendee, you do not need to make additional changes to the capacity as described below.
Capacity Considerations
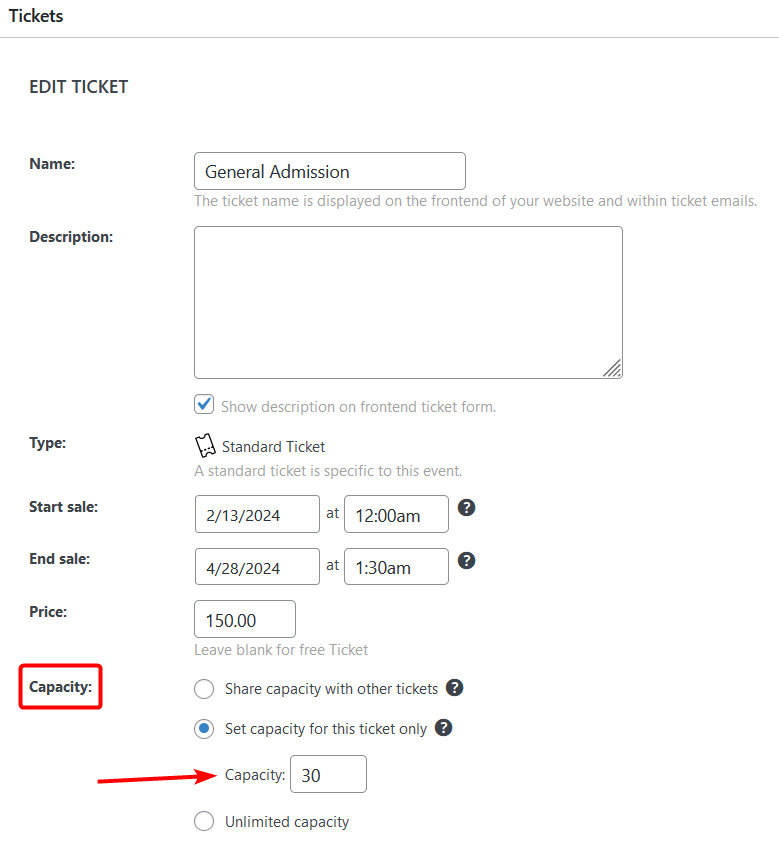
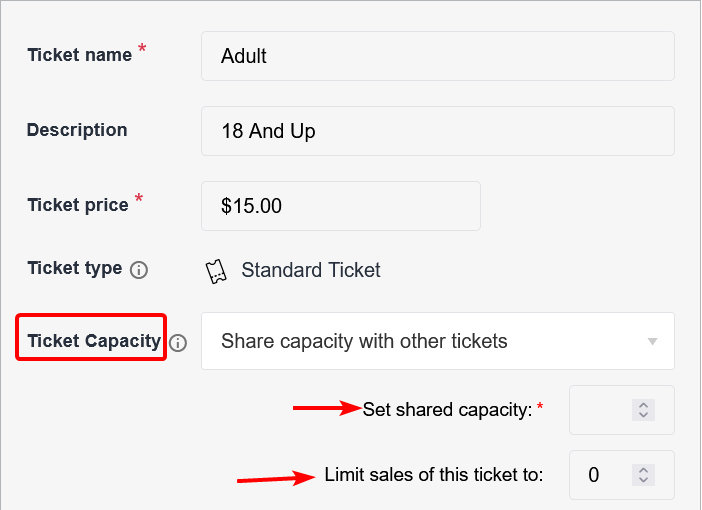
If you choose not to delete the attendee associated with a refund but still want to increase the number of available tickets, you can do that manually by adjusting the ticket capacity. To do this, go to the edit screen for the event whose tickets you are dealing with. On this event’s edit screen, select the ticket(s) that you refunded and increment the available capacity by the number of tickets you refunded.
For example, if you refunded two tickets to the event “Jerry Seinfeld Live” and want to make sure that those two seats are made available for purchase again by someone else, head to the edit screen for the event named “Jerry Seinfeld Live.” Once there, scroll down to the Tickets page and click the name of the ticket that you previously refunded. You’ll see the previous number of available tickets in the Capacity field. Increase the capacity of the ticket by two and click the blue Save this ticket button to save your changes.
If you do not want the refunded seats to become available to other potential buyers, then simply process the refund or cancellation of the order—no other steps are required.
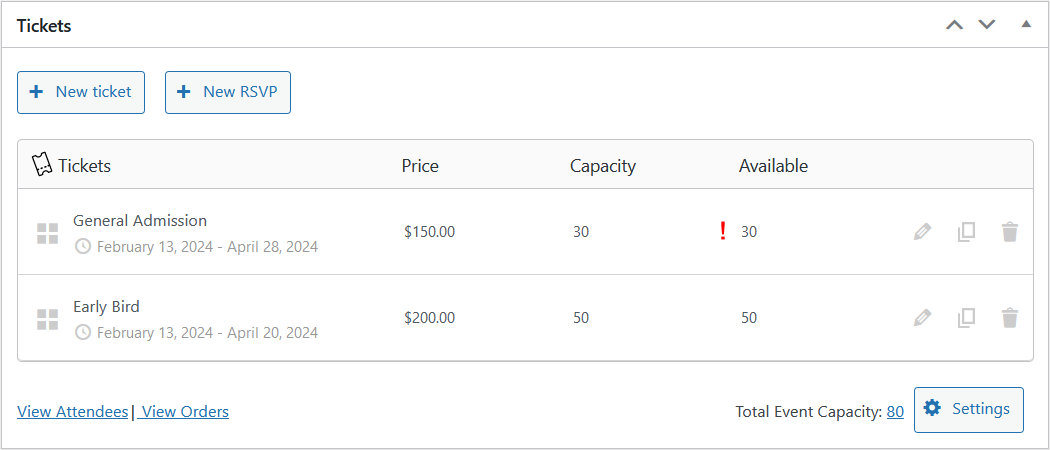
Note: The ticket editor will warn you when the number of Complete ticket sales does not match the number of attendee records generated by showing a red exclamation icon next to the number of available tickets. That means you should check the Attendees list and adjust ticket capacity as needed.
👋 Note: When using Seating for Event Tickets to sell tickets with assigned seating, ticket capacity is determined by the associated Seat Layout and Seat Type. If you refund an attendee and want their seat to become available to another buyer, go to the Attendees tab for the event and remove their seat assignment. That seat will then be available for purchase again. Read more
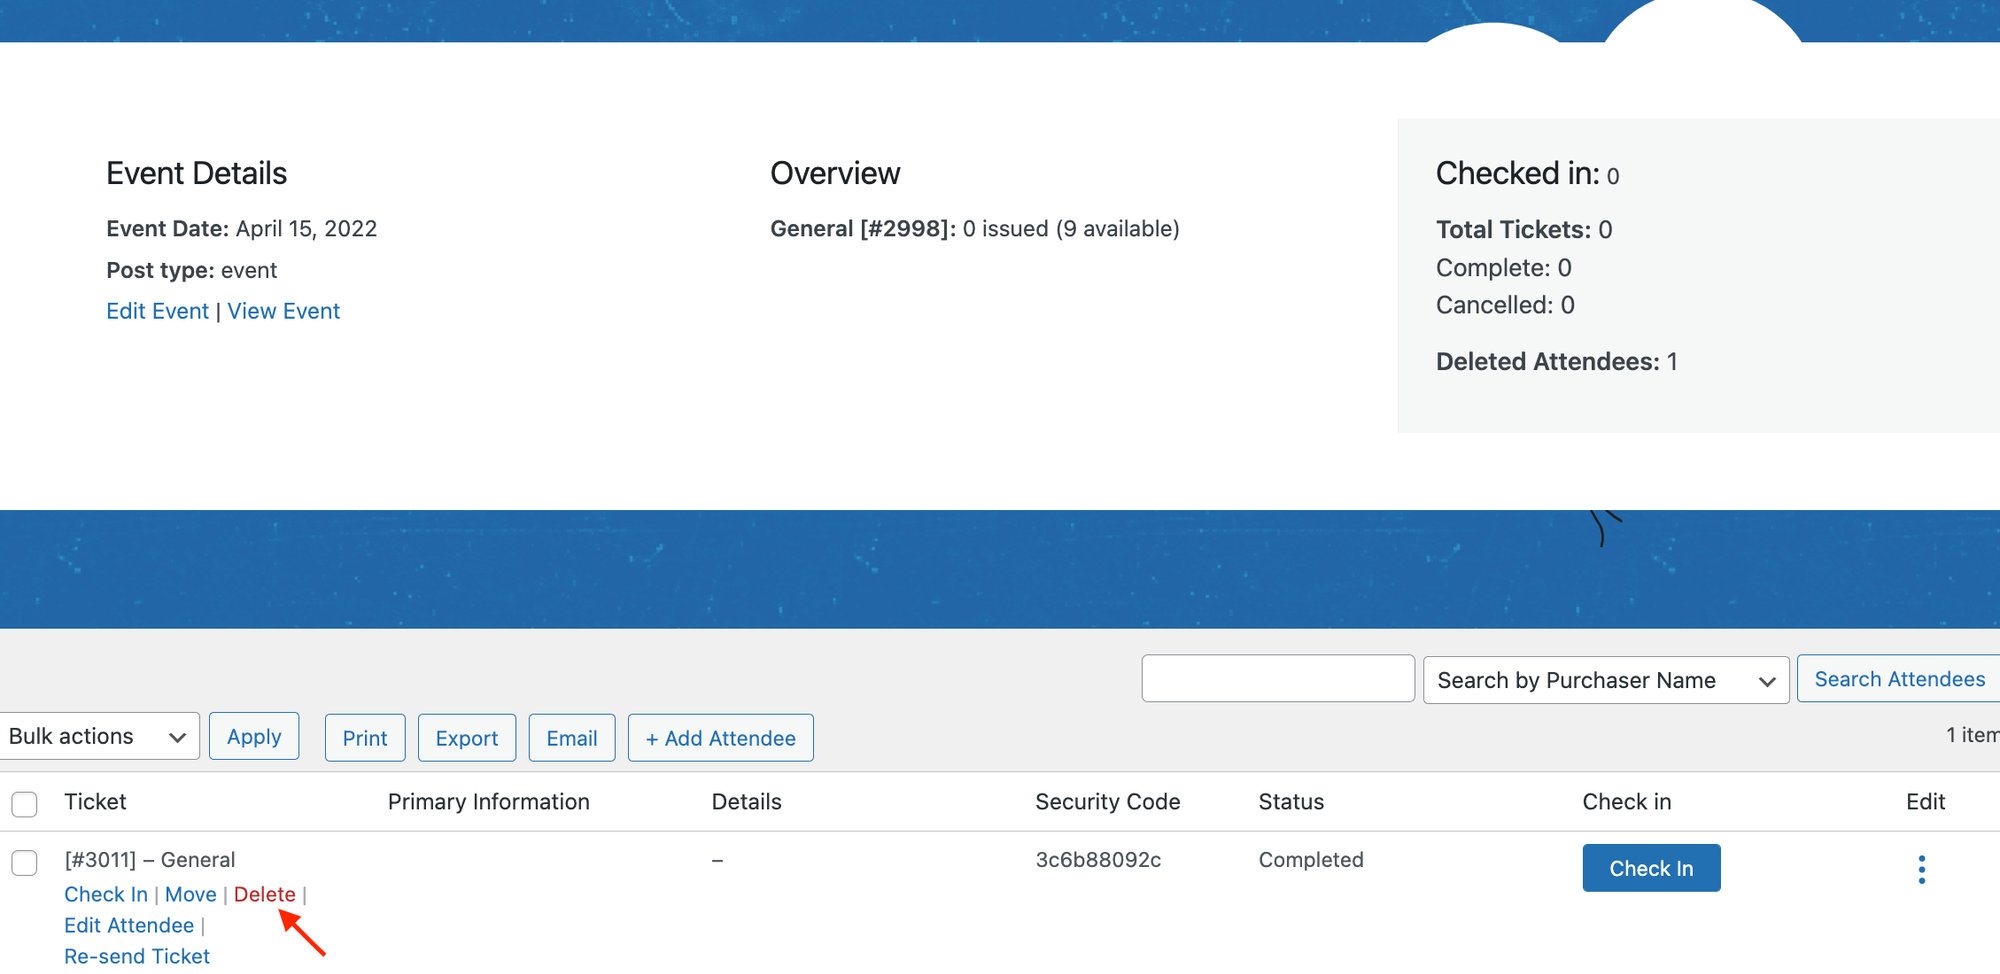
Manually Deleting Refunded Attendees
To do this, locate the event or page where your ticket is and click on Attendees.
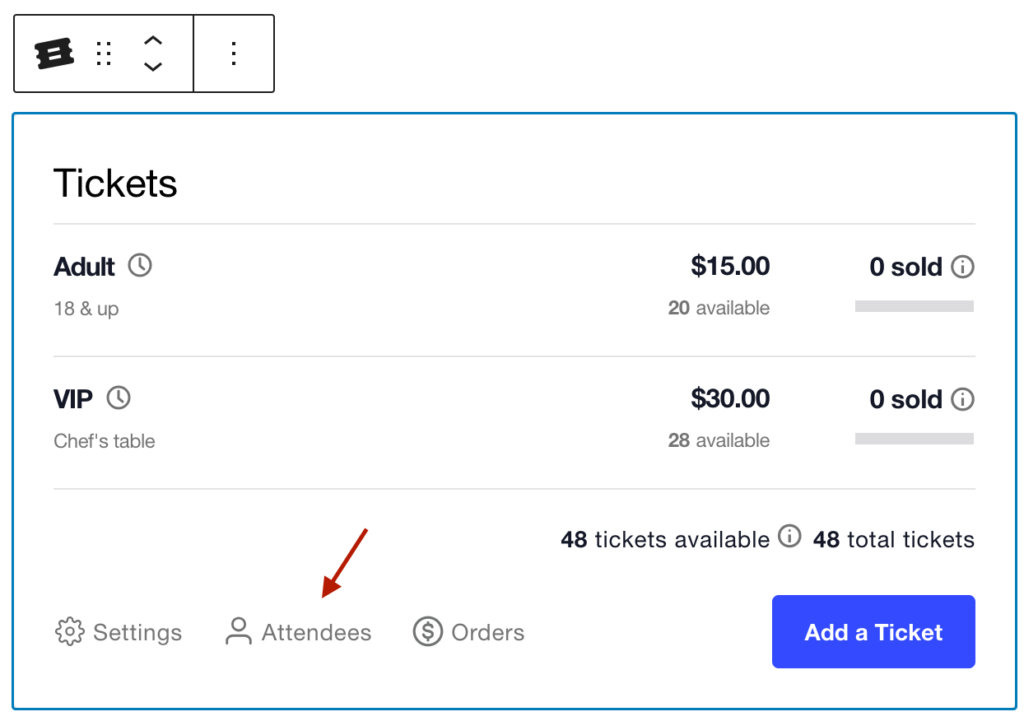
Hover over the ticket and click Delete. Now the ticket has been returned, and you’ll see that the available tickets have increased.