We’re going to go over the Events List Widget in this tutorial, including how to configure it, things to expect from it, and perhaps some tips and tricks you can use at your next cocktail party. You’ll be the star of the show, for sure.
Adding the Widget to a Sidebar
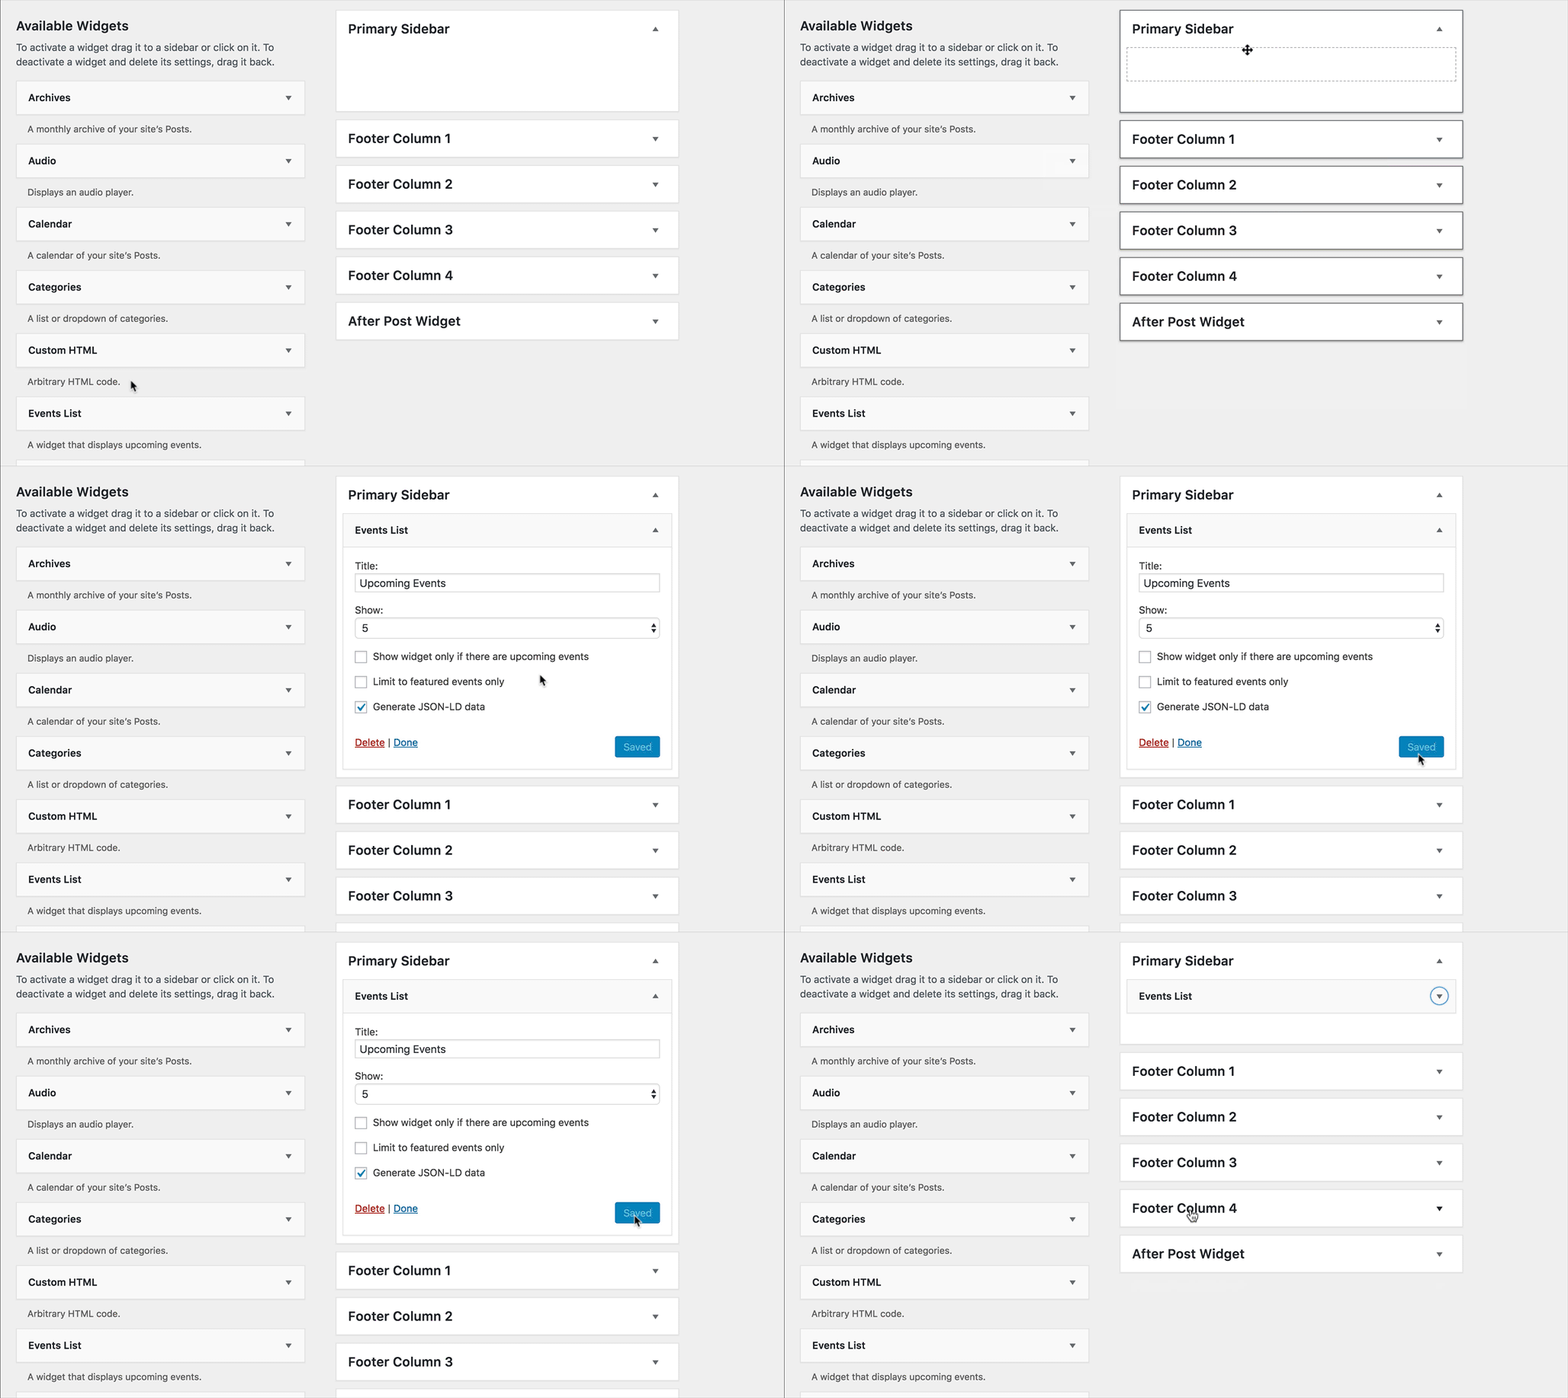
The first thing to note is about the Events List widget is where to find it. The widget comes packaged with the core version of The Events Calendar. You’ll find it in Appearance > Widgets from the WordPress dashboard. Drag that little guy into the sidebar area of your choice, and you’re off to the races!

Events Widget Settings
There are three settings that help customize the Events List widget experience. Let’s take a look at them:
- Title: This is the heading that sits above the widget. By default, this is “Upcoming Events,” but it can be changed to anything you’d like.
- Show: This is the maximum number of events you want to display at any given time. Five is the default, but this can be any number between one and ten.
- Hide this widget if there are no upcoming events: Check the box for this option and the widget will automatically hide itself if there are no relevant events to list. Otherwise, it will display a handy notice saying there are no upcoming events at this time.
- Limit to featured events only: Check the box for this option, and the widget will display featured events.
- Generate JSON-LD data: Enable this setting if you would like to enable structured data in the widget. Structured data is what search engines use to recognize calendar content on and display events in the search results if the data is there and processed by the search engine.
Block Editor Widget
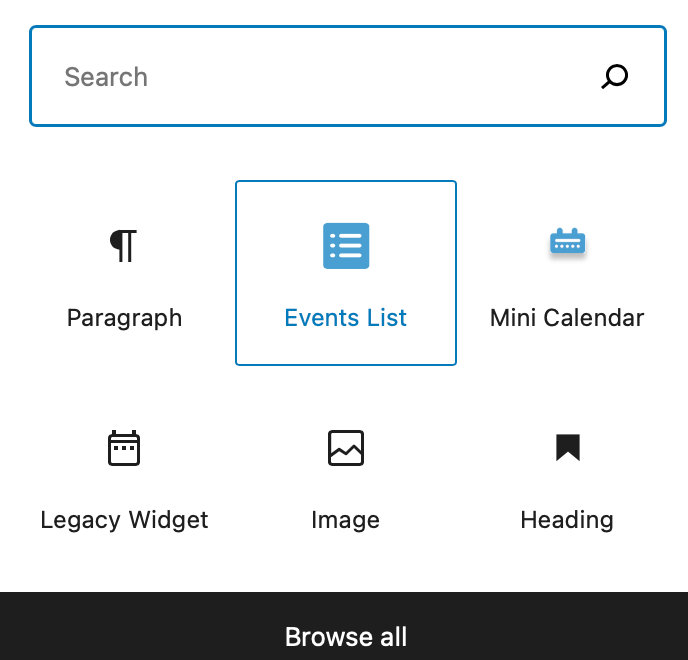
When using the Block Editor, you can add the Events List as a block instead. Simply search for Events List under blocks, and you’ll find all of the same available options.

Configuring the Pro Version
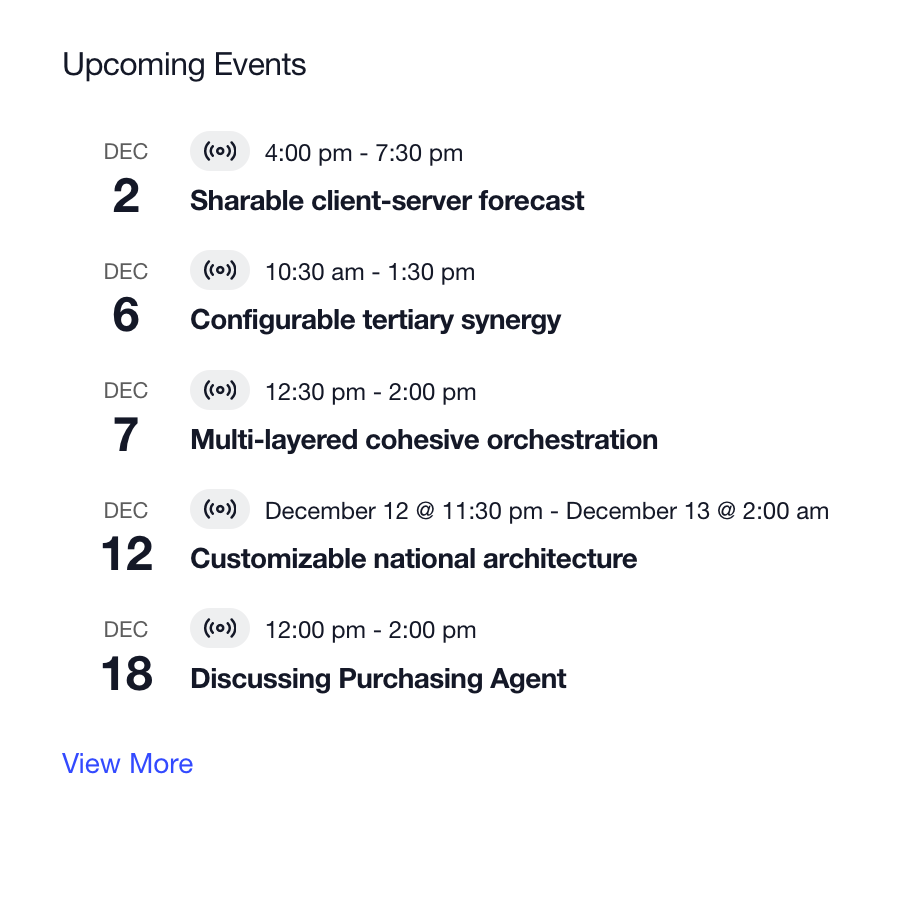
It’s important to bear in mind that the Events List widget in The Events Calendar Pro is the same widget that comes with the core version of The Events Calendar. If you have Pro, you’ll see the same Events List widget under Appearance > Widgets. In your frontend the Widget will have the same appearance; the only difference is that you have some more filtering options available to set up this.

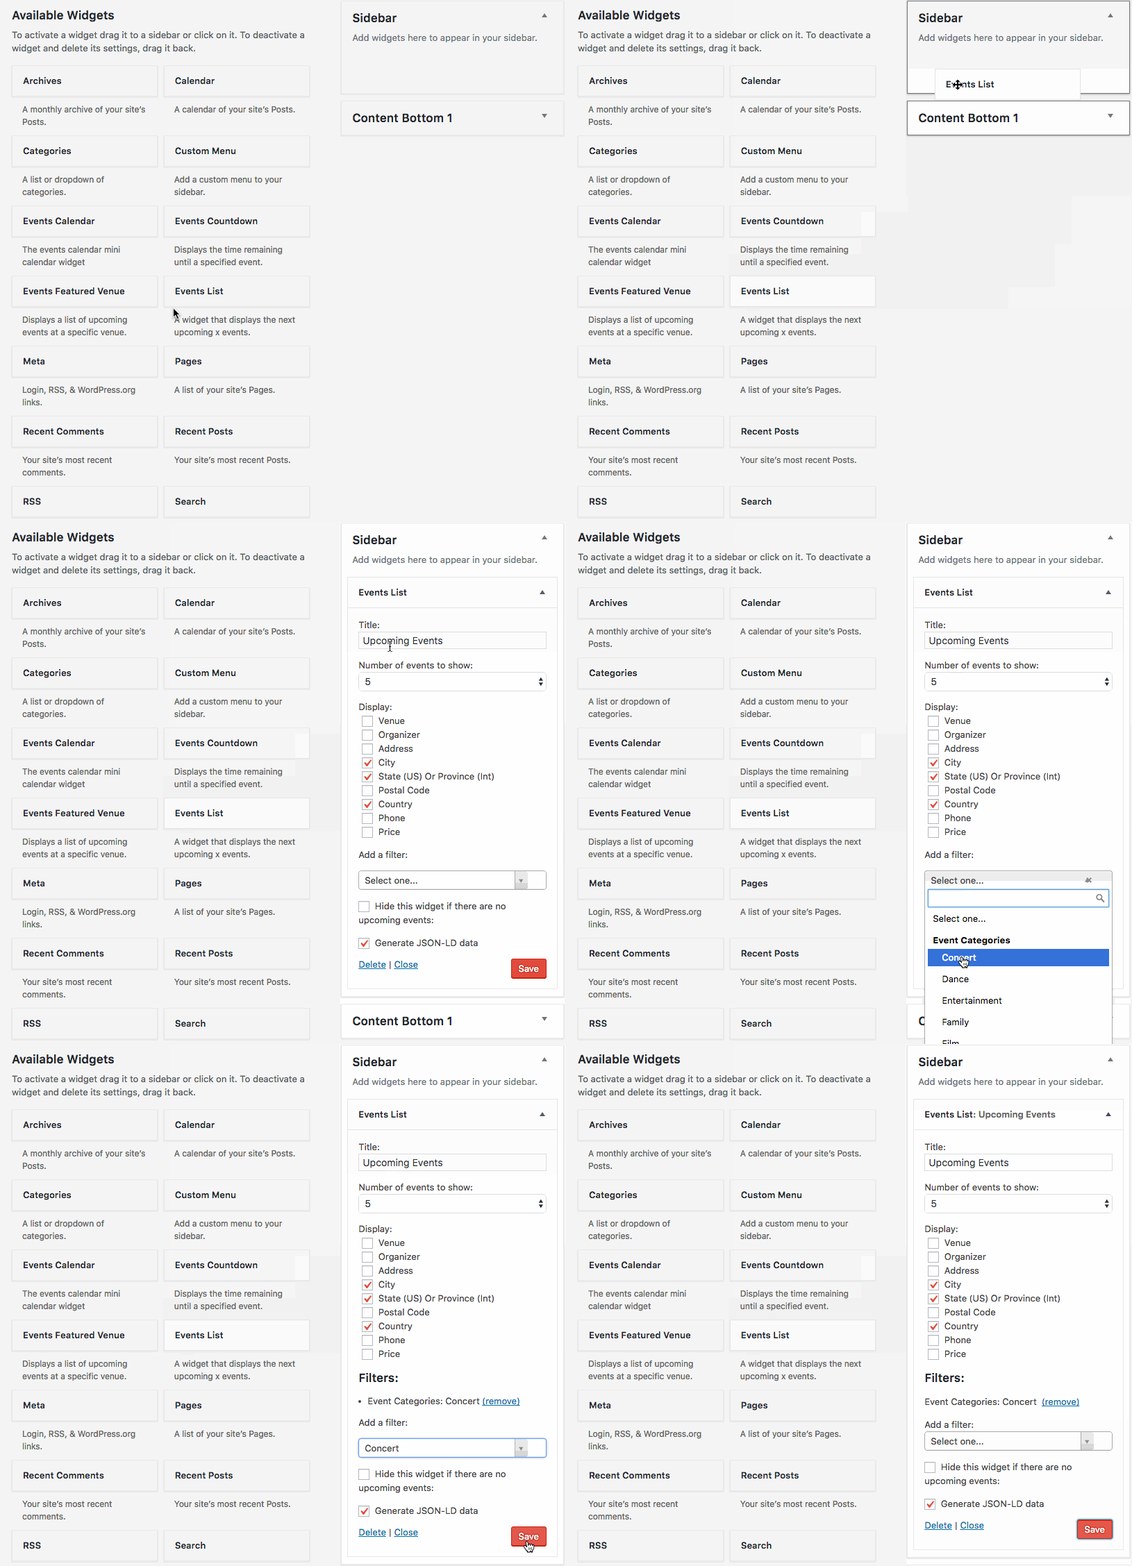
As you can see, there are more configurable options when setting up the Pro widget. Add the widget to the sidebar the same way as described above, and now you’ll see more options. In addition to the same three options in the basic widget, Pro introduces these settings:

- Display: This is a set of checkboxes that allow you to toggle the display of different bits of information, including:
- Venue
- Organizer
- Street
- City
- State (US) or Province (Int)
- Postal Code
- Country
- Venue Phone
- Price
- Filter: This is an advanced setting that allows you to filter the events that display in the widget by a number of variables, including Categories and Tags. You can add multiple filters and also multiples instances of the widget- so if you wanted, you could have different widgets for different Event categories
Please note that all that settings are responsible only for properly loading events from your database. They don’t add or remove any visual information in the Widget!
Phew, that’s a lot of stuff! You really have a lot of options here to customize the widget’s content without touching a line of code, and that’s awesome.
Theming the Widget
We actually have another tutorial that provides a specific example of how to customize the Events List widget, as well as a guide to the stylesheets and classes used in our widgets.
Using Calendar Views
The template for the core Events List widget can be found at: /plugins/the-events-calendar/src/views/v2/widgets/widget-events-list.php. This single file contains all the content and functionality for the widget. To override it, make a copy of it, then:
- Make a new folder in the theme directory called tribe
- Inside the new tribe folder make a new folder called events
- Inside events folder, make a folder called v2
- Make a folder in that one called widgets
- Drop the widget-events-list.php copied file in that last folder
Now that the template is in the theme, you can modify it to your liking. For example, you can customize the notice for when there are no upcoming events by changing this line:
<?php $this->template( 'components/messages' ); ?>
…to something like:
<p> No events here. Holla! </p>
The process for customizing the widget in Events Calendar Pro is very similar. Actually both Free and Pro version of The Events Calendar uses the same file to displays the widget. The main difference here is that Pro version gives you more filtering options in WordPress dashboard.
Wrapping Up
There we go! We covered a lot of ground in this tutorial. Hopefully, now you’ve got a better understanding of the Events List widget, how to configure it, how Pro extends it, and how to customize its templates. Still have some burning questions not covered here? Hit us up at our help desk and we’d be happy to help.