▶️Note: This video may refer to products and features that have since been merged or changed. For the most up-to-date information, please refer to the content of this article.
Community Events Settings
As a site admin, you have a number of controls over how frontend event submission works on your site: who gets notifications of new submissions, whether submissions go live automatically, and more. Almost all of these can be found on the Community settings tab at Events → Settings → Community. After installing the Community Events add-on, it’s worth stepping through each section to make sure the form behaves the way you want it to.
General Settings
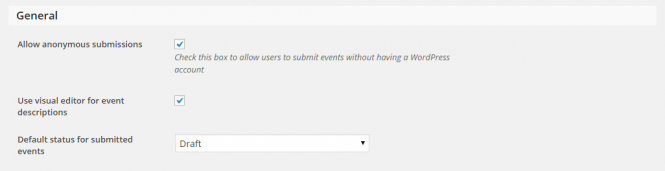
- Allow anonymous submissions: Allow anonymous (non-logged-in) users to submit events on your site. With this feature disabled, only users with registered accounts may submit, and an anonymous visitor will be prompted to log in before accessing the submission form. If you have Events Calendar Pro installed, this setting also governs whether anonymous users can submit virtual events from the frontend. Note: if you want site visitors to be able to register and then submit an event, you’ll also need to make sure Anyone can register is selected on your WordPress General Settings page. Otherwise, only users with pre-existing accounts will be able to submit.
- Use visual editor for event descriptions: By default, a simple text box appears for the event description on the frontend form. Enable this to swap in a visual editor.
- Default status for submitted events: Decide whether submissions go to Draft, Pending Review, or Published:
- Draft – submissions will not display on the site until marked as Published by an administrator.
- Pending Review – submissions will not display on the site until marked as Published by an administrator. This status makes it easier for admins to spot submissions that need review.
- Published – submissions are publicly accessible on your site as soon as the person submits the event.
- Community rewrite slug: Change where the submission form lives on your site. Your community events slug is
siteurl/events/communityby default. Change the events slug under the General settings tab for The Events Calendar, and change the community slug here. An example of your current slug appears beneath the field as a point of reference.
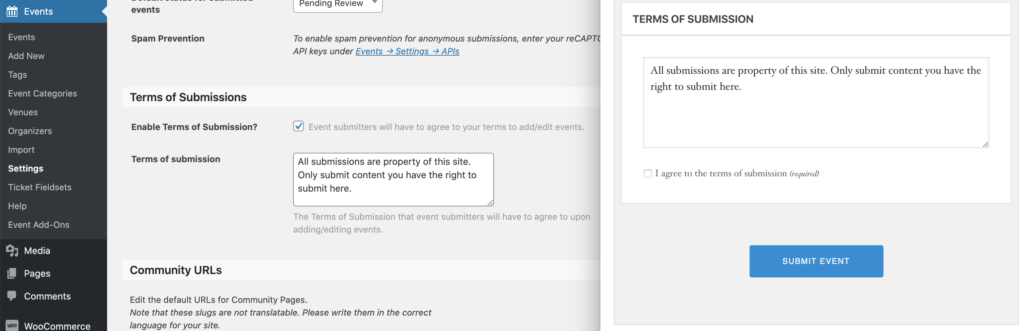
Terms of Submission
Set the Terms of Submission that event submitters will have to agree to upon adding or editing events.
Alerts
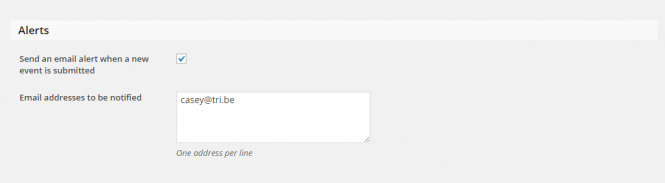
- Send an email alert when a new event is submitted: Enable immediate email notifications alerting you and others of a new submission.
- Email addresses to be notified: The email addresses that notifications will be sent to, one per line.
Configuring these alerts is particularly important if you’ve set the default submission status to Draft or Pending Review, since an administrator will need to take action on every submission. Each address listed will receive an email whenever an event is submitted. Here’s an example:
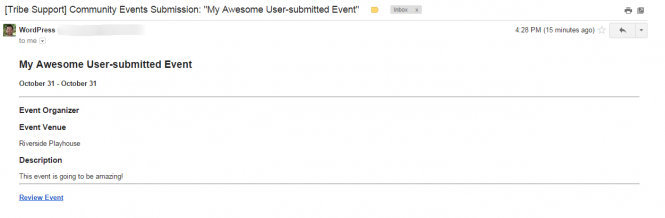
If you’d like to customize the information that displays in the Community alert email, you can override the email-template.php file in the Community Events plugin directory. See our Customizing Template Files guide for more on performing template overrides.
Members
- Allow users to edit their submissions: Logged-in users can edit their submissions (regardless of whether they’re draft or already published) on the frontend of the site. This feature does not work for anonymous users. If you’re using Community Tickets, enabling this setting is also what lets community organizers check in and manage guests from the front end.
- Allow users to remove their submissions: Enable this to let users remove their submissions at will. You will not receive a notification when a submission has been removed, and both draft and live events can be removed. This feature also does not work for anonymous users.
- Deleted events should be: Decide whether deleted events go to the Trash or are deleted entirely.
Venues and Organizers
- Users cannot create new Venues: When checked, users (whether logged in or anonymous) cannot create new venues on the event submission form. They can only choose from existing venues.
- Users cannot create new Organizers: When checked, users cannot create new organizers on the event submission form. They can only choose from existing organizers.
My Events
- Events per page: How many events display per page when a user views the list of their submitted events on the frontend.
- Date/time format: How the date and time formatting appears on the frontend “My Events” list. Reference the WordPress link provided for formatting guidance.
Access Control
- Block access to WordPress dashboard: Enable this to block certain user roles from accessing the backend.
- Roles to block: With the box above checked, pick the role(s) you want to block from accessing
/wp-admin. - Redirect URL: Where users will be redirected if they attempt to access
/wp-admin. Users can be redirected to a custom URL, whether on-site or off-site. Note that this should be a full URL — leaving it blank will automatically use the Community Events List View.
Form Defaults
- Default venue for submitted events: Pre-populates the venue fields for users visiting the event submission form. Users can override this and add a new venue as they see fit.
- Default organizer for submitted events: Pre-populates the organizer fields for users visiting the event submission form. Users can override this and add a new organizer as they see fit.
- Single geography mode: Removes the state, country, and timezone options from the frontend submission form.
Community Tickets Settings
The Community Tickets settings live on the same page as the Community Events settings, directly below them at Events → Settings → Community. The settings below define how Community Tickets works on your site.
The most important setting here is Enable Community Tickets. You must check this box and save the settings page to enable the Community Tickets features and allow community organizers to add tickets to their events. The rest of the Community Tickets settings are optional.
- Allow any user to create tickets: Checked by default. Allows any Subscriber to your site to create events with tickets. Only uncheck this box if you plan to manage more complex user capabilities with additional code.
- Enable ticket images: Control whether community organizers can add an image for event tickets. Submitted images will show in the email ticket.
- Default provider: The ticket provider to be used for events created via Community Events. Changing this only affects new tickets.
- Ticket fee type: Select if and how the site admin will collect payments from ticket sales. None means no extra fees are charged. Flat Fee is a dollar amount per event ticket within an order. Percentage is a fraction of the ticket’s total.
Per-Ticket Fee Options
The following options appear if you’ve selected a Per-ticket fee type other than None:
- Fee percentage: Define the percentage of ticket sales collected by the site admin (for example, 10% of every ticket sold).
- Flat fee: Define the flat fee collected by the site admin per event in an order (for example, $2 per event in an order).
- Fee option defaults: Choose whether ticket fees (percentage and/or flat fees) are included in the listed ticket price or added on top of it. For example, on a $10 ticket with a $1 flat fee:
- Include fees in ticket price — the ticket buyer is charged $10 ($9 to the organizer, $1 to the site admin).
- Display fees in addition to subtotal on the Cart page — the ticket buyer is charged $11 ($10 to the organizer, $1 to the site admin). The extra fee will be shown on the Cart page before the buyer continues to Checkout.
Split Payments
Enable split payments: By default, all money earned from ticket sales is collected by the site admin according to the settings established in WooCommerce — it is then up to the admin to distribute profits to the community organizers. If you enable split payments, money is distributed immediately when a sale is complete: the site admin receives the appropriate fees (as defined in the fee settings) via PayPal, and the community organizer receives the rest through the PayPal address listed on the user’s Payment Options page. If split payments are enabled, community organizers can also adjust the fee option defaults for their own events from their Payment Options page.
If you enable split payments, you must also set up a PayPal developer account and App, and fill out the additional fields on the Settings page (PayPal API username, password, client ID, etc.).
Using reCAPTCHA to Prevent Spam Event Submissions
Opening up your calendars to user event submissions with Community Events is a great way to engage your visitors and build content that reflects the interests of your user community. Community’s default settings allow submissions from any source, including anonymous visitors, so you can curate content from the broadest possible selection of users. To keep forms populated with legitimate submissions rather than spambot traffic, Community includes built-in support for reCAPTCHA. Here’s how to set it up.
Log into your WordPress site admin. Under the Events menu item in the sidebar, click Settings, then click the Integrations tab to open the APIs page of the plugin settings.
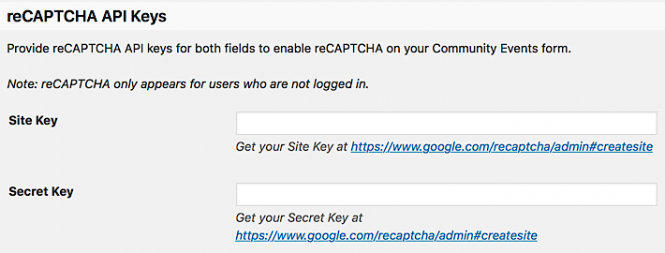
Near the bottom of the APIs page, you’ll see form fields for reCAPTCHA API keys, along with a link to Google’s reCAPTCHA registration page for each field. Click either link to open the registration page in a new tab. (You may be prompted to create a new Google account or log into an existing one.)
Once logged into your Google account, you’ll see the first few fields of reCAPTCHA’s registration form. Enter the name of your site in the Label field and select the radio button for reCAPTCHA V2 under the type subheading. The rest of the form fields will appear below.
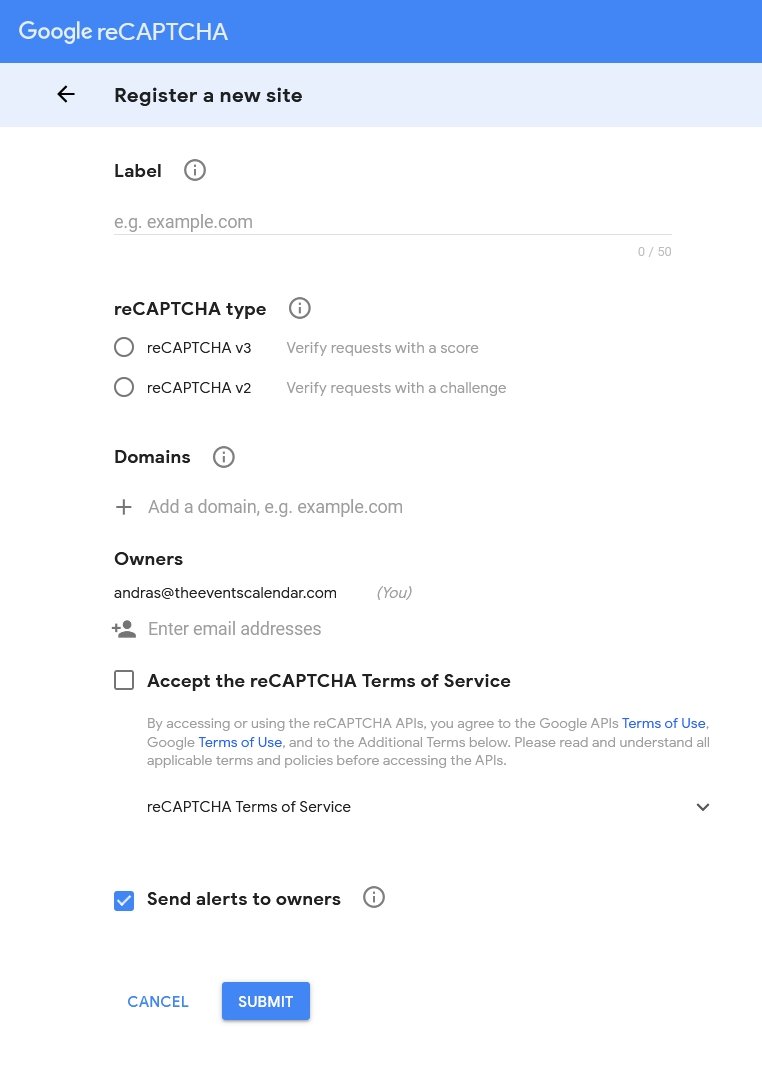
In the text box under the Domains subheading, enter any domains you’re using for your site, including staging and test environments, each on its own line. For example, if your calendar is accessible at example.com/events, enter example.com as shown above.
Review the Google APIs Terms of Use and the reCAPTCHA Terms of Service, then check the box to confirm you agree. The final Send alerts to owners check box is selected by default — leave it as-is to receive messages from Google about your site, or uncheck it to skip those alerts.
Click the Register button to submit your registration. You’ll be taken directly to the management page for your newly-registered site. The Keys content section beneath Adding reCAPTCHA to your site should already be expanded; if it’s not, click the Keys subheading to open that pane.
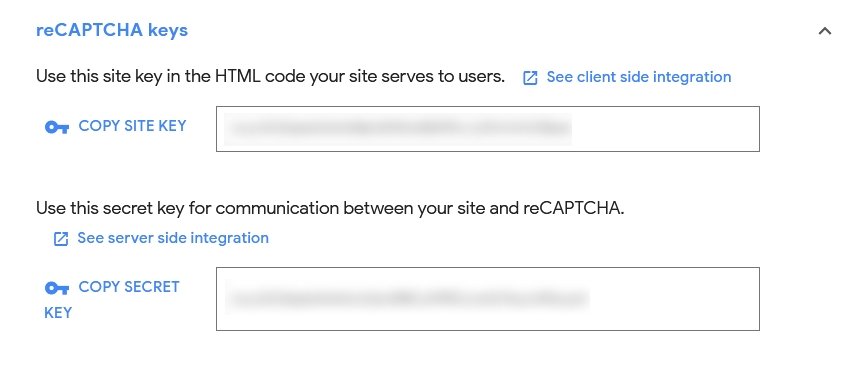
The site key and secret key shown here are all you need to set up reCAPTCHA on your Community Events form. Copy the keys from each field and paste them into the matching fields in the APIs tab of your plugin settings page. Once both keys are entered, click the blue Save Changes button to submit your changes.
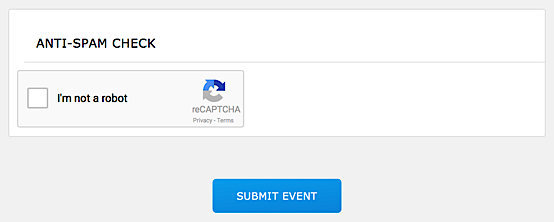
Once you’ve successfully saved your new reCAPTCHA API keys to the plugin settings, you’re finished. Anonymous visitors to your Community Events form will now see the Anti-Spam Check pane displayed below the form fields, and they’ll be prompted to complete a reCAPTCHA check before submitting their event.
If you need help getting things set up, our support team is available through our support Help Desk.