In this article, we are going to talk about how we can export the existing data in Event Schedule Manager and import it to another site without having to recreate Speakers, Sponsors, Sessions, etc. from scratch.
Assume that we would like to import data from site A to B.
Site A Requirements:
- Event Schedule Manager plugin
- WP All Export plugin
Site B Requirements:
- Event Schedule Manager plugin
- WP All Import plugin
Exporting
After installing and activating WP All Export plugin on Site A, we should export data in the following order:
- Sponsors
- Speakers
- Sessions
As an example, we are going to take the following steps to export Sponsors:
- Install and activate WP All Export plugin.
- Create a new Import.
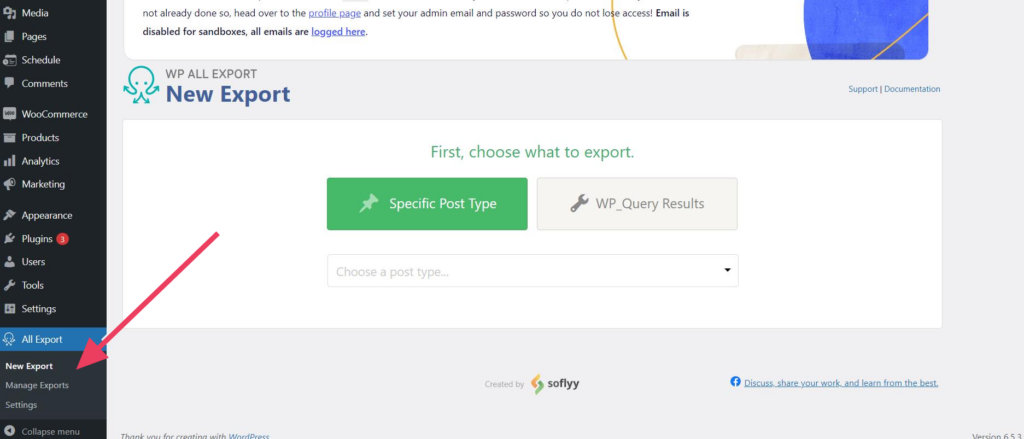
- Select the post type you’d like to export, in this case “Sponsors”.
Besides exporting standard fields that export title and content, we need to export custom fields. Sponsors have only one custom field, which is Website URL.
Speakers and Sessions have more than one custom fields to export. No matter how many fields we want to export the process is the same.
Importing
It’s time to import the date to site B.
Importing has a pretty similar process to exporting, with a bit of differences.
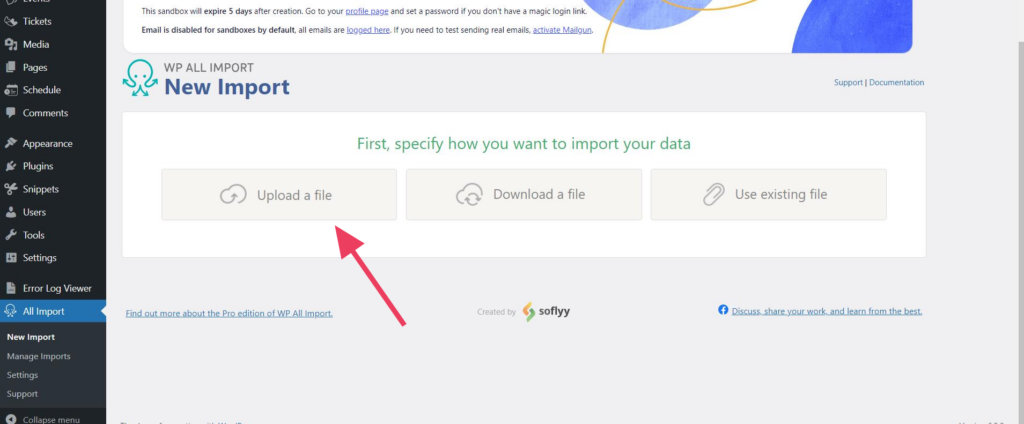
- First, let’s install and activate WP All Import plugin.
- Under All Import > New Import, select the file (in this case, Sponsors).
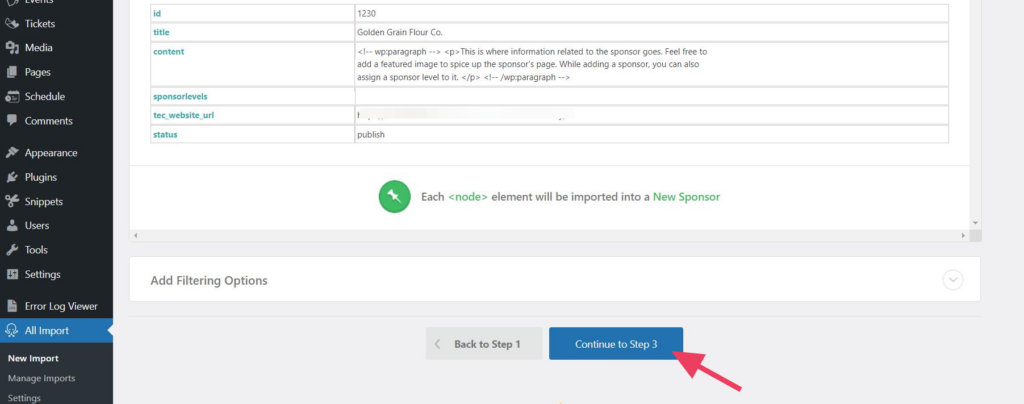
- After uploading the file, it’s time to select the post type. Just like step three in the exporting process, we’ll select Sponsors as post type.
- Click on the blue button to Continue to step 3.
Mapping is the most important part. Besides mapping the Title and Content, we should map the Custom fields. Mapping custom fields is a premium feature in WP All Import.
You can learn more about it here:https://www.wpallimport.com/documentation/theme-plugin-fields/