If you’re reading this post, then chances are you have a couple of questions on your mind: what is an extension, and how do I install one on my site? Our Extension Library contains many small enhancements to The Events Calendar, Event Tickets, and our other plugins. But let’s go into some more detail.
What is an extension?
Each extension is a tiny WordPress plugin that provides additional functionality to another plugin. There is no real difference between an extension and any other plugin you would install in WordPress other than being dependent upon one of our other plugins. Extensions are just extremely miniature plugins and as a result, will typically have no impact on your website’s performance.
In other words: an extension is just a tiny WordPress plugin that enhances the functionality of our products.
While extensions are not officially supported by us, we do periodically update them. This may enhance their functionality or keep pace with the related updates to our core and premium plugins.
Another difference with extensions is that they are available directly on our site. While most WordPress plugins are hosted on the WordPress.org plugin repository, that website has some restrictions in place that prevent things like Extensions from being uploaded there.
Thus we have our own little repository on this site called the Extension Library, and this is where you go to find and download one. That’s great because it’s like a one-stop shop to find what’s there. On the other hand, that also means that they are unable to be updated in the WordPress admin like other plugins that are installed from the WordPress plugin directory.
What does that mean for you? You won’t get updates or notifications from WordPress.org if the extension is updated. That’s disappointing because we really want you to have the latest version!
But, hey, good news! There’s still a way that you can be aware of extension updates and install them from WordPress, thanks to a free tool called Git Updater. We’ll show you how it works.
Install extensions
⚠️ Plugins Remote Installation inside Git Updater is a feature provided for Git Updater Pro users only. Check their documentation page to get more information.
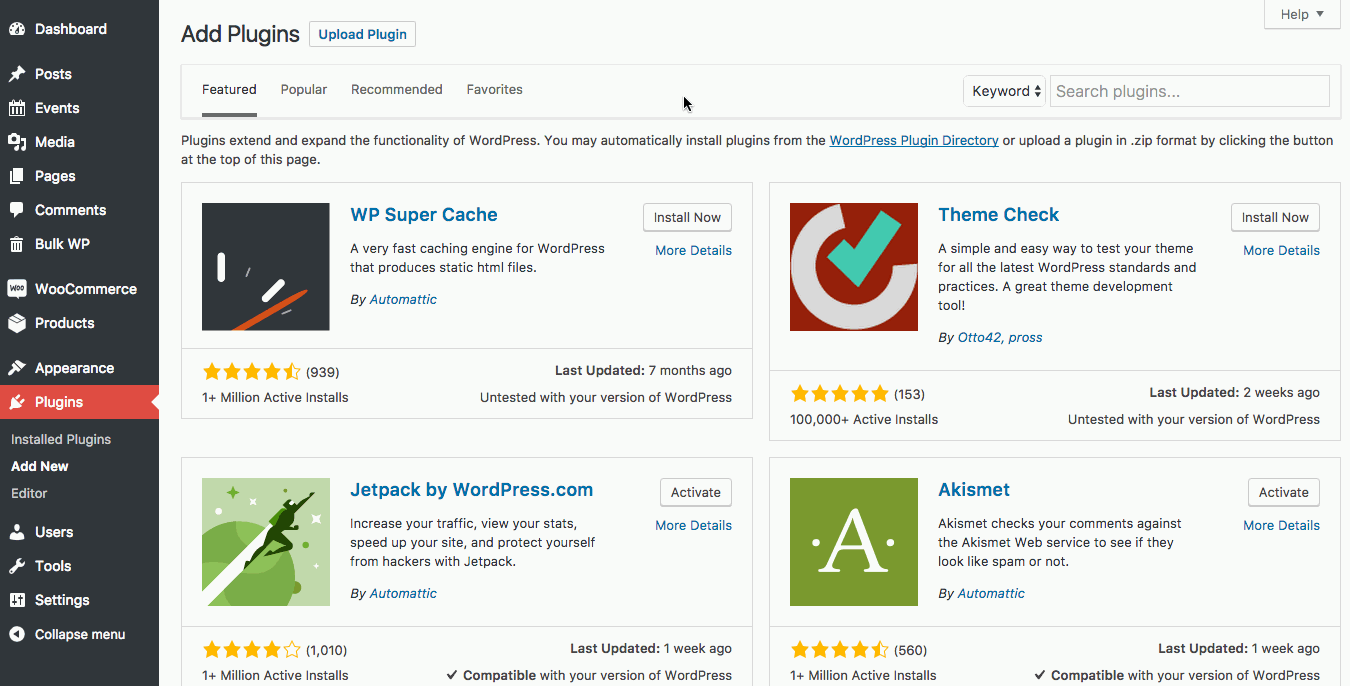
Each extension is packaged as a ZIP file that you download directly to your computer. Once it is downloaded, you will need to upload and install it in WordPress.
- Log in to the WordPress admin where the extension is being installed.
- Navigate to Plugins → Add New.
- Click the “Upload Plugin” button at the top of the screen.
- Follow the prompts to upload the ZIP file you just downloaded.
- Click the “Install Now” button.
- Click the “Activate” button once the upload has been completed.
- To receive manual updates, remove the old extension version and upload the new version.
Install extensions with Git Updater
It’s good to know how to install extensions by downloading them manually. But that approach won’t receive any update notifications. To do that, you’ll want to install extensions with Git Updater.
👋 Most extensions newer than 2019 have this capability. Extensions prior to 2019 will be retrofitted to work with this method at a later time. If the GitHub link displays on the Extensions page, you’re all set to use this method now.
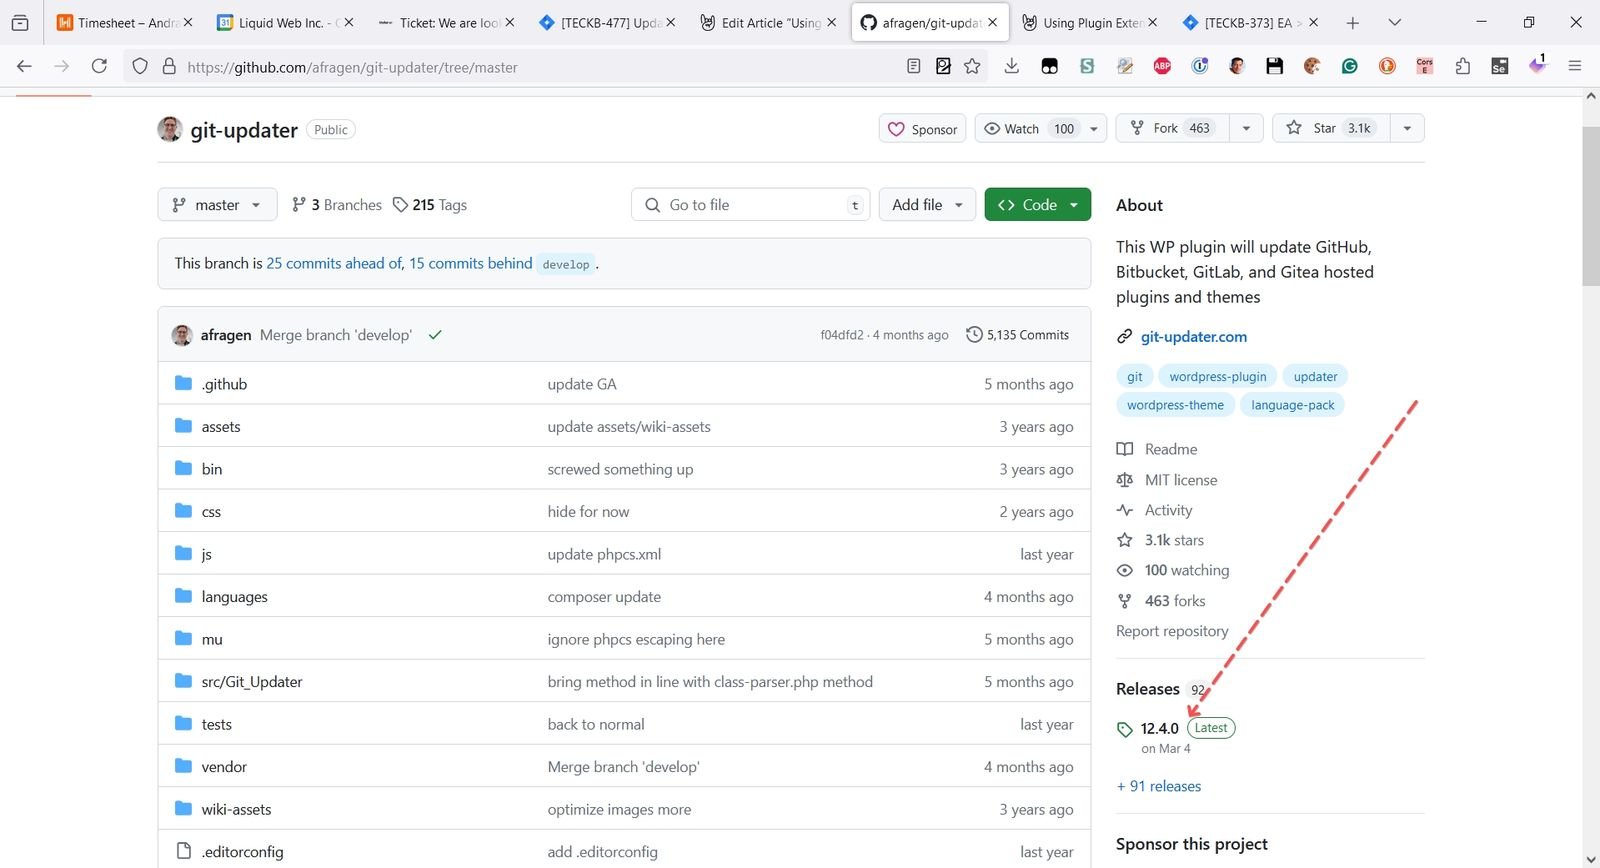
Download Git Updater
First things first: you’ll want to head over to GitHub and download the Git Updater. To ensure you are downloading the latest version, click on the “Latest” button as shown below.
Now that you have it, it’s time to install it in WordPress. Again, because this plugin is from GitHub — rather than the WordPress plugin directory — it needs to be manually installed.
- Log into WordPress
- Navigate to Plugins → Add New
- Select the “Upload Plugin” option
- Choose the saved ZIP file
- Install the plugin
- Activate the plugin after it finishes installing
Using Git Updater
To install an extension with Git Updater, head over to our Extensions page. Find the extension you’d like to install.
Rather than downloading the extension, click on the link that takes you to the GitHub page.
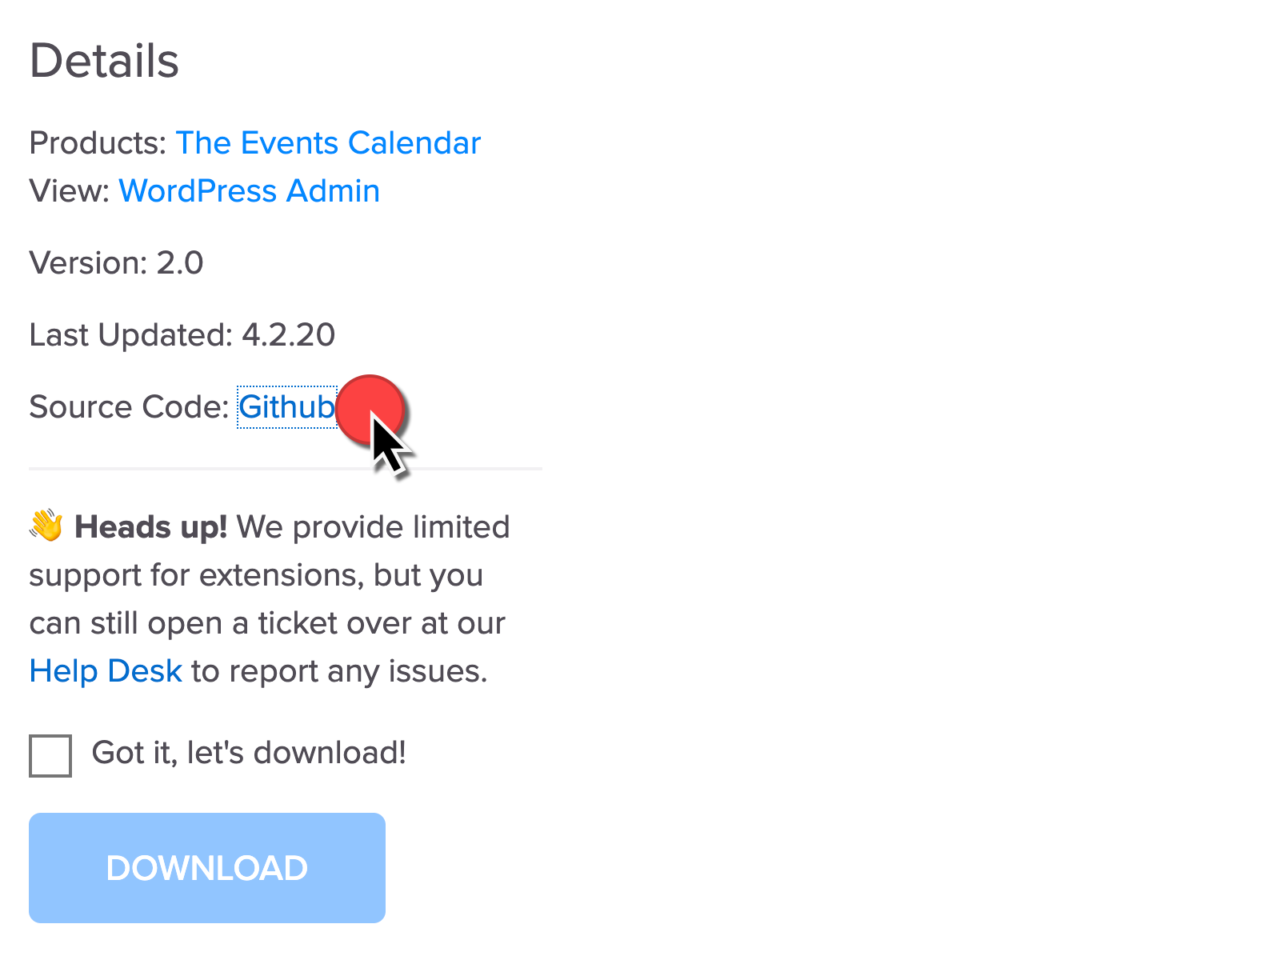
Then copy the URL address, like this:
https://github.com/mt-support/tec-labs-event-slider
Head over to your site. Go to Settings → Git Updater and paste the address you just copied into the Plugin URL field.
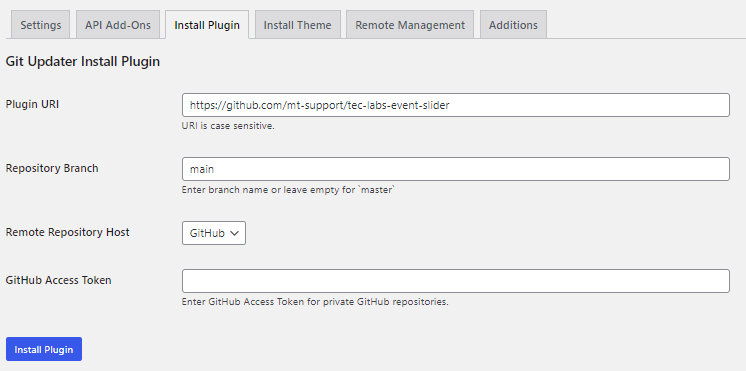
👋 Note: GitHub and many other platforms are now using “main” as the default branch name instead of “master.”

Please make sure you check the branch on the GitHub page to confirm you are using the correct one. Most of our extensions are using the “main” default branch.

After entering all the necessary information, click “Install Plugin.” Once you install the extension you can find it you can find it among the other plugins on your website under Plugins → Installed Plugins.
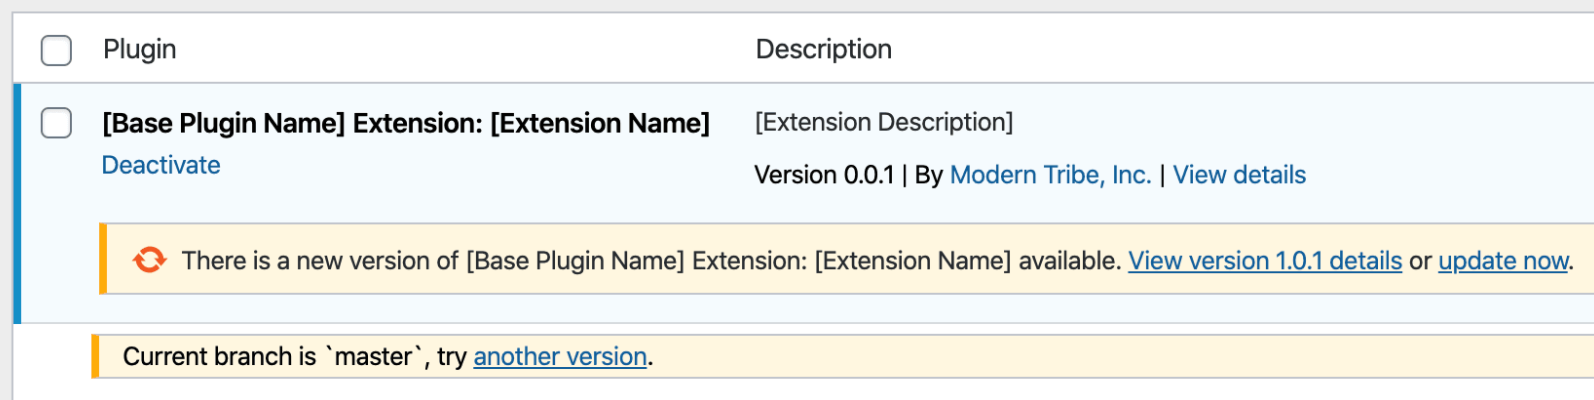
Updating extensions
When we release an update for our extensions, you’ll now be notified, much like other plugin updates. You’ll find an update notification in your Dashboard → Updates, and it will look like this in Plugins → Installed Plugins. Run the update just like other plugins.
Furthermore, if you update the plugins by navigating to Dashboard → Updates → Select All → Update, extensions will update along with them, similar to any other plugin.