We’re going to go over the Events List Widget in this tutorial, including how to configure it, things to expect from it, and perhaps some tips and tricks you can use at your next cocktail party. You’ll be the star of the show, for sure.
Adding the Widget to a Sidebar
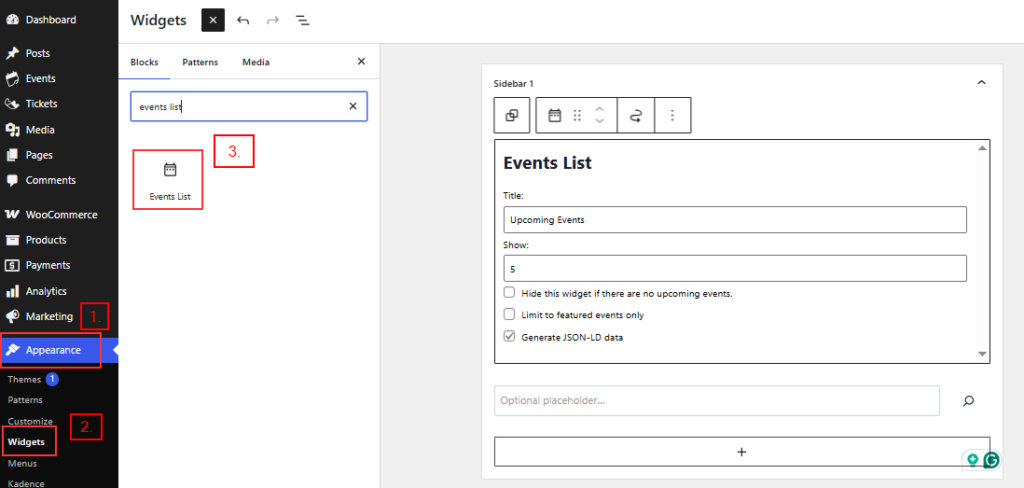
The first thing to note about the Events List widget is where to find it. The widget comes packaged with the core version of The Events Calendar (free). You’ll find it in Appearance > Widgets from the WordPress dashboard.
You can use this widget to display your calendar on pages other than your default events page. Drag that little guy into the sidebar area of your choice, and you’re off to the races!
Events Widget Settings
There are three settings that help customize the Events List widget experience. Let’s take a look at them:
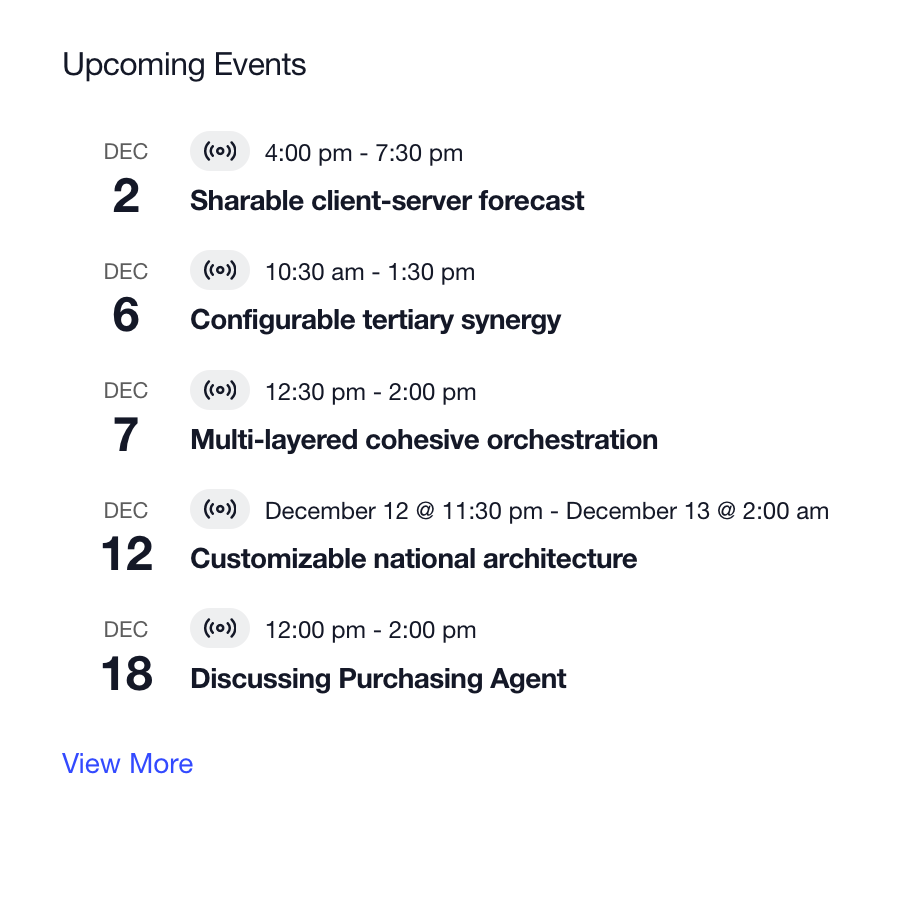
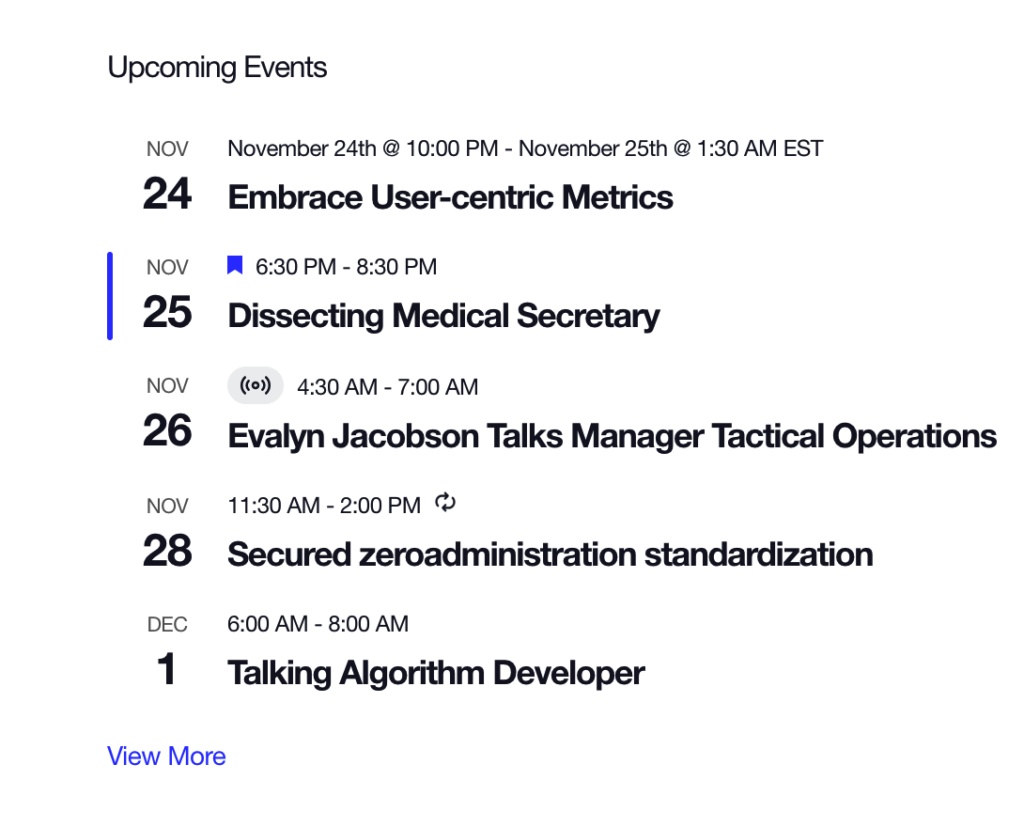
- Title: This is the heading that sits above the widget. By default, this is “Upcoming Events,” but it can be changed to anything you’d like.
- Show: This is the maximum number of events you want to display at any given time. Five is the default, but this can be any number between one and ten.
- Hide this widget if there are no upcoming events: Check the box for this option and the widget will automatically hide itself if there are no relevant events to list. Otherwise, it will display a handy notice saying there are no upcoming events at this time.
- Limit to featured events only: Check the box for this option, and the widget will display featured events.
- Generate JSON-LD data: Enable this setting if you would like to enable structured data in the widget. Structured data is what search engines use to recognize calendar content on and display events in the search results if the data is there and processed by the search engine.
Premium Widget Options
It’s important to bear in mind that the Events List widget in The Events Calendar Pro is the same widget that comes with the core version of The Events Calendar. If you have Pro, you’ll see the same Events List widget under Appearance > Widgets. In your frontend the Widget will have the same appearance; the only difference is that you have some more filtering options available to set up this.
As you can see, there are more configurable options when setting up the Pro widget. Add the widget to the sidebar the same way as described above, and now you’ll see more options. In addition to the same three options in the basic widget, Pro introduces these settings:
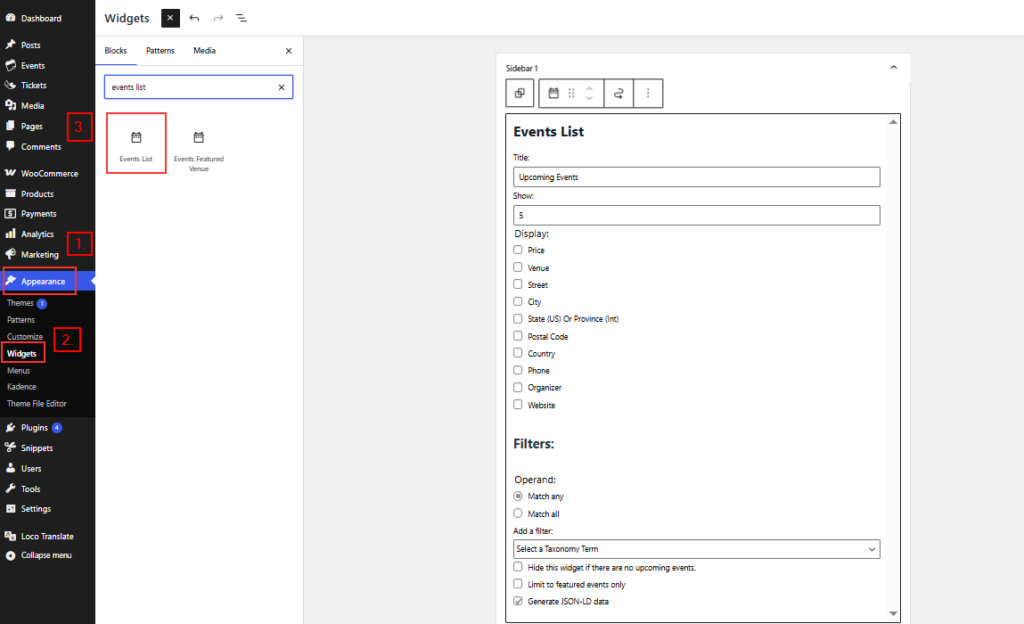
- Display: This is a set of checkboxes that allow you to toggle the display of different bits of information, including:
- Venue
- Organizer
- Street
- City
- State (US) or Province (Int)
- Postal Code
- Country
- Venue Phone
- Price
- Filter: This is an advanced setting that allows you to filter the events that display in the widget by a number of variables, including Categories and Tags. You can add multiple filters and also multiples instances of the widget- so if you wanted, you could have different widgets for different Event categories
Please note that all that settings are responsible only for properly loading events from your database. They don’t add or remove any visual information in the Widget!
Phew, that’s a lot of stuff! You really have a lot of options here to customize the widget’s content without touching a line of code, and that’s awesome.
Widget Block
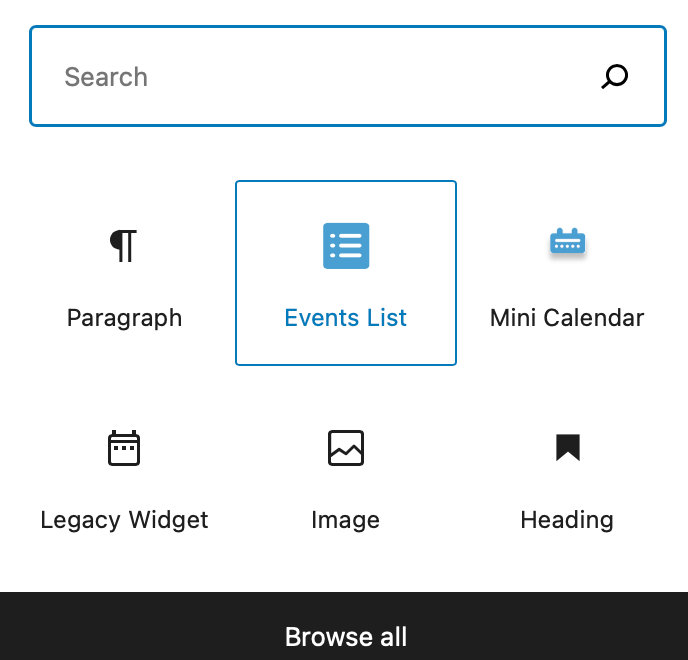
When using the Block Editor, you can add the Events List as a block instead. Simply search for Events List under blocks, and you’ll find all of the same available options.
Embedding the Widget with a Shortcode
To embed the advanced list widget, simply use the following shortcode:
[tribe_events_list]
The widget also comes complete with an advanced set of filtering options, and these can also be used with the shortcode. Here’s an example that looks for events in the party category:
[tribe_events_list category="party"]
We can supply a list of several categories or tag slugs (we just need to separate them with commas), and we can also use IDs by prefixing them with the # symbol:
[tribe_events_list categories="party, black-tie" tag="#512"]
You can also add a tax-operand attribute to the calendar so that multiple categories or tags can display at once:
[tribe_events_list tags="cabbage, broccoli" tax-operand="AND"]
Also, just like the advanced list widget itself, it is possible to specify extra information which should be displayed, such as the phone number and address of each venue:
[tribe_events_list phone="yes" address="yes"]
Here’s a complete list of those optional details:
- venue (supports multiple venues)
- country
- street
- city
- region
- zip
- phone
- cost
- organizer
Finally, you can specify the maximum number of events that should be listed:
[tribe_events_list limit="10"]
Customizing the Widget
Styling with CSS
You can apply custom CSS to the Events List widget to change its appearance. The widget’s styles are loaded from widget-events-list-full.css. To target the widget with your own CSS rules, use the base class:
.tribe-events-widget-events-list {
    /* your styles here */
}
For guidance on where to add custom CSS and how widget stylesheets work, see our Customizing CSS guide.
Using Calendar Views
The template for the core Events List widget can be found at: /plugins/the-events-calendar/src/views/v2/widgets/widget-events-list.php. This single file contains all the content and functionality for the widget. To override it, make a copy of it, then:
- Make a new folder in the theme directory called tribe
- Inside the new tribe folder make a new folder called events
- Inside events folder, make a folder called v2
- Make a folder in that one called widgets
- Drop the widget-events-list.php copied file in that last folder
Now that the template is in the theme, you can modify it to your liking. For example, you can customize the notice for when there are no upcoming events by changing this line:
<?php $this->template( 'components/messages' ); ?>
…to something like:
<p> No events here. Holla! </p>
The process for customizing the widget in Events Calendar Pro is very similar. Actually both Free and Pro version of The Events Calendar uses the same file to displays the widget. The main difference here is that Pro version gives you more filtering options in WordPress dashboard.
Remove the End Date/Time
As you may have noticed, there isn’t an option to hide the end date/time. If you need to do so, the following code snippet will help you achieve that. Be sure to check out our snippet guide for information on how to apply the code snippet to your site.
add_filter ( 'tribe_events_event_short_schedule_details', function ( $schedule ) {
	$dash_position = strpos( $schedule, '> - ' );
	$schedule = substr( $schedule, 0, $dash_position );
	return $schedule;
} );
Change the ‘View Calendar’ Link
The ‘View All Events’ link in the Events List widget defaults to the main events archive page set under Events > Settings > General > Viewing. By default, this is the /events/ slug.
If you have created a custom page to display your calendar using a shortcode, or if you’ve simply changed the main calendar slug, you’ll need to update this link to point to your new URL.
This guide provides a simple code snippet to update the destination URL for the ‘View All Events’ link in the Events List widget.
This snippet uses jQuery to select the ‘View More’ link in the Events List widget (.tribe-events-widget-events-list__view-more) and updates its href attribute to a custom URL.
add_action( 'wp_footer', function() {
?>
<script>
jQuery(document).ready(function($) {
  // Replace 'https://example.com/new-page/' with your desired custom URL
  var customCalendarUrl = 'https://example.com/new-page/';

  // Target the 'View All Events' link in the Events List widget
  $('.tribe-events-widget-events-list__view-more a')
    .attr('href', customCalendarUrl);
});
</script>
<?php
} );
How to Use the Code
Replace the URL: Change the dummy URL 'https://example.com/new-page/' to the exact URL of your custom calendar page.
Add the snippet:
- Add the code to your child theme’s
functions.phpfile. - Or, preferably, use a dedicated Code Snippet plugin for easier management.
Clear any site cache (plugin, server, or CDN) to ensure the new code is loaded on the front end.
For more information, please see our guide on the best practices for implementing custom code snippets.
This approach is simpler than overriding the widget’s template file, and ensures the ‘View All Events’ link points to your custom URL.
Hide the “View Calendar” Link
You can completely disable the link using a PHP snippet. Add the following code to your theme’s functions.php file or through a plugin like Code Snippets. Using this method if you want to remove the link from the DOM entirely (cleaner code output).
add_filter( 'tribe_template_pre_html:events/v2/widgets/widget-events-list/view-more', '__return_false' );This method removes the link from the HTML entirely, so it won’t be rendered on the frontend.
If you’d rather keep the markup and just visually hide the link, you can use this CSS snippet instead. Use this method if you prefer a non-invasive method that only affects the visual display.
.tribe-events-widget-events-list__view-more {display: none !important;}You can add the CSS code in one of the following ways:
- Via Customizer: Appearance → Customize → Additional CSS
- In your theme or child theme’s
style.cssfile - Through a custom CSS plugin
Show Newest Published Events
By default, the Events List Widget in The Events Calendar displays upcoming events in order of their event start date.
But what if you want to sort events by when they were published instead of when they take place? This would allow you to showcase the most recently added events, regardless of their start date.
Fortunately, with a simple code snippet, you can modify the Events List Widget to display events by publication date (newest first) instead.
The snippet below customizes the widget’s behavior. You can add it as a standalone plugin or insert it into your theme’s functions.php file. Once in place, list widgets will prioritize newly published events instead of upcoming ones.
If you don’t want this change to apply to all List Widgets, you can add constraints to target specific widgets or sidebars.
For example, if you only want this behavior for a widget titled “Newly Added”, modify the following line at the bottom of the snippet:
new EventsListWidget_NewlyAddedEvents();
…to this:
new EventsListWidget_NewlyAddedEvents( array(
  'widget_title' => 'Newly Added'
) );
This ensures that only the “Newly Added” widget adopts the new sorting behavior while others remain unchanged.
Check out the snippet below to implement this feature!
<?php //Do not copy this line

class EventsListWidget_NewlyAddedEvents {
	protected $constraints = array(
		'sidebar_id'   => null,
		'widget_id'    => null,
		'widget_title' => null
	);

	public function __construct( array $constraints = array() ) {
		$this->constraints = array_merge( $this->constraints, $constraints );
		add_filter( 'widget_display_callback', array( $this, 'setup' ), 10, 3 );
	}

	public function setup( $instance, $widget, $args ) {
		// We're interested only in the (advanced or regular) events list widgets
		$targets = array( 'tribe-events-adv-list-widget', 'tribe-widget-events-list' );
		if ( ! in_array( $widget->id_base, $targets ) ) {
			return $instance;
		}

		// Check for constraints
		if ( ! $this->constraints_met( $instance, $args ) ) {
			return $instance;
		}

		// Modify behavior
		add_filter( 'tribe_events_views_v2_widget_repository_args', array( $this, 'order_by_latest' ) );

		return $instance;
	}

	protected function constraints_met( $instance, $args ) {
		$fail = false;

		// Should only run within a specific sidebar?
		if ( ! is_null( $this->constraints['sidebar_id'] ) && $this->constraints['sidebar_id'] !== $args['id'] ) {
			$fail = true;
		}

		// Should only run in relation to a specific instance of the widget?
		if ( ! is_null( $this->constraints['widget_id'] ) && $this->constraints['widget_id'] !== $args['widget_id'] ) {
			$fail = true;
		}

		// Should only run when the widget title is set to something specific?
		if ( ! is_null( $this->constraints['widget_title'] ) && $this->constraints['widget_title'] !== $instance['title'] ) {
			$fail = true;
		}

		return ! $fail;
	}

	public function order_by_latest( $args ) {

		// Don't interfere in other queries
		remove_filter( 'tribe_events_views_v2_widget_repository_args', array( $this, 'order_by_latest' ) );

		// Tweak the actual orderby clause
		add_filter( 'posts_orderby', array( $this, 'override_orderby' ), 100 );

		return $args;
	}

	public function override_orderby( $orderby_sql ) {
		global $wpdb;

		// Don't interfere in other queries
		remove_filter( 'posts_orderby', array( $this, 'override_orderby' ) );

		return "$wpdb->posts.post_date DESC, $orderby_sql";
	}
}

new EventsListWidget_NewlyAddedEvents();
Adding the Event Featured Image
If you find yourself thinking, “The event list widget design is great, but I wish it showed the event’s featured image,” well, we’ve got something for you. In fact, we have three approaches to do just that.
Let’s walk through those together!
What We’re Making
In short, we’re adding a thumbnail of the featured image for each event that is displayed in the widget.
The Nice and Neat Way
We’ve got the nice-and-neat way (which we recommend because we like things neat, and you get to learn how the plugin templates work).
As we’ve discussed before in other articles, our new templating system is chock-full of actions and filters that allow for fine-tuned customization. If what we want is to simply jam an image in there, we can do that with a couple of hooks.
Open up your functions.php file. It’s located at the top level of your theme folder. Then add this snippet at the bottom of the file:
// Here we hook into our template action - just before the date tag, which is the first item in the container.
add_action(
  'tribe_template_after_include:events/v2/widgets/widget-events-list/event/date-tag',
  'my_action_add_event_featured_image',
  15,
  3
);

// Here we utilize the hook variables to get our event, find the image, and echo the thumbnail.
function my_action_add_event_featured_image( $file, $name, $template ) {
  // Get the event for reference - we'll need it.
  $event = $template->get('event');

  $link = sprintf(
    '<a href="%1$s">%2$s</a>',
    get_the_post_thumbnail_url( $event ),
    get_the_post_thumbnail( $event, 'thumbnail', array( 'class' => 'alignleft' ) )
  );

  echo $link;
}
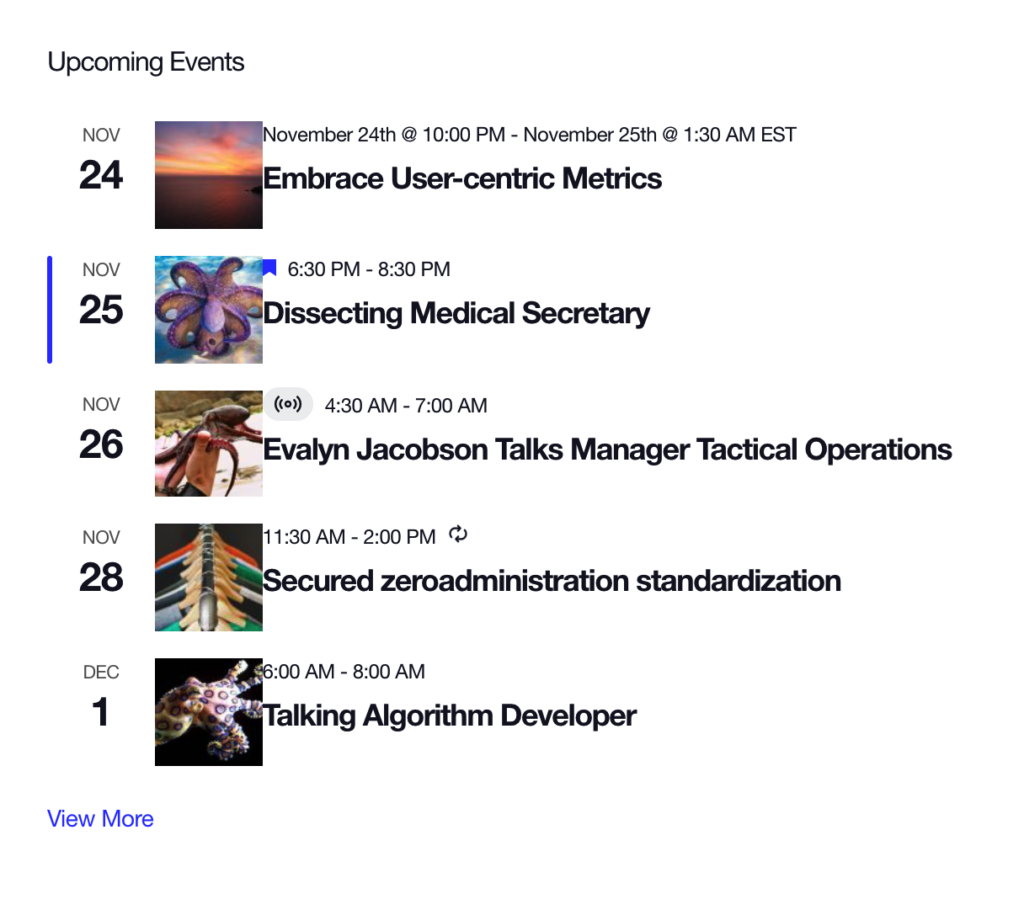
This gives us the images just like we want:

There’s still a little styling to do there. For example, the thumbnail images are pushed right up against the event’s date and title. That’s nothing a little CSS in your theme’s stylesheet can’t handle.
ℹ️ Related: Customizing CSS
The Custom Template Way
This approach is similar to the previous one, but we’re going to be a bit neater about where we put our HTML. What we’re doing is creating a custom template that contains the featured image, goes in the theme folder, and gets injected into the widget.
Follow that? Yeah, not exactly “nice and neat” but it is a very effective and clean approach to get the featured image thumbnail in the widget. It also proWides more room to add logic without creating a giant function to handle it like the previous approach.
First we use the add_action as we did before at the end of the functions.php file. This is hooking into the action that injects the template containing the event’s date and time and tells the theme to run a custom my_action_add_event_featured_image action.
// Here we hook into our template action - just before the date tag, which is the first item in the container.
add_action(
  'tribe_template_after_include:events/v2/widgets/widget-events-list/event/date-tag',
  'my_action_add_event_featured_image',
  15,
  3
);
Now let’s define that function, again, in the functions.php file, right after the previous snippet.
function my_action_add_event_featured_image( $file, $name, $template ) {
	// Get the event for reference - we'll need it.
	$event = $template->get('event');

	// Here's where we get and display our image.
}
In the “nice and neat” approach, we used a similar snippet to inject the HTML for the featured image thumbnail. This time, we’re going to inject a custom template that contains that HTML. That way, you can always add more markup to the file instead of having to mess with your functions.
We don’t need to create a template from scratch. There’s already a template in the plugin that contains the event’s featured image. It’s located in The Events Calendar plugin files, which is in the wp-content directory one level up from the theme folder. This is the file we want: the-events-calendar/src/views/v2/list/featured-image.php.
Let’s copy that featured-image.php file and put the copy in the theme folder. It’s not terribly important where the copied file goes, but it’s best that it lives in a tribe folder so it’s separated from the rest of the theme files. This would make a good path because it conforms to the same pattern used for template overrides: [my-theme]/tribe/events/v2/widgets/widget-events-list/event/featured_image.php.
So, going back to the functions.php file in the theme, we can add that path to our function, like this:
function my_action_add_event_featured_image( $file, $name, $template ) {
  $template->template( 'widgets/widget-events-list/event/featured_image', $template->get_values() );
}
There’s some sleight-of-hand happening here. See that $template->get_values() bit in the function? That makes sure the template values all get passed along to our new template.
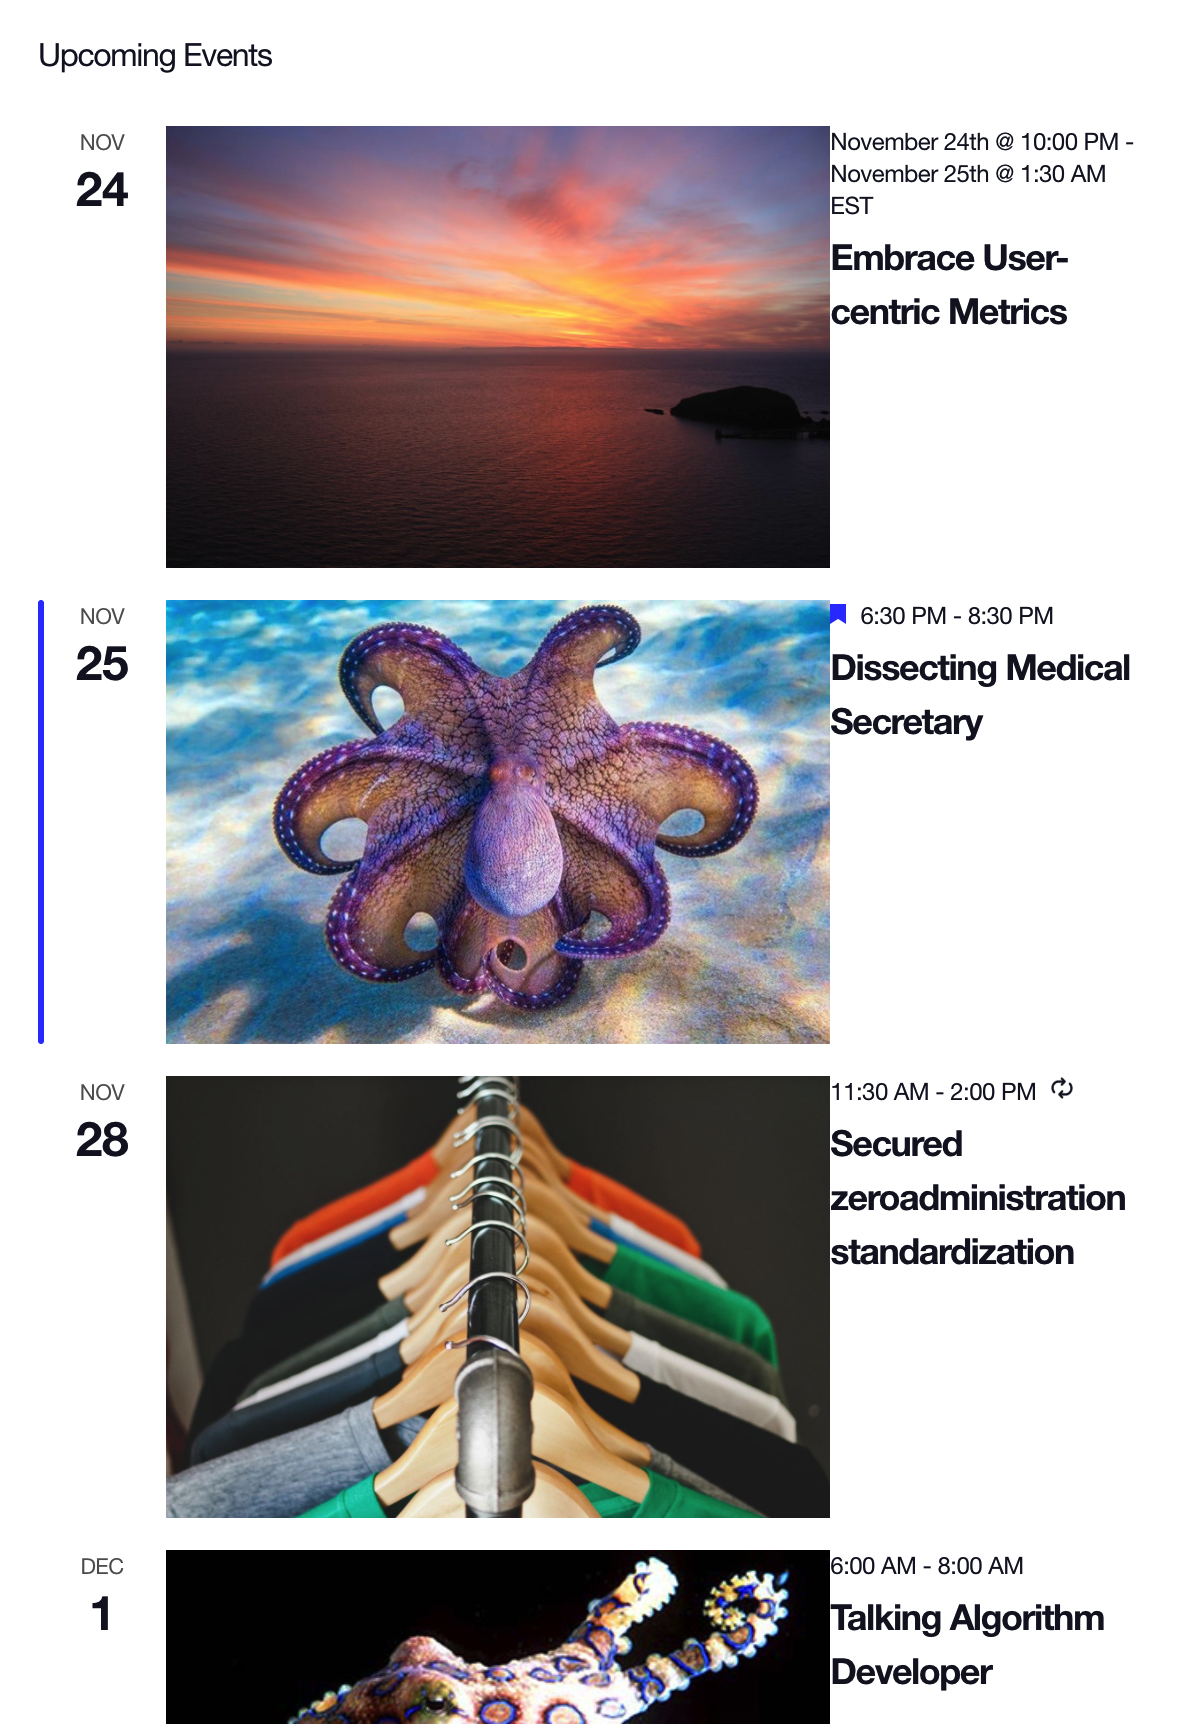
Here’s what we get:
The Template Override Way
We have one more approach, and it’s a bit less work and messing with the functions.php file. Instead of creating our own template, we’re just going to override the plugin’s template. There’s an entire article on template overrides and how they work, but let’s quickly walk through it.
First, locate the template we want to override. It’s located in the plugin folder itself, which is at wp-content/plugins/the-events-calendar. Once in there, let’s snag the actual file called event.php in the /src/views/v2/widgets/widget-events-list folder.
Now that we know where the template is, we can make a copy of it and add it to the active theme. We need to create a /tribe folder in the theme, then drop the copied event.php file in there in another set of folders. The final file path of the copied template will be:\
wp-content/themes/[your-child-theme]/tribe/events/v2/widgets/widget-events-list/event.php
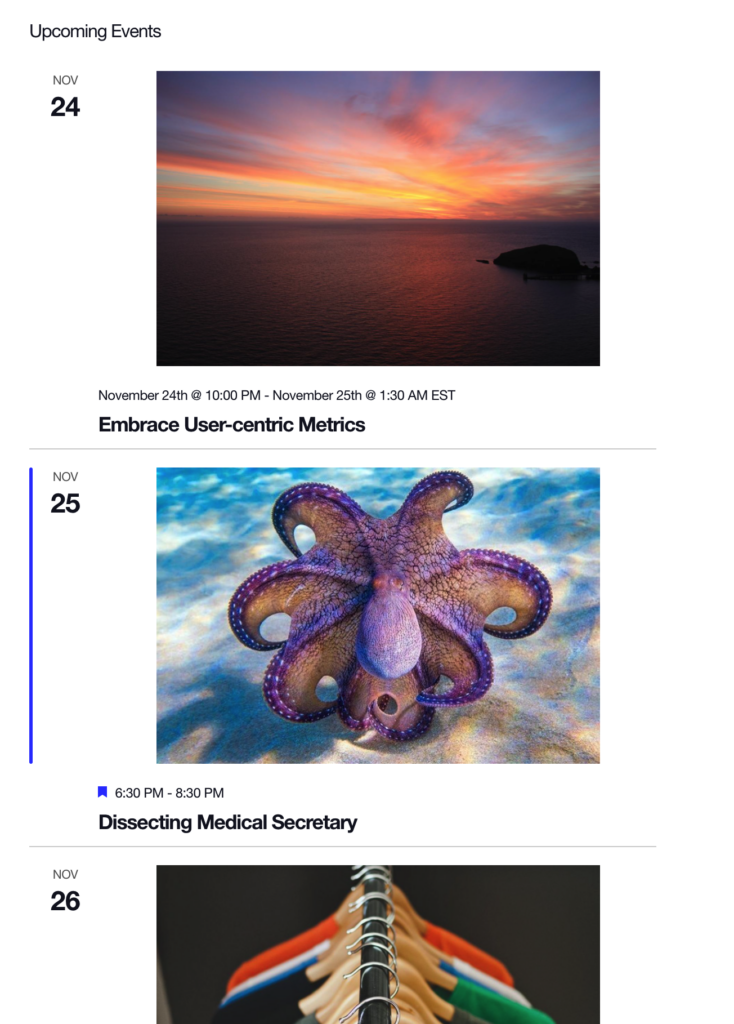
Now that the files is in our theme, we can customize it to suit our needs! In this case, we can add the following line of code to the template to display the features image:
<?php echo tribe_event_featured_image( $event->ID, 'thumbnail' ); ?>
To display the featured image above or below the title, add it above or below this line, respectively:
<?php $this->template( 'widgets/widget-events-list/event/title', [ 'event' => $event ] ); ?>
Or, if we want things to work look and work like the first two approaches, add that code after this line instead:
<?php $this->template( 'widgets/widget-events-list/event/date-tag', [ 'event' => $event ] ); ?>
Wrapping up
And there you have it — three solid approaches for adding an event’s featured image thumbnail to the event list widget. The first approach is “nice and neat” because it only involves working on one file. But the custom template approach offers more flexibility when it comes to adding more markup as well as better separation of concerns as the markup is kept distinct from the function that injects it.