By default, Promoter automatically imports attendees from your events — anyone who purchased a ticket or registered via RSVP. But what if you want to promote your events to people who haven’t attended before? You can create custom lists for that purpose.
💡 Custom lists are limited to a total of 5,000 email addresses across all lists combined. Attendee lists imported automatically from your events are unlimited and do not count toward this limit.
Custom Lists vs. Attendee Lists
It’s worth understanding the distinction between the two list types in Promoter:
- Attendee lists are created automatically from your event registrations. Every person who purchases a ticket or RSVPs to an event is added to that event’s attendee list. These lists are unlimited in size and managed by Promoter.
- Custom lists are lists you build and manage yourself, typically for contacts who haven’t attended an event yet — prospects, newsletter subscribers, or any audience you choose to import manually. These are capped at 5,000 addresses across all custom lists.
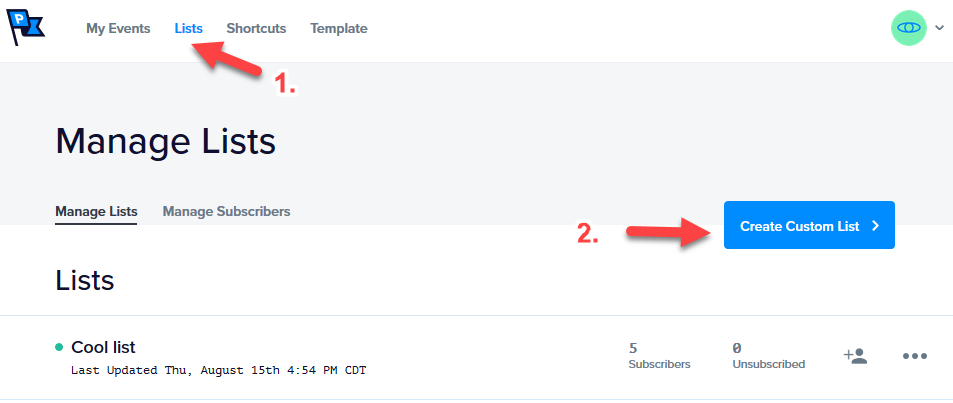
Creating a Custom List
- Click the Lists menu in Promoter.
- Click Create Custom List.
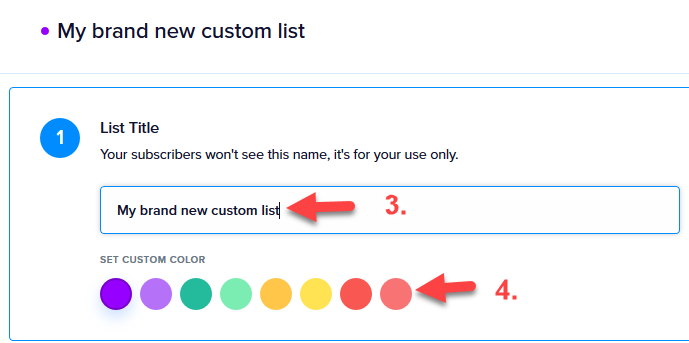
- Enter a List Title — choose a name that will help you identify the list.
- Optionally, set a custom color for the list. This is useful when you have several custom lists and want to tell them apart at a glance.
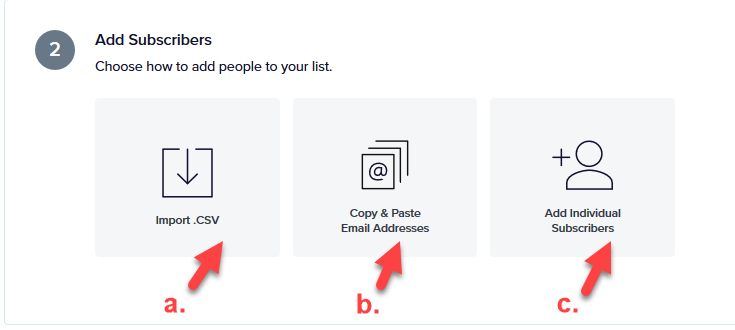
- Add at least one subscriber using one of the three methods below.
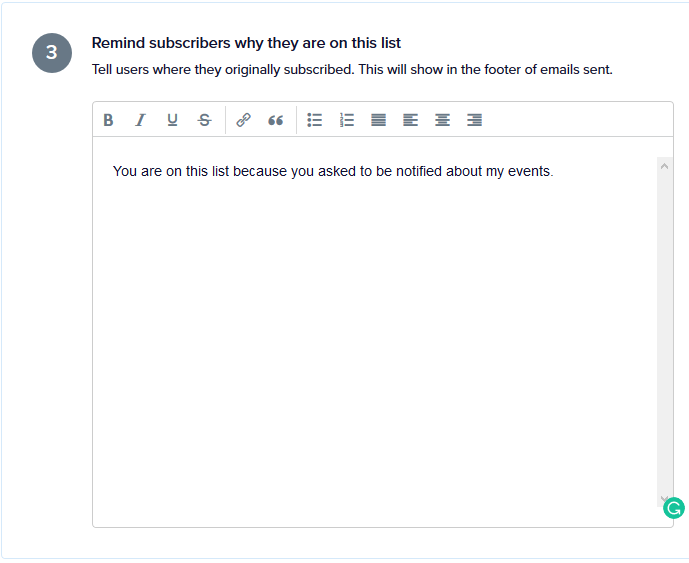
- Fill in the Remind Subscribers why they are on this list field. This text appears in the footer of every email sent to members of this list and is required for compliance with email marketing laws and regulations.
- Check the permission checkbox to confirm that you have consent to send marketing and promotional emails to the addresses you’ve added. Ensuring proper opt-in consent is essential for any email marketing campaign — failure to do so can have serious legal and financial consequences.
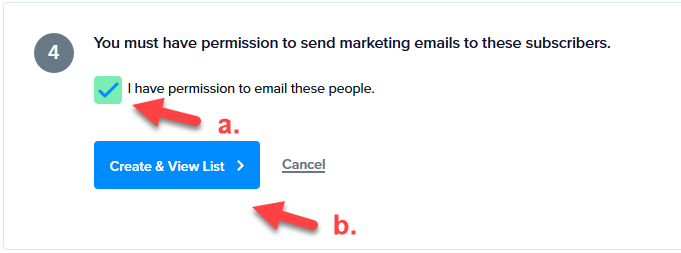
- Click Create & View List.
Adding Subscribers
Promoter provides three methods for adding subscribers to a list. These options are available both during list creation and when adding to an existing list from the Lists menu.
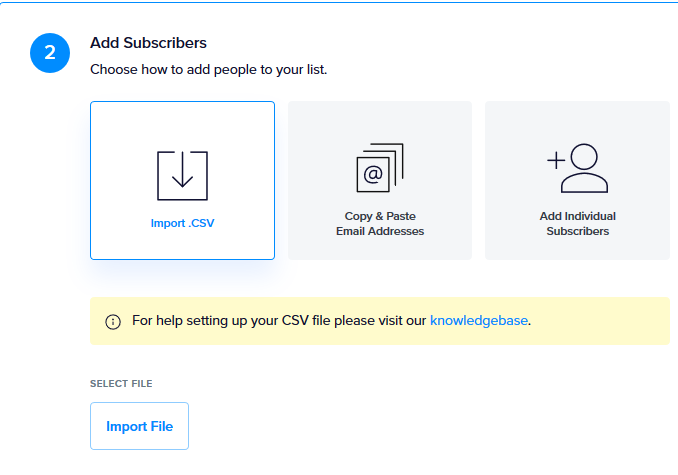
Import a CSV File
Prepare a CSV file with up to three columns: First Name, Last Name, and Email. Email is the only required column, but including First Name and Last Name allows you to personalize messages with the recipient’s name.
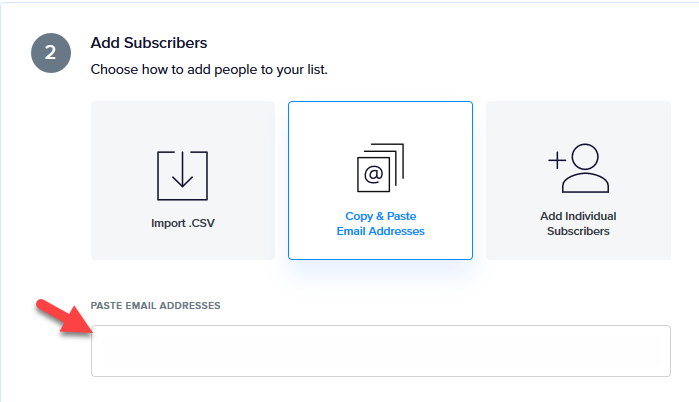
Copy and Paste Email Addresses
Select this option to reveal a text field where you can paste email addresses directly. Separate each address with a comma and submit the form to add them to the list.
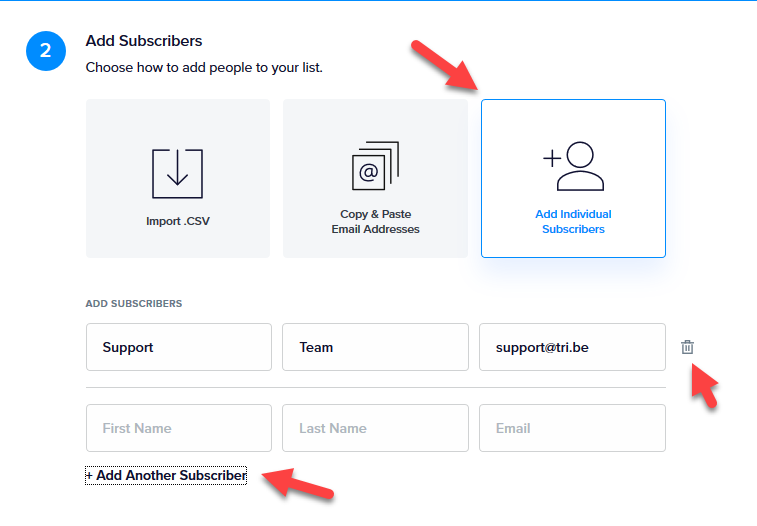
Add Subscribers Manually
This option lets you enter subscriber details one at a time directly on the page. You’ll see the same fields as the CSV import — First Name, Last Name, and Email — with Email being the only required field.