Purchase rules give event organizers advanced control over customer ticket purchases. Rules are triggered based on specific criteria and apply automatically during the purchase process. Drive sales with automatically applied discounts or enforce restrictions like purchase limits. With purchase rules, you can precisely define triggers and actions, and have them automatically applied to eligible events. When customers purchase tickets, purchase rules trigger based on their selections.
Purchase rules are available with Event Tickets Plus. Rules can be used on sites that use Tickets Commerce to sell tickets. They do not apply to RSVPs, Series Passes, or any tickets sold with WooCommerce.
Types of purchase rules
Discount
Discount rules automatically apply a flat or percentage discount based on the customer’s selections. An order discount rule applies a discount to all tickets in the order, based on the number of tickets or the total amount. Ticket discount rules apply discounts to specific tickets are triggered by the defined quantity, e.g. a 10% discount off VIP tickets if the customer is buying four or more.
Example: Apply a $10 order discount to purchases of 5 or more tickets.
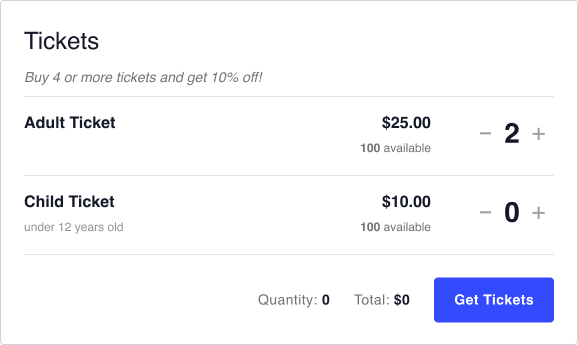
When an event has a discount rule, you can show a promotional message above the ticket listings to smoothly upsell customers.
Purchase Limit
Purchase limit rules allow you to set the maximum number of tickets that a customer can purchase at one time. Limits can be for all tickets on an event or specific to certain tickets. Purchase limits are a great way to prevent ticket scalping and provide more customers with the chance to purchase.
Example: Limit each purchase to 2 VIP tickets.
Purchase Minimum
Use a purchase minimum rule to require customers to buy a certain number of tickets or spend a specified amount per order. With an event purchase minimum, the customer cannot check out until their selections total the required amount. With a ticket purchase minimum, a customer buying any of the specified ticket must meet the minimum.
Example: Require a minimum purchase of $100.
User Role Restriction
Define who can purchase tickets to a given event with user role restrictions. All users can view the available tickets, but only logged-in users of the designated role level will be able to select and purchase tickets to the event.
Example: Limit ticket purchases to Members or Patrons only.
Combined Purchase
A combined purchase rule allows you to require that specific tickets are always purchased in combination. In order to purchase any number of a designated restricted ticket, they’ll also have to select at least one of the required tickets.
Example: Require any Child tickets to be bought with at least one Adult ticket.
Creating a purchase rule
To create a purchase rule, go to Tickets > Purchase Rules and click Add New Rule.
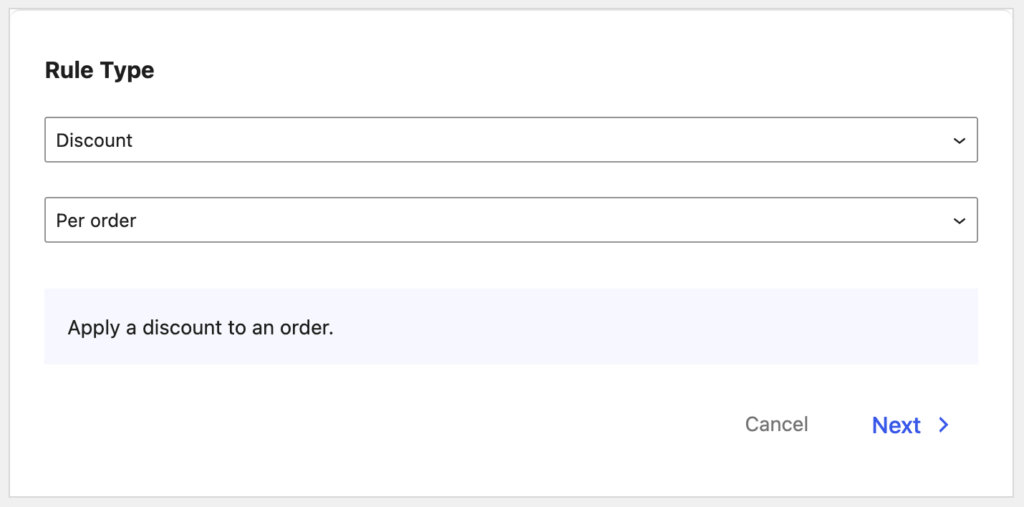
Rule Type
Choose your rule type from the dropdowns. Then click Next.
Rule Definition
Add a name for your rule so you can recognize it later. Then use the options to define the trigger and resulting action of the rule. The available options vary depending on the rule type.
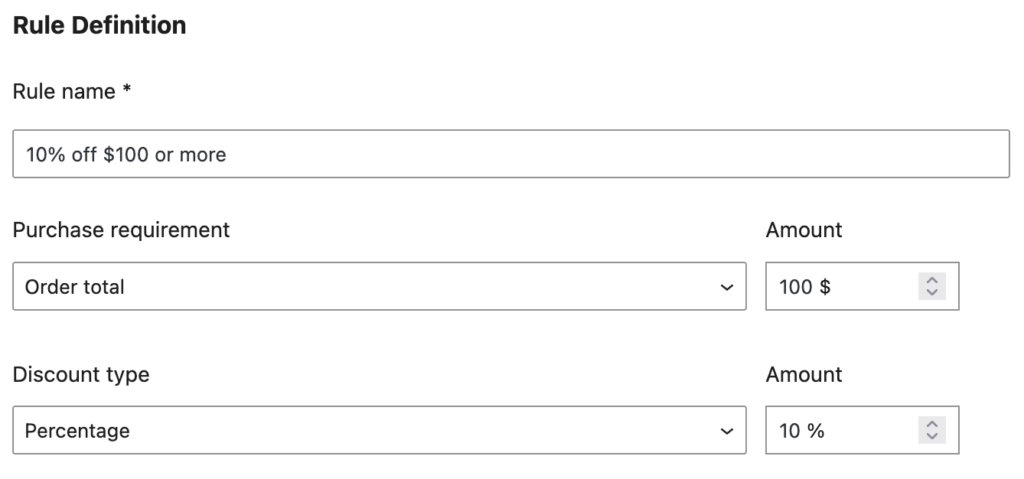
Example 1: Order discount
The Purchase Requirement dropdown sets the type of trigger for the discount. Order discounts can be applied based on the number of selected tickets or the total amount of the selected tickets. Once you define the requirement to trigger the rule, set the discount that should be applied. Discounts can be a flat amount or a percentage of the total order.
In this example, a 10% discount will be automatically applied to the order if the customer selects at least $100 of tickets to the event.
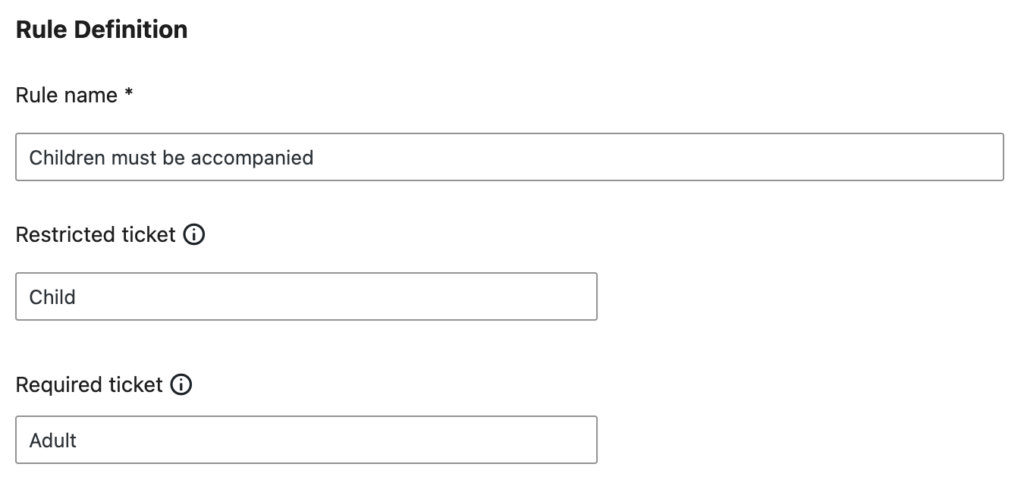
Example 2: Combined purchase
The first step of a combined purchase rule is to set the restricted ticket. Customers attempting to purchase this ticket will have to also select at least one of the required tickets before they can go to checkout. In this example, the restricted ticket is Child, which can only be purchased alongside the required ticket, Adult. As long as the customer has selected at least one Adult ticket, they can purchase any number of Child tickets. Adult tickets are not restricted.
Using ticket name keywords
All ticket-specific rules include at least one Ticket name keyword field. The ability to designate tickets based on keywords allows rules to be applied to multiple similar tickets across events. The rule will be triggered whenever the customer selects the required ticket(s) with that keyword in the ticket name.
Say you price all your events based by age, with Child, Student, Adult, and Senior tickets. You can create a ticket discount rule that applies a $5 discount to a purchase that includes 3 or more Child tickets. The discount could apply to any event that has a ticket with the word “Child” in the name. Even if you have three different events with slightly different ticket names (Child, Children 12 and under, children), the discount rule could apply to those ticket selections.
Not only do ticket keywords allow you to apply rules to multiple similar tickets across your site, but they also allow rules to be applied to future events. To carry on the example above, if you created a new event in the future with a ticket called Children under 18, the “child” keyword makes the ticket eligible to discount based on your established rule. You don’t need to take any additional action.
Rule Scope
The rule scope controls what events a given rule applies to. By default, a rule will be applied to all current and future events. Defining a specific scope allows the rule to be applied automatically to events that meet specific criteria. When you create events in the future, events that meet the rule scope will have the rule applied, so you can set it and forget it. You can also opt to set no scope, in which case the rule will not be applied automatically at all. You can always add the rule manually from the event editor.
Rule scope is defined by specific criteria, and can include any combination of event title keyword, event category, tag, venue, or (for sites with Events Calendar Pro) Series title keyword. You can choose to require an event to match all or any of the defined criteria. For example, say you have set the following criteria:
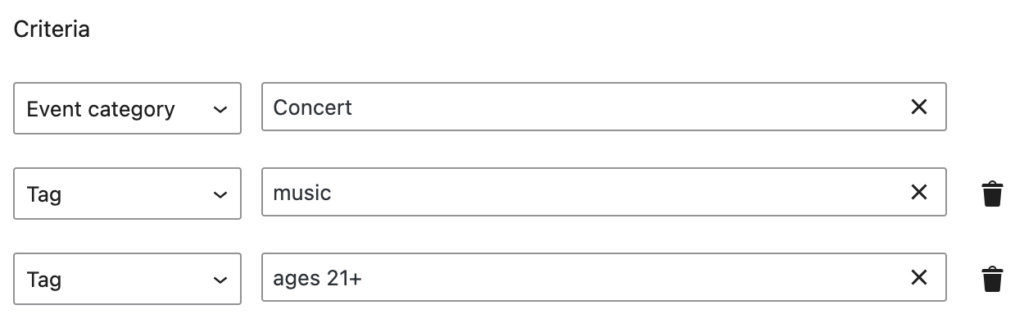
If you require events to match all criteria, the rule will only apply to events with tags music and family friendly. If you set the rule scope to match any criteria, the rule would apply to an event with only music.
Messages
The last step of creating a purchase rule is defining the frontend message that your customers will see when the rule triggers. For discount rules, you can set an optional promotional message. Promotional messages appear above the available tickets and advertise the possible discounts.
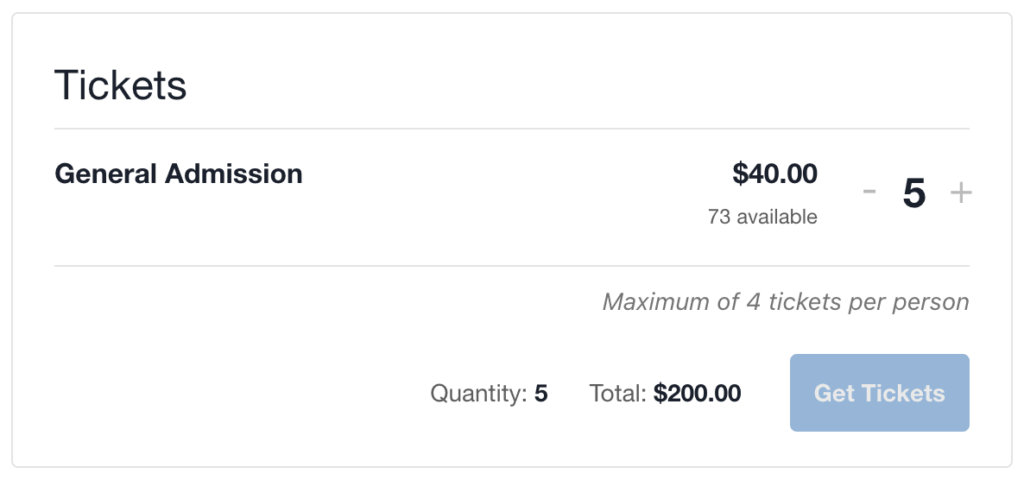
Non-discount rule types require you to set a restriction message. This message appears above the Get Tickets button if the purchase is blocked because of a purchase rule. It’s important for the customer to understand why their purchase is blocked and how they can meet the rule requirements. Once the customer meets the rule requirements, the message will disappear and they’ll be able to move on to check out.
When you save your purchase rule, it will be automatically applied to events that fall within the scope (and for ticket-specific rules, have tickets that match the name keywords). Applied rules will automatically start applying to ticket purchases on those events. You can see a list of all purchase rules applied to an event from the event editor.
Managing and applying purchase rules
You can see all of your purchase rules by going to Tickets > Purchase Rules. From there you can view, delete, or edit any existing rule. By default, rules are set to active and apply to events that match their scope. You can remove a purchase rule without deleting it by changing the status to inactive. An inactive rule will not apply to any events or purchases. Activating and deactivating rules can be useful for running temporary promotions.
When you edit an event with tickets, you can view a list of all applied purchase rules by clicking the Purchase Rules button. If you don’t see a rule that you were expecting to see, check the rule scope and make sure the event matches the necessary criteria. If the rule is specific to certain tickets, e.g. Adult, it will only be listed on events that have a ticket with that name keyword.
If you want to add a rule to an event that is not within the rule scope, you can do that from the event page. Select the rule(s) you want to manually apply to the event and it will apply to eligible purchases on that event.
You can also disable an applied rule for a specific event via the checkboxes. Disabled rules will not apply to any purchases on that event.