The calendar’s view templates and CSS styles are comprehensive and intentionally structured. However, this doesn’t mean you can’t make any changes to them; in fact, you can and the plugin is designed to let you do it! We’ve created a systematic design of the templates and CSS as a strong starting point. You as the user are free to change these as you see fit.
In this article, we will run through two examples of how to customize templates and CSS to create your perfect events view.
Editing event styles in photo view
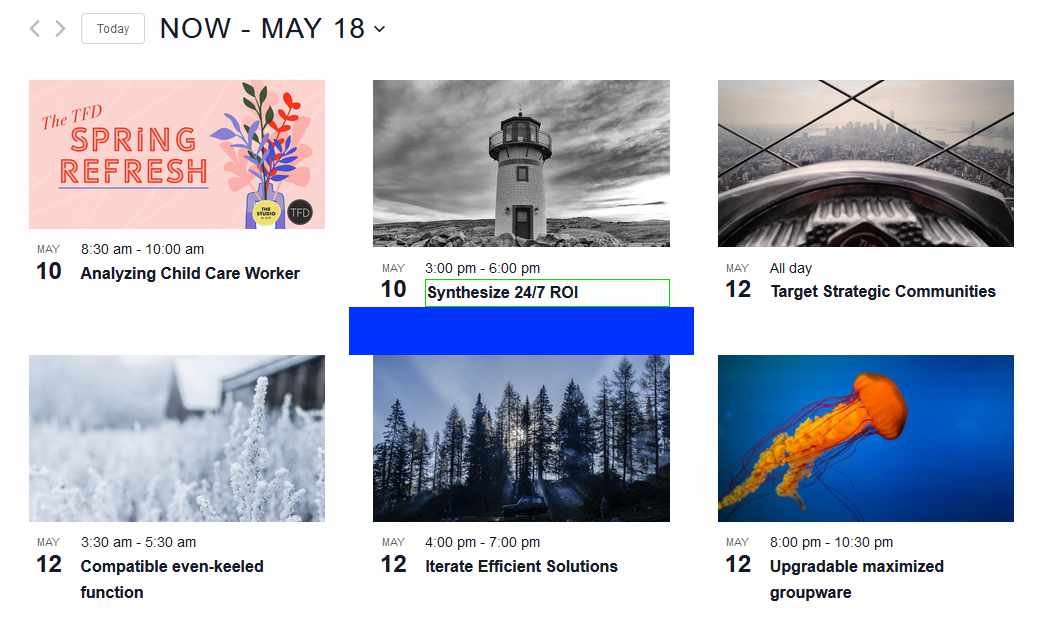
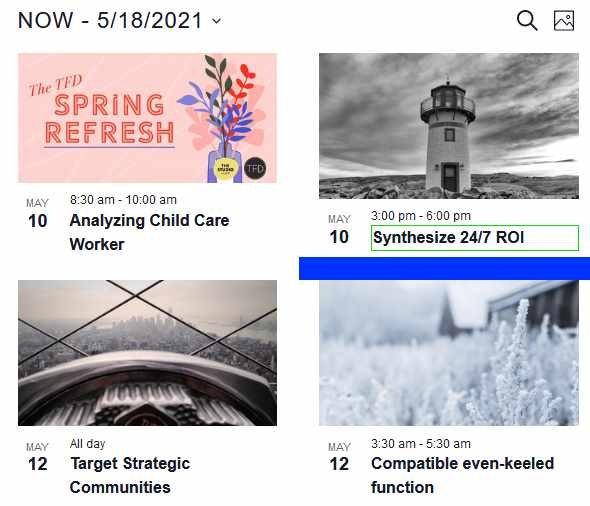
Let’s assume that we want to make a few small edits to the photo view, a feature of Events Calendar Pro. First, we want to increase the event title font slightly, make the event title thinner, and increase the spacing above and below events. We can see these outlined in the images below for mobile and desktop versions of the photo view. The event title is bordered in green and the spacing in blue.
To make these changes, we will add a few CSS rules to your styles.css file or any stylesheet that will be included in the photo view.
.tribe-events-pro .tribe-events-pro-photo__event-title {
  font-size: 18px;
  font-weight: normal;
}

.tribe-common--breakpoint-medium.tribe-events-pro .tribe-events-pro-photo__event-title {
  font-size: 20px;
}

.tribe-events-pro .tribe-events-pro-photo__event {
  margin-bottom: 30px;
}

.tribe-common--breakpoint-medium.tribe-events-pro .tribe-events-pro-photo__event {
  margin-bottom: 60px;
}
Keen eyes may have observed that we used a .tribe-common--breakpoint-medium class. This class is like a media query, but also not. The details of this class are beyond the scope of this article, but just know that it is added when we break from mobile to desktop view.
Once this code is in place, we can go back to the photo view and see the changes we’ve made:
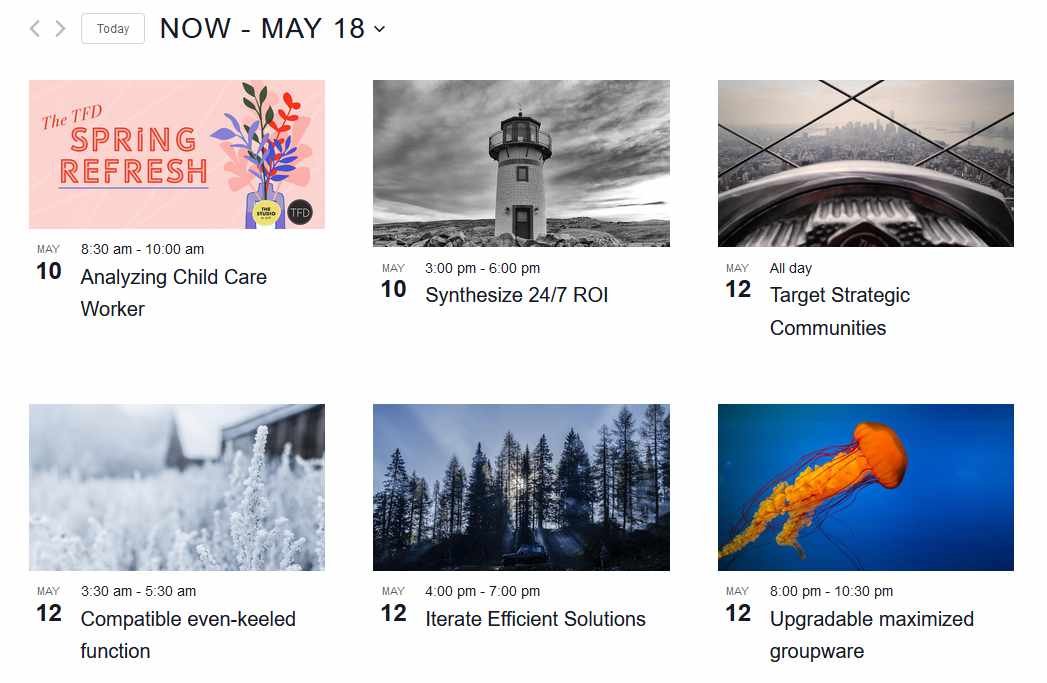
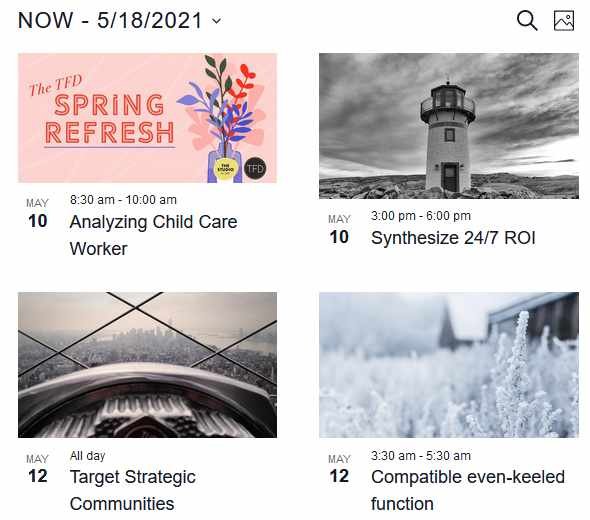
Using the Twenty Nineteen theme from WordPress, you might have noticed that the event spacing changes aren’t displaying. This is because the theme overrides the event styles. To counter this, we’ve added theme override styles to our plugins.
To override our theme override styles, add the following styles to your stylesheet:
/* Remove these styles */
/*
.tribe-events-pro .tribe-events-pro-photo__event {
  margin-bottom: 30px;
}

.tribe-common--breakpoint-medium.tribe-events-pro .tribe-events-pro-photo__event {
  margin-bottom: 60px;
}
*/

/* add these styles */
.tribe-theme-twentynineteen .tribe-events-pro .entry.tribe-common-g-col.tribe-events-pro-photo__event {
  margin-bottom: 30px;
}

.tribe-theme-twentynineteen .tribe-events-pro.tribe-common--breakpoint-medium .entry.tribe-common-g-col.tribe-events-pro-photo__event {
  margin-bottom: 60px;
}
Once you’ve added these styles, you will see the changes take effect.
Moving the event date inside of the photo view card
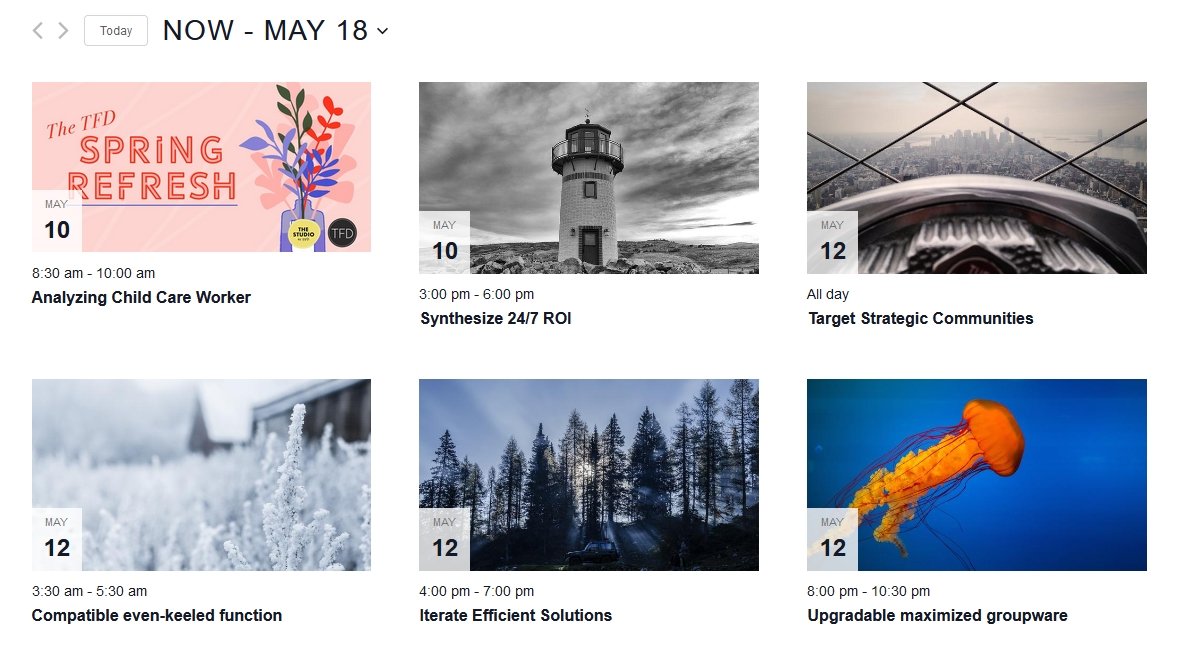
Let’s try something a little bit more challenging now. Perhaps we don’t like the date tag next to the event date and title on the events in the photo view. Instead, we want to move it on top of the event photo. We can see the move in the images below.

To do this, let’s update some of the templates. First, we need to copy the event template file from the plugin to your theme. Find the file /wp-content/plugins/events-pro/src/views/v2/photo/event.php and copy it to [your-theme]/tribe/events-pro/v2/photo/event.php. Now let’s edit the file. Remove the line that says <?php $this->template( 'photo/event/date-tag', [ 'event' => $event ] ); ?> so that the file looks like below:
<?php
$classes = get_post_class( [ 'tribe-common-g-col', 'tribe-events-pro-photo__event' ], $event->ID );

if ( $event->featured ) {
  $classes[] = 'tribe-events-pro-photo__event--featured';
}

?>
<article <?php tribe_classes( $classes ) ?>>

  <?php $this->template( 'photo/event/featured-image', [ 'event' => $event ] ); ?>

  <div class="tribe-events-pro-photo__event-details-wrapper">
    <div class="tribe-events-pro-photo__event-details">
      <?php $this->template( 'photo/event/date-time', [ 'event' => $event ] ); ?>
      <?php $this->template( 'photo/event/title', [ 'event' => $event ] ); ?>
      <?php $this->template( 'photo/event/cost', [ 'event' => $event ] ); ?>
    </div>
  </div>

</article>
Once that’s done, let’s copy over another file. Find the file /wp-content/plugins/events-pro/src/views/v2/photo/event/featured-image.php and copy it to [your-theme]/tribe/events-pro/v2/photo/event/featured-image.php. When you’re done copying, let’s edit the file so it looks like this:
<?php
use Tribe__Date_Utils as Dates;

$image_url = $event->thumbnail->exists ? $event->thumbnail->full->url : $placeholder_url;

$display_date = empty( $is_past ) && ! empty( $request_date )
    ? max( $event->dates->start_display, $request_date )
    : $event->dates->start_display;

$event_month     = $display_date->format_i18n( 'M' );
$event_day_num   = $display_date->format_i18n( 'j' );
$event_date_attr = $display_date->format( Dates::DBDATEFORMAT );
?>
<div class="tribe-events-pro-photo__event-featured-image-wrapper">
    <a
        href="<?php echo esc_url( $event->permalink ); ?>"
        title="<?php echo esc_attr( get_the_title( $event ) ); ?>"
        rel="bookmark"
        class="tribe-events-pro-photo__event-featured-image-link"
    >
        <img
            src="<?php echo esc_url( $image_url ); ?>"
            <?php if ( ! empty( $event->thumbnail->srcset ) ) : ?>
                srcset="<?php echo esc_attr( $event->thumbnail->srcset ); ?>"
            <?php endif; ?>
            <?php if ( ! empty( $event->thumbnail->alt ) ) : ?>
                alt="<?php echo esc_attr( $event->thumbnail->alt ); ?>"
            <?php endif; ?>
            <?php if ( ! empty( $event->thumbnail->title ) ) : ?>
                title="<?php echo esc_attr( $event->thumbnail->title ); ?>"
            <?php endif; ?>
            class="tribe-events-pro-photo__event-featured-image"
        />
        <div class="tribe-events-pro-photo__event-featured-image-date-tag">
            <time class="tribe-events-pro-photo__event-featured-image-date-tag-datetime" datetime="<?php echo esc_attr( $event_date_attr ); ?>">
                <span class="tribe-events-pro-photo__event-featured-image-date-tag-month">
                    <?php echo esc_html( $event_month ); ?>
                </span>
                <span class="tribe-events-pro-photo__event-featured-image-date-tag-daynum tribe-common-h5 tribe-common-h4--min-medium">
                    <?php echo esc_html( $event_day_num ); ?>
                </span>
            </time>
        </div>
    </a>
</div>
Now let’s add some styles so the date tag appears over the image. Add the following CSS to your styles.css file or any stylesheet that will be included in the photo view.
.tribe-events-pro .tribe-events-pro-photo__event-featured-image-link {
  position: relative;
}

.tribe-events-pro .tribe-events-pro-photo__event-featured-image-date-tag {
  position: absolute;
  bottom: 0;
  left: 0;
  background-color: rgba(255, 255, 255, 0.8);
  padding: 6px 12px;
}

.tribe-events-pro .tribe-events-pro-photo__event-featured-image-date-tag-datetime {
  display: flex;
  flex-direction: column;
  text-align: center;
}

.tribe-events-pro .tribe-events-pro-photo__event-featured-image-date-tag-month {
  color: #141827;
  font-family: "Helvetica Neue", Helvetica, -apple-system, BlinkMacSystemFont, Roboto, Arial, sans-serif;
  font-size: 11px;
  font-weight: 400;
  line-height: 1.5;
  color: #727272;
  text-transform: uppercase;
}
Save your stylesheet and view the photo view page. You should see something similar to the below:
