The WordPress 5.0 release introduced a new block editing interface to the platform.
What this really means: the content creation experience in WordPress is changing! Instead of all your content being input into a single field, each element will now live in its own block and can be moved, edited, and styled independently.
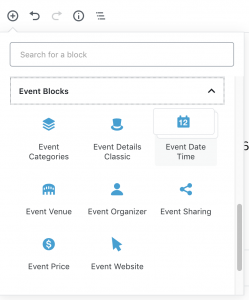
In response, we’ve built a full set of Event blocks so that you can start building events in the block editor and unleash all of the exciting layout possibilities—no code required.
Note: For users of Event Tickets, we also have a complete set of Tickets blocks.
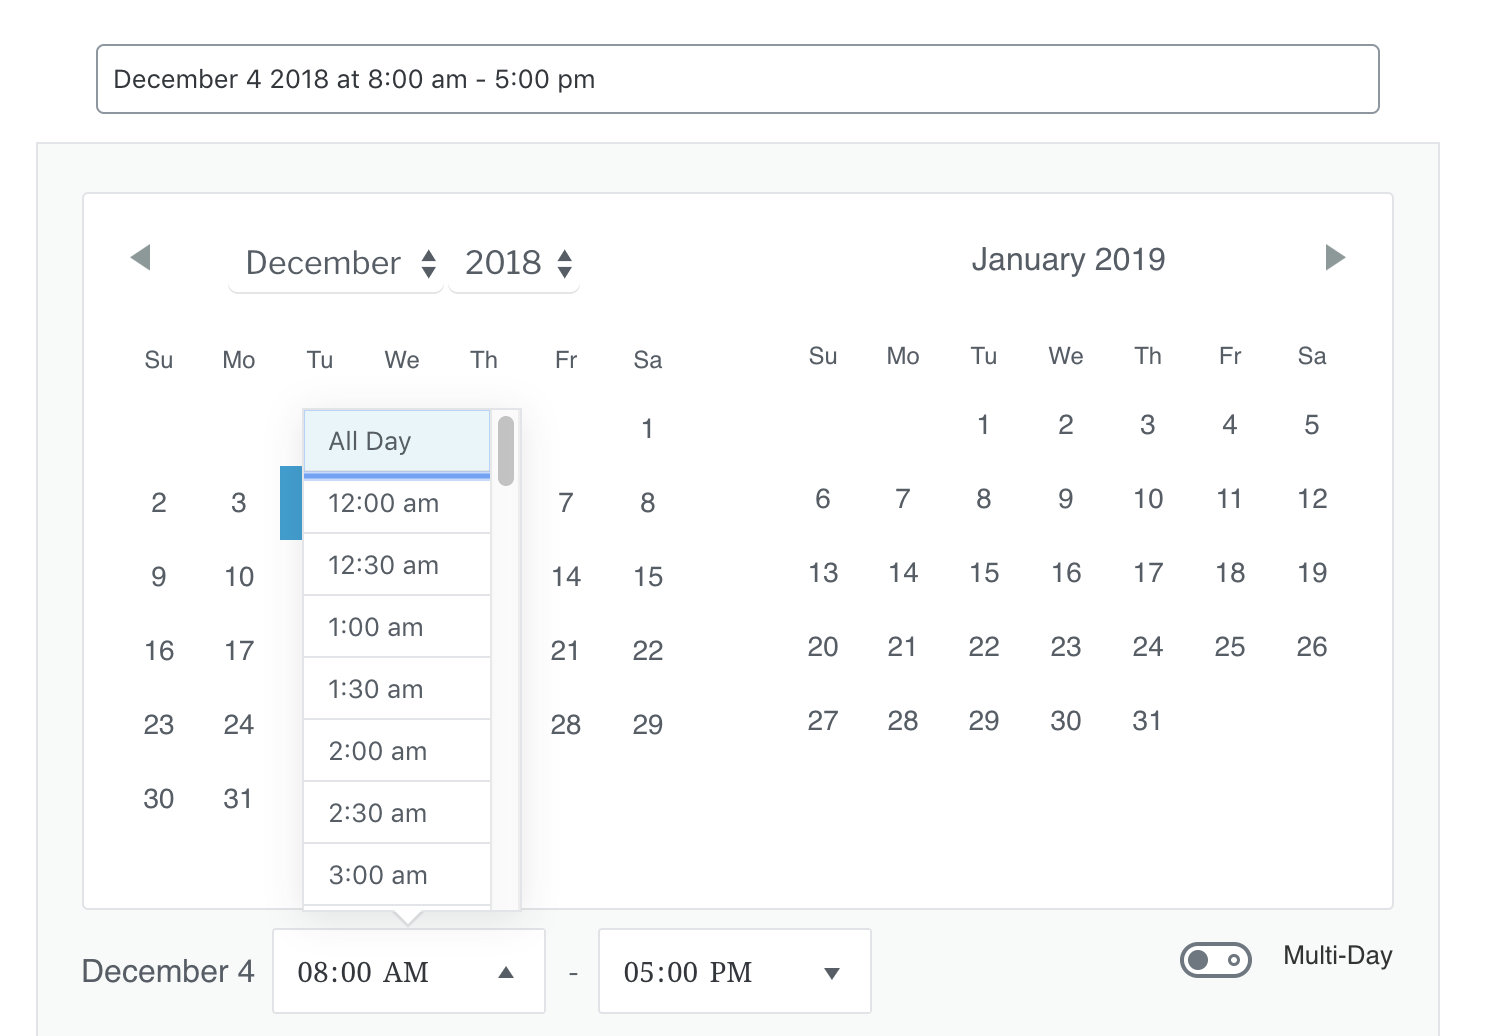
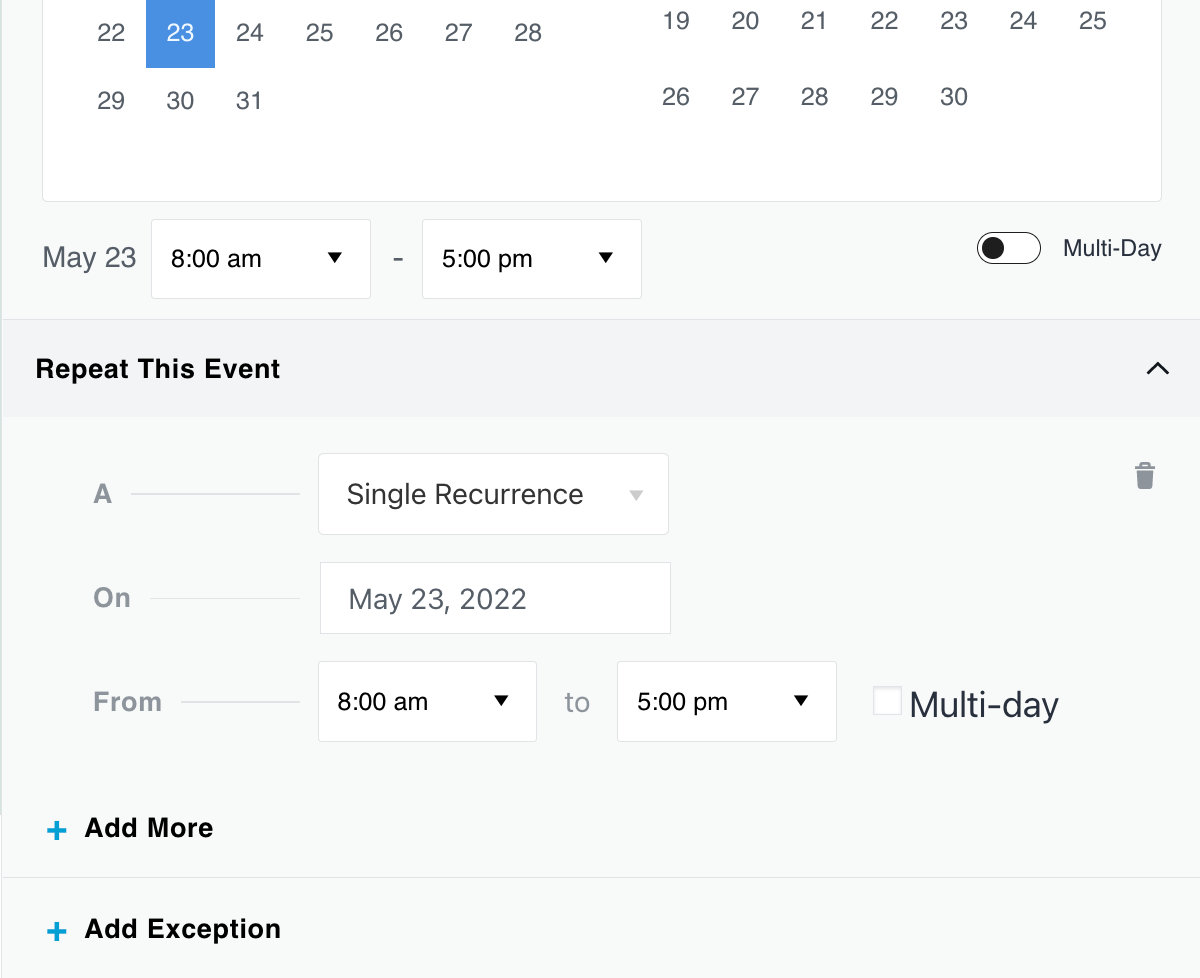
The Event Date Time block
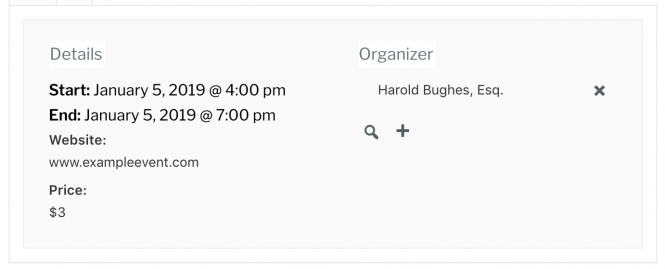
The Event Date Time block is essential to any event since it’s where you’ll define the date, time, and duration of the event itself. For Pro users, it’s also where you’ll find recurring event options.
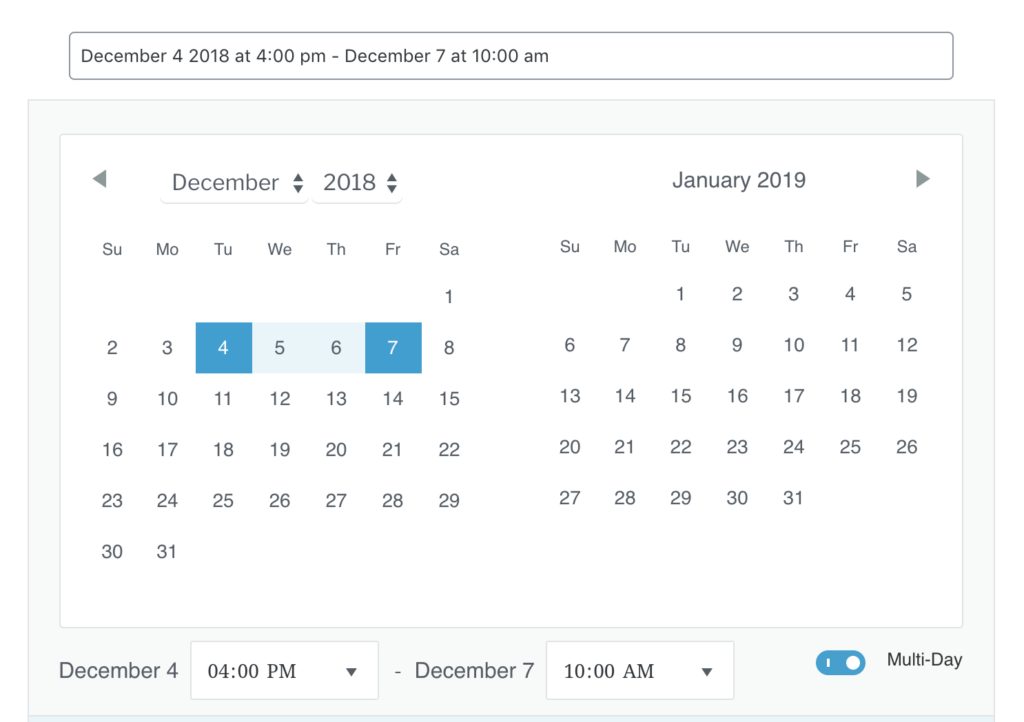
You can set the date and time by clicking on the calendar and using the time dropdowns, or by typing into the field at the top. If the event lasts for a full day, you can select All Day from the start time dropdown. Flip the multi-day toggle and you’ll be able to select a start date and end date to create a multi-day event.
Users with Events Calendar Pro will see an option in the block dashboard to Repeat This Event. Inside that section, you’ll find all options for creating recurrence rules and exceptions- everything you need for setting up your recurring events.

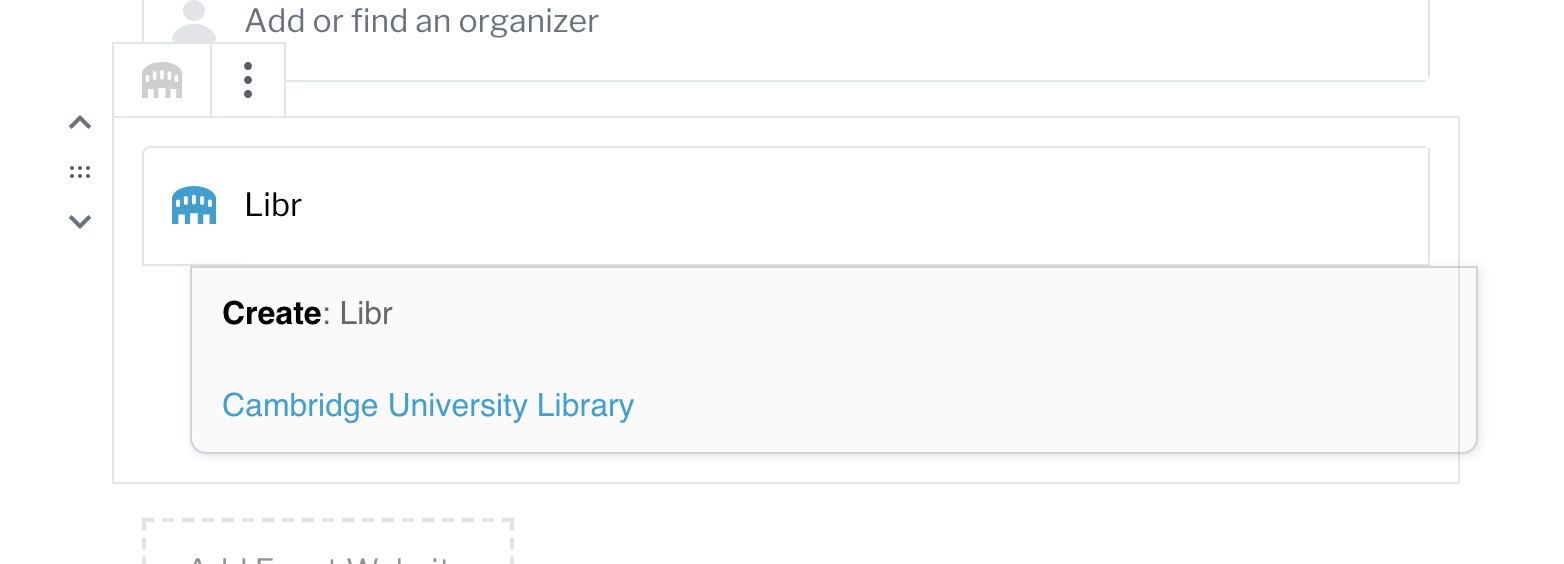
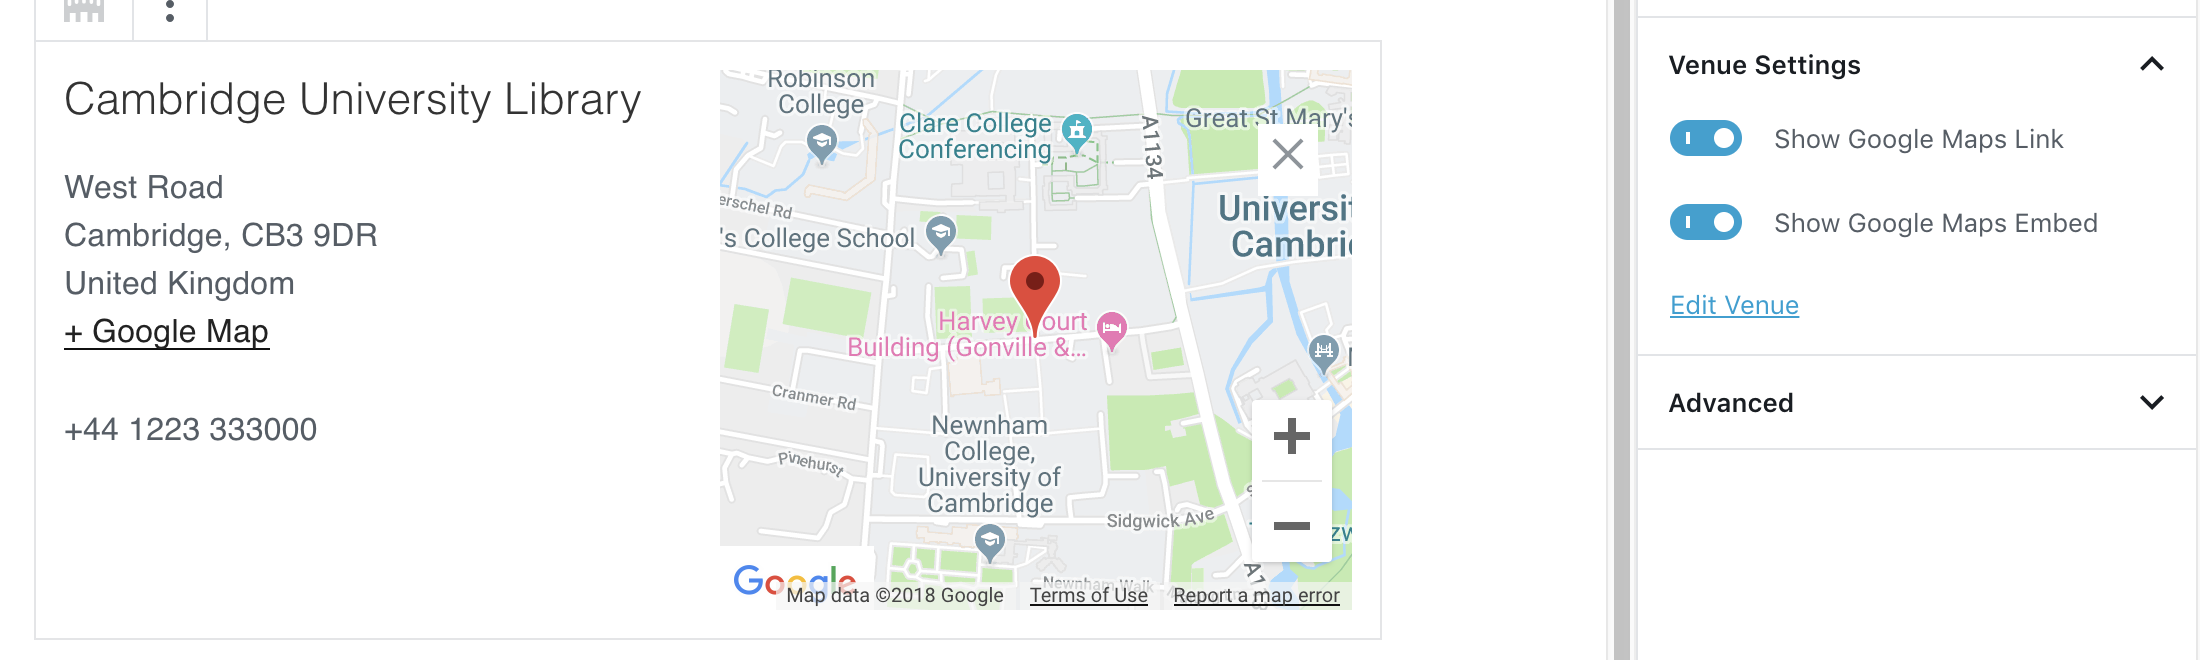
The Event Venue block
Display your event’s location with the Event Venue block. As you start typing, the block will list existing venues matching that name or allow you to create a brand new venue from within the block. You can choose to display a map or map link from the sidebar block settings.
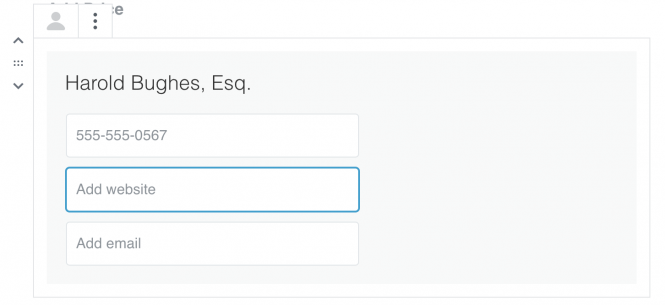
The Event Organizer block
The Event Organizer—surprise!—allows you to set and display an organizer for your event. Just like the Venue block, you can select from existing organizers or create a new one.
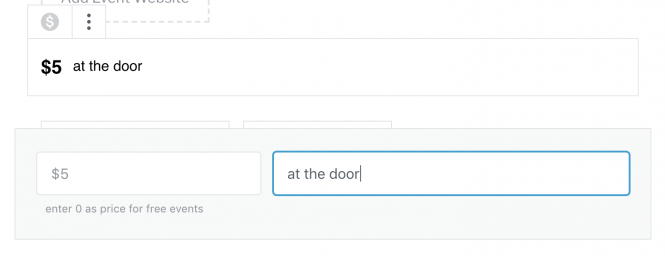
The Event Price block
The Event Price block lets you display the event price as well as an optional price description. You can also use the price description field if your event has a non-monetary price, such as By Donation.
As you type into the fields in the dashboard, the preview content will update to reflect the content.
The Event Website block
If your event has an external website, you can easily link to it with the Event Website block. This block creates a linked button complete with a custom label.

The Event Sharing block
The Event Sharing block allows you to position and customize the Google Calendar and iCal subscribe buttons. You can choose to change the labels, hide one of the options, or just remove the block entirely.

The Event Categories block
If you’ve added Event Categories to your event via the Document Settings sidebar and want to also display them in the event content, you can do so by adding the Event Categories block.

The Tags block
You can also add tags to your event in the Document Settings sidebar. You can then display them right in your event content by adding the Tags block.
The Related Events block
Events Calendar Pro users can use this block to display upcoming events of the same categories and tags as the current event. Up to three events will be displayed. If no upcoming events share categories or tags with the current event, then none will be displayed.
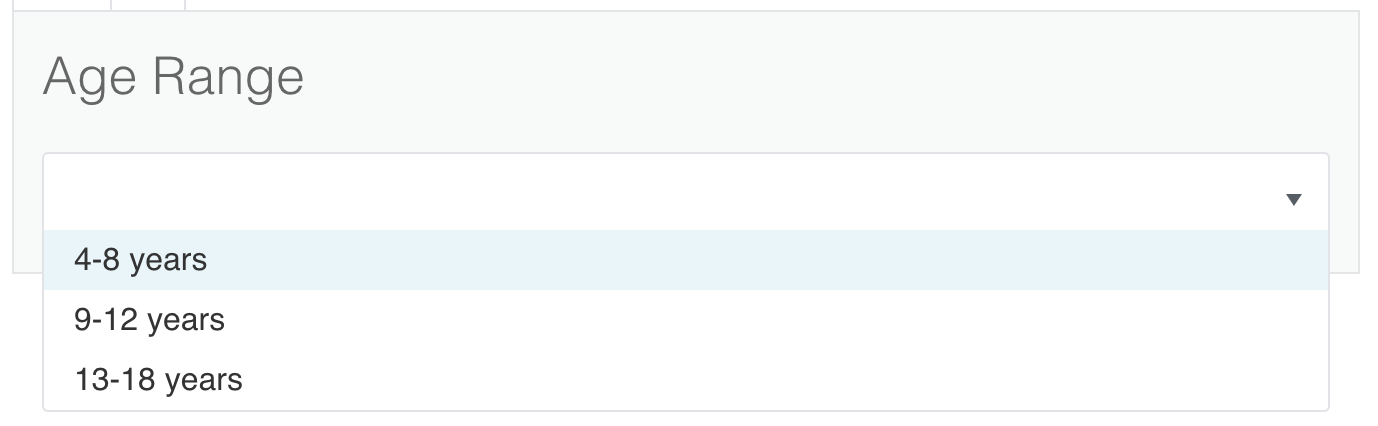
The Additional Fields blocks
If you have Events Calendar Pro, you have access to the new custom Additional Fields blocks. These blocks are automagically created when you configure a custom Additional Field under Events –> Settings –> Additional Fields. The new block will have the same title you entered, and allow the event creation to choose from the options outlined in the settings.
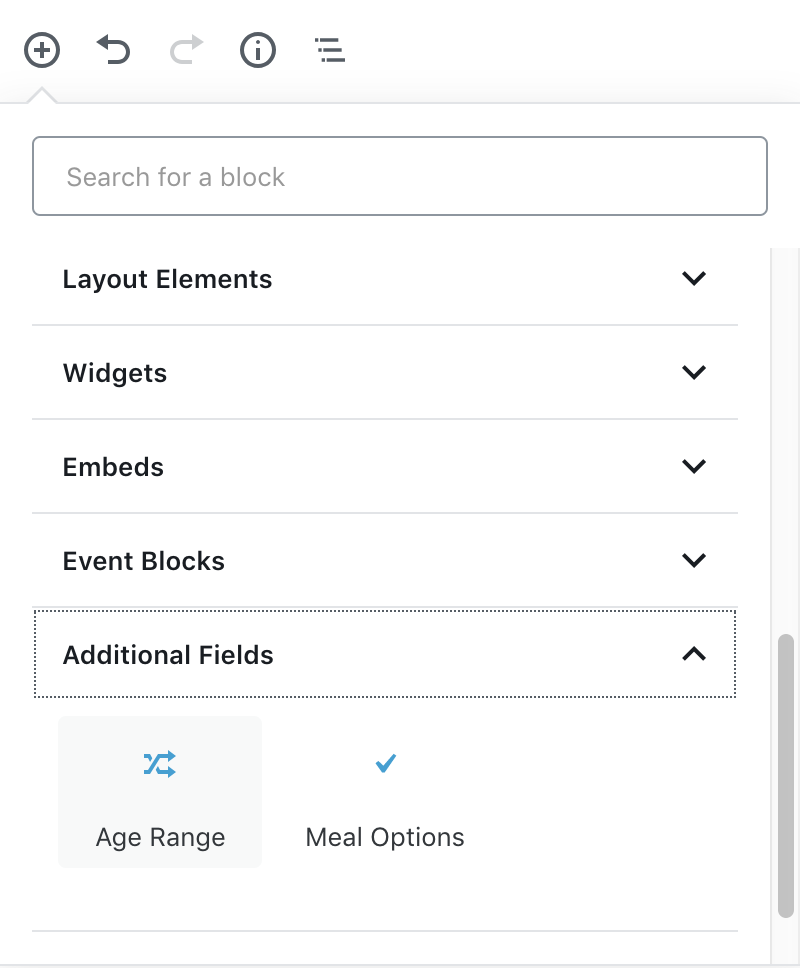
Additional Fields have their own section in the inserter tool
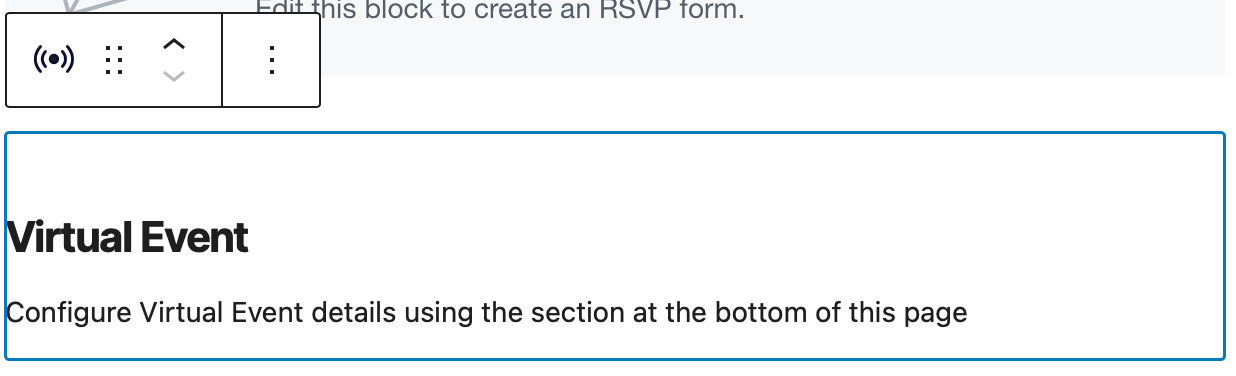
The Virtual Event Placeholder Block
With our Virtual Events plugin, you can add a virtual event block to your event.
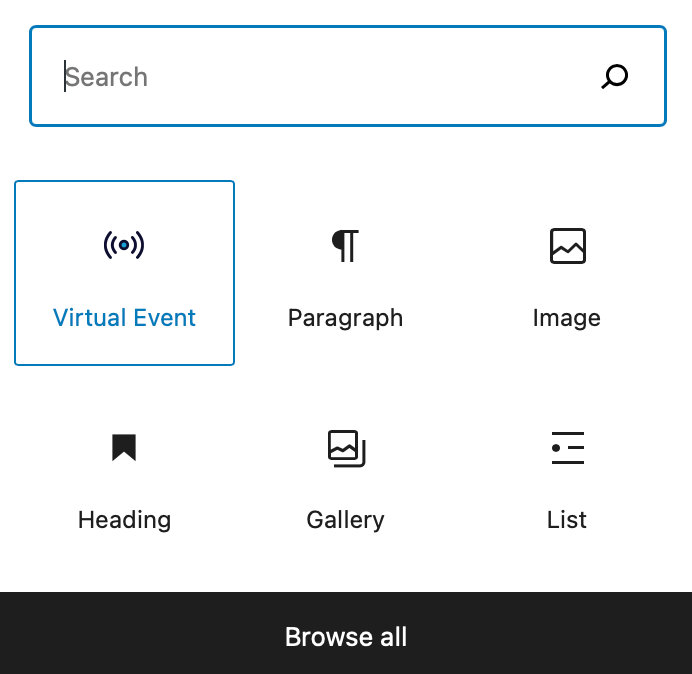
Once you select the block, fill out the virtual event information at the bottom of the page.
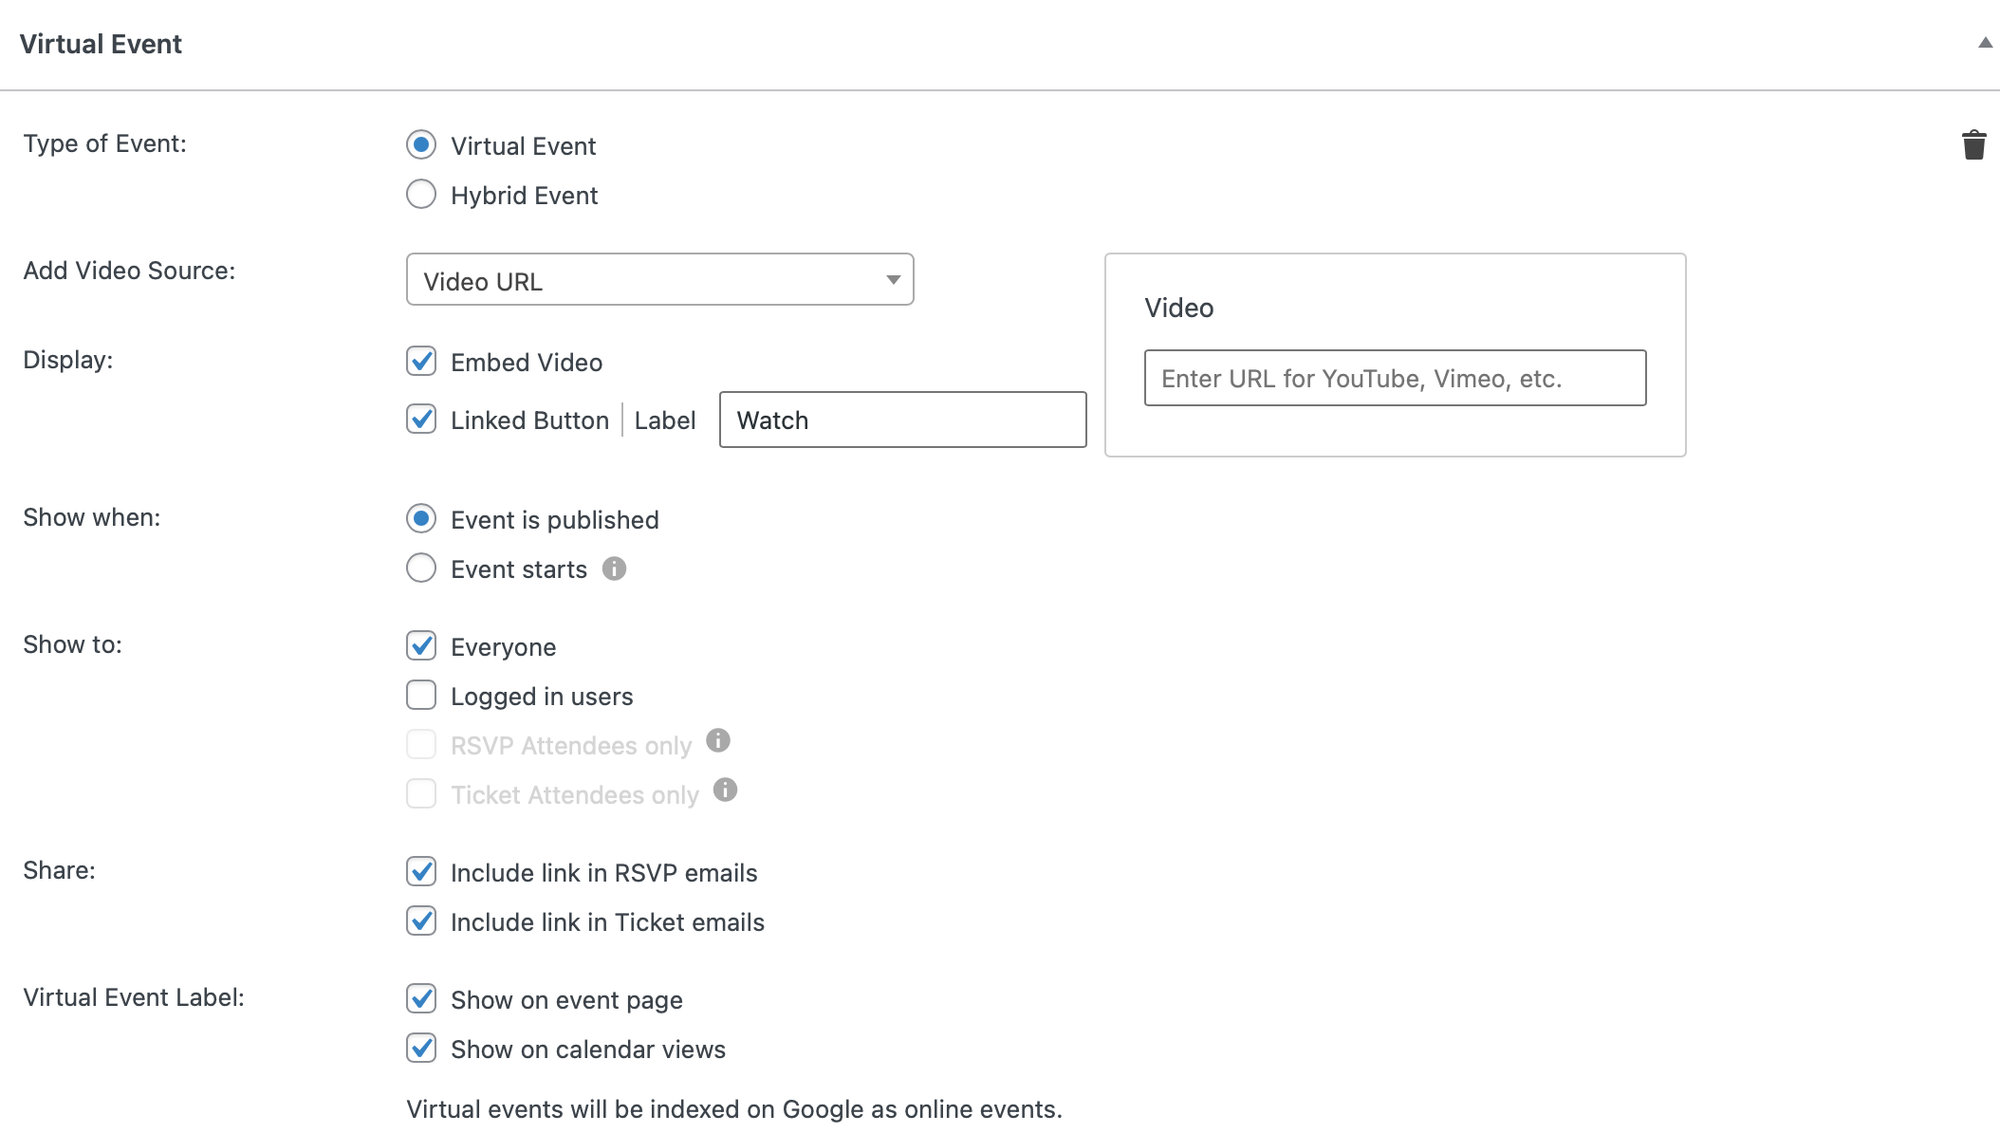
Then you can move the block to anywhere you’d like on the page.
Transitioning your existing events with the Event Details Classic block
If you have an event that was originally made in the classic editor and then you open it with the block editor, it will load using a special block- the Event Details Classic block. This block mimics the layout of event information from before WordPress 5.0.
If you want, you can keep this layout by simply saving the event. You may also choose to add some of the more specific and flexible blocks like those above or use the new blocks to entirely replace the classic layout. If you use a combination of new blocks with the Event Details Classic block, content will sync between corresponding elements. For example, if you update the event’s price in the Event Price block, that change will be reflected in the Event Details Classic block too.