You may have noticed that your calendar is not a typical WordPress page or post. As an archive page, it isn’t something you can see on the front end and edit directly on the page. The good news is that even though it’s an archive page, you can still customize the appearance of the page on the front end.
It’s important to note that even though the calendar isn’t a traditional WordPress page, it does have a slug. This slug should only be used for your calendar and no other page on your site. In other words, if your calendar slug is /events, no other WordPress page on your site should have the same URL. This keeps everything working as expected.
Changing the Calendar Location
The calendar is automatically located at your-site.com/events, where events is the slug of the calendar. Slug is the name WordPress uses to describe the part of the URL that comes after the domain name.
There are two ways to change the calendar slug.
Via Settings
The easiest way to change the address is directly in the plugin settings. From the WordPress dashboard, navigate to Events → Settings → General → Viewing, change the “Events URL slug” setting, then click “Save” to save the change.

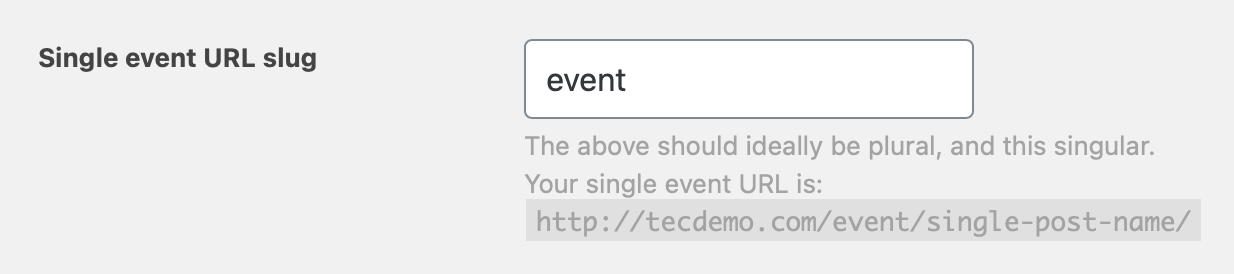
Note that you can change the slug for single events as well in the very next setting. By default, events use /event in the URL. But if you want to change that to, say /workshop, then this is where you would do it.
Embed the calendar on a page
👋 This method requires Events Calendar Pro.
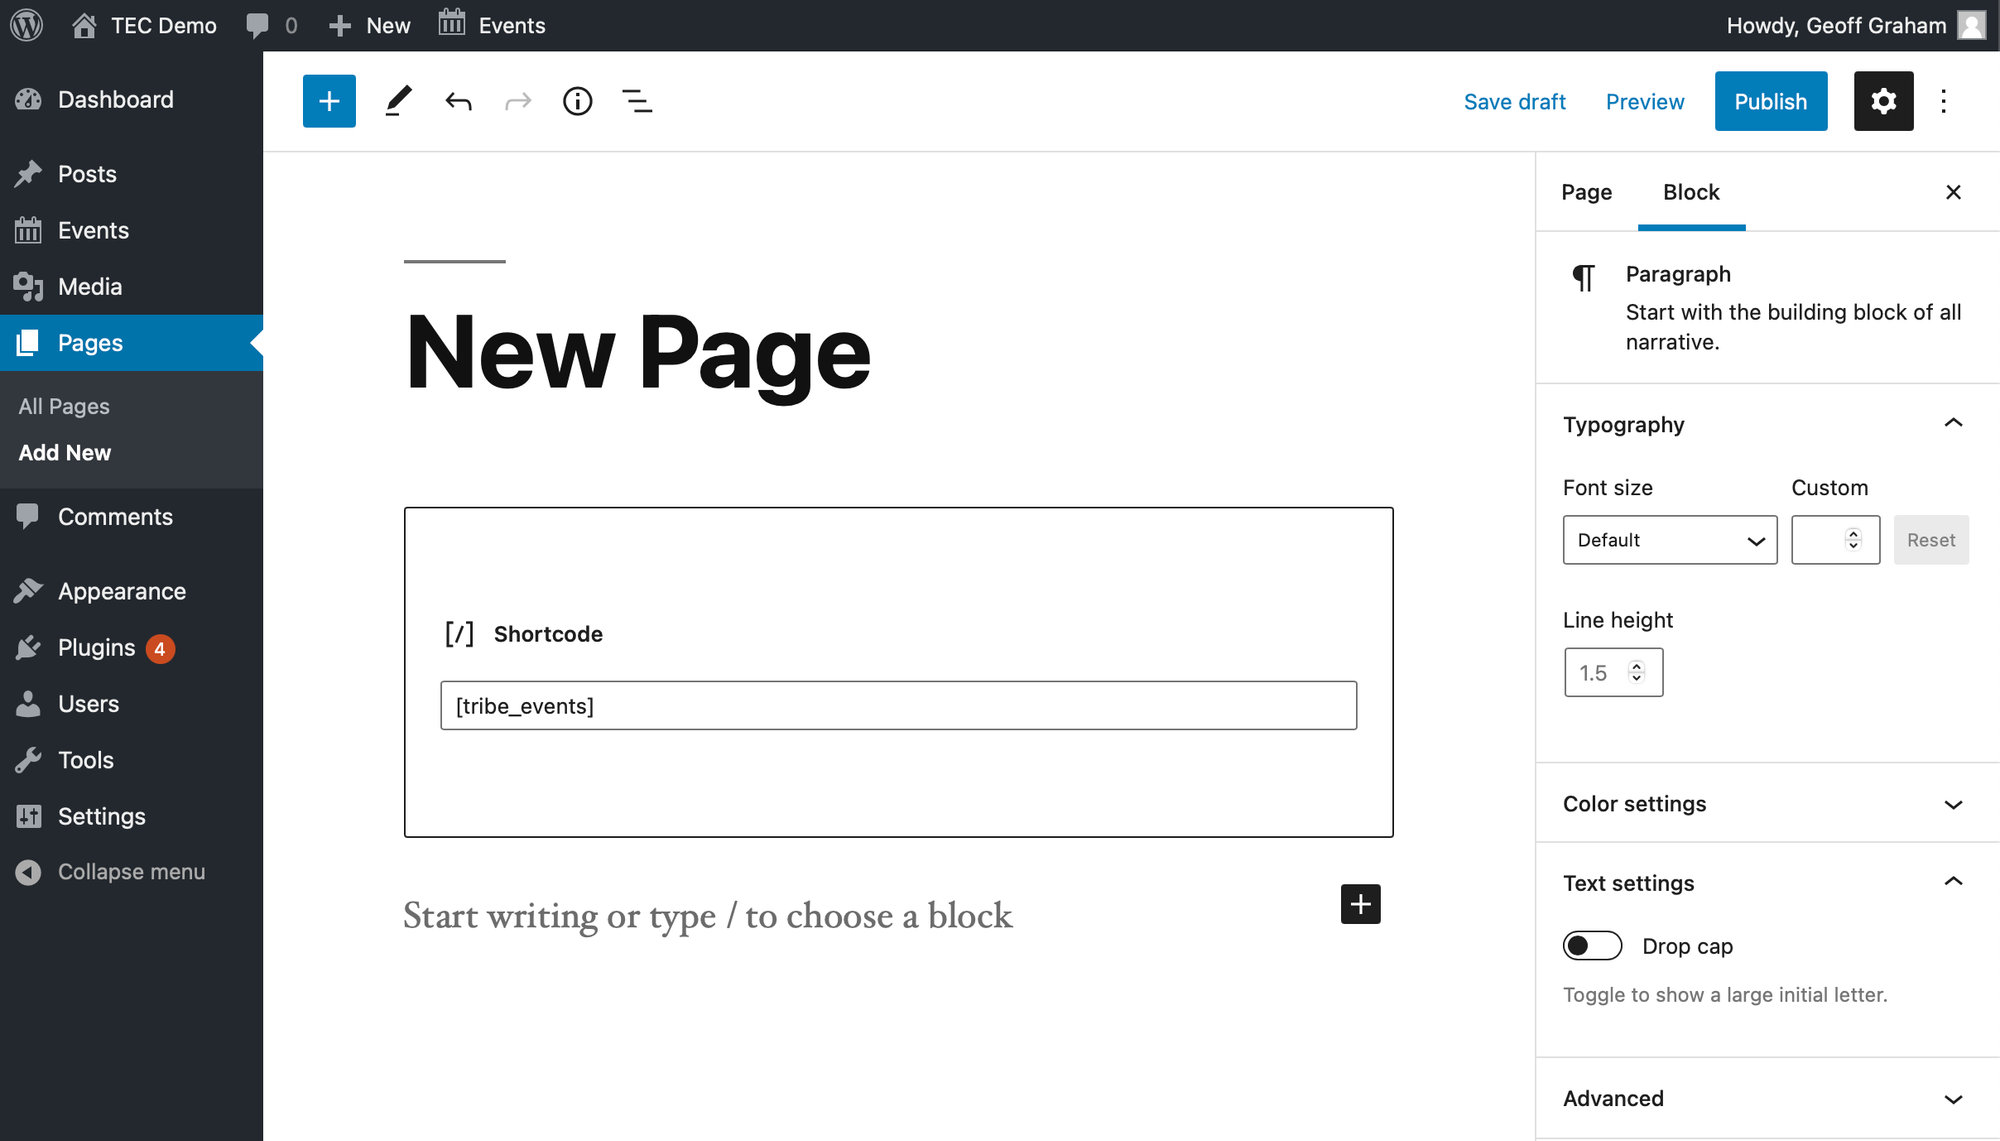
Another option is to embed the calendar on another page and use the URL of that page as your main calendar. If you have Events Calendar Pro installed with The Events Calendar, then the calendar can be embedded on a page using the [tribe_events] shortcode. Add it using the “Shortcode” block and the calendar will be displayed on that page.
Set the Calendar as the Homepage
By default, The Events Calendar places its calendar at a specified URL on your site. The “out-of-the-box”, default URL is /events, so that the events calendar for example.com would be at example.com/events.
You can also make your calendar your site’s home page! Visit your WordPress Settings → Reading page. Make sure the “Front page displays” setting is set to A static page and select Main Events Page for the “Front page” setting. Check out your home page and you should see your main list of events.

Linking to Specific Event Views
Each calendar view has its own URL that you can use to link directly to that view. Whatever you have set as your default view (under Events → Settings → General → Viewing) will be located at www.yoursite.com/events/ (where events is the slug you set in the general Events Settings). Beyond that, you can find the different views at the following URLs:
- List View:
events/list/ - Month View:
events/month/ - Day View:
events/todayor link to a specific day with the formatevents/yyyy-mm-dd/ - Week View (Pro):
events/week/ - Map View (Pro):
events/map/ - Photo View (Pro):
events/photo/ - Summary View (Pro):
events/summary/ - Series (Pro):
yoursite.com/series/series-slug
You can also link to pages showing events of a certain type or taxonomy:
- Event Category:
/events/category/category-slug/ - Tag:
yoursite.com/tag/tag-slug/ - Featured Events:
/events/featured/ - Virtual Events:
/events/virtual/
You can also combine the two types of links — for example, by linking to /events/photo/featured/. Your featured events will show in Photo View even if that’s not your default view.
Community Events Pages
If you’re running the Community Events add-on, users can submit and manage events from the front end of your site. Those submission, list, edit, and delete pages each have their own URLs.
To view and update the Community Events page URLs, go to Events → Settings → Community and look at the Community rewrite slug options. You can update the slugs there, as well as view the URLs to your Event Submission and Event List pages.
By default, the front-end Community Events pages are accessible at:
- Add a new event:
/events/community/add/ - Events list:
/events/community/list/ - Specific page in the events list:
/events/community/list/page/[num] - Edit an already-submitted event:
/events/community/edit/[id](redirects to/events/community/list/[post-type]/[id]) - Delete an already-submitted event:
/events/community/delete/[id]
In these examples, /events/ is the Events Slug defined in Events → Settings → General, and /community/ is the Community Events slug d
Linking to the Calendar to a WordPress Menu
You can add links to your calendar, calendar categories, specific events, or series using the WordPress Menu Builder. If you aren’t familiar with the Menu Builder, review the WordPress documentation on the Menus screen.
To get started, head over to Appearance → Menus in the WordPress Dashboard.
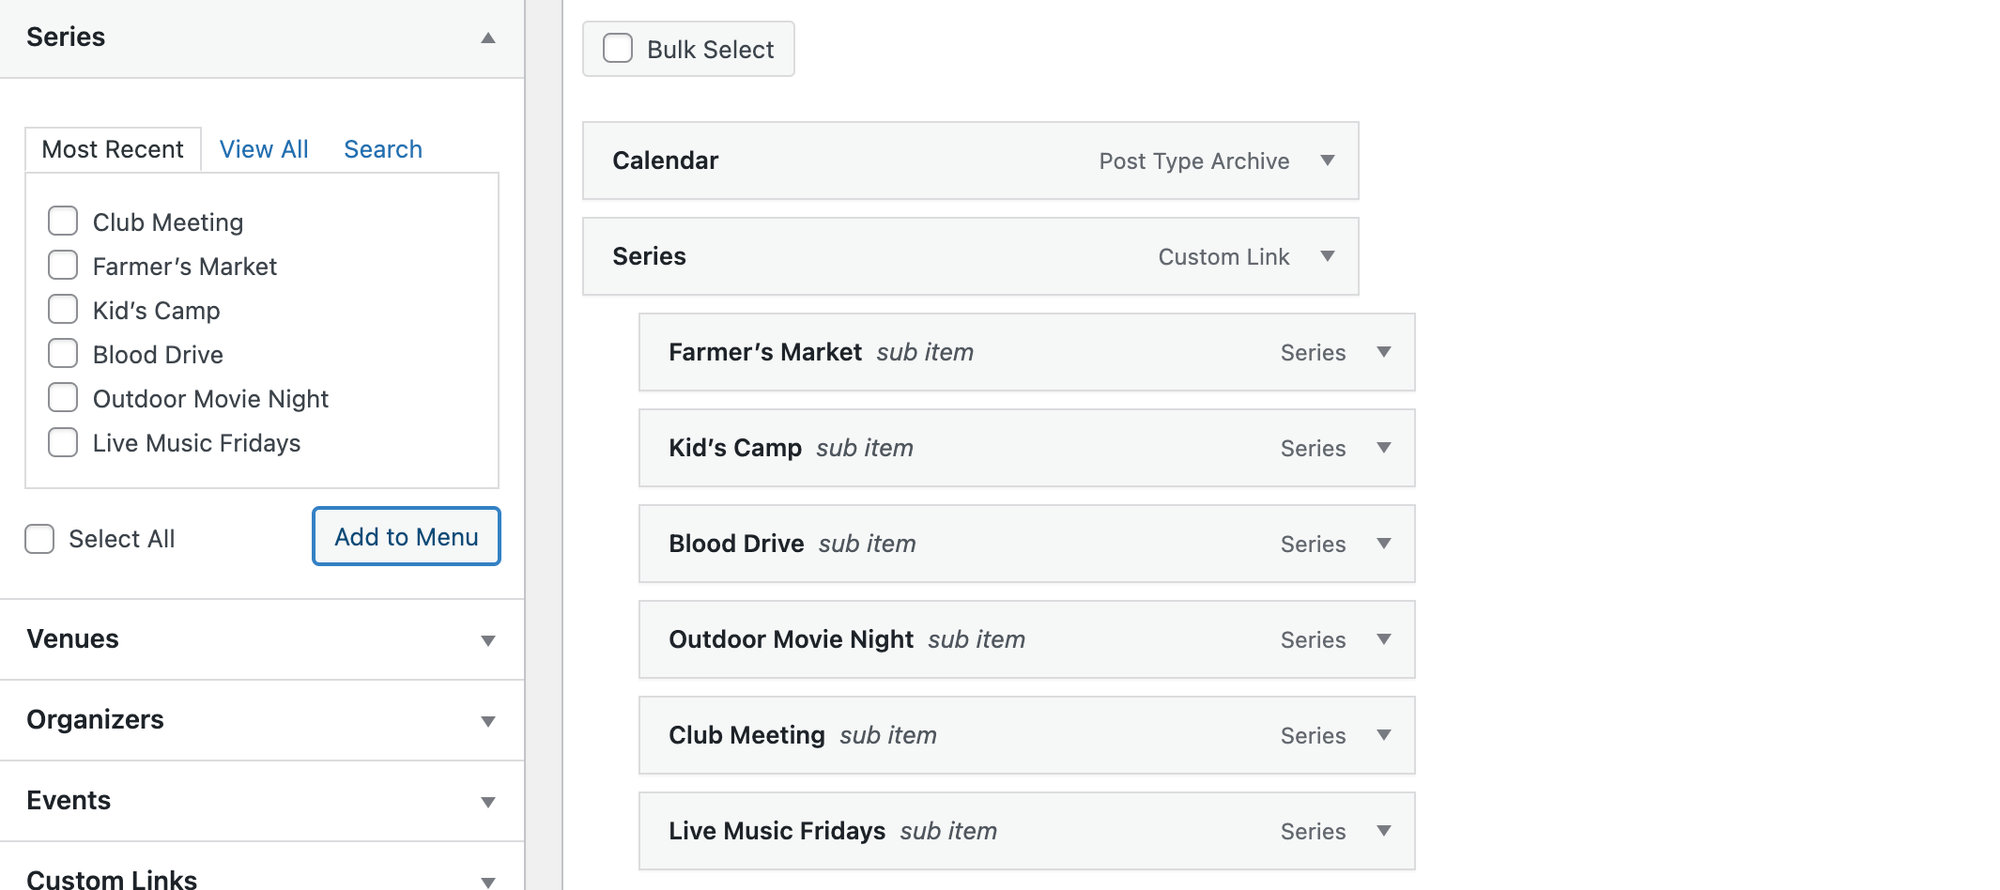
First, click Screen Options and check the boxes for the items you want to see in the Menu Builder:

On the left-hand side, alongside the usual meta boxes for Pages and Categories, you’ll see the additional menu options you’ve selected.
- To add a link to your calendar: Click View All in the Events meta box. At the top of the list, you’ll see an option for Events. Check the box and click Add to Menu. This creates a link to your default calendar view.
- To add a link to a specific event: Select the event from the Events meta box and click Add to Menu.
- To add a link to a category of events: Select the categories from the Event Categories meta box and click Add to Menu.
- To add a link to your series pages: Select the series from the list you’d like to add and click Add to Menu.
For more granular links — like a specific view, a featured-events page, or a date-specific Day View — use the URL patterns from the Linking to Specific Event Views section above. You can add these as Custom Links from the Menu Builder.
Shortening Event URLs for Easier Sharing
The Events Calendar doesn’t have a built-in setting to change the default permalink structure (like removing the /event/ slug), but you can create shorter, cleaner links for social media or print materials using external tools. These methods create a shareable redirect without changing your actual WordPress site structure.
Note: These methods only create shareable short links — they don’t modify your original WordPress event permalinks.
You have two primary approaches for shortening your event links: using a dedicated WordPress plugin or utilizing an external online service.
WordPress Plugins (e.g. Jetpack)
Plugins offer the advantage of keeping your link management within your WordPress dashboard. Jetpack, for example, includes a WP.me Shortlinks feature that automatically generates a short link for every post or page, including events.
You can learn more about enabling and using the shortlink feature in their dedicated guide: Jetpack WP.me Shortlinks.
Online URL Shortening Services
If you prefer to manage your shortlinks outside of WordPress, online services are a fast and free alternative. These services are excellent for creating custom and branded short links (e.g., bit.ly/YourEventName). Sample services that offer this include Bitly and TinyURL.
Conclusion
Since The Events Calendar focuses on managing your event data, using an external tool is the most efficient and versatile way to create user-friendly, shortened URLs for your events. Whether you choose to use Jetpack or an online service, both methods will provide your attendees with an easier way to access event details and purchase tickets.