As with any type of product, when tickets are purchased the resulting order moves through a number of different stages, each marked by a different status. The WooCommerce Codex provides a complete list of those statuses, but here are some key WooCommerce specific ticket settings:
- Payment Pending: The order is placed, but the funds have not yet been received
- On Hold: Stock has been reduced, but payment has not yet been confirmed
- Completed: Payment received and stock reduced
The exact statuses used in any given transaction can vary; what’s important is that Event Tickets Plus uses order statuses to decide when attendee records should be generated and when tickets should be sent to the customer.
The plugin ships with some default statuses on which to do those actions. But in certain cases, it may be desirable to adjust these statuses.
Locating and Adjusting the Settings
To configure the order statuses on which these actions are performed, first head to the Tickets > Settings > Integrations screen in your wp-admin:
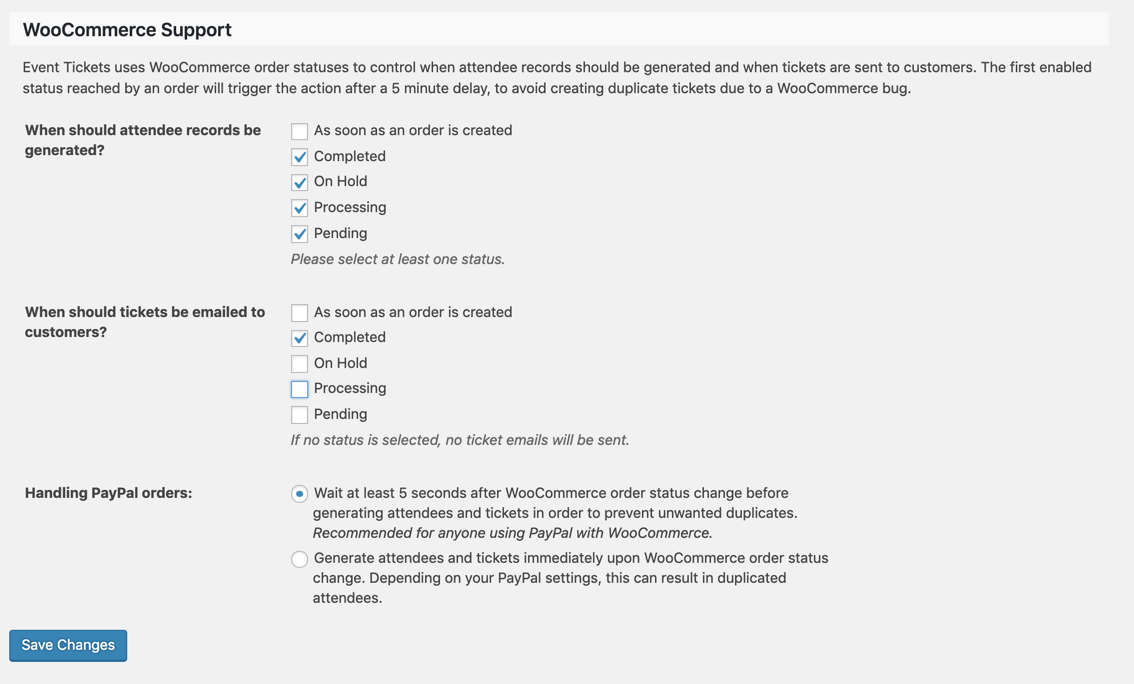
☝️ The first set of checkboxes dictates when an attendee record (the entry you see in the attendee screen) is created.
The second determines when the user should be emailed their tickets.
Typically—and by default—more than one status is selected. As soon as an order is set to one of those statuses, the appropriate action will take place. Critically, each action takes place just once: in other words, tickets will not be emailed to customers multiple times.
An Example
Let’s suppose you set up the following configuration:
- When to generate the attendee records:
Pending Payment, On Hold, Completed - When to send the emails:
On Hold, Completed
☝️ When a WooCommerce Downloadable Product is purchased, it is important to remember that the purchase must be marked Complete in order for the download to get emailed to the purchaser.
A common sequence in the life cycle of an order would be for it to start at Pending Payment before progressing to Completed. In such a scenario, these settings would result in the attendee record being generated first and the tickets being emailed later, once payment has been confirmed.
They would equally accommodate a situation where an order is created manually and is immediately set to a Completed status: the attendee records would be generated and the ticket emails dispatched at the same time.
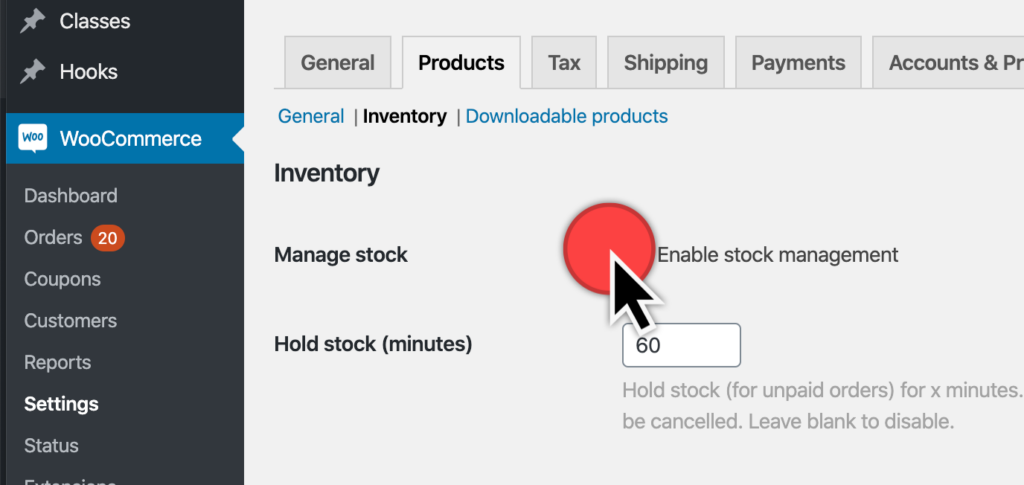
Stock Management
For optimal functionality with Event Tickets Plus, we recommend that you check Enable stock management under WooCommerce > Settings > Products > Inventory. If you leave this option unchecked, it may result in ticket capacity showing as “unlimited” regardless of your ticket stock.
Handling PayPal Orders:
To avoid having duplicated attendees, we’ve included the ability to have a 5-second delay before tickets are sent. If you are using PayPal with WooCommerce, enabling this delay is advised.
Please refer to our guide on using PayPal for ticket purchases to configure your PayPal settings.
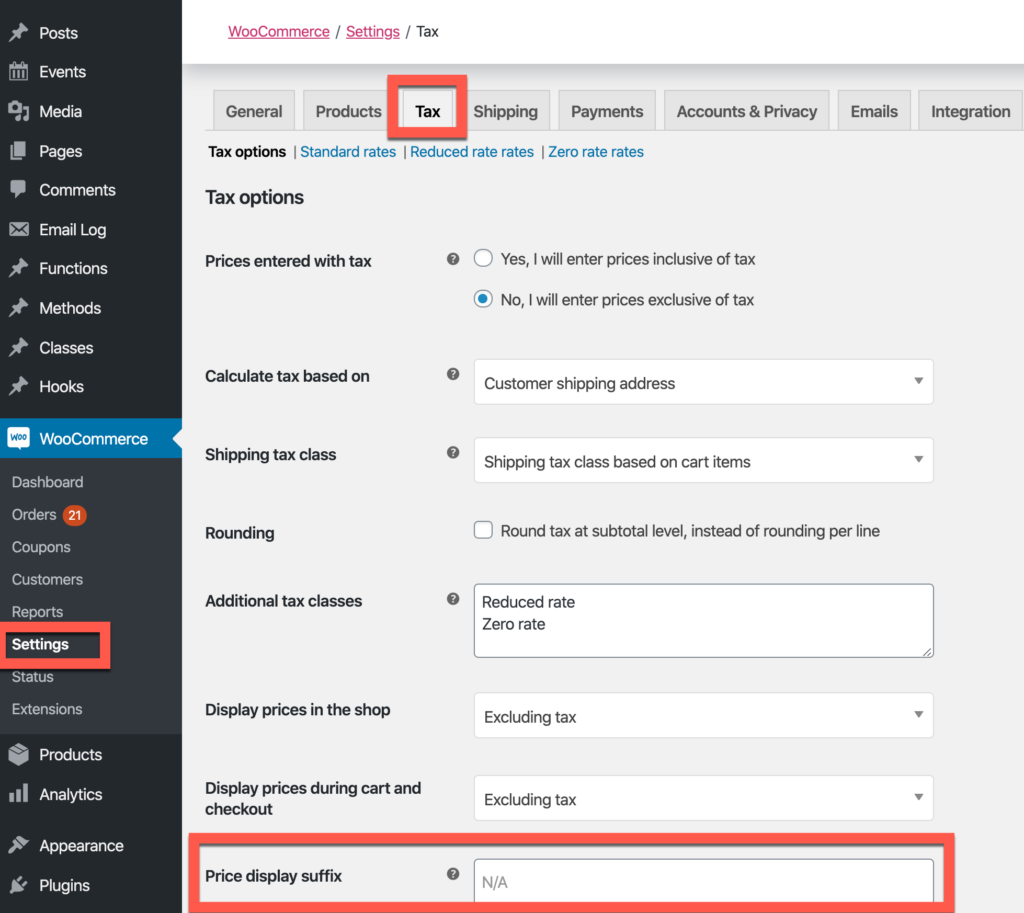
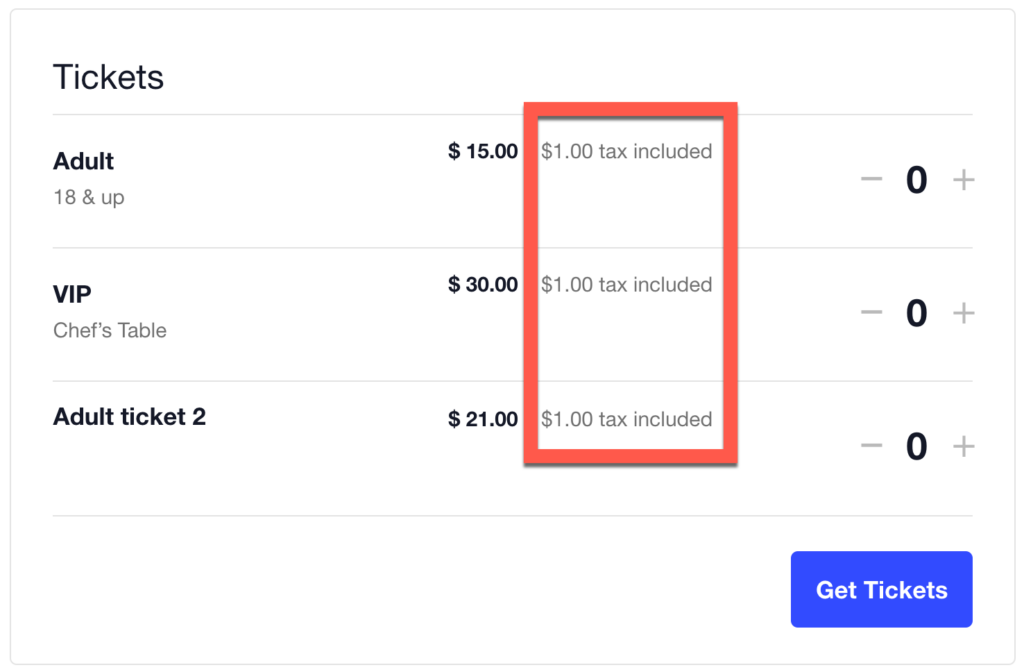
Price Suffix:
Ever want to add some descriptive text about a ticket after the price? A “Price Suffix” is text that displays after the product price, showing details related to the price of the product. WooCommerce has a method for displaying suffix text and we’ve integrated it in the tickets block when you have the WooCommerce tax feature enabled.
To enable this, head to WooCommerce → Settings → Tax → Price display suffix.
To see the WooCommerce Price Suffix on your Event Tickets, view a published ticket.
Notes
- These settings are only available to users of Event Tickets Plus who also have WooCommerce activated
- At this time, at least one option must be selected for both settings; it is not possible to uncheck everything. This restriction may be lifted in future releases of Event Tickets Plus.