Opening up your calendars to user event submissions with Community Events is a great way to engage your visitors and build diverse content that reflects the needs and interests of your user community. Our plugin’s default settings allow submissions to be received from any and all sources, including anonymous visitors, so that you’re able to curate content from the broadest possible selection of users. However, in the interest of maintaining high-quality calendars populated with relevant events, we want to ensure that our forms are only being accessed by legitimate (human!) users, not spambots.
To help discourage bots and keep your event submissions looking tidy, we’ve built support for reCAPTCHA‘s robust spam prevention tools right into Community Events. Here’s how to set that up and start protecting your forms!
First, let’s log into our WordPress site admin. Under the Events menu item in your WordPress sidebar, click Settings, then click the Integrations tab to navigate to the APIs page of your plugin settings.
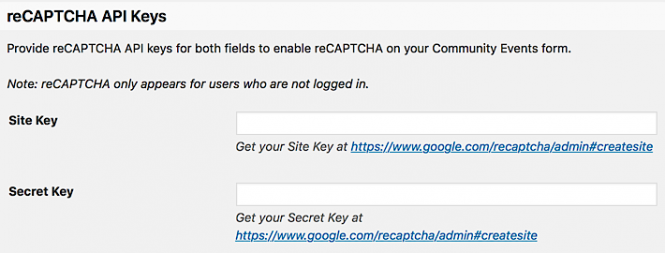
Near the bottom of the APIs page, you’ll see a set of form fields for reCAPTCHA API keys, along with a link to Google’s reCAPTCHA registration page for each field. Click on either of these links to open the registration page in a new tab or window. (You may be prompted to create a new Google account or log into an existing account to start.)
Once you’ve successfully logged into your Google account, you’ll see the first few fields of reCAPTCHA’s registration form available to fill in. Enter the name of your site into the Label field and select the radio button for reCAPTCHA V2 under the type subheading, and the rest of the form fields will appear below.
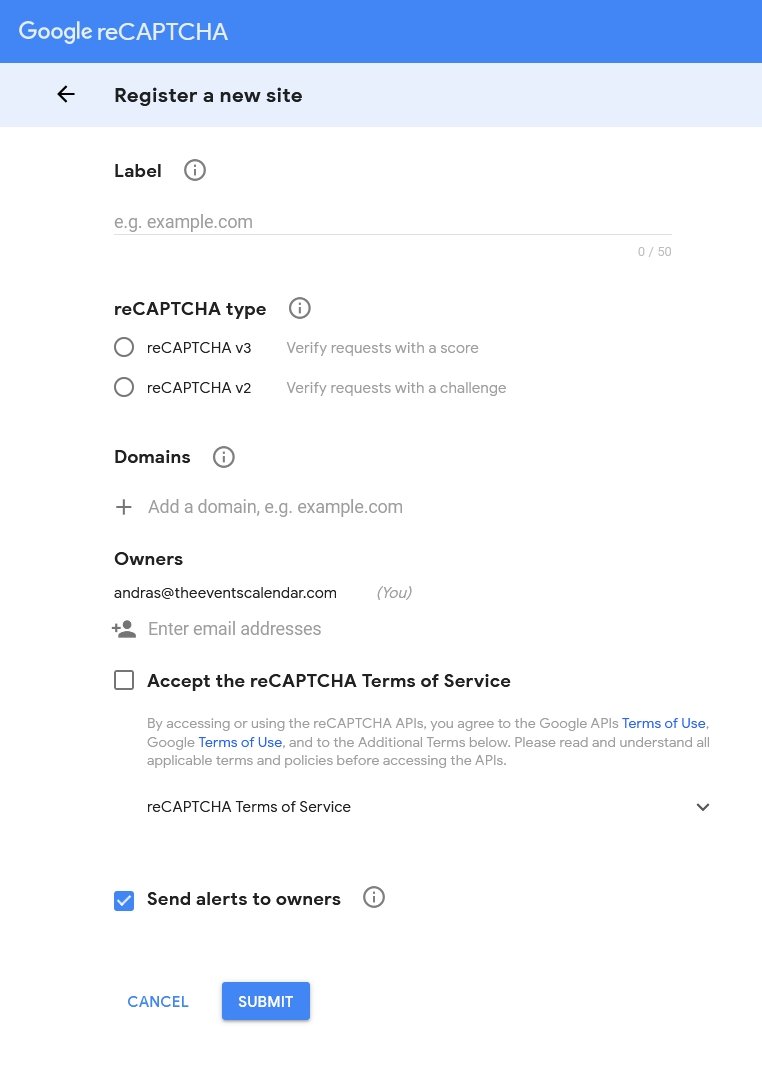
In the text box under the Domains subheading, enter any domains that you’re using for your site, including staging/test environments, each on its own line. For example, if your calendar is accessible at example.com/events, you’d enter example.com as shown above.
Lastly, review the Google APIs Terms of Use provided and the reCAPTCHA Terms of Service, then check the designated box to confirm that you agree to these terms and conditions. The last check box for Send alerts to owners is selected by default; you can leave this as-is if you’d like to receive messages from Google regarding your site, or you can uncheck it if you’d prefer not to see these alerts.
Once you’re finished, click the Register button to submit your registration, and you’ll be taken directly to the management page for your newly-registered site. The Keys content section beneath Adding reCAPTCHA to your site should already be expanded; if it’s not, click the Keys subheading to open that content pane.
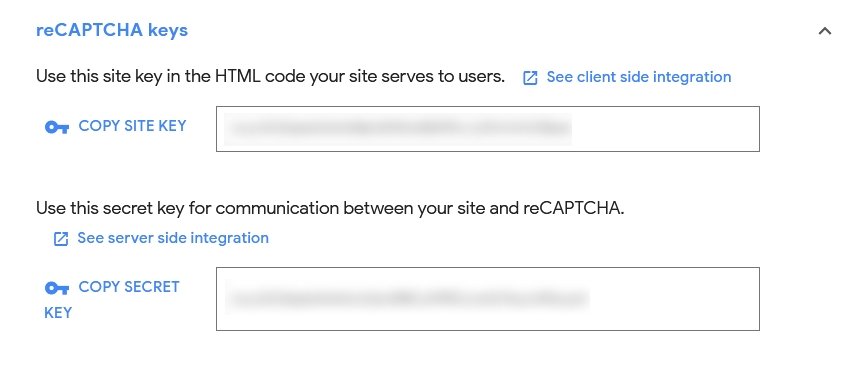
The site key and secret key provided here are all you’ll need to set up reCAPTCHA on your Community Events form. Copy the keys from each of these fields, then paste them into the appropriate fields in the APIs tab of your plugin settings page (as shown above). Once you’ve entered in both keys, click the blue Save Changes button on the settings page to submit your changes to the site.
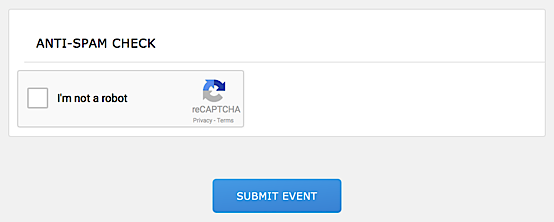
Once you’ve successfully saved your new reCAPTCHA API keys to your plugin settings, you’re all finished! Anonymous visitors to your Community Events form will now see the Anti-Spam Check pane displayed below your form fields, and they’ll be prompted to complete a reCAPTCHA check before submitting their event.
We hope you’ll consider giving this feature a try on your own Community Events setup — it’s a great way to bolster the security of your submission forms and ensure that wandering spambots won’t create trouble on your site! If you should have any questions or need extra assistance getting things set up here, our support team is just a click away over at our support Help Desk!