With Event Tickets, you’re able to sell tickets using our built-in e-commerce option, Tickets Commerce, which works with Stripe and PayPal.
Event Tickets Plus extends Event Tickets by adding options to create and sell tickets using WooCommerce and Easy Digital Downloads.
Let’s break that out so we can see how that lines up:
| Plugin | E-commerce Platforms | Available payment gateways |
|---|---|---|
| Event Tickets | Tickets Commerce | Stripe PayPal |
| Event Tickets Plus (with Event Tickets) | WooCommerce Easy Digital Downloads | PayPal Stripe Additional options are available for WooCommerce and Easy Digital Downloads via paid extensions. |
👋 Not sure which e-commerce plugin is right for you? Here’s an article to help you decide.
Tickets Commerce setup
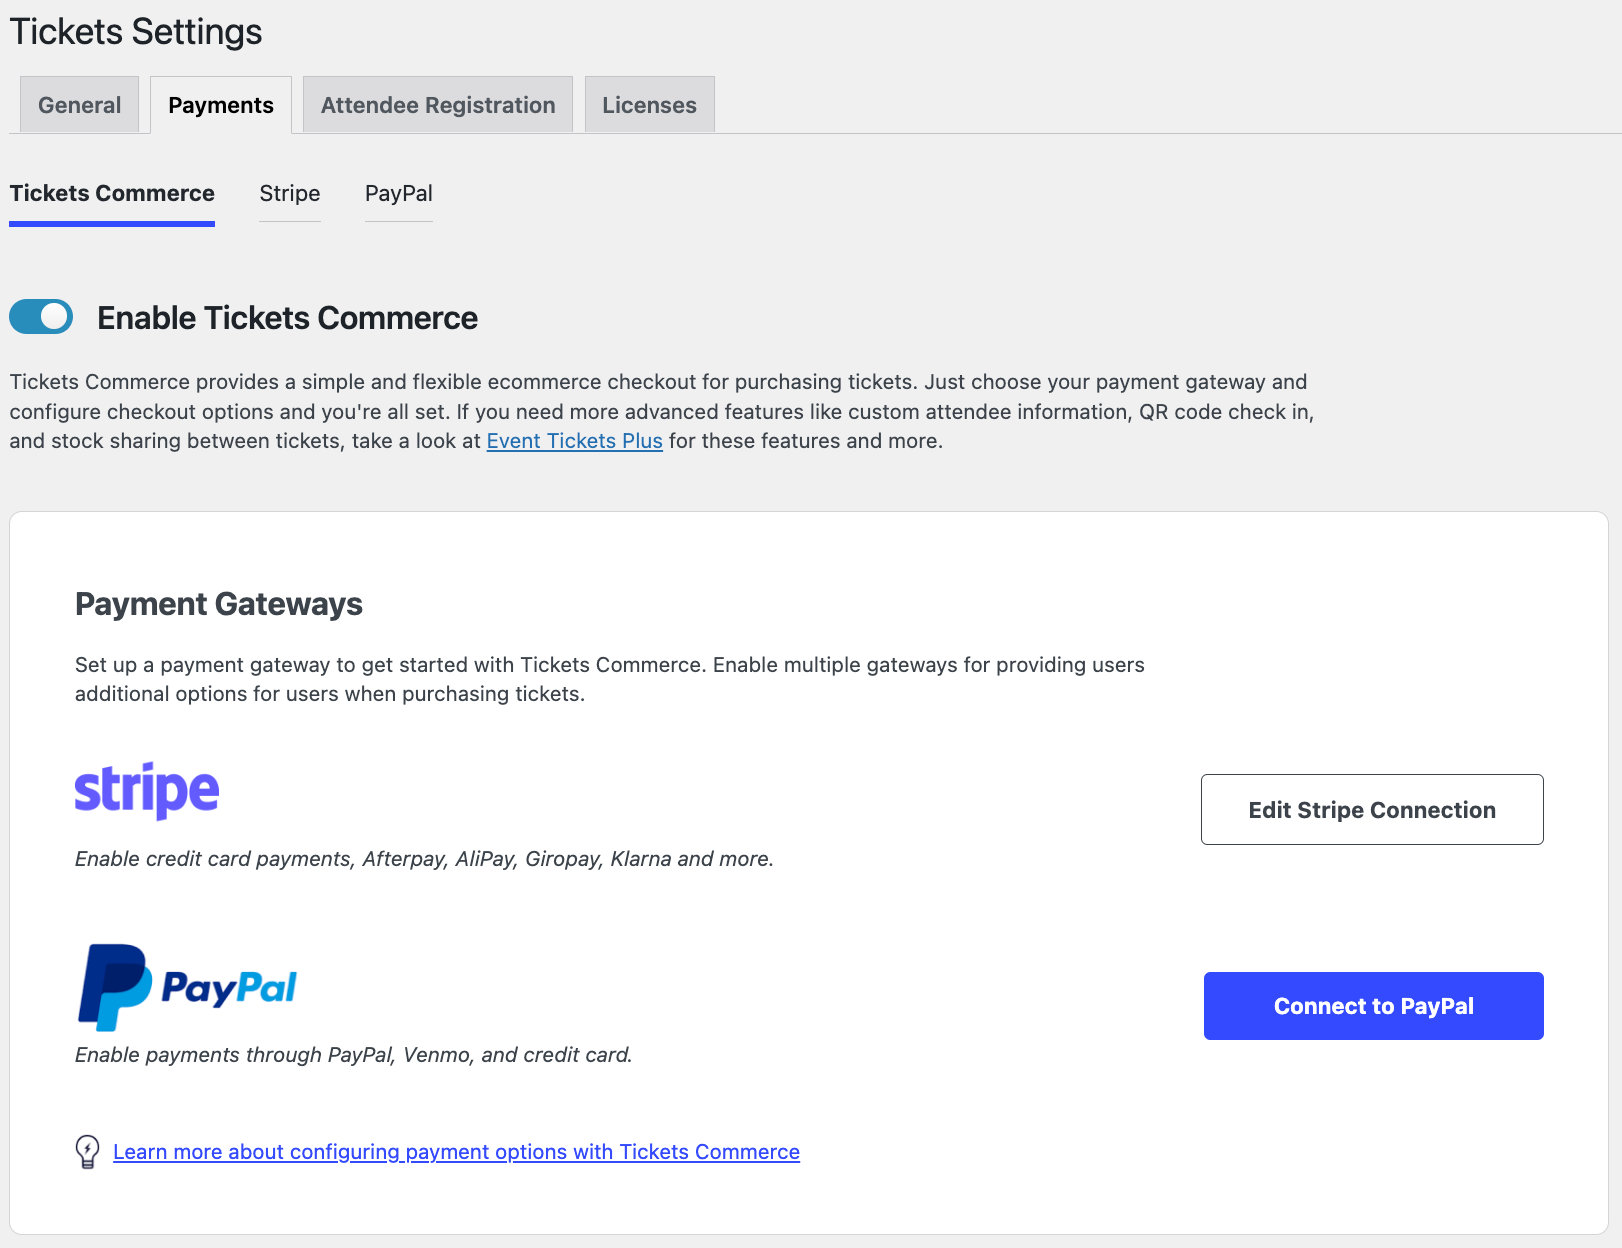
First, make sure that you have Event Tickets installed and activated on your website. From there, head over to Tickets > Settings > Payments and toggle on the option to Enable Tickets Commerce. Once you do, you’ll see all of your Tickets Commerce options.
Check out this article for more information on connecting to PayPal and reviewing the payment settings with Tickets Commerce.
Tribe Commerce setup
Note: Tribe Commerce is our legacy e-commerce solution and is no longer available on new installs. See our Tickets Commerce section to set up our free e-commerce solution with Event Tickets.
Once Event Tickets is installed and activated, you can enable Tribe Commerce. Head over to the plugin settings, located at Tickets → Settings → General. Scroll down to the “Tribe Commerce” section. This is where your PayPal account can be connected to the plugin to start accepting payments for ticket purchases.

Check out this article for step-by-step instructions for configuring PayPal to work with Event Tickets, including steps for creating your first tickets.
WooCommerce setup
Once again, Event Tickets is a requirement here because it provides the baseline functionality for creating tickets. You’ll also need to install and activate Event Tickets Plus to integrate tickets with WooCommerce and its payment gateway options.
Once Event Tickets, Event Tickets Plus and WooCommerce are enabled, it almost works straight out of the box. However, there are a few things to verify before selling tickets:
- Make sure that you have configured at least one payment option in the WooCommerce settings (WooCommerce → Settings → Payments). The WooCommerce site has complete instructions for configuring each of the payment options it provides.
- Make sure the WooCommerce pages (e.g. Shop, Cart, Checkout, My Account) have been created because they provide the ability for users to shop and purchase tickets on your site. If they are created, you will see them on the Pages screen of your WordPress admin. But you can also visit the WooCommerce settings to verify they are there (WooCommerce → Settings → Advanced).
- Review the settings for attendee records and ticket emails (Tickets → Settings → Integrations). An explanation of the settings is available in this article.
- Check your product inventory settings in WooCommerce (WooCommerce → Settings → Products → Inventory). This opens up the ability to enable stock management which means you can set limits on how many tickets can be sold, including by type.
- Add descriptive text to ticket prices in the WooCommerce tax settings (WooCommerce → Settings → Tax, under Price display suffix). This is a nice way to display tax information and fee handling.
After verifying that all your settings are correct, you can start creating tickets!
Easy Digital Downloads setup
Easy Digital Downloads requires both Event Tickets and Event Tickets Plus, just like WooCommerce. Once both are installed and activated, here’s what you want to do:
- Go to Downloads → Settings → Payment Gateways and make sure that you have configured at least one payment option. Note that when testing Easy Digital Downloads on your site, you can enable the “Test Mode” option so transactions are not processed.
- Go to Downloads → Settings → General and make sure the default Easy Digital Download pages (e.g. Checkout, Success, Failed Transaction, Purchase History, and Login Redirect) have been created so customers can shop and checkout.
After you have verified that all your settings are correct, you can start creating tickets!
Available extensions
Our Extensions Library has plenty of free goodies to get the most from your e-commerce setup and customize the functionality of your shop. Extensions are small, lightweight WordPress plugins that extend our plugin and premium add-ons with additional features.
- Add Event and Attendee Information to WooCommerce Order Details: Display the information users enter in the attendee meta fields on the WooCommerce order screen. So, when customers are viewing order details, they can review the information they entered when adding a ticket to their cart, as well as the event name, time, and venue details.
- Event Tickets Attendee CSV Importer: Add attendees to specific events by importing them with a CSV file from the Events → Import screen in the WordPress admin. This is supported by Tribe Commerce, WooCommerce, and Easy Digital Downloads.
- Organizer Notification Email: Send an email to event organizers when a user registers for an event. This is supported by Tribe Commerce, WooCommerce, and Easy Digital Downloads.
- PDF Tickets: Include a PDF version of the ticket when it is emailed to the attendee. This is supported by Tribe Commerce, WooCommerce, and Easy Digital Downloads.
- Event Tickets Plus Extension: Show/Hide Duplicates in Attendees Table. Identify duplicate attendees registered for an event using a button. This is supported by Tribe Commerce, WooCommerce, and Easy Digital Downloads.
We hope you find them useful, but please note that they are optional extras that we do not support to the same degree as our other products.