One of the most useful added features of Event Tickets Plus is the ability to check in attendees to your events via QR code. These scannable codes are generated automatically for all ticket purchases or reservations, and each code references a unique URL that can be used to quickly check in guests without needing to manually access your attendees list.
Note: The article covers version 1 of the Event Tickets Plus app. For the most recent version of the app, please see this article instead.
Event Tickets Plus App
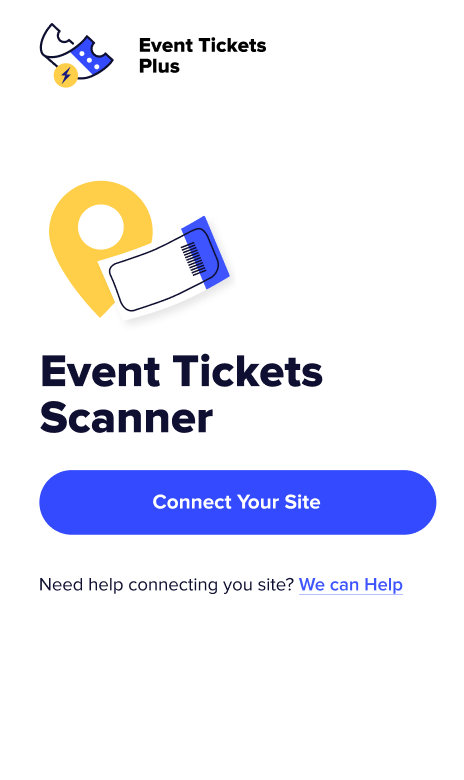
Our Event Tickets Plus App is the easiest and fastest way to check in your attendees directly from your Android or iOS device without the need to log in to your site. Simply install and connect to your site using an API key and start scanning your tickets.
Download the app from:
- Google Play Store – for Android devices
- App Store – for iOS devices
Setting up the App
Once the app is installed on your device, connect the app to your site using the Tickets scanning app API key:
- Navigate to your site’s WP Admin > Tickets > Settings > General tab and under the “QR Codes” section, generate a new Tickets scanning app API key and Save Changes.
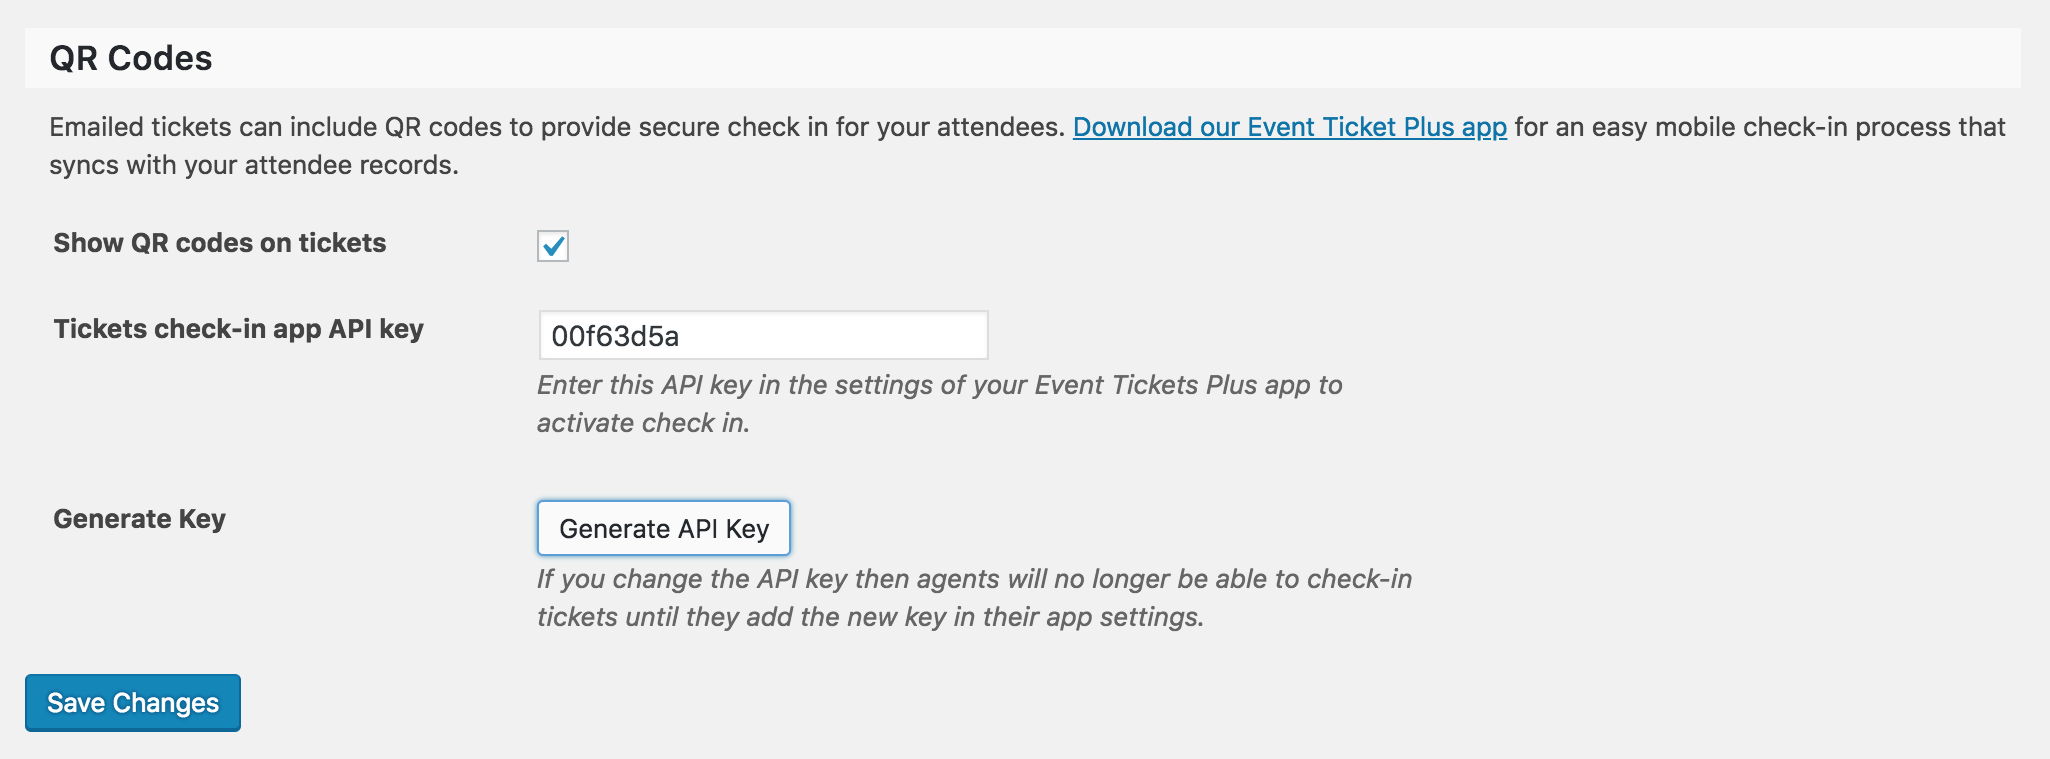
- On your device, launch the Event Tickets Plus App and connect to your site using the API key generated.
- Once the key is in place, you’ll be ready to check in your attendees by scanning their ticket’s QR codes!
Please note you will need to have internet access on your device to check in attendees. For best results, we recommend being connected to a wifi network.
If you’ve never worked with QR codes before, you might have some questions about how to get started with using these for your events. We’ve created this guide to walk you through the basics, from understanding what QR codes are to selecting a scanning app to setting up permissions for staff to validate tickets at your events. Let’s get started!
Understanding QR Codes
First things first, it might be helpful to understand what a QR code is before beginning to use them with your tickets. You can think of QR codes as being similar to UPC barcodes in functionality, though their usage is typically a bit more complex. While barcodes are used primarily to encode simple numerical values, QR codes can contain a variety of data types, including web URLs, contact cards, and even payment information for mobile transactions.
Event Tickets Plus uses QR codes to embed unique check-in URLs for each ticket in your order database; when the QR code is scanned by a site administrator or another user with sufficient permissions, the URL is accessed, and the ticket is checked in automatically.

Example of a QR code.
To scan QR codes at your events, you’ll need a mobile device with a camera (such as a smartphone or tablet) and a QR code scanning application. In addition to our Event Tickets Plus App, you can use a different QR code scanning app to scan your tickets. We’ll look at other options in the next section of our guide.
💡 If attendees report that the QR code is showing as a “broken image link icon”, it may be related to their email client. Several email clients have a setting for whether to automatically download images in emails. If this is disabled, the QR code won’t show in the email.
Creating a New User for Scanning QR Codes
Since full attendee information is made available to site administrators for editing, reviewing, and export purposes, the administrator role is typically also used for checking in users manually or via QR code. But what if you’d like to have another member of staff check in attendees without giving them full access to your WordPress site’s backend? In that case, you can create a new user account with Contributor permissions, which will prevent edit access to your events, posts, or pages while still allowing attendees to be checked in. Here’s how to set that up on your site.
As always, you’ll want to begin by logging into your WordPress dashboard using your administrator credentials. Once you’ve successfully logged in, highlight the Users menu item in the WordPress sidebar and click Add New to open the new user creation form.
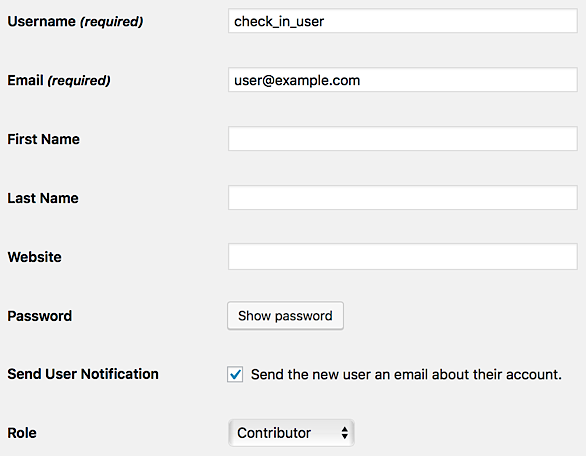
Enter a username and email address for your new user (you can leave the remaining text fields blank). You’ll also want to click the Show password button and note the password for the new account. Lastly, in the Role drop-down menu, select the Contributor role. Click Add New User once you’re finished, and the new user will be added immediately to your site. If you selected the check box for Send User Notification, an email will be sent to the address you provided to confirm the creation of this new account.

When your Contributor user account logs into the site, they’ll see a limited selection of menu items available to them, and they won’t be able to edit or delete any existing events in your database.
Summing Up
With your QR code scanning application installed on your device of choice and your Administrator or Contributor account(s) set up and ready to go, all that’s left is to begin the actual task of checking in attendees! Your process may look slightly different depending on your actual setup and the application you’ve selected for performing QR scans, but the basic steps should be mostly the same across all platforms and applications.
- On the device that you’ll be using to check in attendees, launch your default web browser (or QR code scanning application, if the application that you selected utilizes a built-in browser).
- From the web browser you just launched, log in to your site’s WordPress dashboard using an account with sufficient permissions. (If you don’t wish to use your administrator account for this task, you can create a new account with limited permissions using the steps outlined above.)
- Return to your QR code scanning application and ready your device’s camera to begin scanning.
- Ensure that the QR code that you wish to scan is clean, undamaged, and held at a sufficient distance for your device’s camera to focus. Scan the code.
- If the application prompts you to confirm before navigating to the encoded URL, confirm that you wish to load the page.
- Your QR scanning application should redirect to the web browser to load the encoded URL. Once the URL has finished loading, you’ll receive confirmation in the browser if your attendee was checked in successfully (or an error if the code is invalid or has already been scanned).
Troubleshooting: if you are unable to check in attendees, you might want to take a look at the following post.
We hope that this guide gives you all the information that you need to begin using QR codes with your event tickets and start reaping the benefits of faster check-ins! Don’t hesitate to pay us a visit over at our help desk if you should have any lingering questions–we’re more than happy to assist!